As its name suggests, this variety is of particular interest to farmers growing potatoes for sale. "Farmer" combines qualities sought by vegetable growers, gardeners, and small and large agricultural producers. It's a high-yielding and easy-to-grow variety that thrives in most climates in our country.
Who bred the 'Farmer' variety?
Despite its robust varietal characteristics, the "Farmer" potato is not included in any agricultural crop registry. This variety is the result of folk breeding. Various farms participated in its development. The breeding process lasted for many years, with farmers striving to develop a variety ideal for commercial cultivation. The result is a profitable potato. "Farmer" not only possesses excellent agronomic characteristics but also produces a presentable harvest—large tubers that are attractive in appearance and delicious to cook with.
Description and characteristics of the variety
Growing potatoes for sale, farmers and gardeners are constantly searching for the perfect variety. When developing their hybrids, folk breeders sought to create a versatile potato that would be profitable in all weather conditions and in demand. The key characteristics of the "folk hybrid" are listed in Table 1.
Table 1
| Characteristics | |
| Ripening category | very early |
| Ripening period, days | 40-60 |
| Starch, % | 9-12 |
| Weight of tubers, g | 90-110 |
| Number of tubers in one bush, pieces | 10-15 |
| Yield, c/ha | 200-230 |
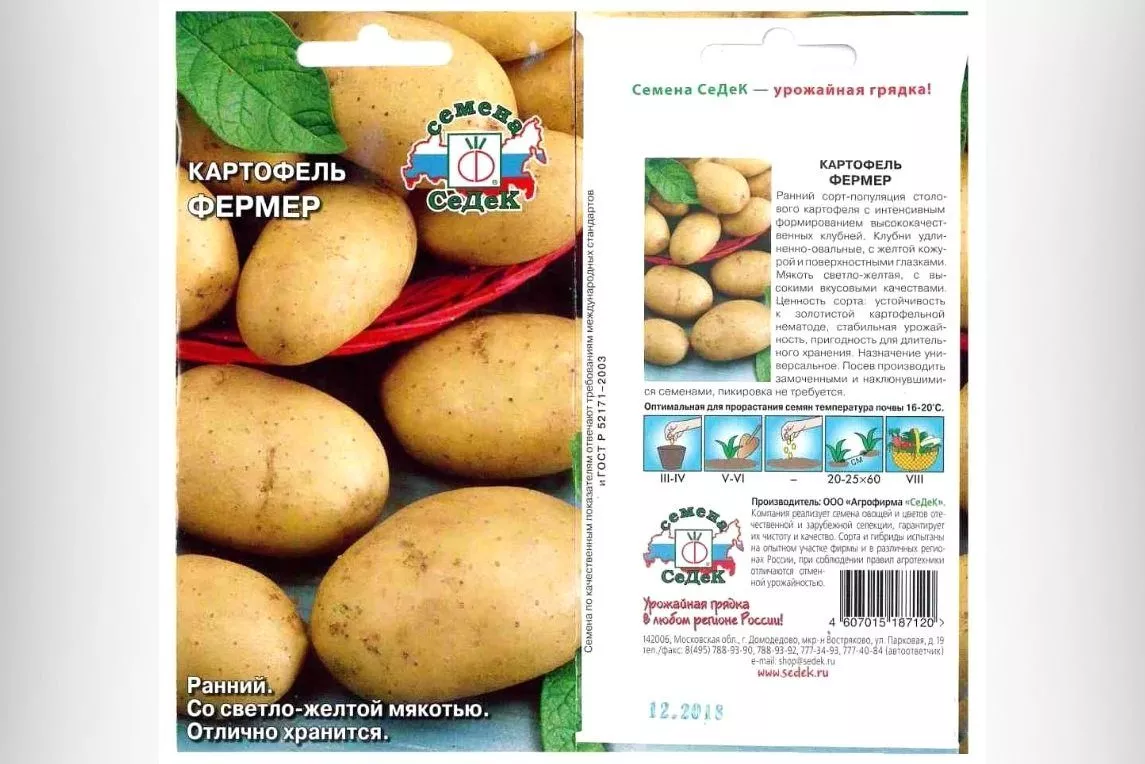
| Tuber shape | oval-elongated |
| Peel | smooth, thin, yellow |
| Pulp color | light yellow |
| Consumer qualities | It's delicious, doesn't fall apart when cooked, and is suitable for frying and dietary nutrition. |
| Shelf life % | 95 |
| Attitude to diseases | can be affected late blight, resistant to nematodes and potato cancer, requires treatment against the Colorado potato beetle |
| Features of cultivation | Can be grown from seeds, responsive to fertilizing and watering |
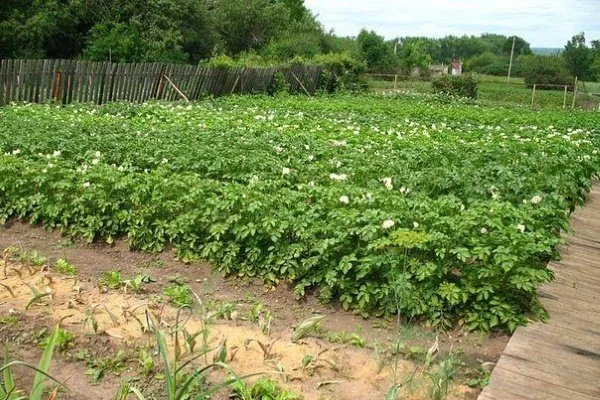
| Appearance of bushes | medium-sized and upright bushes, branches grow compactly, not spreading |
| Appearance of leaves | bright green with slightly wavy edges and clearly defined veins |
| Bloom | white flowers collected in a compact corolla |
| Degree of foliage | average |
Gardeners claim the harvest is ready 50-60 days after planting the seeds. If the weather is favorable, digging can begin after 40 days. The variety is grown in two ways: from tubers and from seeds. The tops remain juicy for a long time – up to 90 days after germination.
Advantages and disadvantages of the "Farmer" variety
This versatile variety thrives in any climate and weather conditions. "Farmer" thrives even at temperatures between 10°C and 15°C. However, the largest yields are achieved under the following conditions:
- warm and mild climate;
- minimum number of temperature changes;
- fertile soils and timely watering.
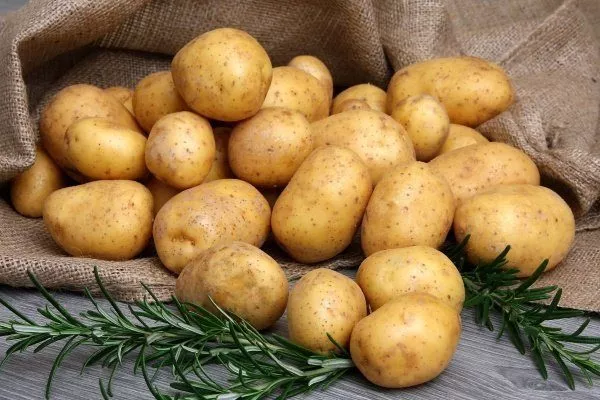
Table 2
| Advantages of the "Farmer" variety | Disadvantages of the 'Farmer' variety |
| Versatile in preparation – it doesn’t overcook, retains its shape when fried, and is suitable for making semi-finished products such as frozen French fries, etc. | Demanding of soil quality characteristics – requires fertilizing. |
| It is not susceptible to diseases that affect nightshades – cancer, nematodes, viruses and fungi. | |
| High shelf life with early ripening. | |
| It is well preserved and transported – it does not lose its marketable appearance, the tubers do not sprout or wrinkle. | |
| Excellent taste characteristics of tubers. | Requires moderate moisture. |
| High yield. | |
| It bears fruit well in any climate – temperate, northern, tropical. | |
| Resistant to degeneration – seeds can be used without renewal for 5-6 years. | |
| Early and uniform formation of tubers. |
As we can see, the variety has virtually no drawbacks, and fertilizing and moisture are the usual requirements for successfully growing vegetable plants.
Comparison of the "Farmer" potato with other varieties
To assess the yield and profitability of this variety, we'll compare it with popular potato varieties using several metrics. Table 3 compares yield, and Table 4 compares tuber weight and shelf life.
Table 3
| Name of the variety | Yield, c/ha |
| Farmer | from 200 |
| Kairanda | 110-320 |
| Riviera | 280-450 |
| Zhukovsky early | 350-450 |
| Veneta | 250-350 |
| Karatop | 200-500 |
| Minerva | 200-450 |
| Forty-day period | 200-300 |
| Meteor | 200-400 |
| Jewel | from 700 |
Table 4
| Name of the variety | Weight of commercial tubers, g | Shelf life, % |
| Farmer | 90-110 | 95 |
| Riviera | 100-180 | 94 |
| Zhukovsky early | 100-120 | 92-96 |
| Veneta | 70-95 | 87 |
| Karatop | 60-100 | 97 |
| Kiranda | 90-175 | 95 |
| Minerva | 120-245 | 94 |
| Meteor | 100-150 | 95 |
How to choose a place to plant potatoes?
Potatoes grow best in light, slightly acidic, fertile soils. The highest yields are obtained from plantings on black soil or peat soils. Good potato productivity is also observed in sandy, sandy loam, and loamy soils, but only with the addition of fertilizers—both mineral and organic. Characteristics of an ideal potato plot:
- soil – black soil;
- illumination – lots of sun, no shading;
- wind - a quiet place, without drafts;
- groundwater – high level, not less than 80 mm in the horizon up to 1 m.
- ✓ The pH level should be between 5.5-6.5 for optimal absorption of nutrients.
- ✓ The soil must be well-drained to avoid water stagnation and rotting of the tubers.
Potatoes don't tolerate excessive moisture, but thanks to a high groundwater level, plants can survive drought without harming the crop. This is especially important in regions with dry summers.
The best predecessors for potatoes:
- legumes - after them everything grows well, including potatoes;
- green manure crops – rye, oats, etc.;
- onion;
- cabbage;
- cucumbers;
- pepper;
- carrot;
- beet;
- garlic.
Undesirable predecessors are all nightshade crops:
- eggplants;
- tomatoes;
- pepper and others.
Planting potatoes after nightshades not only reduces yields but also adversely impacts the epidemic situation. To ensure good yields from the "Farmer" variety, it's essential to follow the rules of small crop rotation. The main principle of this system is a mutually beneficial cropping sequence, allowing for the restoration of soil fertility after potato cultivation.
Potatoes should not be grown in the same place more than once every three years.
Crop rotation scheme:
- 1st predecessor Green manure crops. They are sown in the fall, after the potato harvest. The young shoots are mown down before frost. The grass is left in the field to rot and become fertilizer.
- 2nd predecessor – cucumbers, pumpkin, squash, or cabbage. Sown after green manure crops.
- 3rd predecessor – legumes. Restores soil, saturates it with nitrogen fertilizers.
How to prepare the soil?
Preparing the soil for planting is necessary for:
- elimination of weeds and pests;
- oxygen saturation;
- giving a favorable structure.
Preparation stages:
- In the fall, before frost, remove tops, weeds, and debris from the area. Thoroughly dig the soil to a depth of 30 cm. Digging small furrows will help drain excess moisture in the spring.
- In the spring, when the snow melts, the soil is leveled with a rake to retain moisture. Mineral or organic fertilizers are scattered over the surface, the soil is dug in the spring, and then leveled with a rake again.
In the fall, there's no need to rake the soil. Rough plowing will allow the soil to freeze thoroughly, killing any pests.
How to grow a Farmer from seeds?
Growing this potato variety from seed is more difficult than from tubers, but it's crucial for maintaining varietal traits. Why grow potatoes from seed?
- Genetic information renewal. If tubers are planted year after year, the variety will gradually degenerate. After growing from seed, the new generation may exhibit characteristics from either parent, or even completely different ones.
- Increases resistance to diseases.
Where do they get the seeds?
Potato plants produce fruit when their flowers are fertilized. Seed collection procedure:
- Green berries are collected from the bushes; they contain seeds.
- The collected berries are kept for several days to soften.
- The seeds are removed from the berries. They are washed, placed in a canvas bag, and hung to dry and ripen.
Seeds obtained this way have a low germination rate, so gardeners recommend preparing large quantities of seeds. Another option is to purchase ready-made seeds from a trusted supplier.
Difficulties in growing potatoes from seeds
Difficulties awaiting gardeners who decide to grow seedlings from potato seeds:
- Seedlings have a weak root system, making it difficult for them to grow. It's important to create the most favorable soil conditions possible—the soil should be soft, light, loose, and well-drained. Special commercial soil can be used for seedlings. Another option is to use damp sawdust instead of soil.
- Potato seedlings are fragile—the thin shoots require plenty of light to grow. If the light source is too far from the seedlings, they will stretch and weaken. When picking and transplanting, be especially careful—the roots or sprouts can be easily damaged.
- Potato seedlings are susceptible to blackleg disease. To prevent infection, soil treatment with black yeast or trichoderma is performed.
How to prepare seeds for planting?
Before planting in the ground, seeds should be properly prepared:
- Soaking – to speed up germination. The seeds are scattered on a saucer and covered with water.
- Hardening. This is done simultaneously with germination. During the day, the seeds are kept at room temperature and at night, in the refrigerator. Hardening is carried out over the course of two days.
- The water is drained, the seeds are spread on a piece of cotton cloth, and placed in a warm place. Cheesecloth is not suitable for this purpose, as the delicate roots will grow through its mesh, become tangled, and damaged.
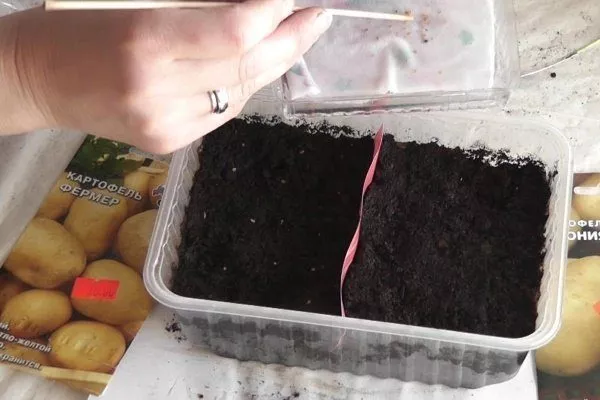
Planting seeds
The order of planting sprouted seeds:
- Sow the seeds in a container and spread them evenly over the soil. Sprinkle a thin layer of sand on top—weak sprouts may not be able to germinate through the soil.
- The container with the seeds is watered. Cover the top with plastic or glass to create a small greenhouse. Growing conditions:
-
- warm and well-lit place;
- Optimal hydration – no drying out or over-watering.
- The film/glass is removed daily to allow the seedlings to air out.
- Seedlings appear after 3 days. The maximum time is 2 weeks.
Seedlings need a warm, draft-free location. Windowsills are a poor choice, as they will be uncomfortable due to the chilly air coming from the windows.
How to transplant seedlings?
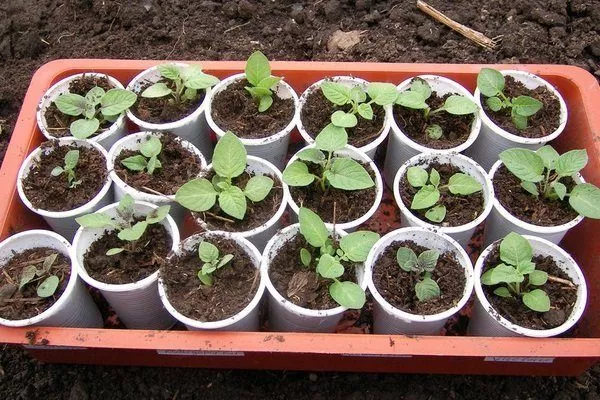
Once the potato seedlings have developed two leaves, they can be transplanted into individual pots. Pricking (transplanting) instructions:
- the pots must have drainage holes;
- seedlings transplanted into pots are watered with phytospirin - along the edge of the container, preventing the solution from getting on the sprouts;
- The soil in the pot should always be moist, but not wet.
The seedlings in pots must take root and grow until they are planted in open ground.
How to plant seedlings in open ground?
Planting can begin as soon as the threat of frost subsides—around the end of May. The exact timing depends on the regional climate and specific weather conditions. By the time of planting, the seedlings should have 4-5 leaves. If the threat of frost persists—in some regions, it can occur even in late May—cover the beds with plastic. Planting procedure:
- Prepare holes at intervals of 20 cm. Depth – 10 cm.
- Add humus to the holes and water generously.
- Plant the seedlings, burying them so that only 3 leaves remain on the surface.
If seedlings are planted in heavy clay soils, it is recommended to add a mixture of sawdust, humus and sand, taken in equal parts, to the holes.
Modern agronomy allows for a wide variety of potato seedling planting options, but vegetable growers most often use a row layout. A garden marker is used for marking. The distance between rows is 60-70 cm, and between plants, 20-25 cm. The depth of the holes is determined based on the soil type:
- black soil and sandy soils – 10-12 cm;
- clayey – 6 cm.
Potato bushes grown from seeds require standard care:
- timely weeding and loosening;
- 2-3 hillings per season;
- Colorado potato beetle control.
Experience has shown that the Colorado potato beetle primarily attacks potato plants grown from seedlings, so they will need to be treated more frequently than when grown from tubers.
In this video, a specialist explains how to grow potatoes from botanical seeds, and you'll also learn about the specifics of obtaining pure seed material:
Planting with tubers
This method of planting potatoes is used by most gardeners and farmers to obtain tubers for both commercial and seed production. The most critical step in this case is tuber preparation:
- The tubers for planting are selected in advance, during harvesting, and stored separately from the general potato mass.
- Seed potatoes are sorted in a timely manner, removing diseased or rotten roots.
Avoid using small, oversized, or irregularly shaped tubers for planting—these will all yield a low-quality, low-yield crop. Healthy, medium-sized tubers are the best planting material. To increase the yield of valuable planting material, tubers can be cut into pieces. Use a disinfected knife to cut the tubers.
Preparing the beds
Soil cultivation begins in the second half of April. For any variety, including "Farmer," it's essential to create a loose, moist soil layer. Potato plots are always dug twice—in the fall and in the spring.
If you are growing potatoes in a plot for the second year, you don’t need to dig the soil in the fall; you just need to clear the plot of plant debris.
Next, the soil is prepared depending on the chosen growing technology:
- Comb. To increase potato yields, ridge-cutting is often used to grow potatoes, as it improves soil aeration. This technique is particularly effective in humid climates and is recommended for loamy and clay soils. Only experienced farmers use this technique, as it requires cultivators to create the ridges.
- Smooth. This type of planting does not require ridge formation and is usually used in arid regions.
- Trench. Requires mechanization or physical force.
Gardeners prepare their beds in the fall, digging the soil and adding fertilizer along the way.
Planting tubers in the ground
The tubers are planted on the south side, facing north—this ensures uniform light distribution. Before planting, peat, humus, and wood ash are added to the holes or trenches. It is also recommended to add onion skins—they effectively repel Colorado potato beetles.
The interval between tubers placed in the soil is determined depending on the ripening time:
- early varieties - 30-35 cm;
- late varieties – 25-30 cm.
The interval between rows also depends on the ripening category:
- early varieties - 60 cm;
- late varieties – 70 cm.
The depth of planting tubers depends on the soil type:
- heavy and loamy – 8-10 cm;
- clayey – 4-5 cm;
- lungs – 10-12 cm.
All parameters are calculated for medium-sized tubers; if the size increases or decreases, adjustments are made, but not more than by 3 cm.
Caring for potato plantings
After planting tubers or seedlings in open ground, farmers and gardeners are tasked with ensuring optimal growing conditions. Almost all potato varieties grown in Russia require similar care: they require regular tillage, hilling, watering, and fertilizing.
Watering and hilling
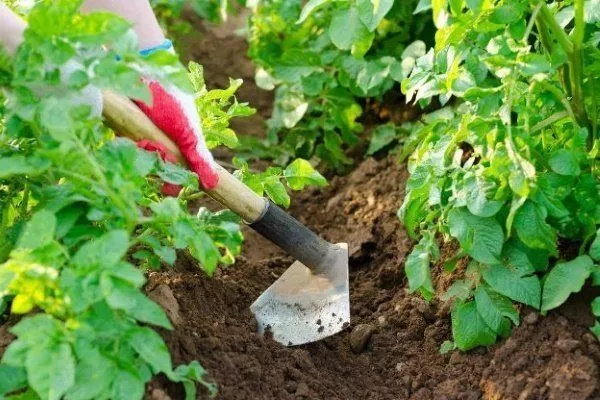
To ensure a high yield, the soil under the bushes must be loosened and moistened. Maintaining optimal moisture conditions is crucial. Hilling guidelines:
- After each watering, the soil needs to be loosened.
- Potato bushes should be hilled in the morning or evening.
- The first hilling is done when the bushes grow to 12-15 cm in height.
- The second hilling is done 20 days after the first.
More useful information about hilling potatoes can be found here.
There's no set time for watering—it depends on specific weather conditions, soil conditions, and the region. Under normal weather conditions, three waterings may be sufficient for potato plantings:
- 1st – when the shoots appear;
- 2nd – when the buds appear;
- 3rd – when the potatoes have finished flowering.
The "Farmer" variety grows best in cool temperatures, as summer heat negatively impacts the harvest. Early ripening allows the most unfavorable period—the July heat—to be avoided. Vegetable growers recommend drip irrigation for soil moisture and mulching to control weeds and prevent the soil from drying out. Straw or grass clippings are used as mulch.
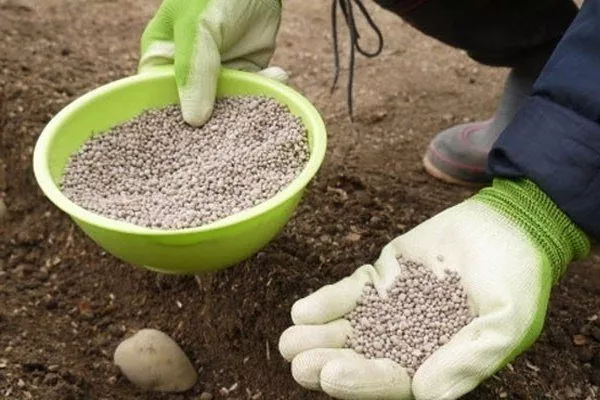
What to fertilize with?
Whether potatoes are grown for seed or for food or sale, they need to be fertilized. This crop is fed with humus or compost.
During the season, fertilizers are applied 2-3 times:
- First feeding – 2 weeks after emergence.
- Second – during flowering and tuber formation.
Fertilizers of various types are used for feeding:
- Organic. Potatoes can be fed with diluted manure, bird droppings, and herbal infusions.
- Mineral. Gardeners most often fertilize potato plantings with urea, superphosphate, potassium sulfate, and ammophoska.
The plantings should be fertilized with a complex fertilizer containing potassium and magnesium once or twice per season. Foliar feeding is also necessary; for example, spraying the bushes with a superphosphate solution is an option. Fertilizer application times and rates are listed in Table 5.
Table 5
| During landing | |
| Type of fertilizer | How to contribute |
| Rotted manure | 200-250 g together with mineral fertilizer |
| Chicken manure | dissolve in water 1:15 (in one well - 1 l) |
| Plant waste | 0.5 liters of herbal infusion is added together with mineral fertilizers |
| Wood ash | 150-200 g – applied without mixing with other fertilizers |
| Complex mineral fertilizer | 15-20 g per hole |
| After emergence, apply root fertilizing | |
| Chicken manure | the solution (1:15) is left for 24 hours and 1 liter is added under the bush after abundant watering |
| Mineral fertilizer | urea solution - 20 g per bucket, add 1 liter per bush |
| Before flowering | |
| Potassium-phosphorus fertilizer | 20 g potassium sulfate + 60 g ash or 60 g superphosphate per 10 l |
| 1 feeding after flowering – to improve the taste of tubers | |
| Microfertilizers | Mag-Bor fertilizer, 1 tbsp. per 10 liters, per 1 bush – 5 liters |
| 2nd feeding after flowering | |
| Superphosphate | add 300-400 g per hundred square meters or spray with a solution of 100 g per 10 liters of water |
A vegetable gardener explains the specifics of potato fertilization. You'll also learn what, how, and when to fertilize potatoes to get a bucket of tubers per plant:
How to fight pests and diseases?
The "Farmer" variety is resistant to most diseases affecting potato plantations. Its main enemies are late blight and the Colorado potato beetle, which are targeted for control. Control measures are listed in Table 6.
Table 6
| Colorado beetle | Late blight |
| Control measures | |
| Manual collection of beetles and larvae. | If the first signs of late blight are noticed, the potatoes need to be dug up. |
| Spraying with insecticides:
| Before planting, water the area with fungicides:
|
| Deep digging of the soil. | Seed treatment. |
| Planting plants that repel the Colorado potato beetle – calendula, dill, tansy, nasturtium, etc. | Compliance with crop rotation rules. |
| Use of herbal infusions for spraying. | |
Potatoes are treated with fungicides according to a specific scheme:
- First spraying – for prevention, carried out before signs of disease appear. The signal for preventative treatment is when the tops in the rows close together, reaching a height of approximately 15-20 cm.
- Second spraying – 1-1.5 weeks after the first.
- All the rest of the time – before harvesting the tops, spray the plantings once a week – if the weather is dry, and if it rains – every 4-5 days.
Features of spraying potatoes against the Colorado potato beetle:
- Early potato varieties, which include 'Farmer', are recommended to be sprayed from the moment eggs appear - females lay them on the underside of the leaves.
- The interval between successive sprayings is 15 days. Treatment times also depend on the type of poison used.
- The last spraying should be done 14 days before harvesting, no later, otherwise the tubers will contain poison.
- The best weather for processing is dry, windless weather. High humidity significantly reduces the effectiveness of etching.
Don't spray potatoes if there's dew—the effect is reduced because the poison is diluted with water. Also, avoid handling poisons in extreme heat—you could get poisoned.
- Spraying potatoes during flowering is not recommended. It's better to collect beetles and larvae by hand. The plant is vulnerable to chemicals during flowering, and bees pollinating the flowers may also be harmed.
- The ideal time for spraying with insecticides is before 10 am and after 5 pm.
All poisons used against beetles provide only a temporary effect. The most powerful treatments are chemicals and insecticides. Biological products, made from fungi and bacteria, are considered safer for humans. Chemical poisons accumulate in the plant, while biological ones do not.
Folk remedies against the Colorado potato beetle:
- Ash and soap solution. Boil 0.5 kg of ash in a liter of water. Let it sit for 24 hours, then add 50 g of liquid soap. Bring the volume to 10 liters.
- Dissolve tar in water – 100-150 g per 10 l.
- Prepare a pepper decoction by boiling 100 g of dried pepper in 10 liters of water for 2 hours. Then add 40-50 g of soap.
- Mix 0.5 kg of tobacco dust in 10 liters of water. Let it steep for 24 hours. Add laundry soap.
- Organizing mechanical traps: placing jars with potato pieces around the perimeter of the area – beetles will crawl into them.
- Planting between rows and around the perimeter of plants that repel Colorado potato beetles – wormwood, onions, calendula.
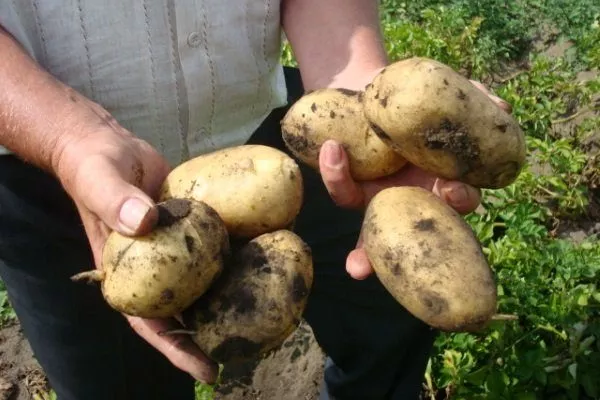
How to harvest and store crops?
Gardeners are always eager to grow potatoes early. But if you're storing tubers, don't rush harvesting—only ripe tubers will keep well. Potatoes mature within 3-4 weeks from the time the tops begin to dry. During this time, potatoes accumulate starch and other substances that determine their flavor and aroma.
Harvesting rules:
- The tops are mown 1-2 weeks before harvesting.
- You need to dig on a dry, sunny day.
- The dug-up tubers are dried first in the sun for several hours, then in the shade. They should be air-dried for about a week, protected from the sun to prevent them from turning green.
- The dug-up tubers are immediately sorted—for seeds, food, and livestock feed. Diseased and damaged potatoes are removed.
- The tubers are treated with antifungal biopreparations – Baktofit, Fitosporin, etc.
- The "Farmer" variety is early ripening, so the harvest should be in July-early August.
Sun-drying is essential for the tubers' preservation—ultraviolet light destroys bacterial infections. Early varieties don't keep well—as early as November, the potatoes begin to wrinkle, and their flavor deteriorates. Therefore, only seed tubers of the "Farmer" variety are stored.
"Farmer" is a potato that, unlike most popular varieties, was developed through "folk selection." Despite this, it boasts consistent varietal traits, high yields, and undemanding growing conditions.