It's important to understand the best time to sow seeds. This depends on several factors, the most important of which is the region where you live. The warmer the region, the earlier you can plant seedlings outdoors and, consequently, sow the seeds.
When to plant tomato seedlings?
About two months should pass between sowing seeds and planting seedlings, during which time the seedlings will sprout. Those living in warmer regions can begin sowing seeds in February, and those living in the northern part of the country can begin sowing in March.
| Region | Beginning of sowing | Planting in the ground |
|---|---|---|
| Southern regions | February | April |
| Central regions | March | May |
| Northern regions | April | June |
When planting seeds, it's important to take into account the weather forecast for the coming days. They should be sown two months before the end of spring frosts – this will ensure the tomato plants will be better established in the open ground and will produce fruit well.
Another key factor is the planting location. Weather conditions are only important when planting seedlings in a field or garden. If you have a greenhouse, this isn't essential, and you can start planting seedlings as early as midwinter. The key is to provide the seedlings with good heat and light conditions.
Choosing seeds in the store
To select the right and suitable seeds, you need to pay attention to the parameters of the future bush and the conditions for its best growth.
Tomato plants come in tall, medium, and short varieties. They require different care, so it's best to choose plants based on their growth potential.
Tall tomato plants can reach heights of two meters or more. They are grown both outdoors and in greenhouses. Support is essential. This is because during the ripening period, tomatoes can weigh up to 20 or 30 kilograms per plant. If the plant isn't properly supported, it may break, resulting in loss of the harvest.
Tall bushes bear fruit longer and produce a harvest much earlier. Fruit can be harvested from midsummer until late autumn. This planting option is suitable for those with limited planting space but a high yield.
Most varieties have medium-sized bushes. They reach one and a half meters at their peak and don't require as much care as taller bushes. However, their yield is significantly lower.
Dwarf varieties are the most popular among the population. They grow no taller than a meter, are quite compact, and are easy to care for. They can be grown indoors, for example, in a box on the balcony. They don't require support, as their trunks are strong enough to support up to 8 kilograms, which is how much yield a single plant can produce.
- ✓ Bush size
- ✓ Purpose of fruits
- ✓ Fruit color
- ✓ Price category
Another selection factor is the characteristics of the fruit itself. You need to decide what you'll be using the tomatoes for. Large, fleshy varieties are great for salads, while small tomatoes, such as plum tomatoes, are ideal for canning. For those who love sweet tomato varieties, we recommend reading next article.
Tomato color can also vary. There are red, orange, and black varieties. Each has a different flavor, so choosing one should be based on personal preference.
You can also choose by price. There are cheaper and more expensive seed varieties. Statistics show that more expensive seeds germinate better and produce a higher yield. Cheaper varieties often contain empty seeds that don't germinate in the soil.
If you are relying on yield, then choose the appropriate varieties, for example, those that have proven themselves wellSiberian tomato seeds.
In addition, there are seeds in stores that have been processed - they can be planted directly, or you can use seeds you have prepared yourself for sowing.
Seed preparation
To ensure a bountiful and pleasing harvest, it's essential to carefully select the seeds before planting. This process weeds out all the poor-quality seeds, leaving only the strongest ones. Most people buy regular seeds and prepare them at home, as it's not difficult:
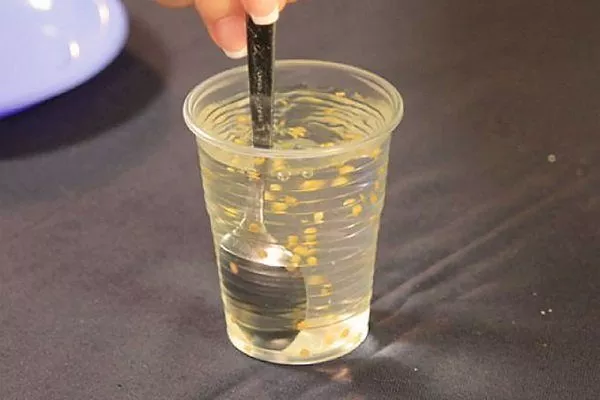
- The first step in this process is seed calibration.For this, you'll need salted water. Add a teaspoon of table salt to half a liter of plain water and stir thoroughly until completely dissolved. Then, place the tomato seeds in the resulting solution and let them sit for a few minutes. After a while, all the good seeds will settle to the bottom, while the bad ones will float to the surface. Skim off the top layer with a slotted spoon or spoon, and carefully scoop the bottom layer out of the jar. These are the seeds that will eventually be planted in the ground.
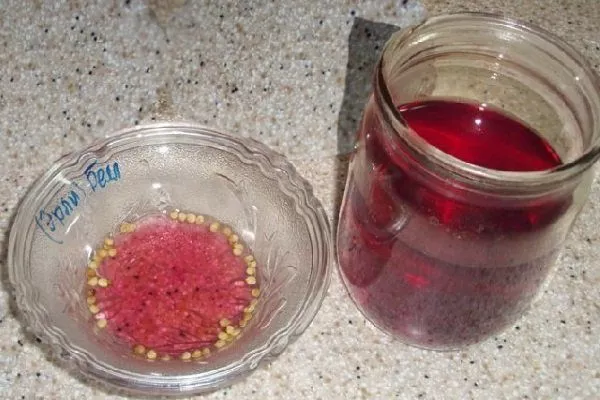
- The next step is disinfectionThis is necessary to destroy potential pathogens and fungi, ensuring a healthy harvest. A solution of potassium permanganate has long been used for this purpose, at a ratio of 1 gram per liter of water. For disinfection, seeds should be soaked in this solution for no more than 20 minutes, as over-soaking can reduce germination. In addition to potassium permanganate, ready-made solutions are also used, such as Fitosporin, which can be purchased at the same store as the seeds.
- Stratification This is a rather specific method of seed preparation. It involves exposing the seeds to winter temperatures. To do this, the seeds are thoroughly mixed with a store-bought peat mixture and then refrigerated for a month. After this, the seeds are washed and dried.
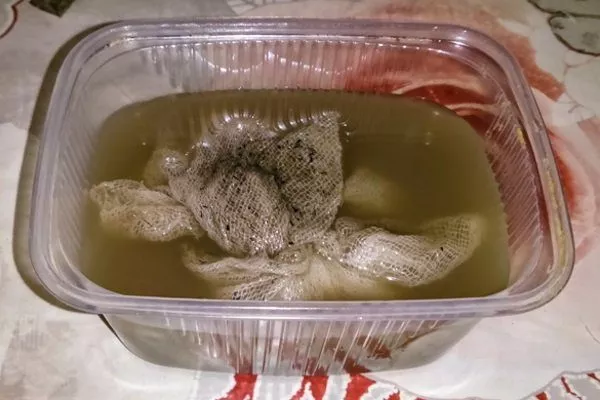
- Stimulating the growth of tomato seeds – one of the most important steps in preparation. Without it, the plants will be weak and puny, and the harvest will be meager. To prepare the stimulant, you will need ash and water. For three teaspoons of ash, use a glass of water. The stimulant should be steeped for at least 24 hours. Then, the seeds, wrapped in cheesecloth, are placed in the mixture for about 5 hours. Afterwards, they must be thoroughly dried.
tomato seed calibration
Disinfection of tomato seeds in potassium permanganate
Seed stratification
Stimulating the growth of tomato seeds

Soil preparation
Equally important is preparing the soil for planting seeds. Ideally, this should be soil that hasn't been used for other crops in the last few years; in a pinch, soil previously planted with cabbage or zucchini can be used. Soil previously planted with nettles is also suitable. Forest soil can also be used. However, make sure it doesn't contain any residue or seeds from other crops, especially harmful weeds.
It's always important to thoroughly check the soil for pests. Otherwise, you could lose your entire harvest, or a significant portion of it, costing you time and money.
To improve the soil, you can add ash—it's an excellent fertilizer, especially for tomatoes. Tomatoes also prefer sandy soil, as it retains the moisture they need well.
- Check the soil for pests.
- Add ash for top dressing.
- Make sure there is sand to retain moisture.
If you can't find the right soil naturally, you can use a store. Most garden centers offer delivery services for the required substrate, which is pest- and crop-free and fertilized with nutrients.
Containers for seedlings
To ensure sprouts emerge and are ready for subsequent planting in open ground, they need to be provided with a suitable container. There are many different types, each with its own advantages and disadvantages:
- A wooden box is considered a classic container for planting seeds. Its advantages include its large capacity and easy transportation. Furthermore, such a box can be assembled independently, making it quite cost-effective. A disadvantage of this method is the weight of the container containing the soil—wooden boxes are very heavy. Furthermore, planting seedlings from a wooden box into open ground is difficult, as their roots are easily damaged.
- Plastic cassettes are an alternative to containers—they can be as large as containers but are much lighter. Furthermore, their length can be easily adjusted with a knife or scissors. The downside of cassettes is their fragility—they easily break when overloaded with soil, which can damage immature seedlings. They're also not very convenient to transport.
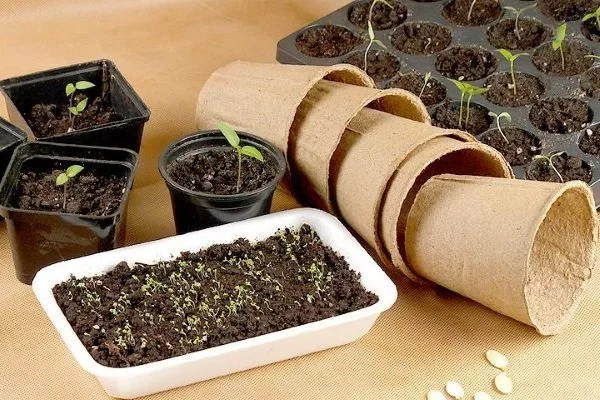
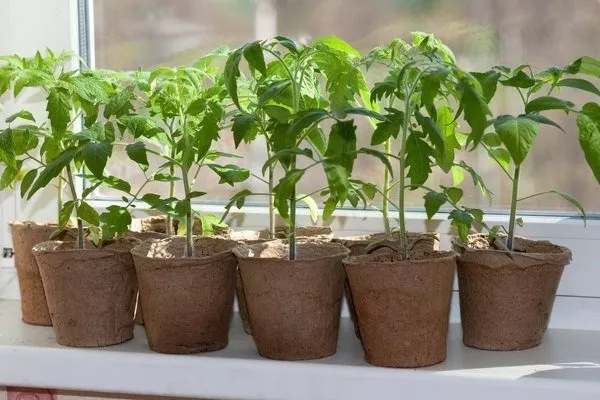
- Peat containers are environmentally friendly. They come in both pots and tablet form. They can be planted directly into the ground along with the seedlings. This is a major advantage, as the root system is not damaged. However, due to their natural nature, they are susceptible to mold, which can damage the seedlings and reduce germination. Furthermore, it is very difficult to properly water peat, as it absorbs a lot of water. These containers are among the most expensive, so not everyone can afford them.
- A cheap alternative is regular plastic cups, which can be adjusted to suit your needs. Removing seedlings from them is very convenient, as they don't damage the roots—a plus. The downside is the need to drill drainage holes, which is quite time-consuming, especially if you have a large number of seedlings. They also tip over easily during transport and can be toppled by even the slightest draft.
- Experienced gardeners use more than just the above-mentioned containers for seedlings. As a budget-friendly option, they use Tetra Paks (milk containers). The top is cut off, and the bottom is used as a seedling container. Sour cream cups and plastic buckets used for sauerkraut also work well. The only caveat is to wash them thoroughly after use to prevent root rot.
- A little-known, but no less effective, method is to place seeds in newspaper. To do this, roll the newspaper into a bag, like you would for sunflower seeds, and fill it with soil, creating a stable bottom. This is the most cost-effective seedling container and also offers good air permeability. The downside of this method is that it's quite difficult to transport, as newspaper bags easily tip over.
How to plant tomato seedlings: step-by-step instructions
To begin planting seeds to obtain sprouts, you need to prepare the soil. To do this, add hot water with potassium permanganate to the soil two days beforehand, and apply a fungicide the following day. This will help prevent root rot.
To avoid mixing up seedlings when planting several varieties, you can label the pallets, for example, by sticking on multi-colored stickers with the names of the tomatoes.
Planting the seeds is straightforward. Place the soil in a pre-selected container, stir it with a wooden stick, and then level it. A ruler is helpful for this. Then, use the same ruler to make grooves (furrows) in the soil, spaced no more than three centimeters apart. The grooves should be at least half a centimeter deep.
The seeds are planted in these depressions at a distance of 5-10 millimeters from each other, after which they are sprayed with water and covered with soil.
The final step is covering the future seedlings with polyethylene.
Caring for sprouts
The room temperature should be constant and maintained at a certain level. The optimal temperature for tomatoes is considered to be between 18 and 20 degrees Celsius. Under these conditions, the first leaves will appear on the third day.
After this, the tomatoes need to be moved closer to a light source—this way the leaves will absorb sunlight and grow better. Natural light is usually sufficient, but if planting in winter, artificial lighting should be provided in January or February.
The daily light should be approximately 16 hours. Avoid leaving the light on 24 hours a day, as this can weaken the seedlings.
Maintaining a proper humidity level in the container is important. Overwatering will cause root rot, while drying out will simply kill the plant. To prevent this, you must adhere to certain rules:
- During the first week of growing, there is no need to water the plants; there is enough water in the soil from the preparation and sowing period.
- For watering, it is better to use a spray bottle - it will provide gentle and careful moisture and will not damage weak sprouts.
- If you can't use a sprayer, you can water with a watering can, but only near the edge of the container so as not to wash the soil off the sprouts.
- The water should be at room temperature.
Top dressing Fertilizing is done after the leaves appear. You should wait at least a week after this point. Fertilizing solutions and mixtures from specialized stores are often used.
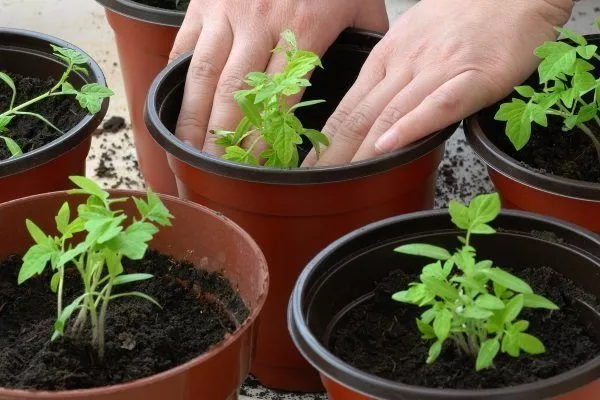
After this, watering should be done 4 or 5 hours before transplanting. This is done to facilitate the process of transplanting the plants. Picking tomato seedlings It is carried out after three weeks from the emergence of most sprouts, but you need to focus on the condition of the plants.
Pricking out is done to provide the young plant with plenty of soil and to prevent root systems from becoming entangled. To perform this procedure, prepare the soil in the same way as before planting seeds.
The plant should be removed from moist soil to prevent clods of dry soil from damaging the roots. Place it in a separate container. Individual cups are ideal. Plant the seedling carefully, gently burying the roots and part of the stem into the soil. Gently press the soil around the plant with your fingers and water to remove any air pockets.
After these manipulations, the transplanted seedling is left undisturbed for several days in a warm, dark place. This is necessary to ensure it establishes better in its new container.
After 3 or 4 days, return the seedlings to a bright location. During this period, water the plants regularly, loosen the soil in the containers, and feed the tomatoes with special solutions for rapid growth.
We also recommend that you familiarize yourself with the recommendations that will help you grow strong and healthy tomato seedlings - here.
What should seedlings be like before planting?
For successful planting, the seedlings need to develop a strong root system. With proper care, this occurs 60-90 days after planting the seeds in the soil. This varies for each variety.
Before planting, the plant needs to be prepared to prevent it from dying in the unfamiliar conditions. To do this, the seedlings should be brought outdoors a week after transplanting. The time should be increased gradually, starting with half an hour and working up to a full day.
Let's watch a video on how to sow tomato seeds to grow seedlings. We'll learn how to create the necessary conditions for tomato seedling growth and how to properly care for the planted seedlings:
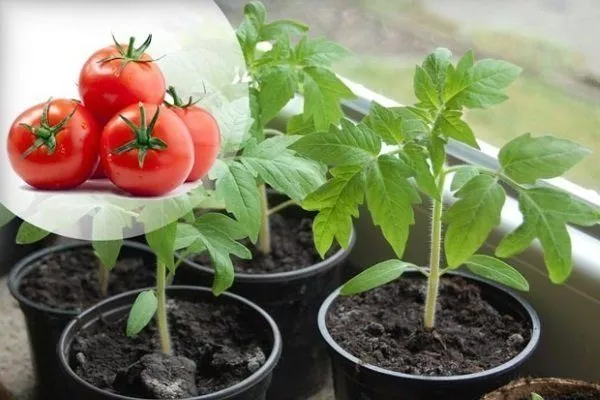
To ensure a good harvest is a joy to behold, follow the simple rules and instructions outlined above. Your tomatoes will be tasty and juicy, and their quantity will be worth all the effort you put into them.