Planting potatoes underground allows for an early harvest, as this crop ripens faster in the moisture of winter and spring. The plant produces tubers before the onset of hot weather and the onset of late blight, so disease control is virtually eliminated. However, there are risks, including the possibility of seed damage over the winter. Let's explore how to plant potatoes correctly for a good harvest.
Is it possible to plant before winter?
In the spring, seedlings often emerge from the ground, sprouting from nightshade or tomato fruits that overwintered in the soil. Potatoes, also a member of the nightshade family, can be planted in the fall and bear fruit in the spring. This is further supported by the fact that potatoes remaining deep in the ground break through to the surface in the spring, although they form small tubers.
More experienced gardeners, on the contrary, deliberately plant potatoes before winter to save time in the spring. The yield of winter potatoes is no less than that of spring-planted ones. This requires a truly snowy winter. As strange as it may seem, winter planting of tubers is not advisable in the southern and southeastern regions, where snowfall is sparse and prolonged thaws often occur in midwinter.
In conditions of sudden warmth, the tubers sprout, but if severe frosts occur afterwards, they die.
When planting potatoes in winter, it's important to anticipate the approximate time of snow cover formation and its thickness. This protects the soil from deep freezing, preventing the tubers from freezing. Typically, this snow cover only forms in December. In the southwestern regions, it is 2 to 3 cm deep at the beginning of winter, reaching 6-7 cm by the end. In the central and southeastern regions, the snow cover ranges from 5-10 cm to 20-23 cm.
Selecting a location for planting potatoes and preparing it
A suitable planting location is sheltered from the sun and where meltwater does not stagnate. For example, this could be near a fence or near currant or gooseberry bushes. For a good harvest, it is recommended to plant in the fall on sandy or sandy loam soils. A good harvest can also be obtained from loam soils. On clay soils, where water stagnates in the spring, it is best to plant in raised beds rather than on a flat surface. This will protect the tubers from getting wet.
- ✓ Sun protection
- ✓ No stagnation of melt water
- ✓ Predecessors - cabbage or legumes
- ✓ Sandy or sandy loam soils
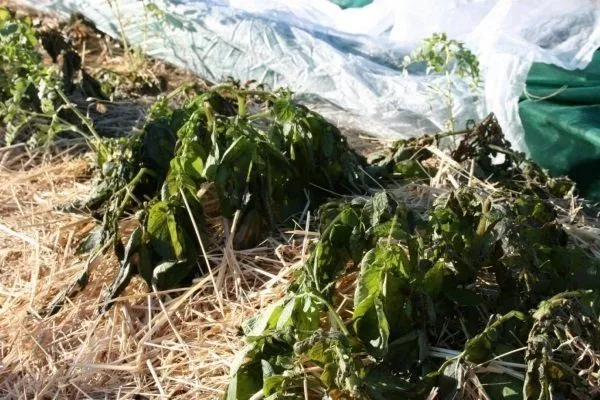
Potato plots grown in the summer are often plagued by pests after harvest, making them unsuitable for winter planting. Therefore, a different plot should be chosen. Ideally, one previously planted with cabbage or legumes.
The selected area must be prepared properly:
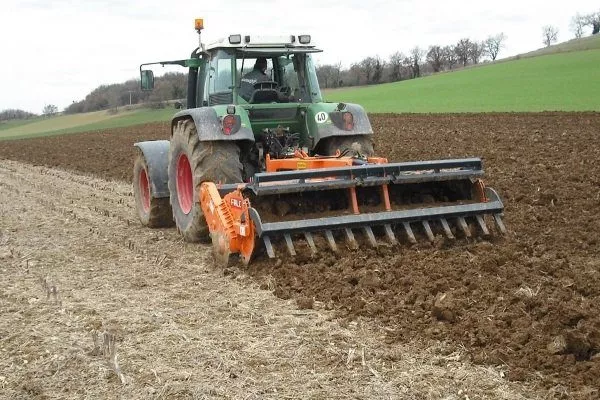
- Clean and process with a disc harrow using a walk-behind tractor or tractor.
- Add organic fertilizer. Typically, gardeners use manure or compost.
- Let it sit for a while and then loosen the soil. The optimal depth is up to 30 cm.
- After the rains, carry out cultivation. For this, you will need light agricultural equipment, such as a walk-behind tractor or mini tractor.
- Clear the area of previous crops.
- Add organic fertilizers (manure or humus).
- Loosen the soil to a depth of 30 cm.
- Carry out cultivation after rains.
To prevent potato rot, it is worth developing a site with a slight slope, which will ensure normal absorption and distribution of moisture in the soil.
Selection of seed material
Potatoes planted in the fall will overwinter in extreme conditions, and in the spring, their sprouts must struggle to break through a thick layer of soil. Therefore, it is recommended to select large tubers weighing at least 100-150 g for planting, and they must be completely healthy.
It's worth noting that many vegetable diseases only become apparent during vernalization. Since tubers for fall planting are not vernalized, in July, while the tops are still green, it's worth marking the healthiest and most vigorous plants, free of any diseases, with stakes. The fruits from these plants will serve as seed.
Of course, in addition to choosing the right tubers, you need to pay special attention to the plant variety. To do this, consider two things:
- To obtain an early harvest, plant early varieties (necessarily frost-resistant), of which "Luck" is a representative, however, there is a risk that during the January thaw the tubers will grow up, but a significant part of the bushes will die with the onset of frost. Comparison of potato varieties for winter planting
Variety Frost resistance (°C) Disease resistance Ripening period (days) Yield (kg/m2) Nevsky -10 High 70-80 3.5 Svitanok of Kyiv -12 Average 80-90 3.0 Volzhanin -11 High 75-85 3.2 Agria -9 Average 65-75 3.7 Adretta -10 High 70-80 3.4
Ultra-early varieties germinate too quickly in spring, so they can freeze even at night at low air temperatures.
- Late-ripening varieties, including Lorkh, Zdabutak, and Asterix, are more resistant to temperature fluctuations, but they take significantly longer to germinate, first developing a root system and then powerful tops that quickly become coarse.
So, the best option is mid-early potatoes, as they are more productive than late varieties and also germinate later than early varieties. Here are examples of mid-early potatoes:
- Nevsky;
- Svitanok of Kyiv;
- Volzhanin;
- Agria;
- Adretta;
- Impala;
- Call;
- Karatop;
- Margarita;
- Horizon;
- Radich;
- Haze;
- Strongman;
- Talovsky 110;
- Caprice;
- Aksamit;
- Lapis lazuli;
- Uladar;
- Lily;
- Breeze;
- Yavar.
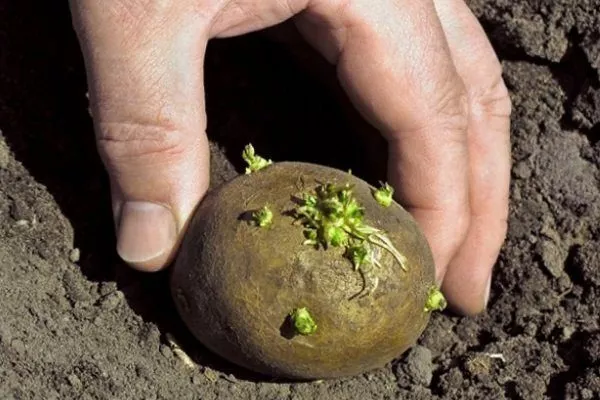
For planting in the first half of winter, it's best to use unsprouted seedlings, and in the second half, use sprouted ones, which can grow 2 to 4 cm by February. In this case, the risk of frost is virtually eliminated.
Preparing tubers for planting
Potato tubers typically die in winter due to rot or soil-borne pests that attack the plant in the fall. Therefore, to ensure a good harvest, careful seed preparation is essential. In general, two simple steps are required:
- Fourteen days before planting, place the tubers in the sun to allow them to green up inside and out. Regularly turning them is recommended. This promotes greening. The potato's color changes due to the production of solanine, an organic compound that protects the crop from soil-borne pests, including mole crickets.
- Thirty minutes before planting, spray the tubers with a solution made by mixing 10 liters of water, 4 g of Aktara, and 10 g of Fundazol. This will protect the plant from rot and pests during the early stages of development in the soil.
How deep should I plant?
The key to successfully overwintering tubers is planting them at the correct depth. Experiments have revealed the following:
- when planted at a depth of 0 to 12 cm, the tubers freeze and die;
- When planted at a depth of 20 to 30 cm, the tubers are crushed by an excessively dense layer of soil, and their sprouts are greatly weakened when they break through.
Thus, the optimal depth is between 12 and 20 cm. This should also be based on the weight of the potatoes being planted. A sprout will be able to emerge from a depth of more than 20 cm if the tuber weighs 100 g or more.
Methods of planting potatoes and harvesting
The specific sowing method is determined by the soil type and the site's location. In the spring, the soil in the garden bed hardens. Naturally, the heavier the soil becomes, the more difficult it will be for the seedlings to break through. If the site is located in a lowland, it may be flooded after the snowmelt. Potato planting takes these nuances into account.
Light soil
Sowing occurs during periods of autumn frost, when the soil freezes slightly in the morning and thaws during the day. Follow these instructions:
- Create double beds 70 cm wide using stakes and string. The optimal distance between them is 80 to 100 cm. Don't exceed these parameters, as you'll need to install greenhouses in the spring. The distance between rows can be 25 to 30 cm. Plant in a staggered pattern.
- Dig holes 15-20 cm deep. Cover the bottom with compost, a handful of ash, and onion peels to protect the crop from wireworms. It's best to avoid using well-rotted manure, as it's attractive to mole crickets. If organic matter is lacking, you can spread fertilizer over the bed at a ratio of 30-40 g of potassium chloride and 40-60 g of superphosphate per square meter. Then, rake the soil.
- Spray the planting material with clean water and lightly sprinkle with ground red pepper to protect it from mice. Alternatively, simply treat it with a 1% Bordeaux mixture solution.
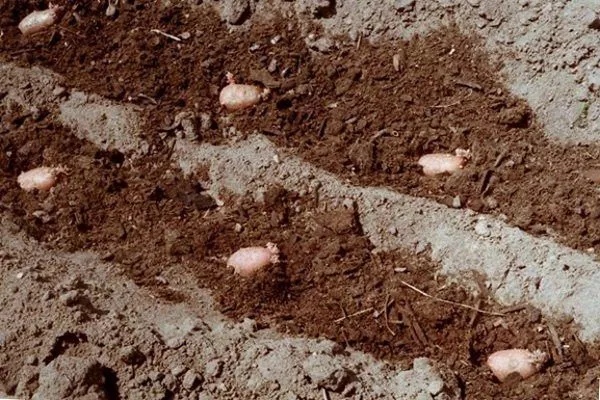
- Place the potatoes in the holes and cover with soil.
- Cover the beds with branches (preferably pine or spruce) for drainage, and then add a layer of organic matter such as sawdust, hay, and straw. The optimal thickness is 30-40 cm. Then, scatter poisoned rodent pellets around the area.
- Cover the bed with white spunbond. You'll have to forgo the plastic, as the plant will rot under it.
Learn more about planting and growing potatoes under straw/hay – read here.
With the arrival of spring, do the following:
- Remove the mulch and install arches over the beds. Stretch spunbond over them.
- If the potatoes have sprouted, the soil has dried out to a depth of 7-8 cm, and there's been no rain, it's time to water them. It's recommended to add a growth stimulant, such as Baikal EM-1, to the water.
- Remove the greenhouses when the shoots reach 10-15 cm in height. The bushes need spud.
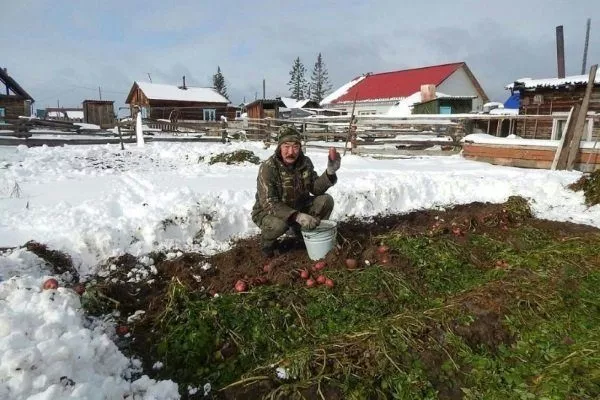
- Harvest when the tops are dry. Clear the area first.
This method is used for sandy, sandy loam or loamy soils.
Clay soils
Planting potatoes in the fall requires a large amount of hay, which is mown in several stages – in July, August, and September. Planting is done as follows:
- Cover the area with hay and straw. The layer should be continuous and at least 30 cm thick.
- Break up the beds, keeping a distance of 1 m between rows and 70 cm between tubers in a row. Plant in a checkerboard pattern.
- Use a stake to poke holes through the hay layer. The optimal depth is 30 cm and the width is 8-10 cm.
- Prepare a separate fertile soil mixture: mix compost and ash in a 1:1 ratio. Pour about 1 cup of the mixture into each hole, and place the tuber on top, sprinkled with hot red pepper powder. Then, add another 3 cm of the mixture.
- Plug the holes in the hay “pillow” with bundles made by tightly twisting dry grass.
- During rainy weather, cover the beds with black spunbond, which should be removed with the first snow. During winter, the plants are warmed by hay, which melts the lower layer of snow. This effectively creates a snow dome over the potatoes, protecting them from frost.
In spring, weeds under the mulch are converted into humus by bacteria, and the potatoes sprout. They don't require tilling or fertilizing, and they're already protected from late blight thanks to the hay bacillus in the mulch. The first shoots will emerge in 10-14 days, and the potatoes can be harvested on the 40th day.
This method is advisable to use on clayey soils, as well as on light soils when there is a risk of flooding the beds.
Pros and cons
Planting potatoes in winter has the following advantages:
- you can get an early harvest, since the seedlings appear 1.5-2 weeks earlier than with spring sowing;
- On “winter” potatoes, the most productive sprouts remain intact, which often break off in the fruits of spring planting;
- no need for a cellar to store planting material;
- planting work can be carried out without haste, and there is no need to water the furrows or fight weeds;
- the plant is resistant to late blight, especially since Colorado potato beetles rarely eat tough greens, preferring young leaves planted in spring;
- Fruits planted in winter do not need to be hilled.
Despite all the advantages listed above, it is worth taking into account some rather significant disadvantages:
- even the central part of Russia is subject to severe frosts below 15 degrees, and for potatoes, a drop in temperature below -10…-12 degrees is a serious risk of freezing;
- in case of an excessively rainy spring or a very snowy winter, the tubers may become soaked, so the seedlings will be excessively sparse;
- It is difficult to protect the crop from blackleg, wireworm, and the Colorado potato beetle, since the infection only appears during the germination of tubers, and during winter planting it is not possible to remove the infected material in a timely manner;
- This type of planting is often unsuitable for use on clay and medium clay soils, which are prone to strong compaction – it is difficult for the seedlings to break through the surface, they are often affected by rhizoctonia, and the number of stems and, consequently, the overall yield of the bush is reduced.
Video instructions
The following video provides a visual demonstration of how to plant potatoes for the winter:
So, potatoes can be planted in winter for an early harvest. Statistics show that about 12% of gardeners resort to winter planting. This means that the method is truly effective, although there is a risk of crop failure due to unexpectedly severe frosts or rodent infestations.