Breeders have developed a large number of potato varieties. Among them is the Irbitsky variety. It is gaining increasing popularity among gardeners, despite being introduced relatively recently. This variety is distinguished by its excellent taste, early maturity, and high yield.
Description of the variety
The Irbit potato is a mid-season variety intended for table use. Its detailed characteristics can be found in the table:
| Criterion | Description |
| Originator | State Scientific Institution Ural Research Institute of the Russian Academy of Agricultural Sciences. |
| Ripening period | It lasts 65-70 days. |
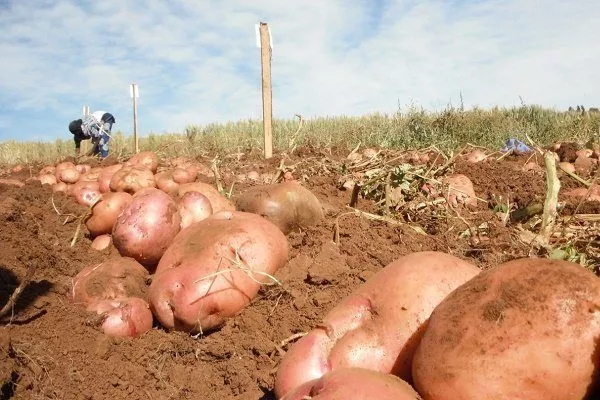
| Productivity | The average yield is 250-400 centners per hectare, with a maximum of 468 centners per hectare. One bush can produce 6 to 10 tubers. |
| Plant species | Semi-erect, intermediate type. Stems are erect, 50 to 60 cm tall, and intensely colored with anthocyanin. Foliage is average, with large to medium-sized leaves, dark green, and moderately dissected. Flowering is abundant and productive. Inflorescences are large and spreading. Corollas are medium-sized and reddish-purple. |
| Weight and appearance of commercial tuber | Ripe potatoes weigh from 110 to 200 g. They have a round, elongated shape, smooth pink skin with small eyes and yellow flesh. |
| Starch content | From 13.0 to 16.5% |
| Marketability | High – 81-96% |
| Shelf life | Good – 97% |
| Disease resistance | The variety is highly resistant to potato cancer, golden nematode, rugose and streak mosaic, and leafroll virus. The plant is more susceptible to the pathogen late blight. |
| Preferred regions for growing | It is listed in the State Register of the Russian Federation for planting in the Volga-Vyatka and West Siberian regions. It is also grown in other countries, including Moldova and Ukraine. |
When to plant?
For an early harvest, plant the seeds in the last ten days of April. Irbit potatoes can be planted much later than early varieties, in the second ten days of May.
To ensure the right planting time, it's important to consider the climate. The soil should warm to 7-8°C at a depth of up to 12 cm. Some gardeners plant potatoes at temperatures as high as 30°C, but in this case, the seedlings must be sprouted. Planting potatoes in unheated soil will reduce yield by an average of 20%.
Early planting allows the root crop to develop a strong root system, which ensures the health and development of the plant.
Folk wisdom can also help determine the right time to plant potatoes. It says to plant potatoes when the birch tree produces and grows green, coin-sized leaves. Birch trees begin to bloom when the soil temperature reaches around 8°C at a depth of 10 cm. It's important that the soil is slightly moist and the clods are well-crumbed.
Selection of soil and its preparation
Choosing a good location for growing potatoes is crucial. It should be open and well-drained. In partial shade, the yield will be small, and the tubers will grow small. It's also important that the plot isn't located in a low-lying area where groundwater stagnates. The best predecessors for potatoes are winter crops, legumes, and flax.
- ✓ The area must be protected from strong winds that can damage the tops.
- ✓ The soil must have good drainage to avoid water stagnation.
A good harvest also depends on the soil type. Black soil and peat are considered the most fertile. Potatoes will not grow well in clay soil, as it will retain water. However, if sand, wood ash, compost, or manure are added to clay soil, it will also be suitable for growing this variety. Generally, Irbit potatoes are considered easy-to-grow, so they can even grow in sandy soil if lupines were previously grown in the area.
It is important to complete all preparatory work in advance on the selected site, which is divided into two stages:
- Work in the autumn periodStarting in the fall, you should begin preparing the plot for spring potato planting. To do this, apply mineral fertilizer and till the soil. However, don't rake it afterwards; it's best to leave it as is to kill insects and fungi that could harm the crop. Furthermore, this ensures the soil is well-hydrated.
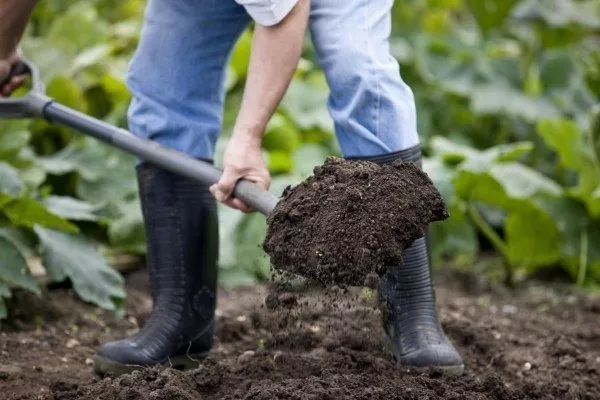
- Work in the springTo prevent crusting and allow the soil to breathe, loosen it to a depth of 15 cm in the spring. Once loosening is sufficient if the soil is sandy or sandy loam. If the soil is clayey, loosen it twice before planting. It's important not to dig with a shovel, but rather loosen it with a pitchfork. Take a small layer of soil, lift it slightly without turning it, and then return it to the same spot.
- Test your soil for pH and nutrient content one month before planting.
- Add organic fertilizer (compost or rotted manure) two weeks before planting.
- Deeply loosen the soil a week before planting to improve aeration.
This preparation prevents the soil from drying out and enriches it with oxygen. It is also necessary to allow excess moisture to evaporate from the area.
Preparing seeds for sowing
In order for the seed to take root well in the soil, it must be prepared correctly:
- About 3-4 weeks before planting, vernalize the potatoes, or sprout the eyes. To do this, remove them from the cellar and carefully sort them, removing any rotten tubers. Move them to a warm, room-temperature location with good lighting. It's best to arrange the tubers in two layers in boxes or crates.
- Ensure the humidity in the room is around 80%.
- As soon as the potatoes begin to sprout, the air temperature should be reduced to 12°C. This is necessary to acclimate the root crop to lower temperatures. The sprouts will not stretch out too much and will grow strong. Ideally, they should be about 1.5-2 cm long.
- About a week before planting, cut large tubers in half or into thirds. It's important that each cut potato has sprouted eyes. This allows the potato to develop a protective coating.
If you don't have time to prepare the potatoes in advance and have to cut them right before planting, it's recommended to treat the cut area with special products, such as Prestige or Maxim.
Planting methods and technology
Potatoes can be planted using a variety of methods. Some continue to plant with a shovel, while others opt for a more modern method – planting with a walk-behind tractor. Each planting method deserves its own consideration.
Manual
If your plot is small, this method of planting potatoes is suitable. Follow these steps:
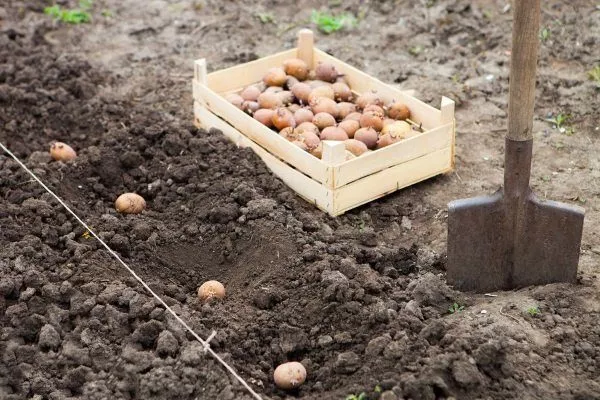
- Prepare pegs about 70 cm long. Attach a cord to them at a height of 10-15 cm from the bottom.
- Dig holes along the cord at a distance of about 20-25 cm. If it is smaller, it will be inconvenient to produce later. hillingThe depth of the holes is about 10 cm. In fact, this is half a shovel.
- Add 1 tablespoon of fertilizer to each hole. This could be Azofoska, a handful of manure, or a little compost.
- Place the tubers in the prepared holes with the sprouts facing up.
- Using pegs, measure the distance between rows from the holes back to the planting site. When digging new holes, fill in the soil from the previous rows.
Planting can also be done without a cord. In this case, dig one hole at a time, fill it with fertilizer and potatoes, and then cover it with soil collected from digging the next hole. Finally, level the entire area with a rake to prevent excess moisture evaporation.
If the soil where you're planting potatoes is extremely moist, it means the groundwater is close. In this case, it's recommended to create raised beds, raising the soil to a height of about 15 cm. The distance between the beds should be about 50 cm. Potato tubers are planted in the raised beds. This method is not suitable for arid regions.
Using a walk-behind tractor
In this case, a walk-behind tractor is used to cut even furrows into which the tubers are placed. The optimal distance between holes is 20-30 cm, and between rows – at least 50 cm. The tubers are then covered with a rake or a walk-behind tractor.
Some gardeners believe that mechanical planting affects crop yields because a walk-behind tractor loosens the soil better than a shovel.
Caring for potatoes
Although this variety is considered easy to care for, some care guidelines are still required. We'll cover them below.
Watering
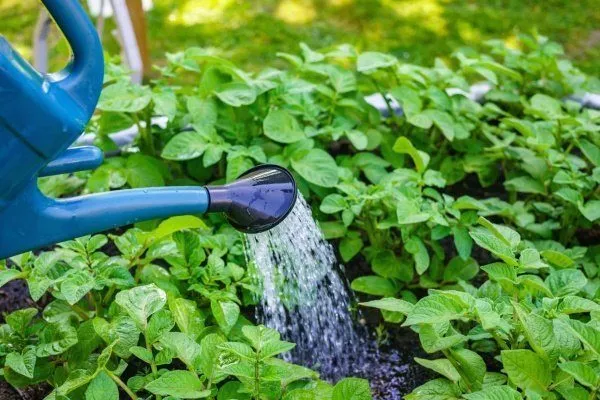
Irbit potatoes tolerate drought well, but to ensure a good harvest, they still need to be watered if the summer is dry and rain is rare. This is essential during seed germination, as well as when the potatoes are developing buds and blooming. It's best to keep the soil moist when the tubers form, which typically occurs in August.
When watering, be sure to avoid stagnant water. Any crust that forms should be broken up with a hoe to allow oxygen to reach the roots.
Hilling
Hilling is essential when growing potatoes. It's done twice a season to improve airflow to the tubers. The first time, potatoes are hilled when the stems reach 15 cm. Aim for a ridge of soil about 20 cm deep. The next time, the stems reach about 30 cm. It's recommended to hill them after rainfall.
Fertilizing
Like all plants, Irbitsky potatoes need to be fertilized. The first time is after the initial hilling. You can add complex mineral fertilizers, but it's important to follow the recommended dosage.
Adding more nitrogen fertilizer will result in active growth of tops, while tubers will be much more delayed in setting.
Potatoes will also need to be watered with slurry, which is recommended to be made from chicken manure. However, it's important to remember to calculate the concentration correctly, otherwise you could burn the plants. Typically, take 1 part chicken manure to 15 parts water. Let it sit for several days. Then water at a rate of 1 liter per plant. When fertilizing, pour this infusion right at the roots to avoid damaging the stems and leaves.
It's helpful to feed potatoes through their leaves. To do this, soak nettles in a solution for several days, then spray the leaves with the infusion. It's also recommended to water potatoes with a solution made by mixing 30 grams of nitrogen, potassium, and phosphorus fertilizers in one bucket of water.
Pest and disease control
Irbit potatoes must be treated against such pests:
- Colorado potato beetleIt's considered a major and dangerous pest. If left untreated, the larvae can completely destroy all the leaves, leaving only bare stems. To prevent the pest from spreading, it's recommended to treat potatoes with herbal remedies. This can include an infusion of wormwood, celandine, or walnut leaves. Chemical treatments such as Aktara, Bankol, Colorado, Regent, etc. are also suitable. If the plot is small, it's recommended to collect the larvae by hand.
- WirewormThis worm is believed to be the larva of the click beetle. It burrows into the potato tuber, damaging it. This can lead to potato rot. Control involves adding lime to the soil if it's acidic. Digging and loosening the soil is also necessary.
- Stem nematodeThese are very small white worms, about 0.4 cm in size. They are almost invisible when they infest potato tubers. These nematodes damage the integrity of the tubers. Only when the potatoes are dug up do you notice the skin peeling off and the top layer turning black. To prevent these worms from appearing, it is recommended to monitor the quality of the seeds and till the soil in the fall.
- Mole cricketsThis insect causes significant damage to many plants, including potatoes. It lives in the soil, constantly digging tunnels, cutting roots and stems, and then damaging the tubers. To combat the mole cricket, it's necessary to prepare special baits containing boiled grain and poison such as Malathion.
- Noctuid caterpillarsThey can be found anywhere on potatoes because they feed on leaves, stems, and tubers. After feeding, the stems become damaged, and various types of rot form on the wounds. Biological products are used to control them.
As for diseases, late blight poses a threat. It develops more often in cool and rainy weather, more resembling potato rot, which first spreads on the stems and leaves. They turn yellow and become covered with grayish spots. After rain, fungal spores fall to the soil and penetrate the tubers. At harvest, late blight is not noticeable on the tubers, but they don't store well and rot after a short time.
As a preventative measure, it's recommended to treat the tops with copper sulfate. Dissolve 5 grams of copper sulfate in 5 liters of water, then spray the potato tops with the resulting solution when the stems reach a height of 20 cm.
If infected with late blight, potatoes cannot be treated.
Harvesting and storage
First, you need to determine if the potatoes are ripe. This is indicated by slightly dried tops. Harvesting should begin before the ground freezes. This typically occurs in late August or early September. Follow these steps:
- Dig up the potatoes, holding the tops with your left hand and digging under the side of the row or ridge with your right.
- Remove the tubers and place them in a bucket.
- Finally, pour the potatoes out onto a flat surface to dry in the sun.
- Sort the potatoes. Keep the larger tubers for eating, and set aside the medium-sized ones, about the size of a chicken egg, for seed. If the tubers show any mechanical damage, set them aside, as they are unsuitable for storage. Also, remove any rotten tubers, as they could infect other potatoes.
- To ensure good storage of tubers, spray them with a solution of copper sulfate at a rate of 2 g per bucket of water.
Potatoes should be stored in a cool, dry place with a constant temperature. A cellar, for example, is ideal. The temperature should not fall below 2°C or rise above 4°C. For cellar storage, potatoes should be placed in bins, but the layers should not exceed 1.3 m to ensure good airflow to the tubers and allow any moisture to evaporate. Potatoes can also be stored in boxes, but it is recommended to inspect them throughout the winter. If any rotten potatoes appear, they should be removed.
The video clearly demonstrates the yield of Irbit potatoes that can be obtained from planting 1 kg of seed:
Positive and negative qualities
The following characteristics are considered to be the advantages of this variety:
- beautiful appearance;
- long shelf life;
- versatility in cooking;
- yellow flesh;
- excellent immunity to fungal and viral diseases;
- adaptability to weather conditions.
So, the Irbit potato is an excellent variety for growing and storing. It grows best in the Volga-Vyatka and West Siberian regions, as well as in Ukraine and Moldova. Irbit potatoes are easy to grow, drought-resistant, rarely susceptible to disease, and boast high yields and excellent flavor.