When choosing a potato variety to grow, more and more gardeners are choosing the Meteor variety. And for good reason, as it has a pleasant taste, high yields, and stores well with virtually no loss. Growing Meteor is quite simple; you just need to know the basic rules.
| Parameter | Meaning |
|---|---|
| Soil temperature for planting | 10°C at a depth of 10 cm |
| Optimum growth temperature | 15-25°C |
| Drought resistance | High |
| Preferred soil type | Loam |
History of the variety
The Meteor variety was developed by scientists in the Moscow region in 2008 by crossing the Shurminsky-2 seed potato with a hybrid. However, this variety was only added to the Russian Register five years ago, in 2013. Around 15 different research institutes participated in the development of the Meteor variety.
Description of the Meteor potato variety
EscapesThe Meteor variety grows tall and semi-erect. The stems are strong, and the leaves are medium-sized but dense and dark green. During flowering, small white flowers appear on the bushes.
- ✓ No signs of disease
- ✓ Presence of sprouts
- ✓ Tuber size from 50 to 80 grams
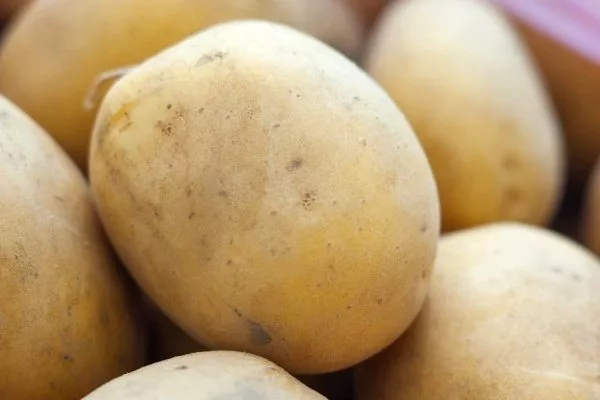
Roots. The Meteor potato tubers are round-oval with yellow skin. The flesh is also yellow. The eyes are medium-deep. The roots are small, weighing between 100 and 150 grams.
Characteristic
This variety has the following main characteristics:
- The potatoes don't darken when cooked and have a pleasant flavor. Their starch content is 12-15%, making Meteor potatoes ideal for frying.
- The variety is considered to be very early.
- Potatoes have high immunity and pest resistance. They are resistant to potato cancer and golden cyst nematode. Meteor has moderate resistance to late blight, scab, rhizoctonia, and rot.
- The variety is very drought-resistant and can easily adapt to any climate.
- The period from the first shoots to technical maturity of potatoes is about seventy days.
- The variety has a good yield: 25-40 tons per hectare of land.
- The harvested crop preserves well, with experts estimating this quality at 95%. This means that only 5% of the harvest may be damaged during long-term storage.
- There are 10-12 root crops under each bush.
- The regions most suitable for cultivation are: West Siberian, Central, Central Black Earth, Volga-Vyatka.
Advantages and disadvantages of the variety
As we've already mentioned, the Meteor potato variety has many advantages over other varieties. These include:
- early ripening of potatoes;
- pleasant taste;
- big harvest;
- long shelf life of the harvest;
- resistance to heat and drought;
- high immunity;
- pest resistance;
- quick adaptation to any climatic conditions;
- a high percentage of marketable tubers - from 88 to 98%, which means that this is the amount of potatoes suitable for sale (eating), and not just as planting material;
- can be grown in different regions;
- unpretentiousness;
- Suitable for growing in any type of soil.
How to choose a landing site?
The Meteor variety prefers sunny areas, so it should be planted in a location out of shade. The area should be free of standing water. Also, choose a location away from strong winds, as they can damage shoots and even root vegetables. The soil for Meteor should be fertile and regularly fertilized. The best soil for Meteor is loam.
To ensure a good harvest, you need to practice proper crop rotation. By following this rule, you'll enjoy a bountiful harvest of delicious potatoes every year.
The best predecessors for the Meteor potato variety are rye, pumpkin, legumes, onions, garlic, cucumbers, watermelon, and melon. These crops will enrich the soil with all the necessary nutrients, so planting potatoes after these plants will eventually yield an excellent harvest.
Avoid planting potatoes after tomatoes, hot and sweet peppers, sunflowers, and eggplants. Also, avoid planting potatoes in the same spot several years in a row, as the soil loses nutrients, and the potatoes lack the resources to grow and develop. As a result, the roots remain small, and their number is much lower than it should be.
You can use this method for planting: after harvesting, plant special green manure crops that will enrich the soil for the next planting. Green manure crops for potatoes include rye, mustard, rapeseed, alfalfa, phacelia, buckwheat, and oats.
Alternatively, if you can't change your growing location, you can simply plant potatoes, alternating between rows and beds. This little trick can be a lifesaver if your garden plot is small and there's nowhere to transplant your potatoes.
Planting dates
Meteor potatoes are typically planted in late April or early May, but the planting time depends on the growing region. Therefore, it's best to determine the planting time by measuring the soil temperature. At a depth of 10 cm, it should be 10 degrees Celsius.
There is also a folk method for determining the planting time: when the bird cherry blossoms or the birch leaves become the size of a 10-kopeck coin.
But regardless of the chosen method, check the weather forecast. If frost returns after a warm spell, it could seriously damage the future harvest. The tubers will freeze and become unpalatable, and their growth may also be stunted. Therefore, in this case, it's best to wait until the weather warms up completely.
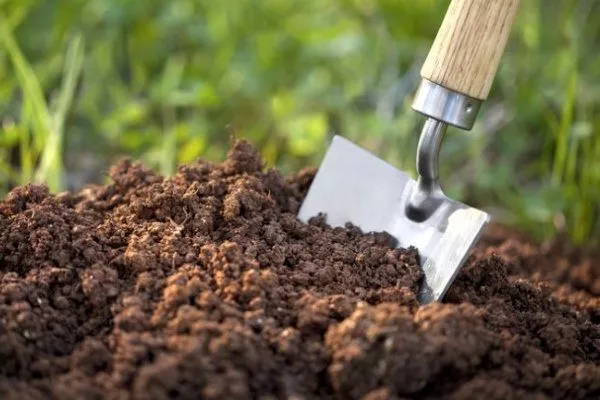
Soil preparation
To ensure successful potato growing and a bountiful harvest, the soil must be carefully prepared for planting. To do this, clear the soil of weeds and old plants and crops, then add the appropriate fertilizer for the variety.
- Clear the area of weeds and remains of previous crops.
- Apply organic fertilizers in the fall.
- In spring, dig up the soil and add mineral fertilizers.
Organic fertilizers are essential: manure (10 kg per square meter) or humus (5 kg per square meter). These will help nourish the soil and prepare it for planting potatoes.
Fertilizer should be applied to the soil in the fall, and then dug up again in the spring. Also, add minerals to the soil: iron, magnesium, nitrogen, calcium, sulfur, phosphorus, and potassium. This pre-planting preparation will help introduce nutrients into the soil and ultimately grow tasty and healthy potatoes.
Preparation of planting material
Before planting, remove diseased and weak tubers. Then, stimulate the growth of the planting material. A suitable mixture is: a tablespoon of copper sulfate, a few granules of potassium permanganate, and 1 kg of wood ash, dissolved in a bucket of water. You can also add urea (40 grams), superphosphate (60 grams), and boric acid (10 grams) to the solution. This will disinfect the potatoes and help protect them from pests. Soak them in this mixture for about half an hour.
Next, the tubers need to sprout. This is done about a month before planting. For about three days, the tubers are kept in bright light and at a temperature of up to +30°C (86°F), and then moved to a cooler location, with a temperature of +15°C (59°F).
If you missed the sprouting deadline, don't worry. There's a method that will help you sprout your tubers faster. It's called the "wet method." To do this, place the potatoes in a box and cover with wet peat moss or compost.
Sometimes gardeners choose an even faster method: treating the tubers with growth stimulants a couple of days before planting. This eliminates the need for pre-sprouting altogether.
How to plant Meteor potatoes?
When planting, leave 35 cm of space between each future bush and 60 cm between rows. The tubers should be planted at a depth of about 10 cm. Before planting, it is useful to add fertilizer to each hole: 1 tablespoon of nitrophoska or half a cup of bone meal, 700 grams of humus, and 5 tablespoons of wood ash.
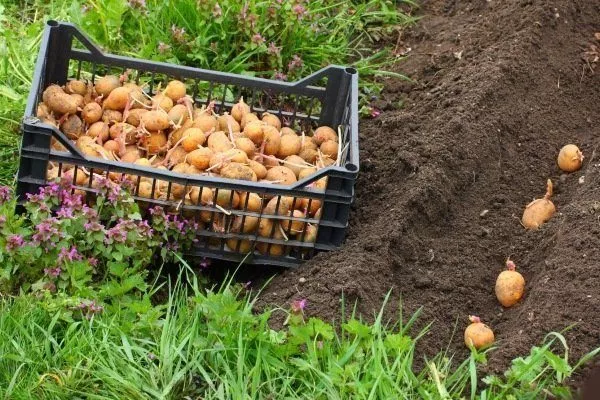
By following this plan, you will provide each bush with free space, thanks to which everyone will have enough nutrients and moisture from the soil.
Caring for potatoes
Meteor is unpretentious in care, but still has some peculiarities.
Watering
This variety is drought-resistant, but it still requires watering every 10 days. Ensure that the water reaches the tubers and not just covers the soil surface. Otherwise, the roots will not receive sufficient moisture and nutrients, leading to slow growth and disease.
Fertilizers
When planting potatoes, keep in mind that the soil itself must be rich in nutrients necessary for growth and development. However, it's still best to fertilize the plants to ensure a large harvest and healthy potatoes. Fertilizers ensure the potatoes receive all the necessary vitamins and nutrients to ensure proper development. About three such applications are sufficient.
Please note that in rainy weather the plant needs even more fertilizer.
Cow manure is the most suitable fertilizer. Dissolve a liter of this liquid in a bucket of water and pour two liters of the solution under each bush.
Loosening and hilling
Within a week of planting the potatoes, loosen the soil and remove weeds. Loosening should be shallow to avoid damaging the tubers.
Meteor only needs to be hilled twice during its entire development period. The first time is when the bushes reach 15 cm in height, and the second time is four weeks later.
Hilling Hilling is necessary in cold regions, especially if late frosts occur. This procedure helps protect the plant from freezing. However, in warmer climates, hilling can be omitted, as its main purpose is to provide moisture to the tubers, which is supplied by both loosening the soil and watering.
We suggest watching the video to learn more about how to hill potatoes and what equipment is needed for this:
Protection from diseases and insects
The Meteor potato variety is immune to most diseases and insects, but additional preventative measures will not hurt it.
Bushes should be regularly inspected and, ideally, sprinkled with ash to prevent Colorado potato beetles. To protect against wireworms, lower the soil's acidity and remove couch grass.
In addition, to protect plants, they need to be thoroughly sprayed with insecticides. But even routine care, such as watering, tilling, weeding, and loosening the soil, helps protect the crop from diseases and pests.
Harvesting and storage
Meteor potatoes can be stored for a long time if storage rules are followed.
First, the harvested potatoes must be sorted and rotten and damaged ones removed. Next, remove any remaining soil from the tubers. Afterwards, they should be laid out in a dark, ventilated place for 2-3 weeks, and then inspected and sorted again.
Then you can place the potatoes in a place where they will be stored throughout the winter. Remember, this location should be dark, with humidity around 75% and an air temperature of 1 to 6 degrees Celsius. Experts also recommend sorting the potatoes again in the winter, removing any spoiled ones to prevent them from damaging the rest of the crop.
The Meteor potato variety offers numerous advantages, including a pleasant taste. It has strong immunity to various diseases and is rarely damaged by insects. Caring for the potato is quite simple and requires little effort. Therefore, the Meteor variety is an excellent choice for growing for sale or for home gardening.