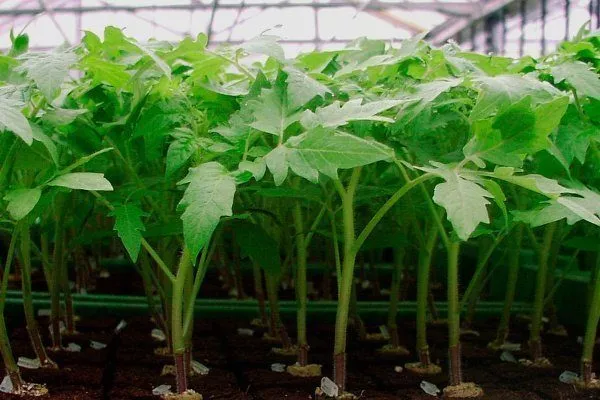
Tomatoes grown from seedlings have excellent flavor and produce high yields. Gardeners consider soil preparation the first important step when sowing seeds. It's also important to know how to care for the shoots and how to strengthen the plant's immune system and protect it from insects and diseases.
Timing of sowing tomato seeds for seedlings
Planning the dates when you'll transplant the tomato seeds outdoors will help you figure out when to sow tomato seeds for seedlings. Growing tomato seedlings takes no more than a couple of months. You need to wait until the first true leaves appear.
The weather conditions of the region influence the transplantation of shoots into the ground:
- In the southern regions, warm weather arrives as early as March. This means that seeds can be safely sown in late January or February.
- In the north, frosts give way to warmer temperatures at the end of May. Therefore, tomato seeds are harvested for sowing in early April.
It would be a good idea to look up favorable days for sowing seedlings in the lunar calendar.
| Region | Sowing time | Transplantation into the ground | Recommended varieties |
|---|---|---|---|
| Southern regions | January 20 – February 10 | April 1-20 | Early ripening (Alpha, Amur standard) |
| Middle zone | March 1-20 | May 15-30 | Mid-season (Bull's Heart, De Barao) |
| Northern regions | April 1-15 | June 1-15 | Cold-resistant (Far North, Taimyr) |
It has been proven that during the waxing moon, vegetable crops experience rapid sap flow.
If you sow seeds for seedlings during these days, shoots will appear within a few days. During the full moon, the fruits become succulent and smell delicious. Harvesting is fine during this phase, but it's best to avoid pruning the leaves.
Secrets of preparing tomato seeds
To ensure good germination and disease resistance in open ground, it's important to properly prepare the seeds for sowing. First, select high-quality planting material. Large, heavy seeds indicate a high nutrient content.
To determine which seeds are suitable for sowing, place the planting material in a solution with added salt. Dissolve 1 teaspoon of salt in 1 cup of warm water. Let the solution steep for 10 minutes.
Next, the gardener checks to see if any grains float to the surface of the water. They are removed, and those remaining at the bottom are rinsed under running water and laid out on cheesecloth on the windowsill to dry.
If the seeds were collected from a previous tomato harvest and were stored in a cold room over the winter, it is recommended to warm them for a week to revive them. The initial temperature is 18 degrees Celsius (64 degrees Fahrenheit). Gradually increase the temperature to 80 degrees Celsius (176 degrees Fahrenheit). This procedure is performed one month before planting.
Disinfection will help prevent diseasesThe most common method for disinfecting seeds is to soak them in a weak solution of potassium permanganate for 20 minutes. It's also a good idea to soak the seeds in a 2% hydrogen peroxide solution, preheated to 45 degrees Celsius, for 7 minutes.
If a gardener thoroughly prepares tomato seeds for growing seedlings, they should consider increasing the yield even before sowing. Soak the seeds in a nutrient solution; fertilizers are available at the store. Immunocytophyte, Virtan-Micro, Epin, and sodium and potassium humates are considered effective.
If you can't find commercially available solutions, you can use folk remedies: aloe vera juice and freshly squeezed potato juice. After treating the seeds with the nutrient mixture, there's no need to rinse them; just let them dry on a windowsill.
The simplest method for preparing planting material is to soak tomatoes in room-temperature water. This process lasts for 12 hours. Gardeners recommend draining the water and replacing it with fresh water every 4 hours.
If you missed the deadline for sowing tomato seeds for seedlings, don't worry. The seeds will germinate faster if you line the saucer with damp cheesecloth or toilet paper. The air temperature should be at least 20 degrees Celsius. Don't let the cheesecloth dry out, but don't create a swamp either.
Experts never tire of repeating: tomatoes are heat-loving seedlings. After being planted outdoors, the plants struggle to withstand drafts and climate change, and they begin to suffer from diseases. As a result, the harvest leaves much to be desired.
A procedure called hardening will strengthen the immunity of tomato seeds for seedlings. Hardening involves alternating temperatures.Sprouted seeds are placed in the refrigerator for 1/2 day at a temperature of +2 degrees Celsius. The following day, the tomatoes are stored at a temperature of 15 to 20 degrees Celsius. Repeat this procedure 2-3 times.
If you have a compressor, you can use a bubbling system. The seeds are soaked in warm, oxygenated water. One end of a hose is secured to the bottom of a jar of water, and the seeds are lowered into the water. The compressor and hose circulate air into the glass container, mixing the seeds. The process takes 12-13 hours, after which the effect will be visible. The seedlings are then removed and thoroughly dried. Then, sowing begins.
What is the best soil for sowing tomato seeds?
A standard soil mixture suitable for sowing tomato planting material in containers consists of the following components:
- Peat – provides excellent drainage, allows air to reach the tomato roots, absorbs moisture, and retains it in the soil for a long time. It's a good idea to add deoxidizers and chalk to the peat. Dolomite flour is suitable for neutralizing acidic soil. To prevent large fibers from ending up in the cups, which could entangle the fragile roots of developing seedlings, sift the peat.
- Leaf soil Although it's light and loose, it doesn't contain the necessary amount of nutrients. However, leaf mold is perfectly suitable as a base for tomato seedlings. The only caveat is to avoid soil under oak and willow trees, as it can retain a large amount of tannins. Tomatoes don't tolerate these and may die.
- Sand – is an excellent leavening agent, but only if it's pure river sand. The sand should be free of clay. Rinse the sand in water and then place it in a preheated oven.
- Perlite – used when pure sand is unavailable. The material makes the soil loose and easily absorbs moisture.
- Humus Use rotted compost. If the compost isn't fully decomposed, the tomatoes will die. Compost is prepared in advance by mixing manure, branches, and trimmed greenery.
- Sawdust Used instead of peat and sand. Before mixing with other ingredients, sawdust is scalded with boiling water.
It is unacceptable to add the following components to the soil for tomato seedlings:
- Organic fertilizers are in the decomposition stage. They emit significant amounts of heat, which is more likely to destroy the seeds. Even if the first shoots appear, the shoots will die due to excessive heat.
- Avoid using soil containing clay. Clay makes the soil mixture heavy and dense, preventing the seedling roots from breathing.
- Avoid using soil for tomato seedlings near busy roads or chemical, industrial, or metallurgical plants, even if they've been inactive for a long time. The soil retains accumulated heavy metals for decades, and the seedlings will inevitably absorb them.
Tomato seedlings are delicate, so before planting the seeds, the soil must be disinfected. Gardeners cite gentle yet effective methods:
- Freezing. The above-mentioned soil components are prepared in the fall and left in a bucket on the balcony for the winter. A few days before excavation, the soil is brought in to allow it to warm up to room temperature.
- Steaming in a water bathDestroys bacteria but preserves beneficial microflora for seeds. Fill a large pot or basin with water, covering it to a depth of 5 cm. Place bricks and, using a cast iron tripod, place a bucket of soil inside, then cover with a tight lid. Steaming takes 2-3 hours.
- Pour boiling water over the soil generously. and let it dry completely.
Soil mixtures that are considered the best for tomato seedlings:
| Soil type | pH | Moisture capacity | Breathability | Nutritional value |
|---|---|---|---|---|
| Peat | 5.5-6.5 | High | Average | Low |
| Sheet | 6.0-7.0 | Average | High | Average |
| Turf | 6.5-7.5 | Low | Low | High |
| Combined | 6.0-6.8 | Optimal | Optimal | Optimal |
- To one part of soil taken from the garden bed, add the same part of leaf mold, sand, and humus. Add 10 grams of urea, 25 grams of potassium sulfate, and 30 grams of superphosphate to a bucket of water. This nutrient solution should saturate the soil with missing micronutrients.
- Mix turf soil with peat and sand. If peat is unavailable, substitute with store-bought soil, but pay attention to the ingredients. If the purchased soil mixture doesn't contain any additives, add ½ liter of wood ash and 2 tablespoons of superphosphate per bucket.
- To 2 parts turf soil, add 1 part each of humus and river sand. Add ½ liter of wood ash per bucket to the mixture.
The following video provides helpful tips on how to properly prepare soil for planting seedlings, as well as other useful recommendations:
How to choose a container for sowing tomato seeds for seedlings
The quality of future seedlings depends on the container in which the tomatoes are grown. There are a variety of containers suitable for sowing tomato seedlings, ranging from plastic yogurt cups to peat pots. If you choose plastic boxes for seedlings, choose containers that fit on windowsills and have drainage holes.
Wooden boxes are hand-made. The height of the boxes is 10 cm. Before placing the grains in the container, a plastic film is placed on the bottom. This will prevent water from seeping through the sides and bottom. A tray, however, would also be a good idea to make.
Caring for tomato seedlings in wooden boxes is simple. The containers are moved to the desired location as needed and turned so that the desired side faces the daylight. Once the sprouts emerge and grow, the seedlings are transplanted into individual cups. If the seedlings are not pricked out promptly, they can grow into the wood or become excessively tangled.
Gardeners also grow seedlings in trays. They look like boxes, but have dividers running across and along them. The advantages of trays are:
- ease and practicality of use;
- low cost of cassettes, long service life (over 10 years);
- compactness;
- The cells are provided with recesses for draining liquid, preventing over-wetting;
- ensures that there is no factor of outgrowing the limited space.
Experts advise avoiding cassettes made of polyvinyl chloride and polystyrene.
They contain toxic substances that, when the material overheats, can be harmful to human health.
The list of disadvantages of using trays for growing tomato seedlings includes the following:
- The small capacity of the containers causes the soil to dry out. The cassettes are fragile, and their walls are unstable.
- To remove a stem from a tray without damaging the root ball, you will have to make some effort.
Peat tablets are made of pressed material containing nutrients. For tomato seedlings, it's best to choose containers with a diameter of 9 cm. As they gradually absorb water, the containers expand to seven times their original size. After generous watering and the tablets have absorbed the water, they are ready for use. Sow the seeds by making a depression at the top of the tablet.
Now let's talk about containers that are inexpensive and ideal for growing tomato seedlings. These are plastic pots with holes in the bottom for drainage. For tomato seedlings, it's best to buy plastic containers 12-17 cm wide and 12-17 cm high.
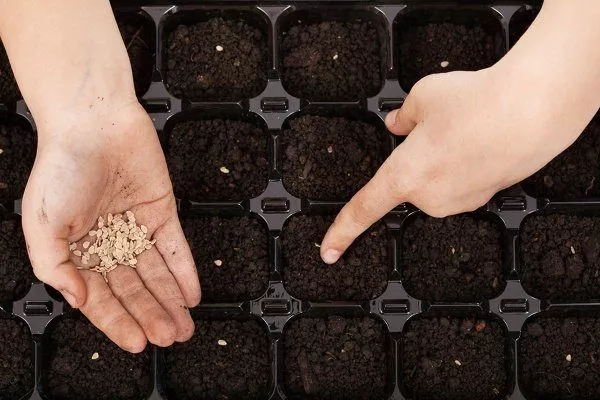
Step-by-step sowing of tomato seeds
Sowing tomato seeds for growing seedlings in a common box and in individual cups requires a certain sequence of actions:
- Fill the container with pre-prepared and slightly damp substrate.
- Use your fingers to create small furrows in the container, leaving a distance of 3 to 4 cm between rows. If you're using pots, plant one tomato seed in each pot.
- In a common container, try to leave 1-2 cm between the seeds. This will prevent the roots from becoming too tightly intertwined and the transplanting will proceed without any unpleasant consequences.
- Cover the seeds with a thin layer of soil and water the pot.
Optimal conditions for growing tomato seedlings
Tomato seedlings prefer the following growing conditions:
- Abundance of lightPlace the pots on the windowsill. In February, plants don't get enough daylight, so use fluorescent lamps. For the first two days after the shoots emerge, it's advisable to illuminate the boxes without turning off the lamp. After that, maintain your usual lighting schedule—no more than 16 hours a day.
- High percentage of humidityThe seedlings should be watered a couple of times a day using a spray bottle. It's also a good idea to cover the seedling box or tray with a piece of glass. This way, you can recreate greenhouse-like conditions for seed germination indoors. Remove the glass a couple of weeks after sowing the tomatoes. Alternatively, use a humidifier. Check the soil moisture in the morning. If the seedlings are wilted and looking stale, water them immediately. Otherwise, by 12 noon, the shoots will dry out completely and die.
- The room temperature during the day is 25 degrees, at night 15 degrees with a plus sign. Avoid exposing seedlings to direct sunlight, as this may cause stem and leaf burns.
- When the first tomato shoots are formed, add fertilizer to the soil top dressingRepeat this procedure weekly. The best composition is considered to be a natural fertilizer based on organic matter, such as manure or grass. If you prefer commercial fertilizers, choose vermicompost or humic fertilizer.
- First feeding: after the appearance of 2 true leaves (nitrogen fertilizers)
- Second: after 10 days (complex NPK)
- Third: a week before planting (phosphorus-potassium)
- Additional: if there are signs of element deficiency
Seedling fertilizing schedule
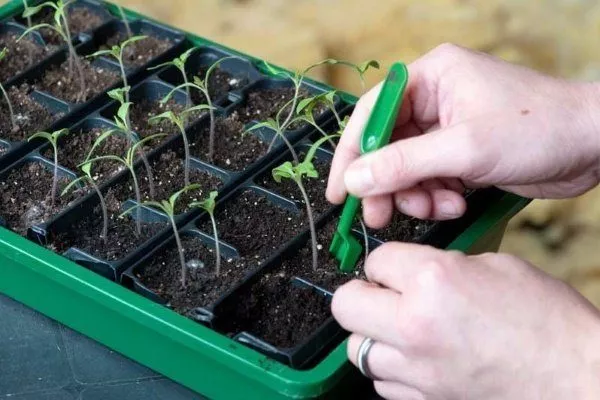
Picking and hardening tomato seedlings
If tomato seeds were planted in the same container, it's best to separate the seedlings once true leaves appear on the shoots. This should be done a week after germination. There's no need to separate the roots from the root ball. Choose a new container with a capacity of 200 ml. After a couple of weeks, replant them into pots with a capacity of up to 1 liter.
Approximately 1.5 months after sowing, tomato seedlings will produce flower clusters. After two weeks, transplant the seedlings into the garden. If you miss this step, the harvest will be poor. Tomatoes are placed on the balcony, gradually increasing their time outdoors to allow the plants to acclimate to the growing conditions they will encounter in their garden.
How to protect seedlings from pests and diseases
The sticky surface of tomato leaves will indicate aphids.Most of the insects are collected by hand, and the remaining ones are removed by spraying with a solution of laundry soap. Dissolve 25 grams of soap in 1 liter of water. You can also try treatment with Decis, Inta-Vir, Kinmiks, or Fitoverm.
Thrips are identified by silvery spots on the leaves.Fitoverm, Akarin, or Vermitek will help kill them. Spray three times, with a week between each application.
Whitefly moth causes tomato seedlings to dry outYou can kill pests with a garlic infusion. Grind 2 cups of peeled garlic cloves through a meat grinder. Place the mixture in a jar and add 1 liter of water. Cover with a lid. After 5 days, the infusion can be used, first diluting 1 teaspoon in 1 liter of water.
| Problem | Signs | Control measures | Prevention |
|---|---|---|---|
| Blackleg | Darkening of the stem at the base | Stop watering, add sand | Soil disinfection |
| Late blight | Brown spots on leaves | Treatment with copper-containing preparations | Regular ventilation |
| Chlorosis | Yellowing of leaves | Foliar feeding with iron chelate | Soil pH control |
Growing tomato seedlings is a painstaking process. However, by paying due attention to seed and soil preparation and creating optimal growing conditions, you'll reap a delicious and bountiful harvest that any experienced gardener will envy.