Gardeners prefer to plant cucumber seedlings when they want an early harvest. Once planted in the ground, the seedlings are resistant to diseases and unstable weather. To grow strong cucumber seedlings, it's important to properly prepare the planting material and create favorable conditions for the vegetable crop.
Preparing planting material for sowing
It's recommended to plant fresh cucumber seeds in containers for seedlings. Over time, the seeds show a poor germination rate. When collecting seeds for seedlings yourself, it's important to understand that if the seeds were collected from hybrid vegetable varieties, you shouldn't expect a harvest with the same fruiting qualities and flavor as last year. If you want to grow vegetables with ideal characteristics from seedlings, you'll need commercial planting material. We recommend learn about cucumber varieties, which produce the greatest yield.
Seed preparation begins with sortingRemove small and irregularly shaped seeds immediately. They are unlikely to grow into healthy cucumber seedlings, but rather fragile sprouts that will quickly die. Seeds that appear good quality can be soaked in salt water. Prepare a solution of 250 ml of clean water and 1 teaspoon of table salt. Wait a short time and then separate out the seeds that float to the surface.
Only those that settle to the bottom are suitable for planting in seedling containers. They are rinsed under running water and laid out on cheesecloth to dry naturally.
But that's not all. To increase the protective barrier of cucumber seeds, it is important to carry out the hardening procedurePlace the seeds on a damp cloth to germinate. Then, refrigerate the cloth and seedlings overnight. Remove the cloth in the morning and keep it at a comfortable room temperature. Repeat this process for another 2-3 days until the seed coats crack.
During this time, make sure the fabric doesn't dry out. The material should remain damp.
To achieve high germination rates, the seeds are soaked in a water solution of a biostimulant for 10-12 hours.
Disinfection will help improve the health of seeds for seedlingsThere are several ways to perform this procedure:
- The seeds are soaked in a 1% solution of potassium permanganate, a soft pink color, for half an hour. Then, the grains are thoroughly washed and dried.
- You can place the seeds in the oven for 3 hours. Set the temperature to 60 degrees Celsius. Gardeners use incandescent light bulbs instead of the oven.
- Before sowing cucumber seeds for seedlings, it's a good idea to place the seeds under a UV light. Five minutes is plenty.
- Prepare an infusion with wood ash. Dissolve a couple of tablespoons of ash in 1 liter of warm water. Let the solution steep for three days. Soak the seeds in the solution for half an hour, then dry.
| Disinfection method | Efficiency vs. | Processing time | Risk of damage |
|---|---|---|---|
| Potassium permanganate 1% | Fungi, bacteria | 30 min | Average |
| Heat treatment at 60°C | Viruses, fungi | 3 hours | High |
| UV lamp | Bacteria | 5 min | Short |
| Ash solution | Mushrooms | 30 min | Null |
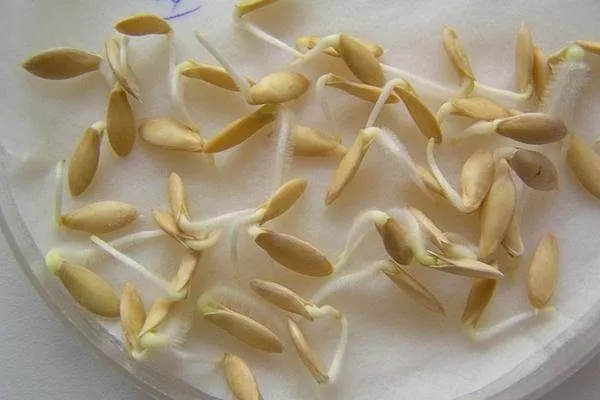
Before sowing cucumber seeds in containers, if the planting material is of poor quality or has been stored for a long time, it is recommended to germinate the seeds. Gardeners recommend not wasting time and sowing only cucumbers that have already sprouted.
However, sprouted seeds do have a significant drawback: they require warm temperatures and frequent watering. If the seed coats become dry and the seeds aren't planted deep enough, gardeners should be aware that the seedlings are unable to shed their coats on their own. This can be helped by spraying the seed coats with water using a spray bottle. Once the surface is moistened, the coats are carefully removed with a toothpick.
The optimal temperature for sprouting vegetable seeds is between 25 and 28 degrees Celsius. Follow these step-by-step instructions:
- Place the seeds in a container or on a saucer, lining them with 2-4 layers of damp toilet paper. Use thick paper that won't disintegrate when wet.
- Next, place the container in a plastic bag in a warm place for a couple of days. Cotton wool and cheesecloth are not suitable for sprouting cucumbers.
To stimulate the growth and development of cucumber seedlings, you can soak them in fertilizer. This method is especially helpful for gardeners who plant seeds in infertile soil. Soaking in a nutrient solution is similar to soaking with plain water:
- The grains are laid out on paper, a piece of gauze and fabric.
- Next, fill it with the prepared solution containing fertilizer.
- Cover and monitor the liquid level.
The seeds should remain in the nutrient medium for 12 to 20 hours. The treatment is carried out at a temperature of 20 to 28 degrees Celsius. If the temperature is lower, the procedure may be ineffective. Next, the enlarged seeds are placed in a cheesecloth bag and left to germinate until roots form at a temperature of 25 degrees Celsius.
Beginners are interested in which fertilizer is suitable for preparing a nutrient composition:
- You can take Epin. The seeds are left in Epin for at least 16-24 hours. 2 drops of the product are dissolved in 100 ml of water.
- In Zircon It is necessary to keep the cucumber planting material for 10-12 hours, add 1 drop to 150 ml of water.
- A solution of potassium and sodium humates is also suitable. – one day of soaking is sufficient. The solution should be 0.005-0.01%.
If cucumber seeds for seedlings have been stored for 6 to 7 years, it's best to perform a bubbling procedure before sowing to enrich the seeds with oxygen. This procedure is pointless for young seeds; the effect is minimal. Bubbling occurs as follows:
- The seeds are placed in a bag made of gauze.
- The bag is placed in a jar filled with water at room temperature; there is no need to heat it.
- Air is supplied to the jar using an aquarium compressor.
- Air passes through the tube, enriching the seed sac with oxygen. Bubbles are visible in the jar.
If there are a lot of seeds in the glass container, it's best to replace the water with fresh water after 24 hours. If the cucumber seeds were purchased at a hefty price in the store, they've likely already been calibrated and treated with a fungicide or growth stimulant.
This is easily recognized by the change in color of the seeds—when you open the package, you'll see colored planting material. Self-treatment can harm these cucumbers. Plant them in a seedling container without any preparation.
For more information on how to properly prepare cucumber seeds before sowing, watch the video:
Timing of sowing cucumber seedlings
To sow cucumber seeds for seedlings, first determine the time to transplant the seedlings into open ground. The dates depend on the weather outside:
- If the gardener lives in the middle zone, the seedlings are transferred to the garden bed at the end of May or in the first days of June.
- If the gardener lives in the south of the country, sowing can be early, in early May.
Better yet, track the average May temperatures in previous years. If the temperature outside hasn't dropped below 5 degrees Celsius, it's time to plant seeds for seedlings.
Based on the Lunar Calendar, in 2018, you should sow vegetable seeds for seedlings for subsequent cultivation in a garden bed or greenhouse:
- In April - 10th, from the 18th to the 21st, from the 23rd to the 28th.
- May – seedlings will show the best germination when sown for seedlings on the 4th, 5th, 9th, 13th, 14th, 16th-25th, 31st.
- June – 6, 10-13, 15-17.
Don't be careless with the lunar calendar. Sowing seeds for seedlings on an unfavorable date can result in weak seedlings and a small harvest with poor-tasting cucumbers.
Necessary conditions
Choosing the right soil for cucumber seedlings can take a long time. However, experts recommend using soil similar in characteristics to the soil in which the seedlings will later develop. This is because it makes it easier for the young plant's roots to grow and establish themselves in the new environment.
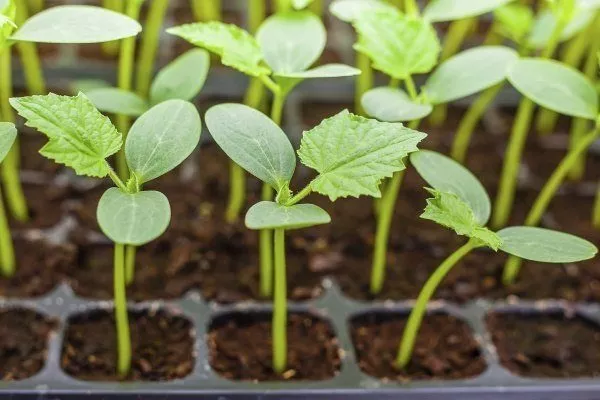
A bright, cool location is chosen for the seedling container as soon as the first cotyledon leaves form on the shoots. This will ensure that the stem area under the cotyledons does not become elongated. The seedlings will grow strong and fleshy.
Cucumbers love light, but they don't tolerate direct sunlight. The delicate young leaves can be burned by UV rays.
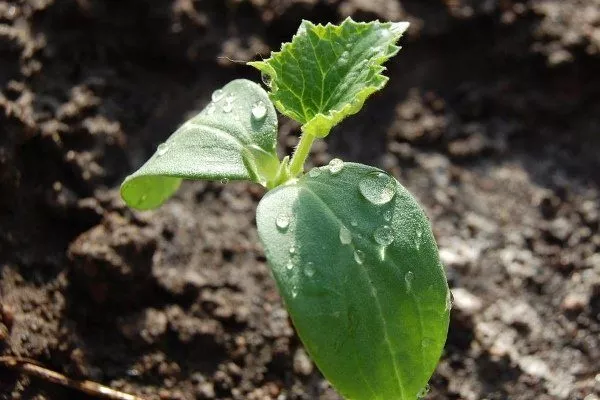
Water cucumber seedlings with warm water. Mist the leaves before midday. Cucumbers thrive in high humidity, but prefer to rest overnight with dry foliage. Damp leaves at night are susceptible to fungi and mold.
Heat and, conversely, hypothermia of seedlings can also cause plant diseases. Under these conditions, cucumber seedlings are attacked by blackleg. A black spot forms at the base of the shoot, causing cell death and the death of the green part. Saving the immature shoot is virtually impossible. It is pulled out, and the contaminated soil is discarded along with it. Seedlings that have not yet been infected by blackleg are treated with a fungicide to prevent infection.
You can prepare your own soil for cucumber seedlings. Mix the following ingredients:
- Turf soil or soil containing humus.
- Peat.
- Washed river sand.
- A drainage layer is placed at the bottom of the container to prevent excess soil moisture. Expanded clay, vermiculite, sunflower husks, and other absorbent materials are suitable for drainage.
Conditions control schedule
- Days 1-3: temperature +25…+28°C, humidity 90%
- Days 4-7: temperature +22…+24°C, humidity 80%
- Days 8-14: temperature +20…+22°C, humidity 70%
- Day 15-30: temperature +18…+20°C, humidity 60%
If you're using soil from a garden bed, disinfect the substrate. Place the soil ball in a preheated oven and leave for 30-40 minutes. You can also steam the soil in a double boiler or even treat it with just-boiled water.
Methods for planting cucumber seedlings
Those looking to save space on their balcony still use special boxes and trays as seed starting containers. However, experienced gardeners know that this isn't the best option for cucumbers.
In stores, you can also find plastic cups containing peat pellets. Despite their nutritious and beneficial composition, the peat sticks to the sides of the container after it swells, and to extract the sprout and root, you have to cut the cup completely.
If you choose trays made of dense material, cutting them will be a hassle. If the plastic is soft and pliable, the tray with developing cucumber seedlings will bend in all directions and won't hold its shape. Moving such pots is extremely inconvenient.
Some cups have a raised bottom. To remove the seedling, simply press on the bottom from the outside, and the seedling will pop out along with the root ball. However, if the soil is too loose, the root ball will come loose and cause damage.
Peat pots are ideal for planting cucumber seedlings. Choose large pots with a 400 ml capacity and a height of 10-12 cm.
| Type of container | Survival rate | Period of use | Unit price |
|---|---|---|---|
| Peat pots | 95% | Disposable | 8-12 rubles |
| Plastic cassettes | 85% | 3-4 seasons | 3-5 rubles |
| Homemade glasses | 75% | Seasons 1-2 | 0.5-1 rub |
| Peat tablets | 90% | Disposable | 10-15 rubles |
The seedlings' roots grow too quickly; within a couple of weeks, the seedlings will become crowded in their small pots. Peat pots are not recommended; they are too small.
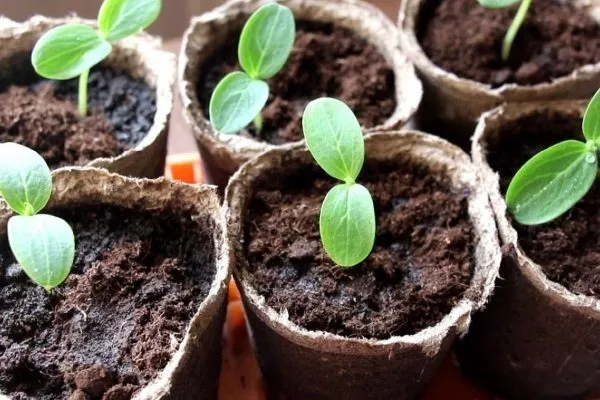
If you're short on cash, you can take yogurt cups, wash them with soapy water, scald them with boiling water, and use them to sow cucumber seedlings. Sowing is carried out taking into account the following stages:
- Fill the washed containers with potting mix. If using peat pots, no preparation is necessary.
- One cucumber seed is sown in the middle of the cups, deepening it into the soil with the blunt end.
- Sprinkle the seed on top with a layer of soil 0.5 to 1 cm thick and water with warm water.
- It's best to place glasses in a tray. When water starts to flow from the bottom, it will fall into the tray, preventing mess. For individual glasses and a shared drawer, you can use a solid tray.
- To recreate greenhouse conditions for growing cucumber seedlings, the containers are covered with a piece of glass or food-grade plastic film.
After the first shoots appear above the ground, the glass is removed and the container itself is placed on the windowsill.
Subtleties of picking
If the seedlings are growing in a common container, when the second true leaf forms, they will need to be pricked out—separating the plants into separate containers. To avoid damaging the fragile root system of the cucumber seedlings, the soil beneath the seedlings is thoroughly moistened for a couple of hours. One by one, the seedlings are removed from the containers and transplanted into the containers along with the soil.
The stems are planted deep to the point where the cotyledon leaves begin to grow.
The soil is compacted with hands so that the seedling does not fall on its side under its own weight.
If weak plants are discovered during transplanting, don't keep them; they won't survive transplanting anyway. Deformed plants should also be removed.
Successful transplanting is considered a healthy measure for cucumber seedlings. However, be prepared for this procedure to slow down the seedlings' development for 5-7 days.
You can grow a delicious and bountiful cucumber harvest by planting your cucumber seedlings wisely. Follow expert advice, and the results will exceed your expectations.
This information is useful and informative. I wanted to learn more about how to shape cucumbers if grown in a greenhouse. And in the open ground, if I understand you correctly, we grow them freely. Thank you.
I'll describe how cucumber bushes are formed in a greenhouse, using parthenocarpic cucumber hybrids as an example. We train the bushes vertically. We begin staking them when the plant reaches 30 cm in height. First, we remove all cucumber buds from the main stem down to the third or fourth true leaf. Then, we make a loose loop of twine under the second or third true leaf, and secure the other end to a crossbar or wire stretched along the "ceiling" of the greenhouse. The twine shouldn't be taut, but it shouldn't sag either. Next, we guide the plant upward, making a loop of twine under each leaf.
Pinching is also very important. This must be done promptly, otherwise: firstly, the cucumber leaves will grow too large and shade each other, which can lead to disease; secondly, there will be too many vines, which will reduce the yield.
Pinching according to plant height:
from 0 to 50 cm - there should be no shoots;
from 50 cm to 1 m - pinch the side shoots above the first leaf, leaving one ovary;
from 1 m to 1.5 m - pinch the lateral shoots above the second leaf, leaving two ovaries, etc.