Potatoes are one of the most popular crops grown in gardens and summer cottages in Russia. Successful cultivation depends on the region, as climate conditions determine the variety selection, timing, and planting method. Let's explore how to get a good potato harvest in the Moscow region.
When to plant?
According to the lunar calendar, the most favorable time for planting potatoes in the Moscow region this year is April, May, and June inclusive. These are the months when the region experiences stable weather conditions. Since the crop is not a fan of cold, there's no need to rush planting. To ensure rapid germination, wait at least a month after the warmer weather.
As for specific planting days, the most favorable days according to the lunar calendar are the waxing moon, when nature gains strength for rapid growth and development. These days are as follows:
- On April 12 and 13, when the Moon is in the sign of Pisces, which has an excellent effect on the fleshiness of the tubers;
- May 1, when the Moon is in the sign of Scorpio, which promotes rapid growth of the plant;
- May 4, 5 and 6 are days that will allow you to get a bountiful harvest.
If potatoes are planted at a soil temperature of +11…+12 degrees, the first shoots will appear on the 23rd day; at a temperature of +14…+15 degrees, on the 17th-18th day, etc.
The following conditions will help determine the correct planting time:
- the optimal air temperature is +12…+15 degrees (the buds of the eyes can “awaken” at a temperature of 5 degrees, but to prevent potato diseases it is worth waiting for warmer weather);
- The optimal soil moisture level is no more than 75%, otherwise the fruits will be susceptible to rotting.
If during the period of seedling development and at the beginning of top formation the need for moisture is minimal, then from the moment of flowering and the appearance of tops it increases significantly.
It should be noted that many experienced gardeners also determine the favorable planting time based on folk signs:
- apricots and bird cherry trees have begun to bloom (if the soil in the area has not warmed up, the flowers on the trees close);
- small leaves have appeared on the birch trees (this is a sign that the soil has already warmed up);
- The dandelions have formed buds.
If all of the above factors are met, the potatoes are ready to be planted. It's also important to remember that tubers shouldn't be planted during the full moon or new moon, as they don't adapt well and are susceptible to disease during these times.
In general, many professional farmers recommend planting potatoes later—from May 8th to 17th—not during the May holidays. This is a more favorable time than late April, as it allows for the return of frosts.
Read more about how to plant potatoes in open ground. here.
Suitable varieties
The Moscow region is considered a problematic agricultural zone because it doesn't always enjoy warm summers. In general, the central part of the region is more prone to cold, rainy days, which can occur during the period of active root crop development.
Thus, mid-season and late-ripening varieties should be avoided, as they will not have time to ripen in the region's conditions. Early varieties—super-early, early-ripening, and mid-early—are more suitable. These include:
- Early rose;
- Penza early ripening;
- Provento;
- Favorite;
- Sorcerer;
- Luck;
- Blue-eyed;
- Leading worker;
- Lorch;
- Cast iron pot
Comparative characteristics of varieties
| Variety | Ripening period (days) | Yield (kg/100 m²) | Disease resistance | Shelf life |
|---|---|---|---|---|
| Early rose | 60-70 | 250-300 | Average to late blight | Good |
| Luck | 60-65 | 300-400 | High | Excellent |
| Blue-eyed | 70-80 | 200-250 | Low to scab | Average |
| Lorkh | 80-90 | 350-450 | High | Excellent |
| A leader | 65-75 | 300-350 | Average | Good |
All of the listed varieties are table grapes, high-yielding, and highly resistant to various pests and diseases. They produce an early harvest even when grown in the Moscow region.
Choosing a landing site
Potatoes yield well in sandy and loamy soils. It's important to consider what crops were previously grown in the bed, as failure to properly rotate the crops can lead to tubers becoming susceptible to various diseases. For example, it's unacceptable to grow potatoes in a bed previously occupied by the following crops:
- nightshades (tomato, potato, eggplant, pepper, etc.);
- sorghum;
- sunflower.
The following plants are favorable predecessors:
- cucumber;
- legumes;
- cabbage;
- pumpkin.
As for safe neighborhoods, you can plant the following next to potatoes:
- carrot;
- beets;
- calendula;
- legumes.
The listed crops are not only harmless to root crops, but also beneficial, as they saturate the soil with useful microelements.
The plot where you plan to plant potatoes should be in a sunny, open area, away from shade from trees. However, avoid planting tubers in low-lying areas, as they can rot during growth due to high soil moisture.
Preparatory work
To get a good harvest, first of all, you need to take a responsible approach to preparatory work.
On the site
Site preparation is carried out in two stages:
- After harvestingAs soon as the plot is harvested, dig up the soil to the depth of a spade. It's advisable to add fertilizer in the form of humus or compost at a rate of 10 kg per square meter. Ash should also be added at a rate of 1 liter per square meter.
- In the springWith the arrival of spring, the area should also be loosened to a depth of 15 cm. It is recommended to use a pitchfork for this. There is no need to turn the soil layers over when loosening.
It is important to carry out such preparation specifically in the area where potatoes will be planted, since other crops require different preparation.
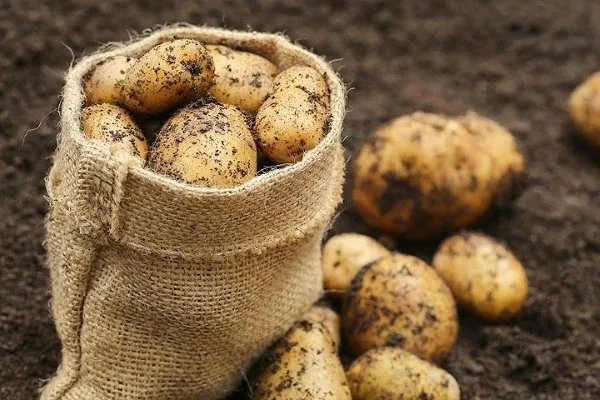
Preparation of seed material
If you're planting potatoes in the Moscow region, you should begin preparing the tubers around March 20th. Select healthy, whole tubers and leave them in the sun at temperatures of 20 to 24 degrees Celsius to green up. They can be laid out in small boxes in 3-4 layers. Exposure to sunlight causes the tubers to form a toxic substance inside, which will help them preserve for a long time.
In two weeks, the tubers will be ready for planting. During this time, it's recommended to mist them with water to support healthy sprout development. Once sprouts appear, the seeds should be stored in a cool place for storage.
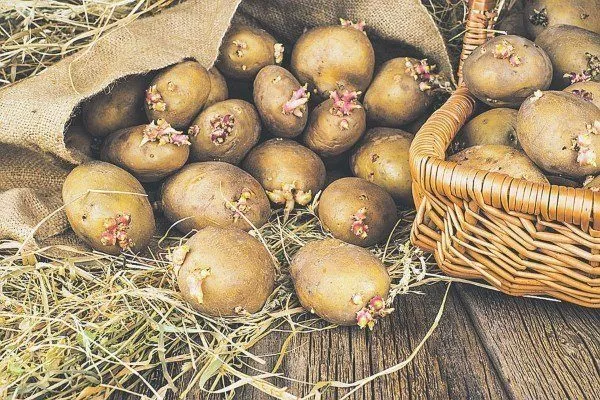
Many people wonder whether it's possible to plant potatoes with long sprouts, which appear when tubers are stored in a very warm room. The answer is a clear no, as this will require the potato to expend more effort to germinate, which could compromise its firmness. For example, sprouts longer than 10 cm are unsuitable for planting.
The longest shoots should be removed, leaving only those up to 3 cm long. It is recommended not to break off the shoots at the top of the tubers.
Immediately before planting the tubers in open ground, they should be sorted again and treated with seed dressings. For example, the day before planting, you can do the following:
- Dissolve 1 teaspoon each of copper sulfate and boric acid in 10 liters of water. The solution should be dark pink.
- Place the box with sprouted potatoes in the prepared solution for 10-15 minutes.
- Treat the remaining boxes with the same solution.
- Leave the prepared potatoes to dry under a canopy.
Methods for planting sprouted root crops
There are various potato planting schemes, many of which are also suitable for the Moscow region's climate. Let's take a closer look at them.
Combs
This Dutch technology, which is used when planting potatoes on mounds of soil. It is especially common in areas with clay soils and low groundwater levels. This allows the tubers to receive the necessary amount of warmth and oxygen without the risk of rotting.
With ridge planting, the plot is cultivated with a tractor, creating mounds about 15 cm high. The potatoes are then laid on the mounds, and ridges are built up on top. The tubers themselves are planted according to the following pattern:
- distance between holes – 30 cm;
- distance between rows – 75 cm;
- The height of the finished comb is 35 cm.
The disadvantage of this technique is that the soil dries out quickly, so the plant is at risk of overheating during hot weather. To prevent this, water the plant more frequently and cover the area with a light cloth during the hottest hours. If soil shedding occurs, secure the rows with boards.
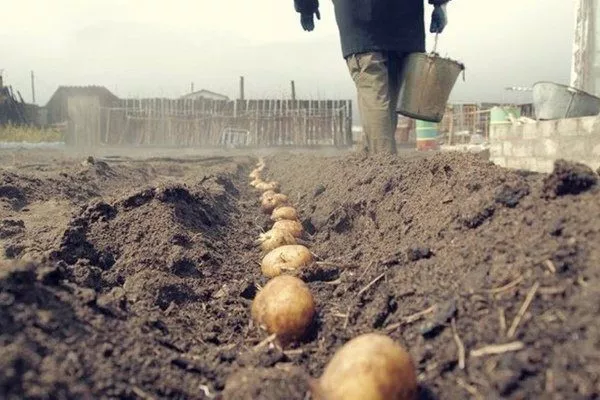
Trenches
In the Moscow region, most gardeners plant potatoes in small trenches to conserve the moisture needed for plant development. The plot is cultivated in the same way as for raised beds, and the root crops are laid out in the trenches according to the following parameters:
- distance between holes – 30 cm;
- distance between rows – 70 cm;
- depth of holes – 11 cm.
Planting parameters for different soil types
| Soil type | Depth (cm) | Scheme (cm) | Recommended method |
|---|---|---|---|
| Sandy | 10-12 | 70×30 | Trenches |
| Loam | 6-8 | 60×35 | Smooth |
| Clayey | 4-5 | 75×30 | Combs |
| Peat | 7-9 | 65×30 | Boxes |
Trench planting is not used in beds located close to groundwater, as cool summers will expose the tubers to fungi and root rot. Trench planting, however, requires special attention to maintenance, including mulching and loosening the soil.
Smooth fit (under the shovel)
This is a classic technique that remains relevant despite its labor-intensive nature. In this case, two people work on the bed: one digs the holes, and the other places the tubers in them. The planting pattern is as follows:
- distance between holes – 35 cm;
- distance between rows – 65 cm;
- depth of holes – 12 cm.
To ensure an even planting, gardeners often mark out the bed using string. This method is often used in loose, moisture-retentive soil.
To ensure active plant growth, tubers should be planted in a checkerboard pattern.
Box landing
This type of planting is labor-intensive, but it requires minimal care throughout the growing season. The challenge lies in creating boxes. The advantage is that they will last for many years. The boxes are prepared as follows:
- height – 25 cm;
- width – up to 120 cm;
- length - at your discretion.
The boxes should be filled with a mixture of soil and organic matter and left for several weeks before planting. Then, dig grooves or holes in the soil surface, into which the tubers are laid, preferably in a staggered pattern. The distance between holes should be at least 30 cm.
Box planting is often used in areas with unfavorable conditions. The boxes remain suitable for several years, so each season you can simply add a nutrient mixture, and in the fall, sow the boxes with green manure and leave them over the winter.
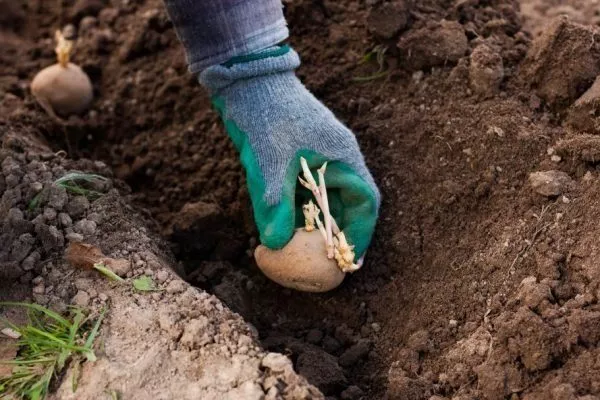
Peculiarities of planting sprouted potatoes
Regardless of the planting pattern, the key consideration is how to arrange the potatoes—sprouts up or down. Traditionally, tubers are planted sprout-side up to help them grow and develop foliage more quickly. However, it's best to consider two key factors:
- If potatoes are planted shallowly, the optimal position of the tubers is with the sprouts facing upwards;
- If you plan to plant early, when the soil has not yet had time to warm up properly, you should lay the tubers out with the sprouts facing down.
Potatoes are laid out with the sprouts facing down due to the following advantages:
- the sprouts grow in different directions, without gathering in one pile and without interfering with each other’s ability to receive the necessary nutrition;
- The first leaves appear a little later, so they can better withstand the threat of frost.
Of course, this method also has its disadvantages:
- You can’t plant potatoes too deeply, because the sprouts will have to travel a long way;
- the soil should be quite moist, so it will be necessary to mulch the soil with a layer of grass;
- Potatoes ripen later than when planted with the sprouts facing down.
If you're unsure about the planting method, consider placing some tubers sprout-side up and others sprout-side down. At the end of the season, you'll know which method works best for your garden.
Planting with green manure
Green manures are plants grown for subsequent incorporation into the soil. They improve soil structure, enrich it with nutrients, and suppress weed growth. Potato growth is promoted by nutrients such as nitrogen and phosphorus, which are found in large quantities in legumes. These include:
- spring vetch;
- peas;
- sweet clover;
- alfalfa.
Green manure crops such as wheat, mustard, rapeseed, and the like are also recommended for planting. They will not only enrich the soil but also prevent erosion and blowing away. White mustard deserves special attention, as it has another important property: it repels pests. Beans are also planted between potato rows for this purpose.
When using green manure, it's important to remember that they should be sown only in very well-prepared soil, 1.5 months before the onset of cold weather. Typically, 800 g to 2 kg of green manure seeds are sufficient per 100 square meters of land. Care involves regularly watering the growing plants.
If you weren't able to sow the green manure in the fall, you can do so in early May, 2-3 weeks before you plan to plant the potatoes. This should give the green manure enough time to rot and enrich the soil.
Secrets of winter planting
Many residents of the Moscow region are increasingly planting potatoes in early autumn. It has already been established that the winter harvest is robust and abundant, but the tubers don't always survive the periods of little snow that are typical of milder winters. Therefore, more careful consideration is required when choosing a planting method.
For winter, the crop should be planted using one of two methods: in trenches or using a shovel. With the raised-bed method, the tubers will be exposed to seasonal fluctuations: wind will cause the mounds to collapse, and the potatoes will freeze instantly due to low temperatures. After planting, it's important to thoroughly mulch the soil, as a maximum insulating layer ensures a safe winter.
Planting tubers without sprouts
According to traditional methods, tubers should be kept in a warm room before planting in open ground to allow sprouts to germinate, which will ensure better root crop yields. However, experienced gardeners believe that, given favorable soil and stable climate conditions, pre-sprouting is possible. This way, sprouts will emerge directly in the soil, followed by leaflets and a harvest.
Planting potatoes without sprouts is done in the following order:
- Sort the tubers, removing any poor-quality seed. Remember, there's no need to keep the potatoes in a warm place for 1-2 weeks, as they're being planted without sprouts.
- Plant the potatoes using any technique you choose. Since there are no sprouts, the tubers can be dropped into the holes either way.
Planted potatoes require proper fertilization and hilling. Regular watering is equally important.
It's important to keep in mind that this method requires more time for the fruit to ripen. If the planting time is not met, the sprouts will not germinate, and you won't be able to get the desired harvest.

Tuberless planting technology
This isn't a new technology, although it's rarely used by gardeners. Breeders often used this method to propagate valuable varieties. They separated the sprouts from the tubers and planted them in insulated soil. Later, experiments showed that this method yielded the same quantity and quality of harvest as when sprouted tubers were planted.
When using this technology, it is important to consider that there are two types of sprouts:
- LightThey grow when the roots are kept in the sun.
- ShadowThey are formed when potatoes are stored in the basement.
Shade-exposed seedlings are often chosen because they have a delicate structure and can withstand low temperatures. Sun-exposed seedlings, on the other hand, are stronger and therefore produce better results.
Plant the sprouts immediately after separating them from the tubers. The optimal length is 6-8 cm.
Soil preparation
It is carried out 30-45 days before planting in the following order:
- Build a small box from planks and install it on the southern windowsill.
- Fill the bottom of the box with sand, and place cups of nutrient mixture on top. It's also a good idea to provide drainage at the bottom, using sand, to prevent the soil from drying out.
- Water the soil in a glass with a solution of boric acid or potassium permanganate.
Planting and care
For planting, you need to select seed tubers. It's best to choose mid-season varieties. They should be planted in several stages:
- Use the first row of cups (located closest to the window) for planting seeds. Make holes in them and plant the tubers.
- Pick off the sprouts when they reach 6-7 cm in length and transplant them into cups in the next two rows.
- Water the seeds 2-3 times a week, and after rooting, transplant them directly to a permanent location.
Seedlings from sprouts require regular fertilization, as they haven't received the necessary nutrients from the mother tuber. Hilling should be done immediately after the first rain, and in dry weather, only loosening the soil is necessary. It's important to remove weeds, as they hinder full plant growth. After 2-3 weeks, a second fertilizing can be applied and another hilling can be done.
Planting in this way in the Moscow region is carried out after May 10.
Plant care
Depending on the specific planting method, specific care requirements for the seedlings will vary, but in any case, proper watering, fertilizing, hilling, and loosening are essential. Pest and disease control are also essential.
Watering
If ridge or bed planting was used, water should be applied between rows, and if level planting was used, water should be applied into holes or continuously. The frequency of watering is determined by the amount of precipitation:
- in dry summers, water once every 2 days, starting 3 weeks after emergence;
- In case of heavy rainfall, water as the soil dries out.
Schedule of agrotechnical measures
- Germination phase (5-10 cm): first loosening, treatment against Colorado potato beetle
- Budding phase: hilling, application of potassium fertilizers
- Flowering: humidity control, treatment against late blight
- After flowering: stop watering, prepare for harvesting
Particular attention should be paid to watering when root crops are setting and growing.
Harrowing and loosening
The first harrowing should be performed 5-6 days after planting, and then every 4-5 days thereafter. This step is no longer necessary once the first shoots emerge. Once the seedlings emerge, another 1-2 harrowing sessions can be performed. This will become impossible as the plant germinates, so it's time to begin loosening the soil.
Loosen the soil as needed after rain, when the soil dries and forms a crust. Deep tillage can be applied between rows, while shallower tillage can be applied within rows to avoid damaging the immature seedlings.
Hilling
The first time this is done is when the seedlings reach 12-14 cm in length, and then again before the tops close. If ridge planting was used, when hilling, the soil should be raked to a depth of 20-25 cm on both sides only, while with other planting methods, the soil should be raked on all sides.
Regardless of the planting technology, it is also important to weed when loosening and hilling.
Top dressing
During the entire growing season, it is enough to carry out two additional feedings:
- The first one is after the emergence of seedlingsFertilizer is applied before loosening and hilling the soil. The bush should be top-dressed with a nutrient mixture consisting of two handfuls of compost and two teaspoons of ammonium nitrate. Ash mixed with soil at a 1:1 ratio can also be added as a top-dressing.
- The second is during floweringThis is done before watering during the early stages of potato development. The plant should be watered at the roots with a solution of 10 liters of water, 2 tablespoons of superphosphate, and 1 tablespoon of nitrophoska.
Fertilizing after flowering is prohibited.
Pest control
There are approximately 60 pests that pose a threat to potatoes. Among them, the most dangerous are:
- Colorado beetle;
- mole cricket;
- nematode;
- wireworm.
Comparison of protection methods
| Method | Efficiency | Safety | Validity period | Cost |
|---|---|---|---|---|
| Biological | 70-80% | High | 7-10 days | Low |
| Chemical | 95-100% | Limited | 20-30 days | Average |
| Agrotechnical | 50-60% | Full | All season | Tall |
Pests initially pose a threat to seedlings, sprouts, and tops, and later to root crops. To protect your crops from them, you can use two methods:
- BiologicalThis is a gentle method that involves planting pest-repellent plants in the potato plot. For example, you can plant matthiola, wormwood, or marigolds. Additionally, as part of biological control, you can spray the potatoes with an infusion of garlic, wormwood, or tomato tops.
Gardeners are in demand for biological preparations, including Actofit, Bitoxibacillin, Lepidocide, and Bicol.
- ChemicalThis method involves treating the plant with chemicals. It's considered more effective, but it's also harmful not only to the crop but also to humans. This treatment is carried out extremely carefully and only before the roots set.
Harvesting and storage
Tuber harvesting begins when the potato tops dry. In the Moscow region, this typically occurs between mid-June and early August, as early varieties are more commonly grown in this region. It's best not to delay harvesting, as the tubers will lose volume, become less dense, and become less nutritious.
It's recommended to mow down the tops 1-1.5 weeks before harvesting to ensure the plant devotes all its energy to ripening the roots. The harvesting process itself is quite labor-intensive, as it involves digging up the tubers, sorting them, processing them, and storing them.
To get the potatoes, the beds need to be dug up, then the soil needs to be loosened and the fruits need to be removed. If the plants are planted flat, each bush will need to be dug up. Once all the roots have been removed, the area needs to be leveled.
The harvested tubers must be sorted. Next year's seed should be selected, and damaged and diseased potatoes should be removed. If different varieties were planted, the tubers should be collected and stored separately, as storage conditions and shelf life may vary between varieties.
Before storing the vegetable, it's best to dry it in a warm place. If the potatoes are intended for seed, they can be laid out in boxes and kept in the sun to green up.
Finished potatoes can be stored in a cellar or basement, first packed in boxes or bags. It's important that the room be well-ventilated and not damp or cold. The optimal temperature is 4-5 degrees Celsius. At least once a week, sort through the harvest, removing any damaged or rotting potatoes.
Potatoes are undoubtedly the most popular crop, grown by many gardeners and summer residents. A good harvest can be achieved even in the Moscow region, but careful consideration is required throughout the entire process—from choosing the right variety to harvesting the tubers. To ensure potatoes retain their quality for a long time, it's also important to consider proper storage practices for the harvested crop.