Dill typically grows naturally and haphazardly in garden plots, but certain varieties of this crop are specifically grown in garden beds for their abundant harvest and long-lasting marketability. Bushy dill is one such special variety.
Bushy dill
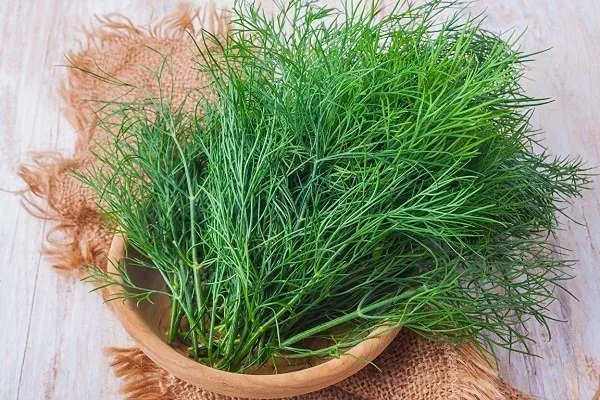
Bushy dill has soft and juicy greens.
Bushy dill is resistant to diseases


Description of the culture, advantages and disadvantages
This bushy variety of dill produces abundant foliage, growing 150-170 cm tall. Each rosette of plants bears 10-12 plump leaves. The branches reach 35-40 cm, forming a compact bush.
Dill leaves are large, dark green, with a subtle waxy sheen. Bushy dill contains many essential oils, giving off a tart, spicy aroma. The lobes are flat and moderately dissected. The greens grow juicy and soft throughout the entire plant.
This variety is grown to produce large quantities of greens, which are used for spices, canning, and storage. The following regions are considered optimal for planting:
- Siberia;
- Central District;
- Ural;
- Caucasus;
- Crimea;
- Far East.
It takes about 35-40 days from planting to harvest. Seed harvesting begins 45-85 days after sowing. The harvest is abundant – at least 3 kg of fresh herbs are produced per square meter of planted area. For making spices, 16-18 kg are harvested from a single plant. Harvesting can be done in stages; it is not necessary to harvest the entire bed at once.
This bushy variety is a late-ripening variety. It doesn't tolerate sudden temperature drops, so temperature fluctuations significantly impact yield. Another factor that reduces germination and weight is insufficient moisture in the garden bed.
Advantages of the variety:
- mild taste;
- lots of greenery;
- resistance to diseases - powdery mildew and fungus, which many varieties of dill suffer from;
- stays fresh for a long time;
- lots of vitamins and useful microelements.
The only drawback of the Bushy variety is its weak frost resistance, which has a number of consequences:
- late germination in spring, even with early sowing;
- seedlings appear only after the soil has completely warmed up, even if planted on time;
- Return frosts can destroy entire beds.
Landing
Planting dill of the "Kustisty" variety isn't much different from regular sowing, but it still requires a fair amount of attention from the gardener due to certain specifics. To ensure a large amount of greenery, prepare the soil and planting material, and adhere to the planting and harvesting schedules.
Soil preparation
Due to the height of the mature plant, this bushy variety of dill is suitable for planting outdoors. When choosing a planting site, choose sunny areas with level terrain to prevent waterlogging.
It's not recommended to plant dill after celery, carrots, parsley, and fennel to avoid the spread of similar pests. Peppers, potatoes, legumes, and tomatoes are considered optimal predecessors to bushy dill. They can neutralize the spread of diseases and leave behind an optimal soil chemistry.
To ensure a good harvest during the warmer months, prepare the soil for dill beds in the fall. Dill dislikes acidic soil. If the soil is too acidic, it needs to be deacidified to a neutral level. Wood ash works well for this – 500 g per square meter.
- ✓ Soil pH levels should be strictly between 6.0-7.5 for optimal growth.
- ✓ The soil must have high drainage capacity to avoid water stagnation.
Do not apply wood ash immediately before sowing bushy dill, as the green color may turn reddish.
For planting, select light loamy and sandy loam soil. If necessary, fertilize the soil for future beds with a mineral-organic complex at a rate of 1 square meter:
- compost - half a bucket;
- potassium salt – 20 g;
- ammonium nitrate – 25 g;
- superphosphate – 25 g.
If the soil in the area is poor, then it is possible to re-apply mineral additives immediately before sowing dill.
Planting dates
Given bushy dill's weak frost resistance, it is sown in early to mid-April. By this time, temperatures have warmed up enough to avoid causing discomfort. Dill can tolerate short-term cold spells down to 5-6 degrees Celsius, but it's best to play it safe and wait for stable warming to reach 15-17 degrees Celsius.
The optimal time for planting dill of the Bushy variety allows you to harvest a lush harvest of greens.
Experienced gardeners try planting bushy dill before winter to get their first harvest a couple of weeks earlier. This is possible, but given the variety's frost tolerance, it needs to be protected.
The last month of autumn or early December is best for planting. If the weather warms up after autumn planting, the seeds will have time to germinate and will die over the winter. Therefore, bush dill should be sown when the air temperature remains below 4-5 degrees Celsius. After planting, cover the beds with a layer of peat or spruce branches. After the snow melts in the spring, remove the cover on sunny days to allow the soil to warm up.
- ✓ The plant height can reach 170 cm, which requires additional space between rows.
- ✓ The content of essential oils in the leaves is significantly higher than in standard varieties, which affects the aroma and taste.
Seed preparation
To speed up the germination of bushy dill seeds, they are pre-prepared for planting by removing the essential oils, which act as growth inhibitors. To do this, wrap the seedlings in damp gauze or a rag for two days. The rag must be kept moist.
Towards the end of the soaking period, the procedure is repeated with water and a weak solution of potassium permanganate. This will allow the planting material not only to swell but also prevent fungal diseases. After two days, the seeds are air-dried for half an hour and planted outdoors.
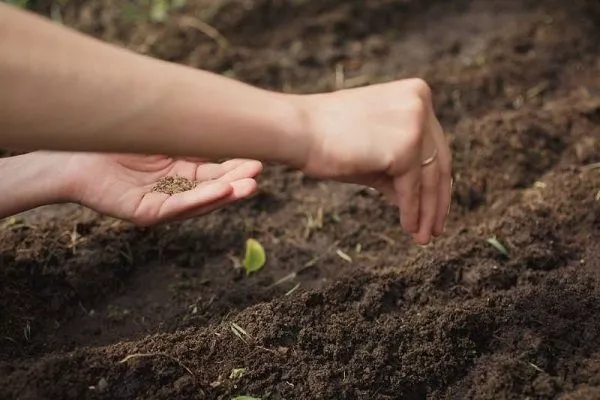
Planting in the ground
To ensure a good dill yield, it is necessary to follow agronomists’ recommendations when planting:
- Every 20-25 cm, furrows are formed in the prepared soil.Such a high sparseness between the beds is justified by the need for good nutrition and the lushness of the adult specimen.
- The groove depth is 2 cm.to prevent the planting material from being deeply embedded in the soil.
- The seeds are spread at a distance of 4-5 cm., sprinkling them with a layer of earth.
- Cover the beds with agrofibre or protective material for the first few days.
To constantly replenish fresh greenery, plant repeatedly at intervals of 12-15 days.
Caring for crops in open ground
Caring for the Bushy variety does not require increased attention from the gardener, but still requires periodic actions to obtain a good harvest and protect the greenery.
Loosening and weeding
After the shoots emerge confidently, thin them out a couple of weeks later. The strongest seedlings should be left, spaced at least 10-15 cm apart. Rejected plants are edible – they are already juicy and flavorful.
Throughout the growth stages of bushy dill, weeds should be removed periodically to prevent them from interfering with the plant's development. Thoroughly weed between rows at least once every two weeks.
Watering
Bushy dill responds well to watering. If the weather is extremely hot, you'll need to water the beds daily. In mild weather, you can do this every 2-3 days.
Top dressing
With fertile soil and proper fall fertilization, dill doesn't require additional feeding. All that's needed to stimulate tillering and overall growth is to apply an ammonia fertilizer at a rate of 7-8 g per square meter a couple of weeks after planting.
Growing dill is not fertilized with liquid manure - such fertilizer can significantly impair the aroma and taste of the spice.
Diseases
Bushy dill is believed to be immune to powdery mildewHowever, in some unfavorable years, this scourge can also affect this variety. If a persistent white coating appears, there's a risk of deterioration in flavor and spiciness, leading to the shoots drying out and dying. To combat this rare, but still possible, affliction, use proven sprays:
- weak solution of potassium permanganate;
- copper oxychloride;
- a mixture of antibiotics in equal proportions: Streptomycin, Penicillin and Terramycin.
With sudden, prolonged temperature changes, excessive watering, or severe root damage, bushy dill may develop fusariumThe disease develops in stages: first, the lower leaves of the bush turn red and yellow, then the upper ones. When Fusarium wilt is detected, the beds are treated with Topsin or Fundazol in the early stages of infection. If dill plants are severely damaged, they are removed from the beds.
Temperature fluctuations, overwatering and lack of sufficient lighting can cause rotting of the root collar of the cropIf disease is suspected, watering bushy dill should be reduced to the bare minimum. Blackleg can be treated in the early stages by spraying the beds with Fundazol.

Pests
There are several common pests of bushy dill that can cause a lot of trouble for the gardener.
Invasion aphids The dill beds can be affected by the insects, so to combat colonies of these insects, the greens are sprayed with insecticides, choosing proven ones: Confidor-Maxi or Admiral.
In the second half of May it becomes more active carrot flyAdults of this species can produce foliage within a month. Bushy dill grown in open, well-ventilated areas is rarely affected, but can migrate from nearby infested plants. During this period, to repel and kill the carrot fly, bushes are dusted with mustard powder, tobacco dust, ground pepper, or sprayed with Cypermethrin or Prestige-KS.
You can stretch a fine mesh around the perimeter of your bushy dill beds. This will prevent carrot fly from migrating from neighboring plants—they can't fly higher than half a meter above the ground.
Harvesting and storage
The bushy dill variety is ready for its first pruning just a month after planting. If reseeding is done every 10-15 days, gardeners can expect a constant, uninterrupted supply of the fragrant herb throughout the summer and early fall.
To keep cut greens fresh and fragrant for 1-2 days on the table, place the bunch in a jar of clean water.
Given the large volume of greenery in the Bushy variety, it's important to carefully prepare dill for long-term storage. There are several ways to preserve its beneficial properties:
- Storing fresh dill in the refrigeratorSort the unwashed dill and place it in a plastic container. Close the container and place it on the bottom shelf of the refrigerator. This method will keep the dill fresh for up to a week.
- FreezingWash the bushy dill thoroughly. Remove any yellowed stems and roots. Gather the greens into a bunch and wrap in cling film or foil. Place in the freezer. To preserve large quantities of dill this way, divide the bunch into individual bunches and wrap each individually.
This method eliminates the need to repeatedly defrost the product to separate the desired portion for consumption and guarantees a shelf life of 6 months to a year. - DryingRinse the bushy dill under running water. Place the sprigs on a baking sheet and bake in the oven at 50 degrees Celsius (122 degrees Fahrenheit). Once completely dry, place the dill in glass jars, tightly covering with lids. This method allows you to store the product for a year or more, preserving its aroma.
Growing the Bushy dill variety provides gardeners with a stable supply of greenery throughout the season. Timely planting, proper seed and soil preparation, and regular care guarantee a bountiful harvest of fragrant and juicy dill.