Growing celery root isn't difficult if you follow simple care guidelines. Simply plant it in a timely manner, water it regularly, and fertilize it. The result will be a harvest of delicious and healthy celery.
Description of the culture
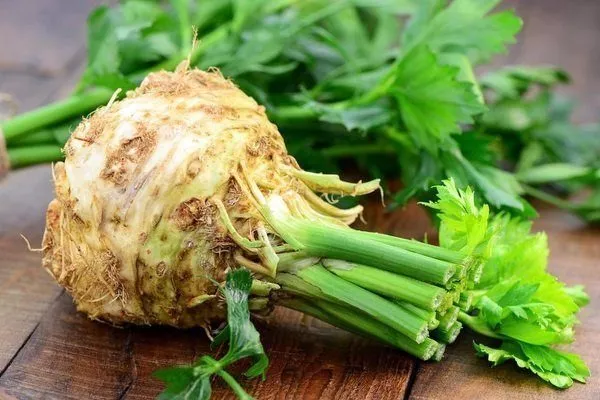
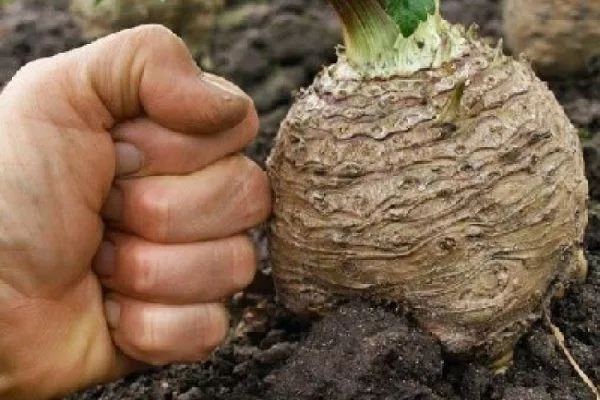
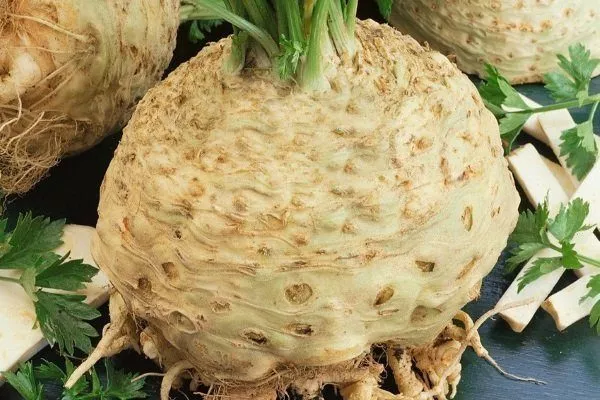
Celery is a vegetable crop in the Apiaceae family. It is considered a perennial plant with a thickened root. The leaves are pinnate and dissected.
- ✓ Optimum soil temperature for seed germination: 15-20 °C.
- ✓ Required soil acidity: pH 6.0-6.5.
The maximum height is 1 m. It prefers moist soils, marshes, and salt marshes. It is a cold-hardy and moisture-loving variety, and is frost-tolerant. It has a strong aroma, making it widely used in cooking. All parts of the root vegetable—root, stem, and leaves—are used in cooking.
Ideal for many dishes as a flavorful seasoning, it has also proven itself in medicine due to its numerous beneficial and healing properties.
Celery originated many centuries ago. It was considered an ornamental plant that prolongs beauty and youth.
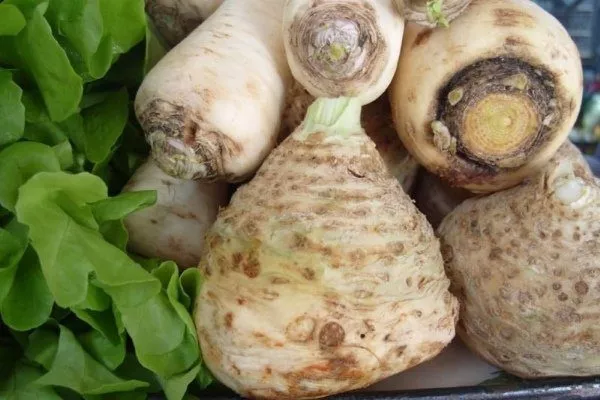
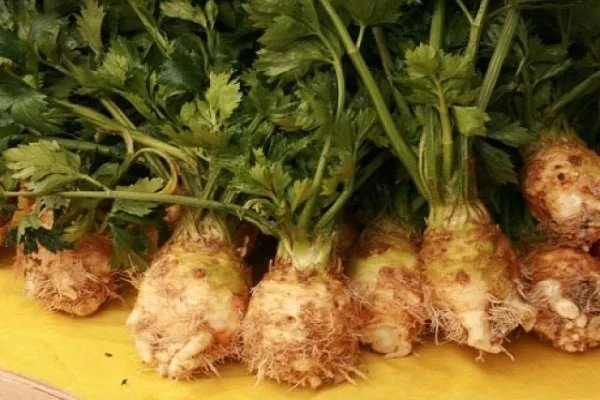
Varieties of celery root
The crop is rich in varieties, which can be selected based on personal preferences and the area in which it will be grown.
Mid-early varieties:
- Apple celeryMid-early ripening period (up to 150 days). Height up to 50 cm, weight up to 0.4 kg. It has a round root and snow-white flesh.
- DelicacyThe root vegetable is flat and slightly rounded. It is covered with lateral roots. Its green leaves give it the appearance of an open rosette. It weighs no more than 0.6 kg.
- The Giant of Prague.High yield. Height – 60 cm, weight – 0.8 kg.
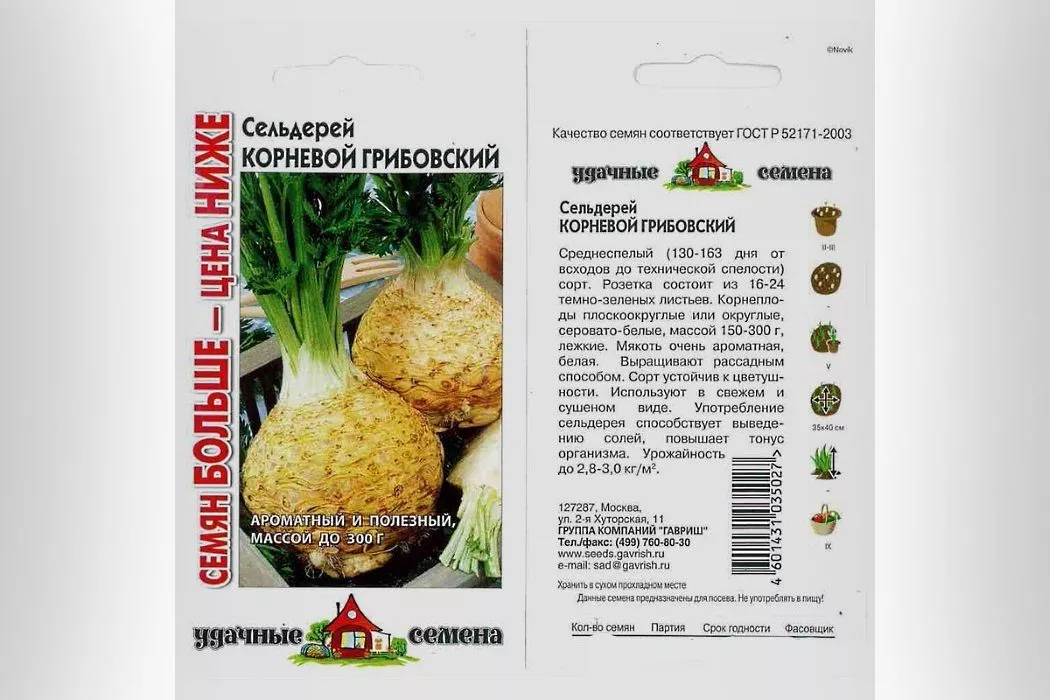
- Root mushroom. Rootsin the form of a ball with an extension and a weight of 250 g, up to half a meter in height.
- DiamondIt has an advantage over other varieties due to its long shelf life. It has a smooth surface and large roots, weighing over 1 kg. There are no hairs or hollow areas.
variety "Apple celery"
variety "Delicates"
variety "Giant Prague"
variety "Root Gribovsky"
variety "Diamond"

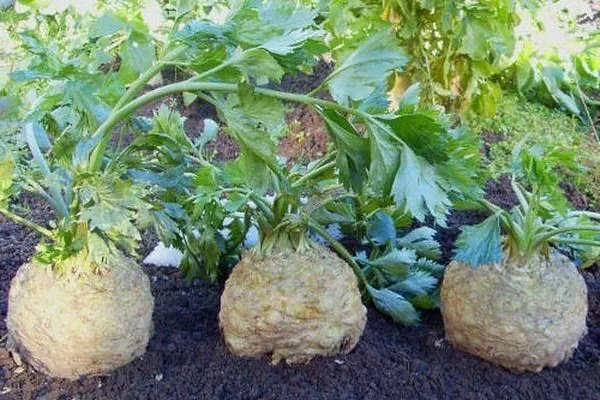
Medium grades:
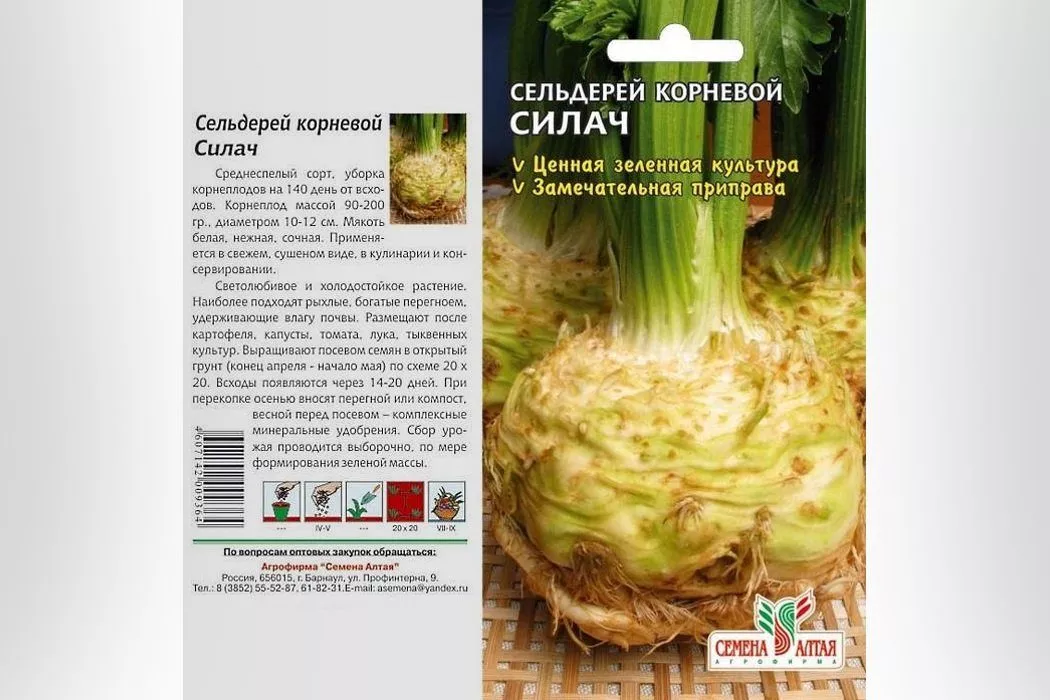
- StrongmanIt germinates 5 months after sowing and weighs 0.4 kg. The snow-white flesh contains a lot of sugar and minerals.
- AlbinIt germinates in 120 days, has a greenish skin tint, and is highly productive.
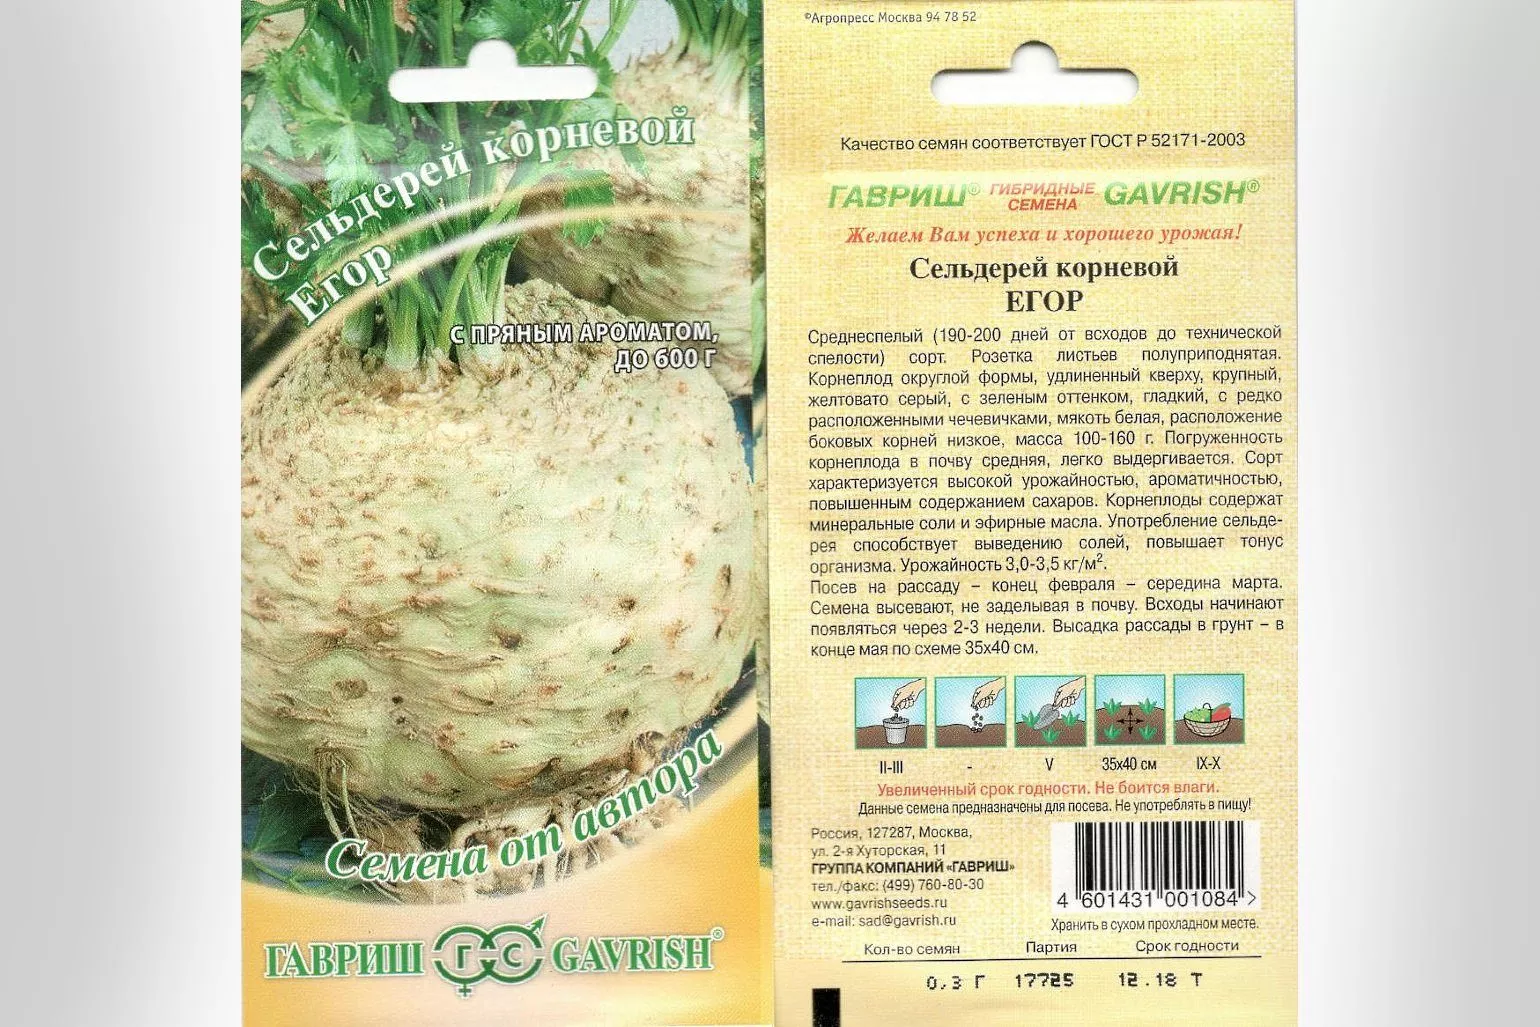
- EgorRipening occurs in 6 months. It is renowned for its rich aroma and high consumer demand.
variety "Silach"
variety "Albin"
variety "Egor"
Late varieties:
- MaximThe fruit weighs 0.5 kg and has a piquant flavor. The roots are round and have lateral roots.
- AnitaThe growing season lasts about 5 months. The root crop weighs up to 400 g and produces a high yield. This variety is used for cooking, eating fresh, and freezing.
variety "Maxim"
variety "Anita"

All root vegetables have beneficial properties, regardless of the variety.
When buying seeds in a specialty store, pay attention to the expiration dates.
Advantages and disadvantages
Celery root is widely known and popular. But most gardeners are unsure whether to grow it in their garden. There are pros and cons to this.
Advantages:
- Strong seedlings. Proper care from the start will produce healthy and strong seedlings.
- Artificial lighting simulation. If there's not enough sunlight, you can use a special lamp.
- Convenient for placing seedling containers. It takes up little space in a small room.
- A variety of varieties.
- Frost resistance. Seedlings planted in the ground can withstand temperatures down to -5°C.
- Convenient planting placement in the garden. If you have a small number of seedlings, you can plant them along the outermost strip of the bed.
- Pairing with certain vegetables. To save space, they can be planted with tomatoes, cabbage, beets, cucumbers, and beans.
- Long-term storage of root crops after harvest.
Flaws:
- Long growing season. Gardeners living in temperate climates will face challenges growing celery root. Harvesting occurs 6-7 months after sowing.
- The seeds have a poor germination rate. Keep a large supply of seeds in reserve, as not all of them will germinate.
- Death or disease due to too much watering.
- Incompatible with parsley, potatoes and carrots.
Planting root celery
Planting celery root requires specific guidelines. Soil preparation and proper seed selection are essential.
Preparing soil and containers for seedlings
Let's begin the process of preparing to grow a healthy and strong plant. You'll need a suitable seed container and high-quality soil. You can find soil from your own garden, buy it at the store, or prepare it yourself. Take equal parts:
- garden soil;
- compost;
- washed sand from the river;
- peat;
- grain husks or sunflower husks;
- eggshell.
Before preparing the soil mixture, keep all ingredients in a warm place. Use a box or a separate "planting spot" for each seedling as a container for the seedlings. The first option requires transplanting each seedling. For the second option, plastic or paper cups are suitable. Make a hole in the cups to allow excess water to drain during watering.
Peat tablets or cassettes are a good solution. The former are made from compressed fertilizer and are enriched with a large number of beneficial microelements. Each tablet is wrapped in mesh. The diameter of the tablet is 2-7 cm.
Cassettes are convenient to use in small spaces. Their volume and numerous cells take up little room. They are suitable for sowing large numbers of seedlings.
Seed preparation
You need to be careful when choosing seeds. They're very finicky. To see sprouts, certain manipulations are required:
- Take a cup of hot water. Place the seeds in it and stir well. The essential oils will remain in the water.
- Let the seeds cool, then rinse with cold water.
- Drain the liquid through a sieve and dry the seedlings slightly. You can soak them in room-temperature water for 1-2 days, changing the water periodically.
- The appearance of tiny shoots on the seed indicates readiness for sowing.
The surface of the seeds is covered with an oil layer. This protects the seed from fungal diseases, but prevents them from germinating quickly.
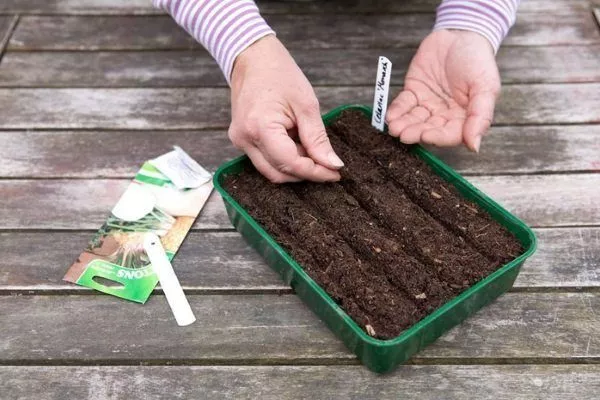
Sowing seeds
The sowing period begins in late February and continues until early March. Growing takes a long time, so late sowing may not yield the expected results.
Prepare soaked or sprouted seeds and containers with seeding mix. To ensure strong, developed, and healthy seedlings, add Energen to the soil immediately before sowing. This environmentally friendly, economical, and safe solution includes:
- silicon salt;
- humic acid;
- useful minerals;
- subbituminous coal;
- sulfur.
Sow close to the surface, do not press the seed too deeply. Growth rate directly depends on the amount of light received.
Caring for seedlings
At first, celery will thrive in company. Later, you'll need to thin the rows.
The optimal temperature for successful growth is 20-25°C. After the first leaves appear, the temperature should be lowered to 16-20°C. Otherwise, the seedlings will stretch in the heat. After 7-10 days, return the temperature to the original level. Make the transition gradually.
Lighting plays an important role. Until the leaves appear, keep the seedlings in a dark place, covering the container with plastic or glass. After that, sunlight is essential. Without it, the plant will be at risk of disease and death. Use special lamps.
If seedlings are grown on a south-facing windowsill, supplemental lighting should be reduced or eliminated. In cloudy weather, don't forget about the light. Daylight hours should be 14-16 hours.
Keep the soil slightly moist. Avoid drafts. Water frequently and sparingly, about once a week. As the sprouts grow, mist them with water from a spray bottle. The stems are fragile, and this method will protect them from dying.
Watering is a labor-intensive and time-consuming process. Make it easier on yourself by using special equipment. You can use drip irrigation with tape or tubing.
Once the first two leaves appear, begin transplanting. Prepare a separate cup with the same soil mixture for each sprout. When transplanting, pinch off part of the main root, leaving two-thirds.
Before planting seedlings outdoors, fertilize and enrich the soil with dissolved poultry manure and compost. This is best done 12 days before transplanting. During this period, harden off the seedlings by briefly moving them outdoors.
Plants that have grown to 20-25 cm and developed 4-5 leaves are ready for planting in the ground. This can be done as early as May 15th-20th. This begins the second stage of the celery root growing process.
Planting seedlings in open ground
If your garden isn't prepared in the fall, dug over, or cleared from the previous season, do so in the spring. Celery prefers fertile soil:
- Position the bed so that the plants receive warmth and sun. Once you've chosen a suitable location, complete some preparatory work.
- Dig the bed. Maintain a depth of at least 30 cm.
- Disinfect the soil with a sprayer. Use a solution of potassium permanganate or copper sulfate.
- Add organic matter (1-2 buckets of compost per square meter). You can make a complex fertilizer from 20 g of urea, 9 g of phosphate, and 15 g of potassium chloride.
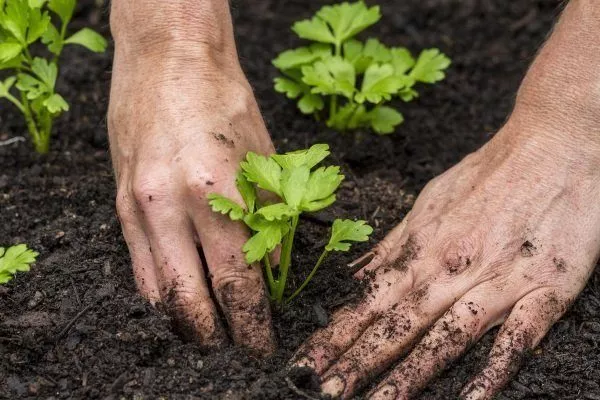
Once the soil is prepared, loosen it and cover it with plastic wrap. This is done in case of unexpected frosts at night. It's best to transplant seedlings on a cloudy day or in calm weather in the evening. When starting to plant seedlings, follow the correct pattern:
- Don't bury the growing point too deep; leave it level with the soil surface. The hole should be approximately 8-10 cm deep.
- Plant seedlings 30-40 cm apart, with row spacing of 45-50 cm. A densely planted bed will not yield a harvest.
- Finish the process with a generous watering.
Avoid planting celery where potatoes, carrots, parsley, or dill were grown. Ideally, plant it in the same area where cucumbers, cabbage, onions, garlic, and legumes were grown.
Growing and care
Growing celery root is a laborious undertaking. It requires constant and meticulous care. If you follow all the rules and care instructions, the results will be pleasantly surprising. Watering, fertilizing, and loosening the soil are essential.
Watering
Celery loves water, but overwatering will kill it. Try to water regularly, but avoid overwatering.
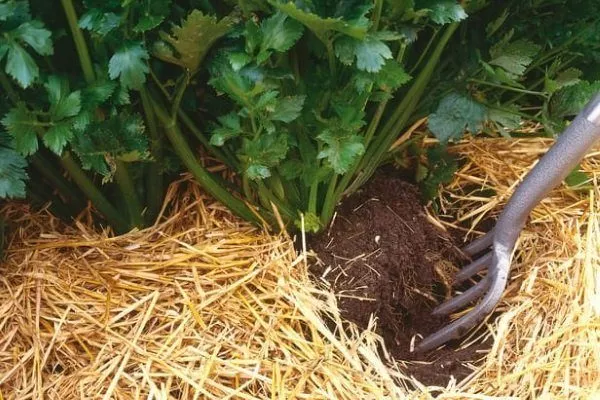
Will do soil mulchingto retain moisture for a longer period. This will also help prevent weeds from growing around the plants. Water directly at the roots.
For greater effect, water the vegetable with nettle infusion several times during the summer. Place the chopped greens in a bucket and fill with water. Let the nettles ferment for 14 days. When watering, add 1 cup of the infusion per 12 liters of water.
Weather conditions change, and soil moisture must be monitored constantly. Avoiding over-drying and over-watering the soil is essential.
Top dressing
The nutrients found in fertilizers added to the soil give plants strength and vitality, nourishing them from within.
To achieve a good and bountiful harvest, the soil and plant should be fertilized throughout the growing season—approximately 3-4 times at equal intervals. The first two fertilizings help the seedlings take root and begin to grow. The last two allow the roots to become larger.
- First feeding: 2 weeks after planting the seedlings, use a solution of mullein (1:10).
- Second feeding: a month after the first, use a complex mineral fertilizer (NPK 10-10-10).
- Third feeding: at the beginning of root formation, use superphosphate (40 g per 10 l of water).
Top dressing:
- Herbal infusion. 7 days after planting seedlings in the ground.
- Mullein or chicken manure (infusions). 2 weeks after the first feeding.
- Superphosphate. End of July. Roots are fed.
- Boric acid (solution). Beginning of head formation.
Some gardeners fertilize their plants 2-3 times a year. This is fine, but no more than 4 times. Otherwise, it will harm the plant, not benefit it.
Weeding and loosening
Weeds grow in all garden beds, and celery is no exception. It needs plenty of space to grow, and excess weeds will only harm the plant. Weed regularly and don't let the area become neglected.
Weeding and loosening the soil are done simultaneously. Root celery prefers loose soil. At first, loosening the soil more frequently is necessary; later, once every two weeks will be sufficient.
Insert the tool 5-7 cm into the soil. Most of the weeding is done between rows. There's no specific time; every gardener has their own weeds and growth rates.
When loosening and weeding the soil, do not hill up the plants. When the root crop thickens, rake the soil away from it, freeing the root section.
When removing excess soil from the root, you may see roots growing on the sides. Don't leave them; trim them with a knife. It's best to leave the leaves alone until September, when the fruit has grown in size.
Diseases and pests
The plant needs to be protected from diseases and pests. If nothing is done, there will be no quality harvest.
Celery can be threatened by the following diseases:
- viral mosaic;
- heart rot;
- black leg;
- stem rot.
You need to be wary of pests:
- slugs and snails;
- scoop;
- carrot flies and larvae.
You can protect celery from damage by small insects in the following ways:
- Do not allow dense thickets to form in the garden bed.
- Water regularly, but make sure the soil isn't too wet. Excess moisture breeds pests.
- Remove weeds in a timely manner.
- Spray plants with special solutions against pests.
- Do not allow the vegetable to become weak or wither; feed it regularly.
Mixed plantings are recommended. Place vegetables near celery. This can help prevent infestation.
Harvesting and storage
Celery harvest time begins in October. It remains in the garden until frost sets in. Dry weather is essential.
If the leaves have started to turn yellow, it's time to harvest. There's no need to rush; the roots gain mass in the fall. Before digging up the roots, water the soil. After 30 minutes, it will be easier to pull them out.
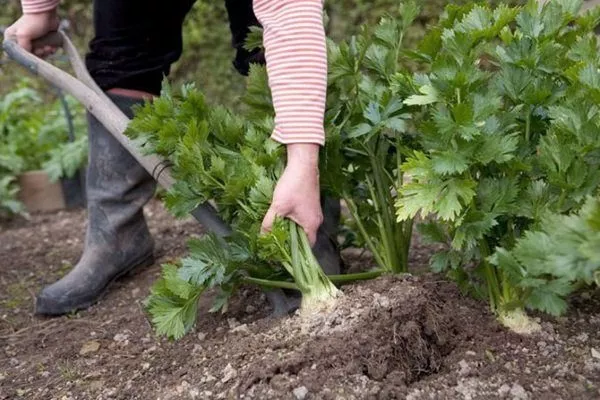
Celery has thin skin, so handle it carefully. Carefully trim the leaves, but leave 2 cm of the root. Don't disturb the root, as this will help it keep better.
Try to choose celery that is unblemished. This will ensure a long winter. Until spring, store the celery in a basement or refrigerator. A root cellar is best. Prepare a box, fill it with sand, and place the celery in it, with the stalks facing upward. The basement should be regularly ventilated, and the temperature should be between 2 and 10°C.
There is a freezing option:
- Peel the fruits.
- Cut into slices.
- Place in bags.
- Place in the freezer.
- Simply defrost the contents of the package before using.
- Can be stored in the refrigerator in a vegetable container.
You can also preserve the root vegetable in dried form. Choose fruits that are firm, white, and undamaged. Discard any with rotten areas. Clean off any soil and wash thoroughly. Use a sharp knife or vegetable peeler to remove the skin. Chop using your favorite method:
- with a large regular grater;
- cut into thin strips with a knife;
- use a Korean carrot grater;
- Use a vegetable peeler to make thin slices;
- Use a knife to cut the vegetable into rings.
The following is suitable for drying root vegetables:
- Preheat oven to 60°C and line a baking sheet with parchment paper. Keep the oven door slightly ajar.
- Fresh air, baking sheets, and racks. Stir the chopped fruit occasionally. Drying time is 2-3 weeks. Keep away from sunlight.
- Electric dehydrator at 50°C. Dry for 10 hours, rotating the rack with the chopped vegetables every 1.5 hours.
Gardeners' reviews of celery root
Root celery has proven itself to be a good choice. It has some minor drawbacks, but mostly advantages. Its beneficial properties are enough to warrant growing the root vegetable yourself.