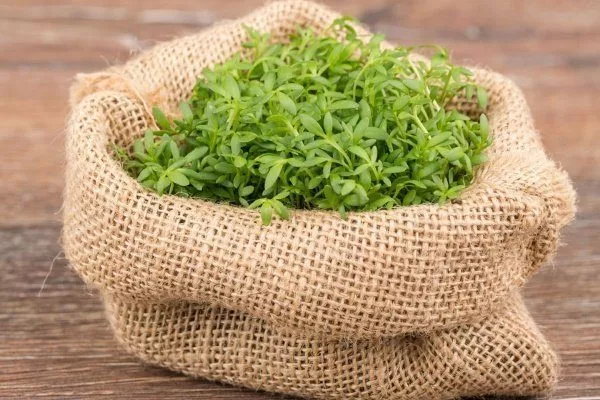
Watercress is a vegetable that is gaining increasing popularity each year due to its piquant flavor, which comes from mustard oil. Along with its culinary value, its low maintenance requirements make it a compelling choice for growing in your own garden or windowsill.
Description
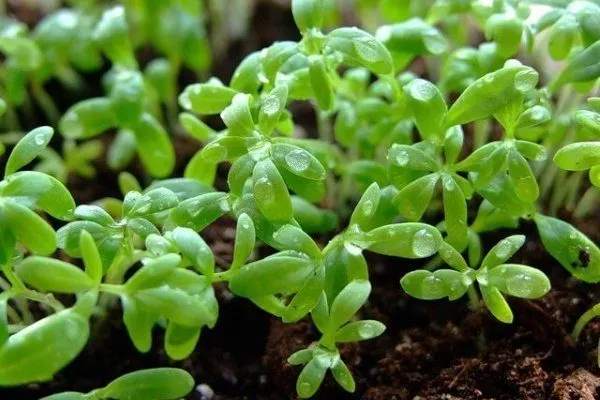
This Middle Eastern native, also known as the common bugleweed, is a herbaceous annual plant in the cabbage family. It is characterized by numerous green leaves arranged on a thin, fragile stem.
In agriculture, the plant is characterized by its unpretentiousness, cold resistance and short growing season relative to other crops.
The combination of all these factors has led to watercress being grown throughout the world, except in regions with extreme climates, where even such a undemanding plant cannot thrive. In Africa, watercress is grown not only for culinary use but also for medicinal and cosmetic purposes.
Types and best varieties
The following types of plants are distinguished:
- CurlyIt boasts predominantly early- and mid-season varieties. A notable feature of this species is its jagged leaves.
- Whole-leafThis variety has the widest range of maturity rates, including both early-ripening and late-ripening varieties. It is notable for its large leaves with entire margins and early germination.
- SowingThis variety of watercress holds the record for the fastest ripening. Visually, it's a happy medium between whole-leaf and curly-leaf varieties. A distinctive feature of this variety is the delicate aftertaste of its leaves.
Many excellent varieties of watercress have been developed, each with distinct characteristics and properties, suited to a variety of situations. The most common are:
- OpenworkThis is a curly-leaved cress. It has distinctively cut leaves (hence its name) in rosettes up to 17 centimeters long. It's considered a mid-early variety (the harvest can be completed in 3 weeks). It thrives both in a garden plot and on a windowsill in an apartment.
- ChordA relatively late-ripening variety of bedbug, it will yield its first harvest only a month later. It is distinguished by the tender, succulent tissue of its long-petioled, serrated leaves.
- DucatIt has large, tender leaves with a sharp mustard flavor. It's considered an ultra-early variety, allowing for harvest in just 18-20 days.
- FunThe leaves of this variety of watercress have a delicate yet distinct aftertaste, reminiscent of horseradish. Suitable for both farmland and home growing, the harvest is ready in about one month.
- LaceOne of the most attractive members of the cabbage family. It has a slightly raised rosette, reaching 12-13 centimeters in diameter, with an abundance of lacy green leaves and beautiful pink flowers. Another advantage is its early maturity: the first harvest is ready for consumption 20 days after germination.
- CurledOne of the earliest and most productive varieties: you can harvest the fruit in 15-17 days. It's ideal for both indoor and greenhouse cultivation.
- SpicyThis variety grows and develops quite quickly: technical maturity occurs in 2-2.5 weeks. However, the full, sharp, mustard flavor will unfold after a month. It has an excellent yield (about 2 kilograms per square meter of land), making it an excellent choice for private cultivation.
- FlagshipDespite having the lowest yield of all the varieties listed, Flagman has the fastest ripening time. The shoots are ready to be harvested after only 12-15 days.
- ChillyThis variety is early maturing, allowing for harvesting 20-25 days after mass germination. It is distinguished by a relatively spreading and small (13 cm long and 15 cm in diameter) rosette, densely covered with green, dissected leaves. It is also characterized by a lack of anthocyanin coloration and milky-white flowers. It grows equally well on a windowsill or in the garden.
- ✓ Resistance to temperature fluctuations: for regions with an unstable climate, varieties that can withstand short-term frosts down to -5°C are preferable.
- ✓ Light requirements: Varieties with high shade tolerance are ideal for growing in conditions with limited sunlight.
Soil preparation
A properly selected location for growing watercress and high-quality soil preparation are the key to intensive growth and a rich harvest of the plant.
Choosing a location
Hot, bright sun that blazes throughout the day is not a friend to watercress, which prefers dappled shade. Therefore, it thrives in a shaded area or a spot that receives sun only in the morning or evening.
Due to the lack of alternatives, the plant can be planted in a well-lit area, for example, on a south-facing side. However, in this case, artificial shade will need to be provided at midday.
When it comes to soil selection, it all comes down to the gardener's abilities. Watercress thrives in virtually any soil, and even grows surprisingly well in sand. However, in neutral or slightly acidic soil, this member of the brassica family will truly blossom.
Predecessors to watercress in the chosen area deserve special attention. The plant will thrive especially well if planted after one of the following crops:
- potatoes;
- onions;
- beets.
However, it is better to avoid planting in areas where other members of the cabbage family were previously grown.
Preparatory work
Preparing the soil at the chosen site is straightforward, and even a novice gardener can handle it. The work begins in the fall: this is the ideal time for deep digging, weed removal, and fertilization. To prepare the most appropriate and beneficial fertilizer for watercress, you'll need the following ingredients per square meter of soil:
- humus – 5 kilograms;
- superphosphate – 20 grams;
- calcium chloride – 15 grams.
The arrival of spring is a good time to thoroughly loosen the selected area. If the soil there is heavy and compacted, it is strongly recommended to re-dig it. Immediately before planting, the soil should be amended with ammonium sulfate and well-rotted compost.
Landing
The main rule when planting watercress is to choose the right time and follow the correct technique.
Timing
You can plant bedbugweed in either spring (April-May) or fall (October). Precise dates are impossible to predict, as planting times depend directly on the regional climate. The following criteria can be used as a guide:
- at least 4-5 centimeters of soil depth - not frozen;
- The average daily temperature fluctuates between 6 and 8 degrees Celsius.
Sowing technique
Watercress seeds are sown directly into the soil, without any preliminary preparation. It's best to plant in rows or using the strip method. If the chosen plot is small, the plants can be sown as a catch crop (this advice also applies to greenhouse plantings).
If you sow seeds too closely, you risk developing a dense carpet of vegetation later, which will be difficult to maintain. Furthermore, dense planting often results in smaller leaves and increased vulnerability to diseases and pests. Therefore, it's important to sow seeds at a distance of 10-20 centimeters between rows. Approximately 0.6-0.8 grams of seeds are used per square meter of area.
A tolerant plant can also survive a more compact planting. However, in this case, the gardener will need to thin it periodically as the stems grow and develop.
In spring, seeds are planted in the soil at a relatively shallow depth—about 1 centimeter. In autumn, this depth can be around 1.5-2 centimeters, depending on the average winter temperature. After sowing, cover the seeds with a thin layer of soil and compact it lightly.
Sufficient moisture and warmth will ensure the first shoots emerge quickly. The first sprouts can be seen as early as five days after sowing.
You can watch the video to learn how to grow watercress in a greenhouse in early spring before planting the main crop and how to care for it in the central Russian climate:
At home
The lack of a garden or land isn't a reason to give up on growing watercress. Many enthusiasts grow it on their windowsills at home. And it's not surprising, because it's so easy to replicate their success:
- Cover the bottom of the chosen container (which could be a pot, tray, container, box, or even a large plate) with a thin layer (about 3 centimeters) of cotton wool or growing medium. The latter can be coconut fiber, vermiculite, a sponge, sawdust, sand, or a ready-made store-bought seedling mix.
- It's best not to use garden soil, especially from unverified sources. It may contain eggs of parasites that infect cabbage crops.
- Spread the seeds on the surface of the improvised miniature plot, lightly sprinkling with the nutrient mixture.
- Moisten the sown soil with a spray bottle (it is better to use a fine spray bottle, that is, with the smallest droplets), cover with film and leave in a dark place until the first shoots appear.
- When the first sprouts appear, the film must be removed and the container with the seedlings moved to a well-lit place, for example, on a balcony, since the temperature must be maintained at around 7 degrees Celsius for several days.
- As soon as the seedlings develop their first leaves, they will need a warmer climate, so the container can be moved to a room with a temperature of no more than 15 degrees Celsius.
- Every day, the seedlings need to be rotated 180º to ensure even exposure to light. Although watercress prefers shade, it also requires sunlight, especially initially. However, no special supplemental lighting is needed for the plant.
- Once the bugleweed reaches at least 8 centimeters in height, it can be safely cut off with scissors – such a plant is already suitable for consumption.
You can watch the video to see how to grow watercress at home on a windowsill using improvised means:
Care
Proper care is necessary not only for good growth of watercress, but also for preventing plant diseases.
- Check the soil moisture daily: the top layer should be slightly moist, but not waterlogged.
- Loosen the soil every 3-4 days to ensure oxygen reaches the roots.
- Remove weeds as they appear to prevent competition for nutrients.
Watering
In the absence of precipitation, the seedling should be watered daily, especially in the summer. On rainy days, watering is unnecessary. In cloudy weather and moderate temperatures, watering two to three times a week is sufficient. After watering, carefully loosen the soil and remove weeds as soon as they are noticed.
Top dressing
There is no need to apply fertilizer after planting, since the growing season for watercress is short, and the nitrates in the fertilizer simply won't have time to be processed.
If you can’t do without fertilizing after sowing the bugweed, then you should use only concentrated fertilizers.
Possible problems
Even if all the rules for growing watercress are followed, sometimes the plants can be affected by uninvited guests and diseases.
Pests
The common bedbug is affected by only two types of parasites:
- Cruciferous flea beetleTiny black bugs can quickly turn leaves into a sieve, but they're relatively easy to control. In hot weather, dust the plant with tobacco dust. Additionally, treat the watercress with ice water: this won't harm the plant, but it will eliminate the insects, which are wary of low temperatures. Chemical pesticides designed for long-term pest control are dangerous due to watercress's short growing season.
- AphidThese small insects suck the sap of the bedbug, causing the green leaves to deform and the plant to wilt. A soap and soda solution will help combat them. To prepare it, dissolve 50 grams of soap and 75 grams of washing soda (or 200 grams of baking soda) in 10 liters of water.
Diseases
There are more diseases affecting watercress than pests:
- Gray moldIt manifests as brown spots, first on the lower leaves and then on the upper leaves. A gray or brown fluffy coating appears on the damaged tissue of stems, leaves, and inflorescences. Affected inflorescences eventually die. High humidity and overly dense planting both contribute to the disease's development. There is no safe treatment, so infected plants are destroyed.
- Leaf spotIt manifests itself as round or angular spots of varying colors. In some cases, they are bordered by a dark red rim or light brown margin. The disease is spread by wind and mechanically during the growing season. It persists in the soil on infected plant debris. Control measures include collecting and destroying debris, timely weed control, and spraying seedlings with Bordeaux mixture or copper oxychloride at a concentration of 1%.
- Powdery mildewIt is accompanied by a white coating on petioles, leaves, inflorescences, and stems. It typically develops in densely populated crops. The pathogen can also survive in the soil on plant debris. Regular thinning of the plant, keeping weeds out, and treating the plantings with a 1% sulfur suspension will help both prevent and control the disease.
- Downy mildewThis disease causes irregularly shaped yellow spots bordered by veins (especially on the upper side of leaves) on watercress. These spots gradually enlarge and merge, and the affected plant tissue turns brown and dies. A white or gray powdery coating appears on the underside of the leaf. In young plants, any organ can be affected and die. Pruning and burning diseased leaves, as well as spraying the seed heads with a 1% Bordeaux mixture, can help combat the disease.
- BlacklegThe disease attacks the root collar of plants, eventually leading to root rot. The stem becomes constricted and twisted. High humidity is the main risk factor. Timely thinning of watercress and proper soil loosening are the best preventative measures. As the disease progresses, affected plants should be treated with Bordeaux mixture or copper oxychloride at a concentration of 1%.
Collection and storage
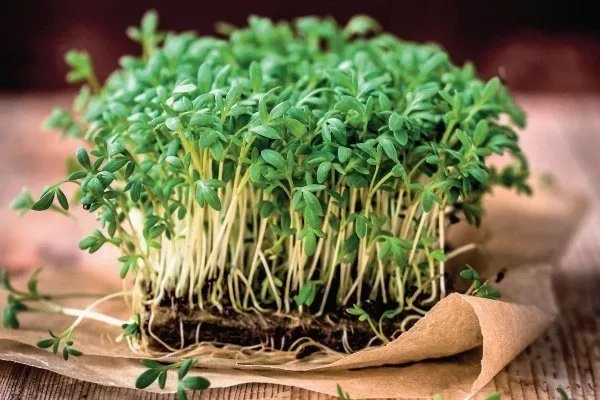
Some varieties of watercress can reach full maturity within 2-2.5 weeks from the first shoots appearing. You can tell when the plant is ripe by its broad, bright green leaves, which, when crushed, release a pleasant, spicy, slightly mustardy aroma. The first fruits can be harvested when the plants reach about 15 centimeters in height. The harvest is made by cutting 10 centimeters from the top of the shoot.
Store harvested plants exclusively in the refrigerator: they quickly spoil and lose their freshness and nutritional value. To ensure that watercress lasts as long as possible, preserving all its vitamins and nutrients, it's best to place it in a container of cold water before refrigerating it.
To collect seeds for future planting, remove the largest, well-developed rosettes from the soil. As soon as they begin to turn brown, they should be stored in a dry place, hanging upside down. To preserve all the seeds, place paper, fabric, cling film, etc., under the plant to catch the seeds. Fully ripened and dried seeds should be placed in a natural fabric bag and stored in a cool, dry place until the next time they are planted.
Growing watercress isn't difficult. The only two conditions a gardener needs to ensure a harvest are partial shade and regular watering. With proper soil preparation and other care, you can not only ensure a long-lasting supply of succulent shoots but also stock up on seeds for future planting or sale.