Sowing parsley isn't difficult. But getting a bountiful harvest requires effort. Desire and commitment, coupled with knowledge of the entire process, from seed preparation to pest control, will ensure you can enjoy delicious, succulent greens year-round. We'll discuss the specifics of planting and caring for parsley below.
Planting parsley
To obtain thick, healthy greenery, it is important to observe the timing of parsley sowing and carry out agricultural measures in a timely manner.
- ✓ pH level should be between 6.0-7.0 for optimal growth.
- ✓ The soil must contain at least 3% organic matter to provide nutrients.
When to plant parsley?
Parsley is planted as soon as the soil has warmed slightly in the sun, in April. However, it can also be planted before winter. For this, planting should be done in October.
It's best if tomatoes, cucumbers, potatoes, or squash were grown in the garden before the parsley. Predecessors from the umbelliferous family are not recommended, although the plant does well alongside them.
The spring planting site should be prepared in the fall. Clear the area of weeds and plant debris, and treat with a fungicide if necessary. Fertilize while tilling the soil. This can include both mineral and organic fertilizers. For example, saltpeter (1 tablespoon per square meter), wood ash (350 g/sq. m), humus, manure, and slurry (3 kg per square meter).
In this case, organic matter has an advantage because over the winter, as it decomposes, microelements and substances will gradually begin to be released and accumulate. The necessary nutrients will already be in the soil in the spring, and their effect will be longer-lasting than that of minerals.
If you weren't able to prepare the plot in the fall, you should do so in early spring to complete the work two weeks before the expected planting date. During this time, use humus and ash to improve the soil quality. This will loosen it and improve its composition.
Favorable conditions for growing
With optimal conditions for parsley, it will delight you with thick, healthy, and delicious greenery. These conditions include:
- Suitable soil. The plant prefers loose, light, fertile and non-acidic soils.
- Sufficient amount of solar heat and light. Parsley does not tolerate shade; the plant becomes frail and stretches out in search of light.
- Agrotechnical measures. Provide timely moderate watering, loosening of the soil, and weeding.
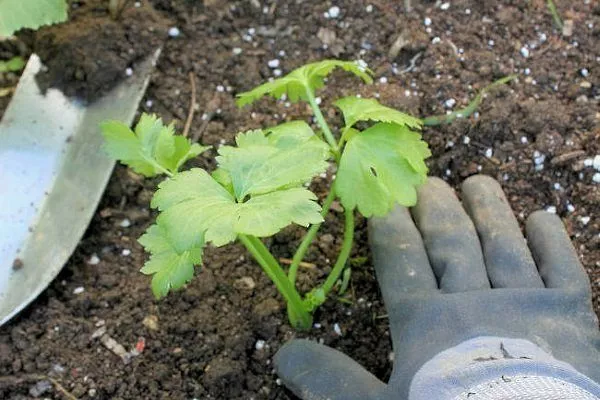
How to plant parsley?
In the prepared area, make furrows up to 1.5 cm deep. Leave a distance of 35-50 cm between rows. This will make it easier to care for the plants and will prevent the bushes from touching each other with their leaves and creating shade.
When sowing seeds in furrows, leave 1.5-2 cm between them. The standard sowing rate is 1 g of seeds per 1 square meter of area. Cover the filled rows with soil. Water the area.
When planting in autumn, additional watering of the soil is not required.
To ensure you have fresh herbs all season long, plant parsley in stages, sowing seeds every week.
Watch a video on how to plant parsley in a prepared area:
Growing parsley on a windowsill
With the onset of winter, when parsley is covered in snow and no longer produces a harvest of healthy greens, you can get it from plants grown on a windowsill in the house.
Soil preparation and planting
First, prepare the planting containers and soil. Flower pots, long tubs, or any other container will work well. You can buy soil at the store, but it's better to prepare it yourself. To do this, mix:
- 2 parts peat;
- 1 part of garden soil;
- 1 part humus;
- 1 part river sand.
You can do it more simply, but then the soil will be poorer in composition. Add compost and a little sand to the garden soil.
Any potting mix, even store-bought, must be disinfected, otherwise the fungi and bacteria it contains will begin to multiply and adversely affect the parsley. This can be accomplished in several ways:
- Place the tray with soil in the oven for 1 hour at 200 °C.
- Steam the soil using a steamer-type device.
- Prepare a pale pink solution of potassium permanganate and pour it over the mixture.
- Dilute Fitosporin according to the instructions and spread the mixture over the soil.
After processing, dry the planting mixture. Apply complex mineral fertilizers if necessary.
To speed up germination, you can use a simple method. Soak parsley seeds in milk. Sprinkle the potting soil with quicklime three times, 15 minutes apart. Then sow.
To plant seeds in pots, just follow a few simple steps:
- At the bottom of the container, make a drainage layer a couple of cm high.
- Fill the container 3/4 full with soil.
- Make furrows 1-1.5 cm deep on the surface of the substrate and water them.
- Sow the seeds in the furrows and cover them with soil.
- Treat the soil with water using a spray bottle and cover with transparent film or glass.
- Place the pot in a warm place until seedlings appear.
At this stage, the plant requires high humidity and an air temperature of at least 25°C. When seedlings appear, the film (or glass) covering the pot is removed and the container is moved to a cooler location. The optimal temperature for parsley growth indoors is considered to be around 20°C.
Once solid, stable seedlings emerge and reach three leaves, thin them out. Carefully pull out any excess plants. Water the seedlings before thinning to avoid damaging the root system of the remaining seedlings.
The video below shows how to grow parsley from seeds at home in pots:
Caring for parsley at home
To get lush parsley greens and enjoy them for a long time, you will need to put in a lot of effort:
- Water your greens regularly with settled, room-temperature water. Ideally, do this 2-3 times a week.
- Additionally, spray the greens with water from a spray bottle when the air temperature is high and the humidity is low.
- After moistening the soil, loosen the soil in the pots. This will ensure air flow to the root system.
- Fertilize every 2 weeks from the appearance of a thick green rosette of parsley.
- In summer, move the containers with greenery to an east or west window, or shade them during the day to prevent direct sunlight from burning the leaves.
- Parsley will grow toward the window. To avoid lopsided growth and the stems stretching toward the light, rotate the pots. This will encourage symmetrical growth, forming beautiful, upright bushes.
In winter, when daylight hours are short, or on cloudy days, it's essential to use fluorescent or grow lights. Parsley requires at least 12 hours of light per day.
Growing parsley in open ground from seeds
To grow abundant parsley in open ground, you need to prepare the materials and, after planting, ensure an optimal set of agricultural care measures.
- Vernalize the seeds 2 weeks before sowing to increase their germination.
- A day before sowing, soak the seeds in water with the addition of a growth stimulator to speed up germination.
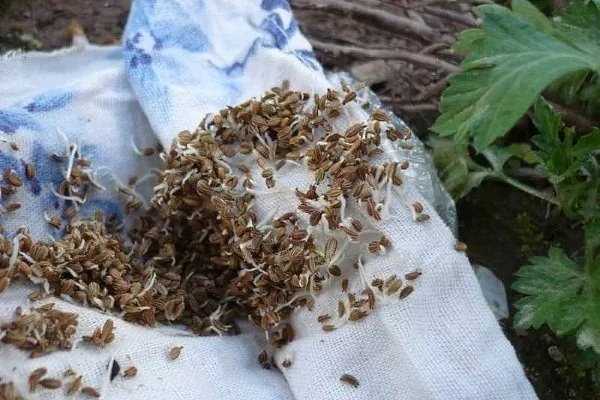
Preparing seeds for sowing
Preparatory measures for seeds should only be carried out if planting in the spring. If you sow them in the fall, no additional preparation is required. There are several methods for treating parsley seeds to speed up their germination:
- Soak seeds in water for 12-14 hours before planting. First, rinse them with hot water (not boiling water) to remove the essential oils, then transfer the seeds to a cheesecloth in a saucer and cover with room-temperature water. You can add wood ash to the water at a rate of 1 tablespoon per liter.
- Place the seeds in vodka for 20 minutes.Alcohol will dissolve the essential oil on the surface of the seeds, so to avoid burning them, do not soak them for too long. After soaking, rinse the cheesecloth with the seeds in clean water. Before planting, dry the seeds until they become free-flowing. This method of seed preparation doubles the germination time.
- Burying seeds. Collect the seeds in a cloth bag and bury them in the soil to a depth of 25-30 cm two weeks before planting. The damp, cold soil will harden them, and the moisture will allow them to swell. Before sowing, remove the bag, carefully pour the seeds out, and dry them until they scatter. Then sow them immediately into the beds.
- Soaking in ash infusion.Dilute 2 tablespoons of wood ash in 1 liter of water and let it steep for 2 days, stirring occasionally. Place the seeds on several layers of cheesecloth, transfer to a saucer, and pour the ash infusion over them. Alternatively, place the seeds in a cloth bag and place it in the container with the infusion. Leave for 4-5 hours.
- Cover the crops in the garden bed with film,after moistening the soil with a spray bottle, and repeating the procedure daily.
- Use of growth stimulants.You can use products from a specialty store or prepare them using traditional methods. Potato juice, aloe, and onion peel infusion are natural growth stimulants. Zircon, Epit, and others contain microelements and substances that influence the rate of germination.
- Air bubbling. Place the seeds in warm water, connect an aquarium air pump, and let them soak in the air-water mixture for 12-15 hours. Enriching them with oxygen increases germination and reduces germination time. Growth stimulants can be added to the water during this process.
- Vernalization.This is a short-term cold treatment of seeds, which has a hardening effect and encourages early germination. To do this, soak the seeds in water and leave them in a warm place until the water evaporates. Cover with damp gauze and, occasionally moistening it, allow the seeds to swell.
This warming period lasts 4-6 days. Place the swollen seeds in the refrigerator for 10 days, or place them on ice or snow.
Vernalization can only be carried out at positive temperatures, otherwise the seeds will become unsuitable for sowing.
Planting diagram
It's generally accepted that the ideal planting pattern for parsley is one where rows are spaced 20 cm apart. However, this rule often has to be modified to suit the needs of your garden bed.
When planting greens in small spaces, a zigzag pattern is used. The distance between plants in this pattern can be 10 cm or less. Zigzag planting allows for space-saving arrangements, preventing the plants from interfering with each other.
To avoid thinning seedlings in straight-line planting, you can maintain a seed spacing of 7-15 cm from the start. The seeding depth remains constant for any type of sowing, at 1.5-2 cm.
Planting dates
Planting timing depends on weather conditions and seed readiness. Warm weather with temperatures of 20-24°C is required for seed germination. Therefore, gardeners have two options:
- Wait for the right season and stable weather with acceptable temperatures.
- Prepare the seeds, harden them off, and sow them in the soil in early spring, covering the seedlings with plastic film. Moisten the soil as needed, and lift the plastic film briefly to ventilate the shelter.
Another option for planting parsley is sowing seeds in winterIt requires more attention and effort. Parsley sowing is carried out from October until the first frost. The beds are covered with plastic or insulated with a mixture of peat and humus. As this mixture rots, it releases heat, but if snow falls, it's still worth insulating the beds by covering them with a white winter blanket.
Hardened in these conditions, the seeds begin to germinate at temperatures of 4 degrees Celsius. Due to the unstable weather conditions in early spring, it is advisable to cover the young seedlings with plastic film.
Growing parsley in open ground from root vegetables
You can grow parsley for its greens by planting the root vegetables or the roots of a common leafy variety in open ground. This is a good way to use a single plant year-round. Transplant the container-grown root vegetables into open ground in the spring, and then repot them in the fall.
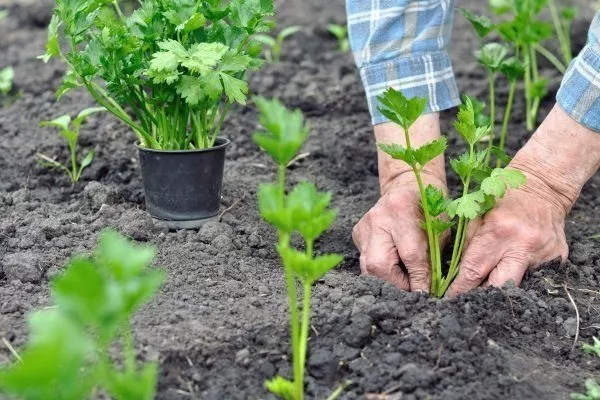
Planting parsley in the ground
Select only healthy roots for planting. They should be up to 5 cm thick, light-colored, smooth, and free of foliage. If the root is long, carefully trim it with a sharp knife to a length of 8-10 cm. Dust the cut area with wood ash or charcoal. Before planting, it is recommended to soak the roots in sand at an air temperature of +2°C.
When and how to plant?
The favorable period for planting root crops is long - from mid-spring to early summer.
When choosing a planting location, consider that parsley thrives in sandy, well-ventilated soil. Avoid shady areas and areas exposed to drafts.
Make small furrows across the bed. Lay the root vegetables at a 45° angle and cover them with soil, leaving about 2 cm of the top exposed. Leave at least 5 cm between the roots, and at least 20 cm between rows. After planting, firm the soil and water thoroughly.
Caring for parsley in open ground
Agrotechnical measures for caring for parsley in open ground and their frequency depend largely on weather conditions.
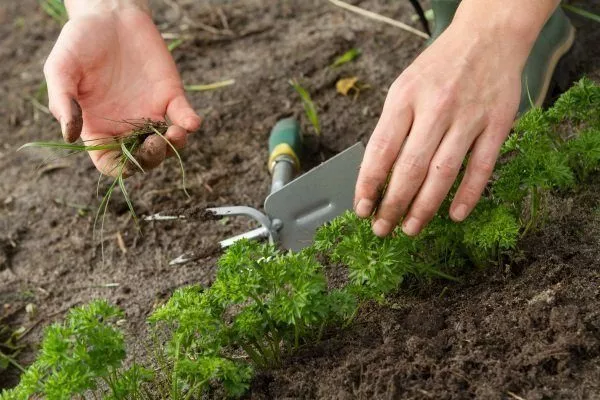
Watering and loosening
When watering, consider the following:
- The plant bushes well and grows in well-moistened soil, but does not tolerate overwatering. Water according to weather conditions and soil type. For example, in sandy soils, daily watering is acceptable in hot weather. In black soil, watering every other day is sufficient.
- The water for humidification should not be cold.
- Water the plant at the roots, avoiding the leaves. Collected rainwater that has been allowed to settle in containers is ideal.
- The optimal time for watering is early morning or late evening. This is because water drops hitting the parsley leaves allow sunlight to pass through, and the prism effect can cause sunburn on the green parts of the plant.
- After moistening the soil, it's a good idea to apply a thin layer of humus to the mulch. This will provide additional nutrition for the parsley and protect it from moisture evaporation.
Loosening the soil in parsley beds is essential. This will allow air to reach the root system and help retain water longer. When loosening, be extremely careful not to damage the parsley roots. Avoid allowing a dry crust to form on the soil surface.
Treatment and prevention of diseases
Parsley, like all garden plants, is susceptible to various diseases that can not only spoil the plant's appearance but also completely destroy the harvest. Disease prevention is crucial to preventing infection. However, if signs of disease appear, immediate action is necessary to combat it.
The most common ones are parsley diseases include:
- Powdery mildew. It's characterized by the appearance of a white coating on the entire plant's surface, which darkens over time. Along with this, the parsley also dies. The leaves and stems become stiff and crumble with even the slightest impact.
Since the disease is fungal and spreads by spores, in the initial stages, the infected plant should be removed and burned. Treat the bed with a fungicide solution. - Stolbur. The causative agent, Phytoplasma, is transmitted by cicadas. The direction and likelihood of spread of the disease depend on their movements and weather conditions. The incubation period for stolbur is approximately one month.
Signs of the disease include the appearance of reddish-brown spots on the leaves. An infected plant flowers in its first year of growth, but its seeds are unsuitable for sowing. Control and prevention measures include weed control, insect repellency, and plant treatment with special compounds. - Rust.The fungal disease attacks the plant from below. Brown spots first appear on the underside of the leaf blades, moving downward toward the roots and gradually covering the entire plant. The parsley dries out, the roots rot, and die.
If detected at an early stage, treatment with a 1% Bordeaux mixture every 10-14 days is recommended. In later stages, only plant destruction and treatment of the area are recommended. This is because affected plants are not edible due to a loss of flavor. - Septoria.Characterized by the appearance of whitish spots all over the plant. By late summer, longitudinal brown spots are visible on the parsley stems, while on the leaves, they remain dirty white with a brown border. It is spread by wind, rain, and watering. The disease also attacks the seeds. Control and prevention measures include crop rotation, weed control, and treatment with 1% Bordeaux mixture.
- Fomoz.With this disease, the plant suffers from the appearance of gray-brown spots all over the surface. Roots and seeds are affected. The parsley becomes brittle and dries out. It spreads through remaining plant parts, wind, and rain. Crop rotation, weeding, tillage, and fungicide treatments will help control the disease.
Preventive measures against fungal and other diseases most often come down to a few actions:
- Crop rotation.Changing the sowing location will prevent the disease from spreading to new areas.
- Weeding. This measure will prevent infection from weeds and also strengthen the immune system by increasing the penetration of oxygen into the soil.
- Proper preparation of the garden bed before planting. Clearing the area of all plant debris, cultivating and digging will help protect against last year's diseases.
- Seed treatment. A light pink solution of potassium permanganate in water will prepare the seeds before planting and reduce the risk of infection.
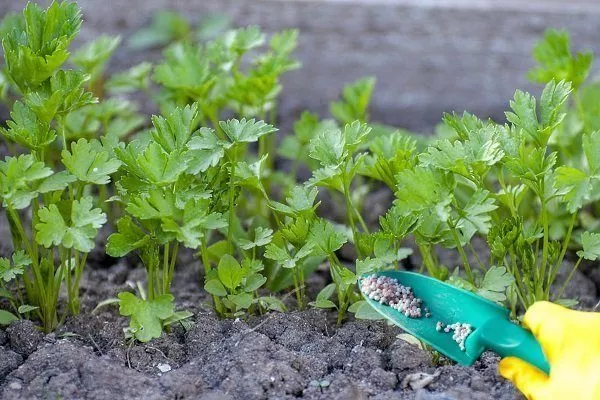
How and when to feed?
Nitrogen fertilizers are a favorite for parsley, but superphosphate and organic matter are also beneficial. Fertilizing the soil occurs in several stages:
- The first nitrogen fertilization is carried out a week after the seeds have fully germinated.
- The second nitrogen feeding is 7-10 days after the first.
- Fertilize the soil for the third time with a fertilizer containing phosphorus and potassium when the parsley begins to bush out.
Ammonium nitrate can be used as a nitrogen supplement. The application rate is 4-6 g per square meter of bed. It can be applied dry or diluted with water. Liquid nutrient is preferable, as it reaches the root system faster and has a positive effect.
Dry granules can cause burns if applied directly to the green parts of parsley. Therefore, be careful not to let the saltpeter come into contact with the plants when spreading, and water the beds thoroughly after applying it.
For the third feeding, use superphosphate. It contains the optimal proportions of nitrogen and phosphorus. The recommended application rate is 1 teaspoon per square meter. Potash (1 teaspoon/sq. m) or wood ash are suitable for enriching the soil with potassium. Spread ash at a rate of 200 g/sq. m over the surface of the beds and cover with mulch or soil.
Pests and methods of control
Pests often spoil the appearance of parsley, and when they proliferate, they can destroy crops. These insects include:
- Carrot psyllid.The adult insect is white and green, while the larvae are yellowish-green. They feed on parsley sap, which deprives the plant of nutrients, causing it to wither and dry out. The leaves curl inward.
Control and prevention measures include treating nearby conifers with "Karbofos" at a dilution of 60 g per bucket of water. Treat parsley in May and June with "Iskra," "Iskra Bio," and "Fitoverm." - Carrot fly.This black-green insect has light-colored legs and wings. It prefers to inhabit particularly damp areas. It feeds on parsley sap, and its larvae live in the roots and tubers, causing irreparable damage to the plant. The parsley becomes weak, and the tubers cannot be stored.
Control measures include crop rotation, planting onions next to parsley, and sprinkling ash or mothballs between rows. Carrot fly larvae die from hypothermia after autumn plowing. - Stem nematode.A parasitic microscopic worm. Adults and larvae live inside parsley and feed on its sap. The plant stunts and dies from lack of nutrition. The nematodes then retreat into the soil, searching for new prey. Crop rotation and seed and soil disinfection will help control this pest.
- Melon aphid.These are very small insects, ranging from green to black in color. Their larvae are lighter in color than the adults. They form colonies on the underside of parsley leaves, flying in from weeds. They feed on parsley sap, causing damage. If their numbers increase, they can destroy an entire plantation. They transmit viral and bacterial infections.
Regularly treating parsley with Karbofos, onion peel decoction, or an ash infusion with laundry soap will help control aphids. In case of widespread infestation, only chemical treatments such as Decis and Intavir can be effective.
Insects that feed on aphids, such as ladybugs, lacewings, hoverflies, and others, make an invaluable contribution to aphid control. Aphids dislike certain plants (garlic, mustard, fennel, nasturtium, etc.), which can be planted near parsley to repel the pests.
Reasons for poor seed germination
Even experienced gardeners are not immune to problems like poor germination. This occurs for several reasons:
- High soil acidity.The solution to this problem is to add limestone, chalk and ash.
- The soil is too compact.In such soil, it is difficult for weak sprouts to break through, so lighten the soil by adding sand, sawdust, humus, and peat to it when digging.
- Not enough sunlight.Parsley germinates poorly in shady beds; the plant is stunted, weak, and light-colored. Its aroma and flavor are practically nonexistent.
- Expired seeds. Seeds stored for up to 3 years are suitable for sowing. Germination may not occur after a longer period.
- Preservation of the essential oil coating on the surface of the seed.If there is not enough moisture, this layer is not washed away and the seedlings are delayed.
By following all the rules for preparing parsley seeds and soil, implementing timely agricultural practices, and taking preventative measures to combat diseases and pests, you are guaranteed a bountiful harvest of parsley. Parsley will delight you with its beautiful appearance, pleasant aroma, and nutritional value all year round.