Before making compost for your garden, carefully study its ingredients and production methods. The quality of this natural and completely free fertilizer depends on these ingredients. The most important thing is that it contains the maximum amount of nutrients.
What and how to make compost?
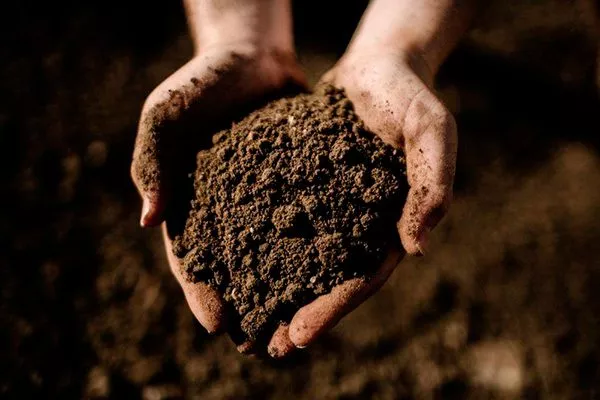
Compost refers to organic matter (humus) that is formed from plant residues, animal waste and other ingredients.
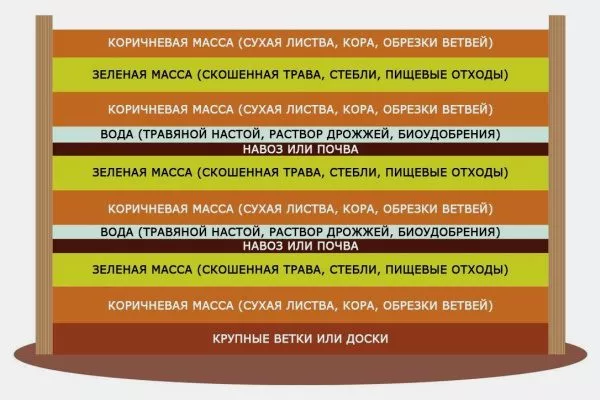
- ✓ The optimal size of a compost heap: height 1-1.5 m, width and length 1.5-2 m to ensure sufficient heat and aeration.
- ✓ The carbon to nitrogen ratio (C:N) should be approximately 30:1 for effective decomposition.
All components are readily available to any farmer, eliminating significant costs while increasing yields.
Features of organic matter
The remains contained in compost are processed by earthworms, various microorganisms, and insects, resulting in the breakdown of complex elements, which are converted into bioavailable compounds.
This is necessary for the rapid absorption and assimilation of nutrients by the plant's root system. A compost mixture is used:
- for seedlings and sowing material;
- for indoor plants;
- in planting holes;
- for mulching;
- as a top dressing.
To ensure the organic "builders" have increased viability, provide the compost with moderate moisture, warmth, and adequate oxygen. Avoid containers and pits where water collects and where there is no aeration.
| Name | Type of organic matter | Nitrogen content | Rate of decomposition |
|---|---|---|---|
| Weeds and grass clippings | Plant residues | High | Fast |
| Fallen autumn leaves | Plant residues | Low | Slow |
| Sawdust, chips and wood shavings | Wood debris | Very low | Very slow |
| Earth | Soil | Average | Average |
| Manure | Animal waste | Very high | Fast |
| Peat | Plant residues | Low | Slow |
| Chicken manure | Animal waste | Very high | Fast |
| Lime | Mineral substance | Absent | Does not decompose |
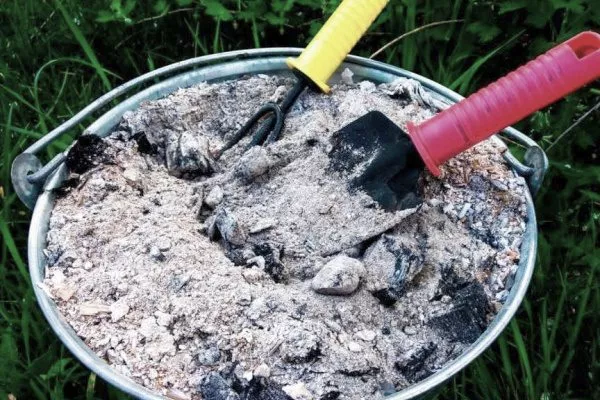
| Wood ash | Mineral substance | Absent | Does not decompose |
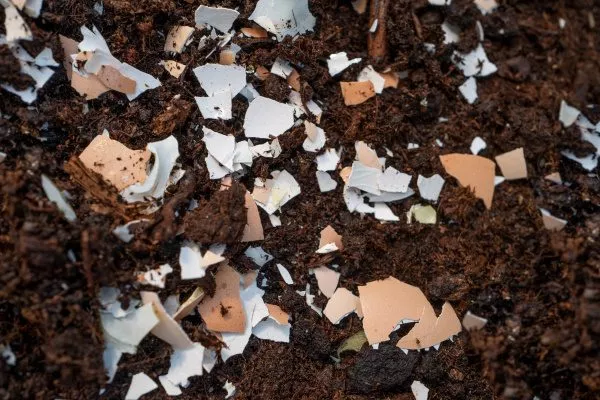
| Eggshell | Animal waste | Low | Slow |
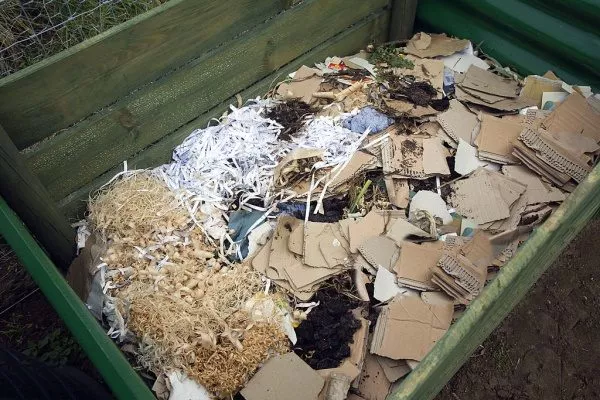
| Paper and cardboard | Plant residues | Low | Fast |
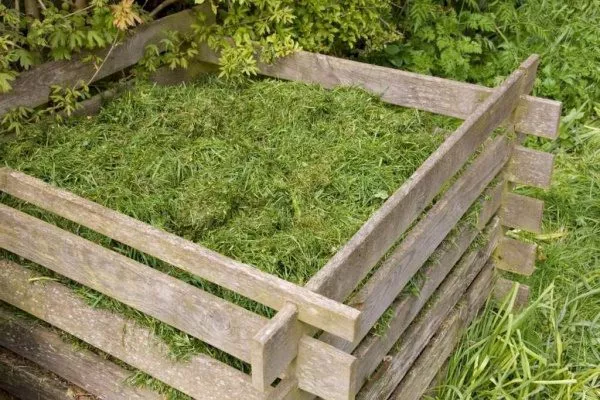
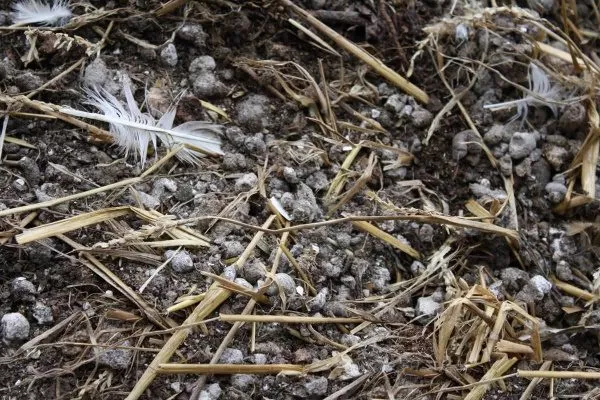
Weeds and grass clippings
This is an excellent material for composting, releasing nutrients into the fertilizer. Grass clippings can be either fresh or dry (hay, straw), and both weeds and green manure are used.
Other features:
- thickness of the vegetation layer – from 15 to 25 cm;
- It is advisable to dry very fresh grass slightly before storing it;
- The green mass must be crushed.
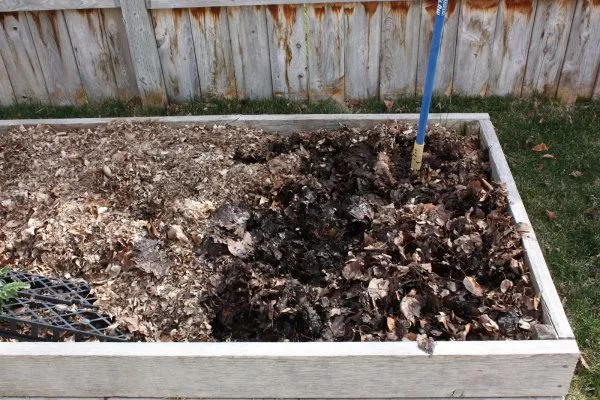
Fallen autumn leaves
The leaves aren't considered rich in nutrients, but they are essential for the layering. Chopping is essential. Otherwise, the leaves will form clumps, preventing air from penetrating into the mixture.
Sawdust, chips and wood shavings
Wood contains a negligible amount of nitrogen (except for the bark). This material is essential for maintaining moisture and warmth. Sawdust also helps sunlight penetrate the compost layers.
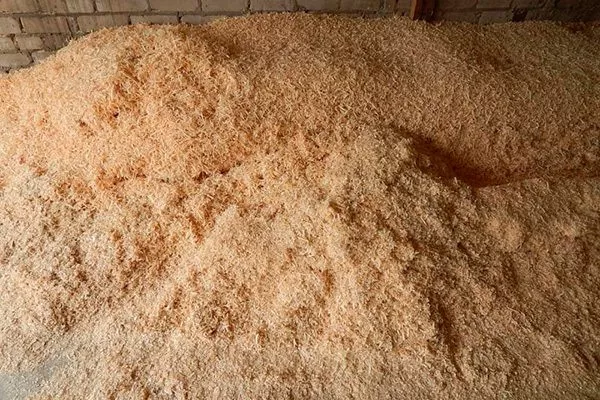
Over time, microorganisms necessary for fermentation form on the surface of the wood shavings. The wood allows the fertilizer to breathe and become loose.
Earth
Soil is needed in small quantities, just enough to cover the first layer of compost, which is about 3 cm. Lime is essential. Soil should be taken from aerobic layers (5-15 cm below the surface).
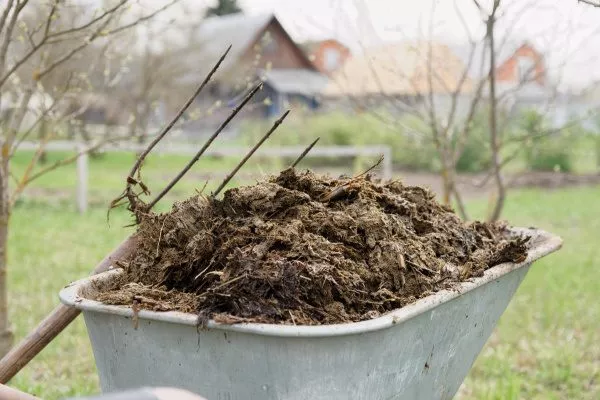
Manure
Manure contains a lot of nitrogen, which catalyzes the decomposition process. It acts as a starter for the rotting of organic matter. The best manure is horse and cow manure, but other options are also available.
Peat
Peat is extracted from plant remains and dead animals. It naturally forms in marshy areas. The biomass is excellent at dissipating heat and permeable to oxygen. Peat comes in three types: high-moor, low-moor, and transitional. The latter is used for compost.

Chicken manure
Unlike cow dung, chicken manure contains a large amount of phosphorus, nitrogen and potassium – the most important substances for crops.
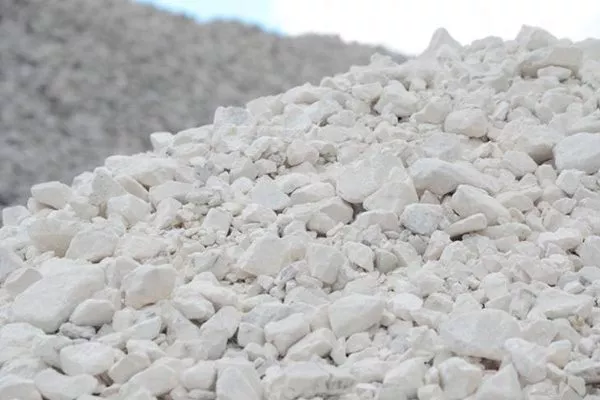
Lime
It's needed to neutralize acid, especially when adding cow manure. The maximum amount of fertiliser is 3% of the total mass. Adding more will result in an overly alkaline environment, which will slow down fermentation and decomposition processes.
Wood ash
Charcoal contains a huge amount of nutrients, but only in its pure form. It must be made from wood or paper that has not been treated with paints, varnishes, or other toxic compounds.
Eggshell
Not all gardeners add eggshells, but experts recommend it. There are several reasons: 90% of the eggshells are essential calcium, and the remaining 10% are minerals (molybdenum, silicon, iron, zinc, and fluorine). This amount is quite sufficient for plants.
Paper and cardboard
Cellulose allows paper products to decompose quickly; the key is to soak and shred them first. Lay them in a thin layer. Only untreated paper, meaning paper without a waxed or glossy surface, is permitted.
What should not be added to compost?
There are a number of products that are strictly prohibited from being added to compost. This is because they inhibit the composting process. What should not be used:
- Bread and baked goods - rats and mice will come running to this smell.
- Fatty residues (from soup and borscht, dairy dishes, vegetable oil, etc.).
- Fish, meat, bones, and the like. These foods don't take long to decompose, but they create a foul odor and breed maggots.
- Any plant material that has been subject to pest or disease infestation. Composting will occur, but pathogens will not be killed and will subsequently migrate to the garden beds.
- Branches and other materials in unchopped form will take too long to decompose.
- Fresh leaves, even if they're dried out. Only use last year's foliage. If that's not possible, place fresh leaves in a plastic bag, tie it shut, and leave it there for 2-3 weeks, making small holes in the bag.
- Plants that have been treated with chemicals this year.
- Plastic, polyethylene, glass and synthetic materials.
- Human excrement and excrement from pets (dogs, cats).
- Citrus fruits – the smell of fruit repels earthworms.
- Plants that are poisonous to other crops, such as potato tops, aconite, lily of the valley, broom, castor oil plant, etc.
Methods of compost preparation
Compost is made using various methods, depending on the location. For example, you can create a pit or pile, place the materials in a bag or bin, or purchase a ready-made composter from a specialty store.
Types of composting
There are two main types of compost:
- Anaerobic. Organic matter decomposes using anaerobic bacteria. No oxygen is required. In this case, a compost pit is created, which should be covered with a layer of soil or an airtight material (polyethylene, etc.). Features:
- fermentation occurs slowly, as the temperature inside reaches only 30 degrees;
- decomposition is based on the formation of foul-smelling gases – hydrogen sulfide, methane;
- the weed seeds do not die.
- Aerobic. Materials are processed by aerobic bacteria and various insects that cannot survive without air. Features:
- can be used for any composting method;
- During fermentation, pathogenic microorganisms and weed seeds are destroyed;
- The fermentation temperature is 70 degrees.
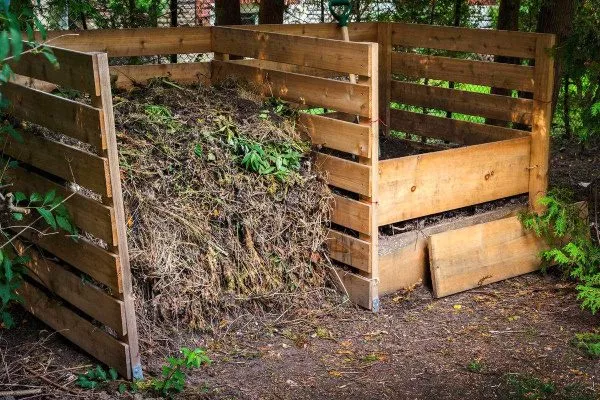
Compost heap
There are two ways to store organic materials: with borders (made of slate, boards, etc.) and without them (i.e., in bulk). The first option is preferable, as the pile will not dry out quickly. Here's how to do it correctly:
- In spring, remove the top layer of soil with a shovel by about 10 cm.
- Place organic matter, alternating waste with manure, sawdust, etc.
- Cover with non-woven material.
- In the fall, dig up the contents of the pile.
- Form the top layer of soil (from the one removed in the spring).
- Sow with green manure. Oats, peas, and mustard are suitable for this.
- In spring, dig it up together with the green manure that has sprouted.
If you plan to build a fence, use available materials. Don't forget to remove it before spring digging.
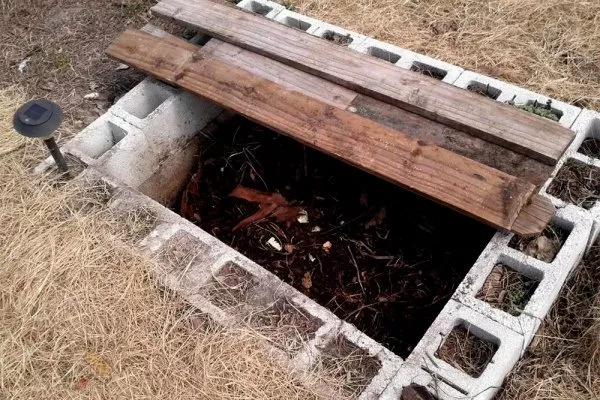
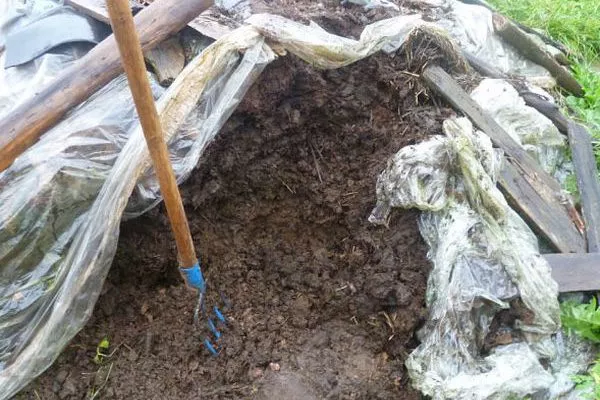
Compost pit
This is the second most popular composting method. It's important to add as much organic matter as possible—the larger the pit, the faster the fermentation process.
Rules for making a compost pit:
- Dig a hole about 100 cm deep and 150 x 200 cm wide and long.
- Place drainage material on the bottom, such as branches from berry bushes or thin tree shoots. This will allow liquid to drain during fermentation.
- Place a layer of soil and manure or chicken manure on top.
- Then plant waste, eggshells, etc.
- The topmost layer is soil. Cover it with straw or spunbond to allow oxygen to penetrate the hole.
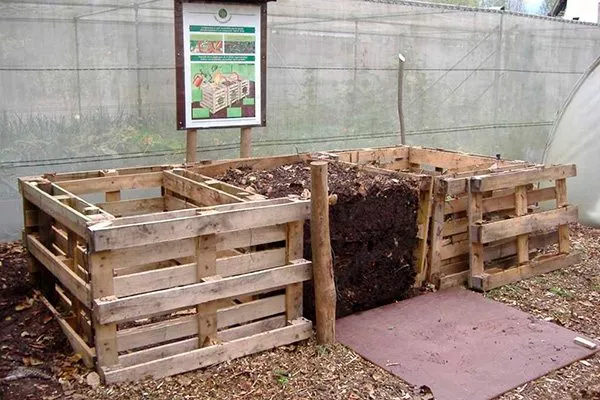
Box
This type of container is convenient because it can be used for many years. The box can be made from anything—slate sheets, corrugated metal, plastic sheets, etc.
Features of the boxes:
- Mount sheet materials on a wooden frame, be sure to make small holes in them to allow air to penetrate;
- box volume – from 1 to 1.5 cubic meters;
- approximate dimensions – 1.5x1.5x1 m;
- It is not recommended to make a bottom, as earthworms will penetrate through the soil;
- in a wooden container, make the walls not solid, but with small gaps;
- treat wooden boards with antiseptics to kill bacteria;
- install in a dug shallow hole with a compacted bottom.
For a wooden structure, you can use planks, window and door frames, beams, and pallets. Pallets are the easiest to construct—simply fasten the elements together.
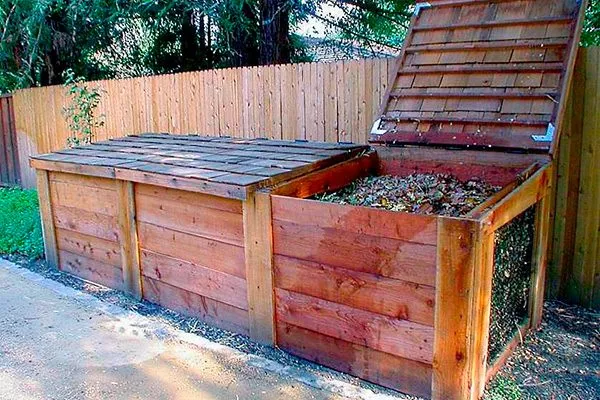
The simplest version of a compost bin:
- Build the frame. It consists of four corner posts made from beams.
- Dig it into the ground for stability.
- Nail the building boards horizontally on 3 sides (from the bottom to the very top).
- Cover one side halfway from the bottom and install a door on top. If you don't want to create such a structure, cover the frame on all sides. Place a lid made from planks nailed together on top of the structure.
- Place the compost material in the bin and cover with a lid. Water and ventilate the contents periodically.
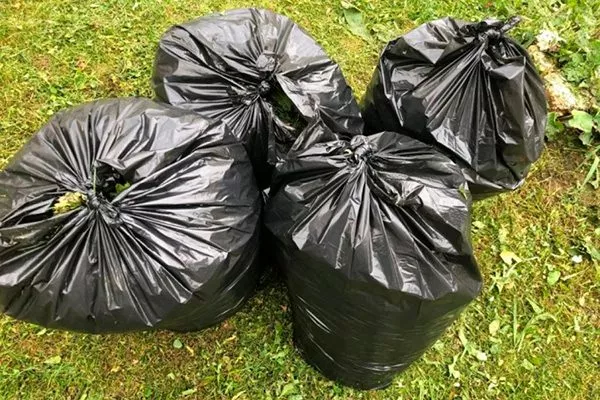
Bag and net
Compost is also made in bags, most often when there's no room for a bin or pit. Bag-like material is used, but black plastic bags are also acceptable.
Installation process:
- Remove the top layer of turf and place it on the bottom of the bag.
- Sprinkle chopped vegetation (weeds) on top.
- Add organic matter (chicken manure, manure, peat, etc.).
- Tie the bag at the top and leave to ferment for several months.
If you have fine-mesh galvanized wire mesh on hand, you can use it as a container. To create the structure, simply follow these steps:
- Roll the net into a cylinder with a 15 cm overlap.
- Secure with wire.
- Place lutrasil or spunbond inside. Secure the fabric at the top with staples or regular clothespins. Otherwise, it will fall down when you add organic matter.

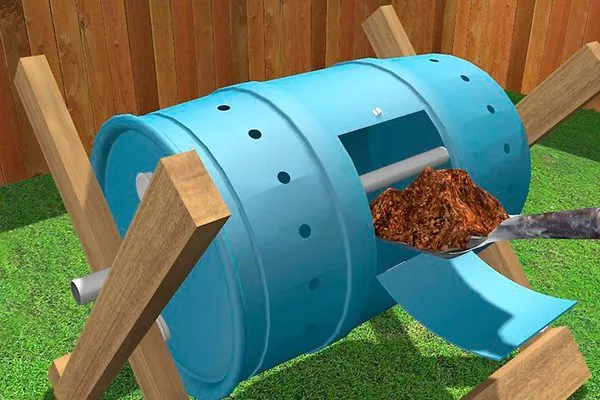
Barrel
The simplest option is if you have a barrel. Gardeners typically use metal models. Here's how to do it right:
- Drill ventilation holes around the perimeter of the barrel on all sides.
- On one side, cut out a rectangular or square window approximately halfway up the height.
- Form a door from the cut piece of metal, hanging hinges on it and the barrel.
- Make holes in the bottom and lid of the barrel. Insert the axle pipe.
- Place the organic matter - first the green components, then the brown ones.
- Open the door and leave it like that for 6 days.
- Close the container and rotate it around the axis of the pipe.
- Open the door again slightly. Throughout the composting process, rotate the barrel around the pipe every 2-3 days to speed up the fermentation process.
Punch
If you don't have the time or desire to mess around with bags, boxes, and other equipment, buy a ready-made composter. They cost between 3,000 and 7,000 rubles.
Commercial composters have many advantages:
- compactness;
- absence of unpleasant odors;
- ease of assembly and installation;
- composting speed and high quality of compost;
- aesthetics of appearance.
The devices are divided into 2 design types:
- Open. They don't have solid walls or a lid. They're considered budget-friendly, but they're rarely purchased by gardeners because they become overgrown with weeds and emit an unpleasant odor.
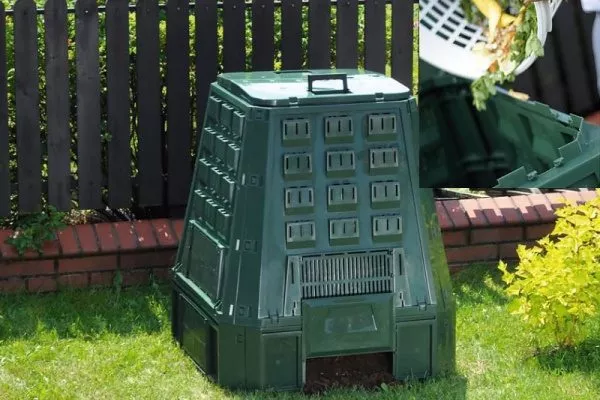
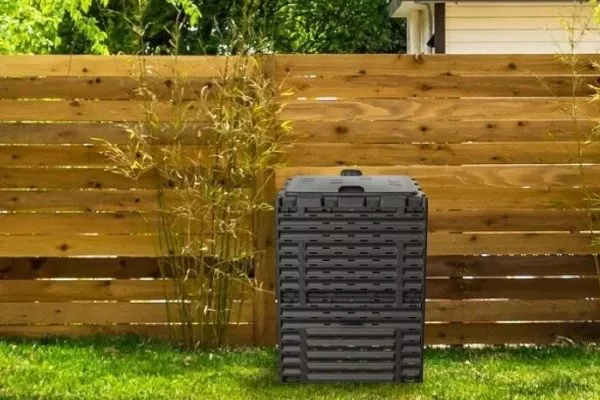
- Closed. These are structures with solid walls and a lid. They have ventilation holes. They are expensive, but offer many advantages.
Composters are divided into the following types according to their purpose and shape:
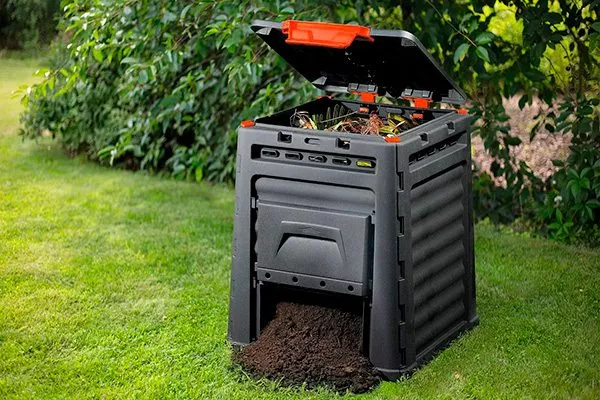
- Box-like design. Made from metal, polypropylene, and polyethylene plastic, it's easy to assemble and move, with a maximum capacity of 800 liters.
- Thermal composter type. It features walls lined with insulating materials to retain heat. This allows the compost to mature quickly. This composter can be used year-round. Some models come with built-in thermometers to monitor the temperature of the contents.
- Vermicomposters. The types available are underground and trough-type. The former have no bottom, as this opening is necessary for earthworms to enter. They are installed in a dug hole up to the lid.
The second tray is filled with organic matter and artificially inoculated with earthworms. Once one tray is processed, another is installed.
There are many models, but there are those that are particularly popular:
- ECO-Composter 320 L. Manufactured in Israel by Keter, the device is made of polymer plastic. It has a lid that snaps securely shut. Specifications:
- volume – 320 l;
- weight – 4900 g;
- dimensions – 65x65x75 cm;
- Feature: Removable flap to simplify the process of compost extraction;
- cost – about 7,400 rubles.

- EvoGreen 630 L. Produced in Poland by Prosperplast, it's made of plastic, but it's not rigid enough. The walls have ventilation holes, and the lid is hinged. Features:
- volume – 630 l;
- weight – 9600 g;
- dimensions – 90x91x13.45 cm;
- cannot be used in winter;
- cost – about 9,900 rubles.
- Piteco K1130. A Russian manufacturer uses frost-resistant plastic for its perforated box, designed for year-round use. This compact model is recommended for plots no larger than 400 square meters. It features a robust loading lid, making it easy to add organic matter.
Specifications:- volume – 300 l;
- weight – 6500 g;
- dimensions – 80x60x60 cm;
- feature - not very powerful locks;
- cost – about 2,800 rubles.
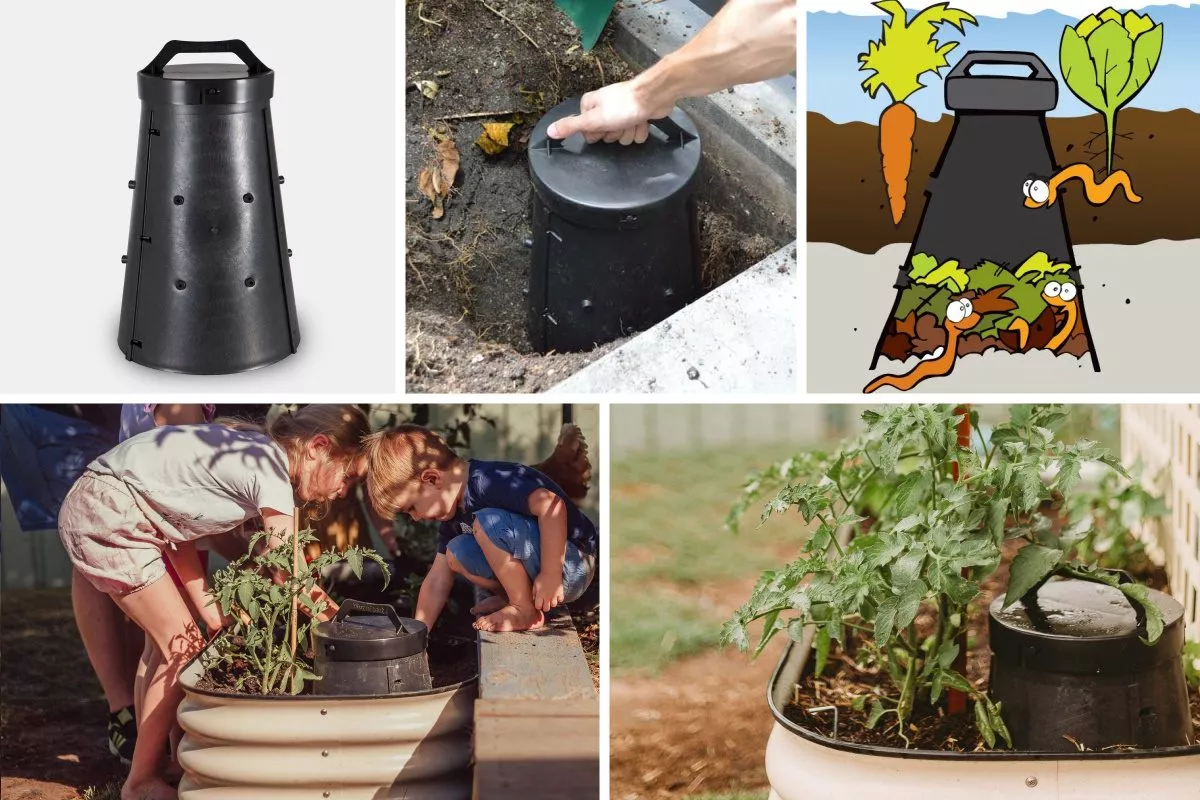
- Tumbleweed Worm Feast 22L. This vermicomposter was developed by Australian company Tumbleweed Worm Feast. It's shaped like a truncated cone and has a lid. It's designed for underground use. Features:
- volume – 22 l;
- height – 51 cm;
- material – plastic;
- price – about 2,900 rubles.
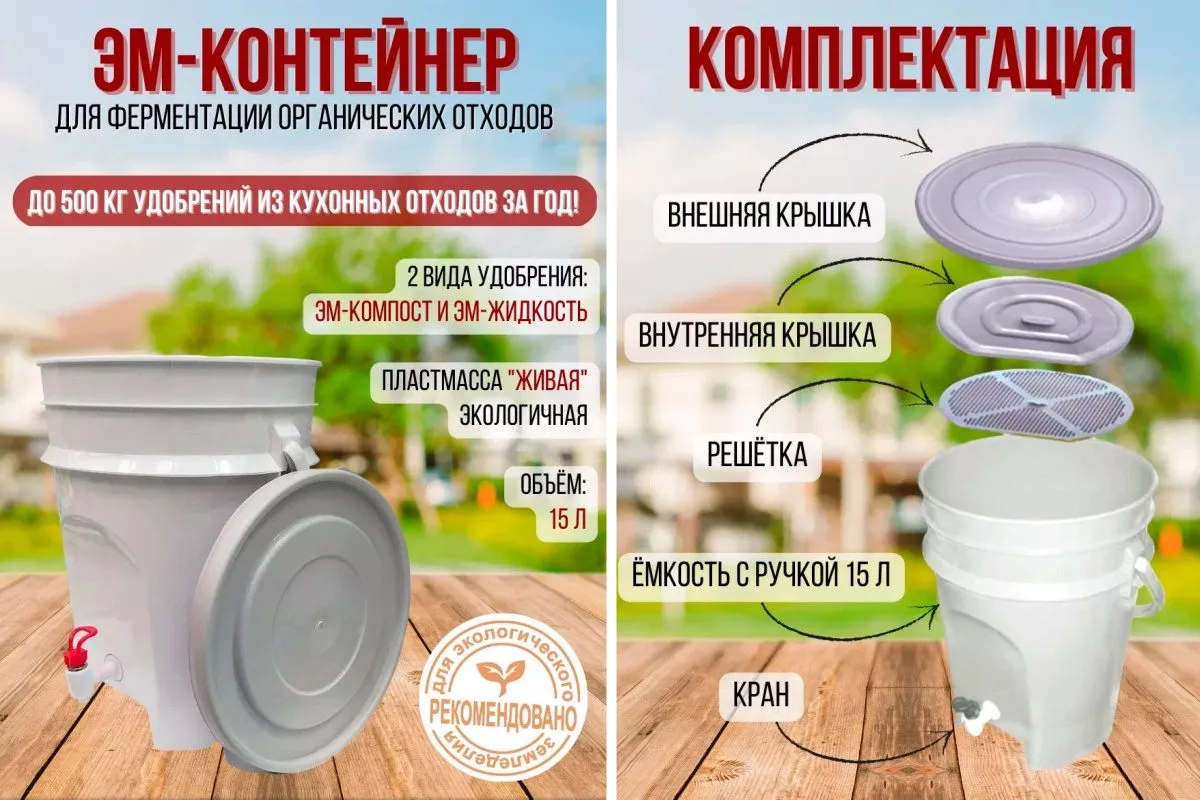
- Bask-Plastic Bucket EM-container. This is a unique, homemade mini-factory for recycling waste. It consists of a cylindrical container with a 15 cm raised bottom.
Designed for storing food waste and other materials directly in the kitchen. It's often used for fermenting organic matter and subsequently fertilizing houseplants. It's important to add composting products such as Vostok EM-1, which is replaced every 3-4 days. Specifications:- volume – 15 l;
- height – 40 cm;
- diameter at the top – 30 cm;
- fermentation time – from 7 to 10 days;
- cost – about 1,500 rubles.

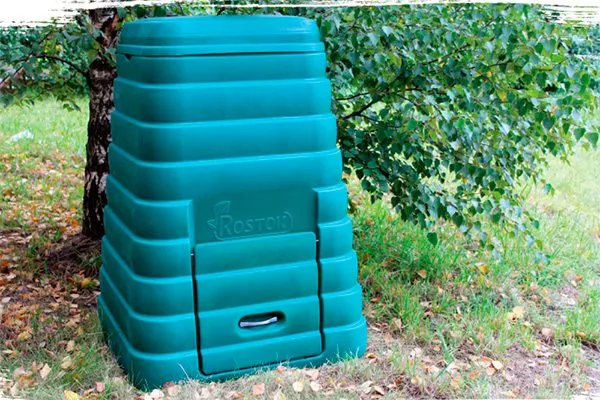
- Sprout. A popular model that can withstand temperatures down to -60 degrees Celsius. Rostok is a closed-type model that requires no pre-assembly. It is made of durable polyethylene plastic. Features:
- volume – 600 l;
- dimensions – 12.2x88.2x88.2 cm;
- weight – 17 kg;
- cost – about 6,400 rubles.
How to make biodynamic compost?
Biodynamic compost (BD) is based on the additional addition of plant-based preparations (nettle, chamomile, oak bark, dandelion, etc.) to the compost pile. Add biodynamic preparations once the pile reaches a height of 1 m.
Types of databases:
- activator - poured into a pile that has just been laid;
- Fladenpreparat or barrel preparation – additionally improves the composition of the soil;
- No. 502-507 – made exclusively from herbs.
Dosage, period of administration and other parameters depend on the specific drug.
Features of preparing hot compost
The hot composting method significantly accelerates the fermentation process—organic matter can be used 30-40 days after placement. It was developed by Nikolai Kurdyumov. How to prepare "hot" compost:
- Make 2 wooden boxes with slots.
- Place organic matter in layers on the bottom of one:
- weeds, leaves, etc.;
- manure;
- paper or dry leaves, eggshells;
- humus or soil.
- Pour warm water over the workpiece.
- Cover with dark plastic.
After about a week, the temperature inside the container should reach 70 degrees Celsius. During this period, transfer the contents to a second drawer. Make sure all components are aired out. Repeat three times.
There's another method of hot composting—the Berkeley method. It's an accelerated process—the compost will be ready on the 18th day. What to do:
- Place the components in a box to form a 150 cm pile. It's important to maintain a 30:1 ratio of nitrogen to other components. The temperature in the center of the pile should reach up to 65 degrees Celsius.
- During the first 4 days after laying, stirring the pile is prohibited.
- On the 5th day and every other day thereafter, turn the contents over.
Compost preparation according to Annenkov
Annenkov suggests using only natural ingredients. How composting is done:
- Place freshly picked weeds and organic waste in layers anywhere in the garden, right down to the contents of the peat toilet.
- Cover the mass with plastic.
- Leave until the compost is fully mature.
Where to place the compost bin?
Try to create and place your compost pile in the far corners of your garden, as the pile will emit unpleasant odors. There are other placement considerations:
- Avoid exposure to direct sunlight as this will slow down decomposition;
- partial shade is desirable;
- Do not dig a compost pit near shrubs and trees – their root system will absorb all the nutrients;
- There should be no drinking water sources (springs, etc.) nearby.
Compost maturation time
Fermentation time is influenced by many factors—composition, proportions, humidity, turning, and temperature. For example, compost matures twice as fast in summer as in winter.
Features of composting periods:
- The layered universal composition becomes ready for use in 6-12 months;
- in some cases, when a person does not help the decomposition process in any way, the time is delayed for 2-2.5 years;
- If you add manure or a small portion of ready-made compost, the maturity time will come in 6 months.
How to check if compost is ready?
Ready-to-use compost has its own characteristics:
- darkening of color, up to brown-black;
- change in smell - it becomes similar to wet soil;
- structure – looseness and flowability are noted;
- The consistency is uniform, it is impossible to see the components separately.
How to speed up compost maturation?
To speed up the process, various methods are used, including agricultural ones – adding a layer of soil with living organisms, moistening during drought, covering with film during heavy rains, planting cucumbers, squash or zucchini on top.
- Turn the compost pile regularly every 2-3 weeks to improve aeration.
- Maintain humidity at 50-60%, adding water as needed.
- Use compost accelerators, such as Baikal M-1, according to the instructions.
Purchased accelerators
Today, there are many compost accelerators available, including the following:
- Baikal M-1. The most popular biopreparation. It comes as a concentrate that needs to be diluted with water. The working solution is added 25-30 days after the pile is laid.
- BB-K035 and BB-K005. Produced in solution and powder form, they are used during component loading.
- Gumi-Omi Compostin. The solution must be diluted with water and poured into the hole when adding organic matter.
- Oxyzine. Liquid form that is added to water in drops.
- Compostello. The powder combines with water and helps to grind even the seed parts of plants.
- EM-Bokashi. The base is fermented wheat bran and is available in powder form.
- Doctor Robik. Contains soil bacteria, packaged in sachets.
Traditional methods
Fans of folk methods recommend using the following:
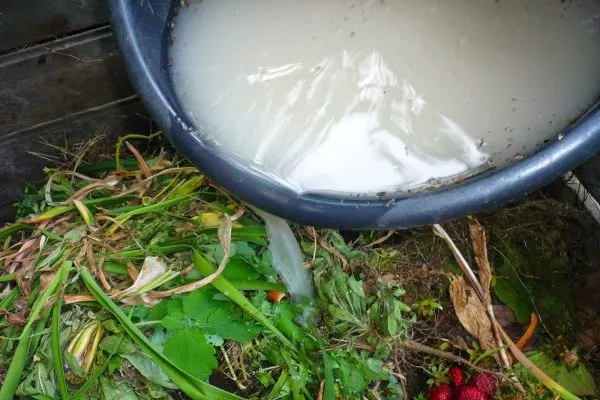
- Herbal infusion. To prepare the infusion, take 2.5 parts of any herb (pre-chopped with a knife), 1 part chicken manure, and 10 parts water. Let it steep outdoors for about 10-20 days, depending on weather conditions.
- Yeast. To prepare the working solution, add 2 tablespoons of dry yeast to 2 liters of warm water. Add 400 g of granulated sugar and mix thoroughly.
Make a hole in the compost bin to introduce the fertilizer. Pour it in gradually.
What difficulties may arise during the compost preparation process?
Novice gardeners especially often encounter problems. To avoid unpleasant moments when composting, pay attention to the mistakes and difficulties that arise during the process:
- Invasion of ants. They usually appear when the pile is extremely dry. This slows down the decomposition of the components. The solution is simple: water the pile generously, but avoid waterlogging.
- Slimy structure and foul odor. The cause of this problem is an excessive amount of plant ingredients. There's only one solution: dig up the pile and add paper, hay, straw, and dried leaves.
- A swarm of midges. These could be fungus gnats circling the compost surface. They appear due to increased moisture in the composting substrate. A small number of them is normal, but if they are excessive, take action. What to do:
- Dry in the open air - during hot weather, open the pile and turn it over;
- add hay, straw or paper.
- There are no changes in the heap. This indicates that fermentation is not occurring. Most often, this slowdown occurs due to the substrate drying out. There are several ways to moisten it:
- add freshly chopped weeds;
- add some fresh potato peelings;
- Water the pile daily with warm, settled water.
To ensure the compost matures quickly and efficiently, lightly moisten it every morning, add composting stimulants, and stir the mixture frequently. Pay special attention to insulating the compost structure in the fall by covering the box with peat moss and then with tree leaves.