The Kapelka pumpkin is a Russian-bred nutmeg variety with medium-sized, pear-shaped fruits. The fruits ripen evenly, are tasty, and convenient for culinary use. The variety is easy to grow, productive, and tolerates environmental factors well.
History of creation
The Kapelka variety was developed jointly by breeders from the All-Russian Research Institute of Irrigated Vegetable and Melon Growing, Agrovnedrenie LLC, and V.N. Tatishchev Astrakhan State University. It was added to the State Register in 2017. It is suitable for cultivation in all regions.
Description of the Droplet pumpkin
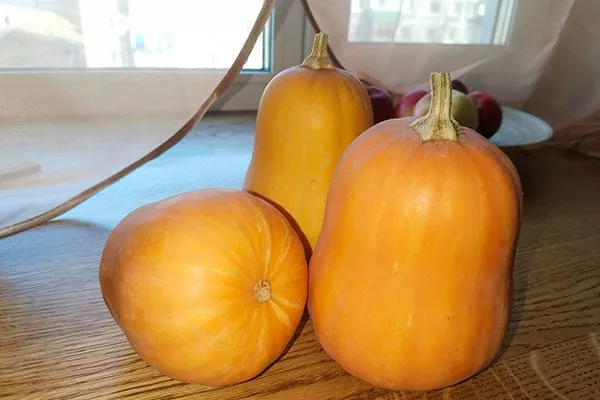
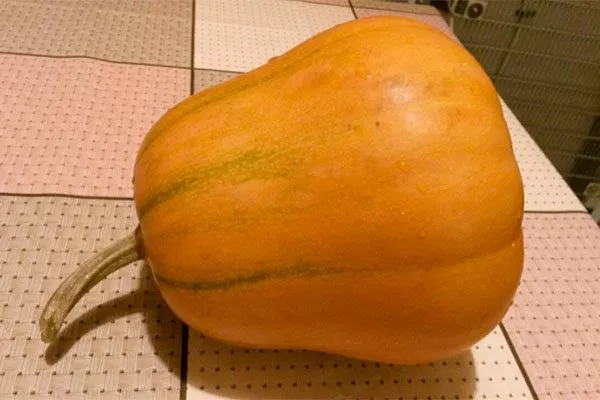
The Kapelka pumpkin has a climbing plant with slightly dissected, green leaves with white spots. The fruits are small, segmented, and have a matte surface.
Brief description of fruits:
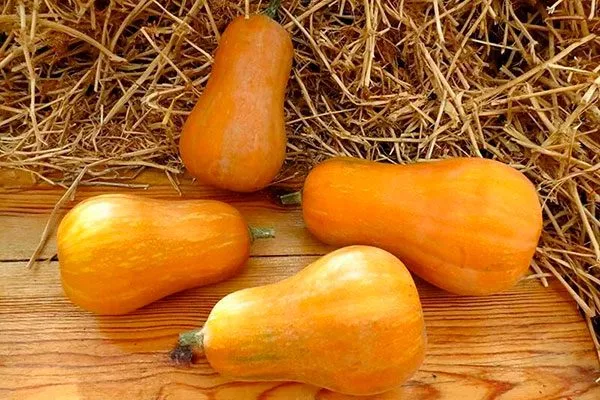
- Rind color: light cream, with faint stripes.
- Shape: pear-shaped-cylindrical.
- Length: 16-18 cm.
- Diameter: 9-12 cm.
- Flesh: deep orange.
- Weight: 0.8-1.3 kg.
A single plant can produce up to 20-25 pumpkins. The seed pod is medium-sized and located at the apex of the fruit. The plantlets (bundles of vessels that supply nutrients to the fruit tissue, loose and filling the entire seed chamber) are medium-dense, and the seeds are small and cream-colored.
Taste and purpose of fruits
The fruits have a pleasant flavor, with crisp, tender yet firm flesh, medium juiciness, and a sweetish flavor, high in carotene. This variety is intended for table use. Kapelka pumpkins are used to make juices, porridges, purees, and other culinary dishes, and they can also be eaten fresh.
Characteristics
The Kapelka pumpkin is a mid-season variety. It takes 100-110 days from germination to fruit ripening. This variety is quite productive, yielding 3-3.2 kg of fruit per square meter, with irrigation.
Pros and cons
Just looking at the Kapelka pumpkin is enough to make you want to plant it in your garden. But before planting this variety, it's helpful to familiarize yourself with all its advantages and disadvantages.
Landing
The Kapelka pumpkin can be grown using seedlings or direct sowing. The latter method is considered easier, but is used primarily in the south of the country. To harvest on time, before frost, gardeners in most regions must start from seedlings.
Selecting a site
When planting your Kapelka pumpkin, choose a site that provides warmth and light. Pumpkins should avoid shade, as should high groundwater levels. Avoid planting pumpkins in low-lying areas, as water accumulates there, leading to disease and the death of the plant. Alternatively, create pumpkin beds at least 40 cm high.
- ✓ The soil pH level should be strictly within 6.5-7.0 for optimal nutrient absorption.
- ✓ The soil must contain at least 3% organic matter to provide the necessary structure and nutrition.
The Kapelka pumpkin requires fertile, light, and loose soil that is well-drained and permeable to moisture and oxygen. The soil should be neutral (pH 7.0). Pumpkins do not grow in acidic or heavy clay soils.
Site preparation
Preparatory work is recommended to begin in the fall. The area is cleared of weeds and plant debris. Then, organic fertilizer—well-rotted manure or compost—is evenly distributed over the area at a rate of 20 liters per square meter. It is also recommended to add 10 liters of sand and wood ash, as well as 2 tablespoons of superphosphate and potassium sulfate.
In the south, the soil is simply dug over with fertilizer, while in the central zone (and further north), it is recommended to form pumpkin beds using organic matter, sand, and leaf mold. All ingredients are thoroughly mixed and the beds are made 40 cm high and 1.5-1.7 m wide, with the length being up to your preference.
Sowing in the ground
In the south of the country, pumpkins, including the Kapelka variety, can be grown by direct sowing of seeds into the ground.
Features of sowing in open ground:
- It is recommended to grow the variety using the square-nest method.
- The optimal sowing pattern is 70-80 cm between plants and 90-100 cm between rows.
- The optimal depth of the holes is 5-10 cm.
- The seeds are planted in the hole with the pointed ends down, 3-5 pieces in each.
- Planting depth depends on soil density. In light soils, seeds are planted 8-10 cm deep, while in denser soils, they are planted 4-5 cm deep.
- The seeds are sprinkled with loose soil and compacted lightly. The crops are covered with transparent film until the seedlings emerge.
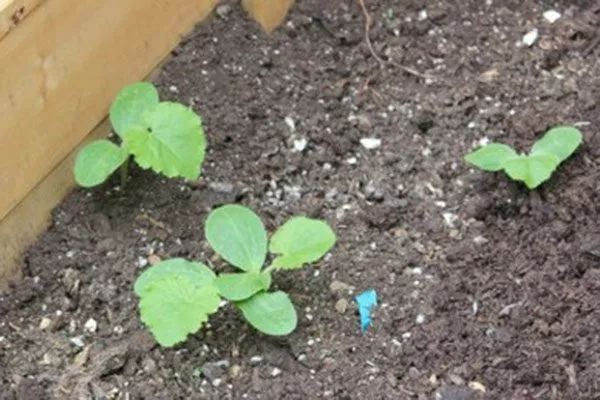
Growing seedlings
Kapelka pumpkin seedlings are sown in late April to early May. In warmer climates, pumpkins can also be grown from seedlings; here, sowing occurs earlier—in late March to early April.
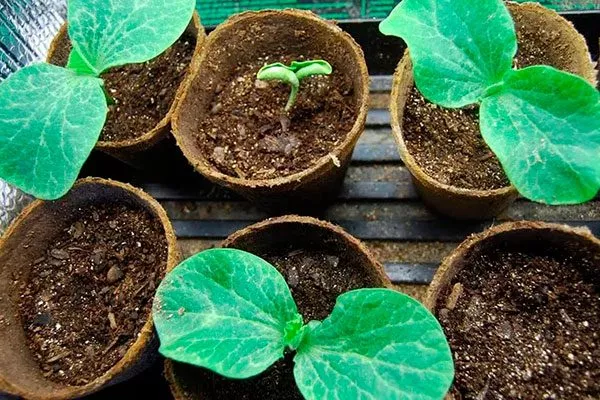
Features of growing Kapelka pumpkin seedlings:
- For planting, choose containers with a capacity of at least 300-500 ml. Pots or cups must have drainage holes in the bottom to allow excess water to drain.
- Planting containers are washed with hot water, and previously used containers are additionally disinfected, for example, with a solution of potassium permanganate (1 g of the substance is diluted in 1 liter of water), hydrogen peroxide, copper sulfate and other disinfectants.
- Planting containers are filled with ready-made seedling substrate or a homemade soil mixture. For example, you can mix equal parts turf soil, neutral-pH lowland peat, and compost. Coconut oil or rotted sawdust can be added to the mixture to loosen the soil.
- The seeds are planted in soil pre-moistened with water. The water is sprayed from a spray bottle. The water should be warm and settled. The seeds are planted 2 cm deep and covered with dry soil. To increase germination, two seeds can be planted in a single pot, spaced 2-3 cm apart.
- The seedling containers are kept under transparent film until germination. The cover is removed daily to allow the seedlings to air out. The optimal temperature for germination is 23–25°C.
When sprouts appear, remove the film immediately. This should be done as soon as the seedlings' "loops" are visible in the soil, otherwise they may die due to high temperatures, simply "cooking."
Seedling care:
- During the first week after germination, the temperature is lowered to 16–18°C to prevent the seedlings from becoming too tall. Nighttime temperatures should be between 12–14°C. Subsequently, the temperature is raised again and maintained at 22–25°C.
- Pumpkins require 12 hours of daylight per day. Seedlings require ample light, so it's recommended to keep them on south-facing windowsills. During midday, shade the seedlings to protect them from direct sunlight. If natural light is insufficient, artificial lighting can be used.
- During the growing season, seedlings are fed twice. The first feeding is done 10 days after germination, using a calcium nitrate solution. The second feeding, using mineral complexes, is done 10 days after the first.
- Water the seedlings as the top layer of soil dries. It's important to avoid overwatering or overdrying. A spray bottle can be used for watering. It's important not only to moisten the soil from the surface, but also to soak it to a depth of 3-4 cm. Use only warm water.
If seedlings are to be planted outdoors, they need to be hardened off for 1-2 weeks before planting. Acclimate the plants to the outdoors gradually, starting by taking them outside for 2 hours, shading them from the sun, and protecting them from the wind. Increase the amount of time the seedlings are exposed to the outdoors each day.
Care Features
The Kapelka variety requires standard care; plants must be watered, fed, and sprayed for preventative purposes on time.
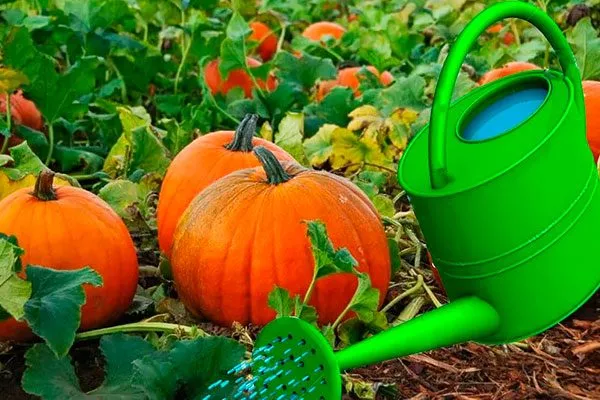
Watering
Pumpkins are watered infrequently but generously. Watering can be combined with fertilizing. On average, the plant is watered once every 10 days. The frequency of watering depends on the amount of rainfall, weather conditions, and soil conditions. The plant requires more water during flowering and fruit ripening.
Loosening
It's especially important to loosen the soil in pumpkin beds while the plants are small. Avoid allowing a hard soil crust to form, which can impede oxygen supply to the roots. If the beds are mulched, you don't need to loosen them; otherwise, loosening is required after each watering or rainfall.
Top dressing
At the beginning of the growing season, pumpkins are fed with nitrogen-containing fertilizers, such as organic matter such as diluted cow manure or slurry. A total of four feedings are performed per season, at two-week intervals.
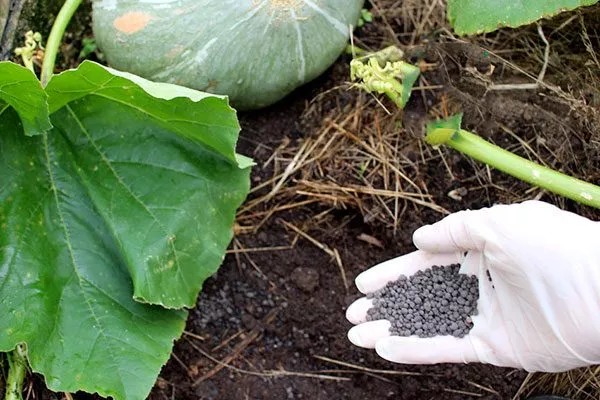
In July, organic matter is replaced with mineral fertilizers, followed by ammonium sulfate, followed by potassium sulfate. For the third feeding, use monopotassium phosphate, and for the fourth, a complete mineral complex for pumpkin crops.
Diseases and pests
The Kapelka pumpkin has a fairly good immunity, but poor agricultural practices and unfavorable weather conditions increase the risk of anthracnose, root rot, and bacterial blight. When signs of these or other diseases appear, use effective fungicides, and spray with Bordeaux mixture or copper oxychloride for prevention.
Harvesting and storage
The mid-season Kapelka variety ripens by mid-September (in temperate climates). It's important to harvest the fruit before frost sets in. Don't pick the fruit, but cut it off, leaving 5-10 cm stems to prevent rot.
- ✓ The storage temperature must be stable, without fluctuations, to avoid condensation of moisture on the fruits.
- ✓ Relative humidity should be maintained at 75-80% to prevent fruit drying out.
The fruits are wiped with a dry cloth to remove any remaining soil and moisture. Only those without rot, dents, or other defects are stored. Pumpkins should be stored in well-ventilated areas at a temperature of 5 to 8°C and a humidity of 75-80%. The fruits should not be exposed to direct sunlight.
Reviews
The Kapelka pumpkin is a very interesting and promising variety with single-piece fruits. It's easy to grow, productive, and virtually disease-free. The only thing to keep in mind is that this pumpkin doesn't store well; don't expect the fruits to last until the next harvest.
Thanks to such a detailed description of the variety, I was able to choose a specific pumpkin. This season, I'll be planting the Kapelka variety. Plus, you clearly and understandably described the entire planting and growing process. Thank you, I wish there were more helpful articles like this!
A good article, beautifully written. However, the recommendation of a 0.8 x 0.8 m planting spacing is clearly not suitable for this pumpkin. I planted it according to this scheme in the spring, and now a major problem has arisen: the vines are sprouting like crazy, growing 0.3 m overnight, and pruning doesn't help much. I can only trim around the edges, but it's impossible to get into the center. Watering is also essential, as such a mass of leaves evaporates a huge amount of moisture. A 2 x 2 m planting would be better for this pumpkin. The shoots root easily and quickly cover the entire area. And this is a truly excellent variety, producing a large amount of fruit. The extra fruits, the size of large pears, can be used as zucchini all summer long. They are much tastier than zucchini in any form.
Excellent comment, thank you for sharing your personal experience! You're absolutely right—the vigorous growth of this variety's vines is impressive. The 2x2 m pattern should truly be considered optimal for ease and care. This is a valuable practical recommendation that will help many avoid difficulties. And yes, using young fruits is a brilliant idea!
We are glad that you liked the variety despite its violent nature.