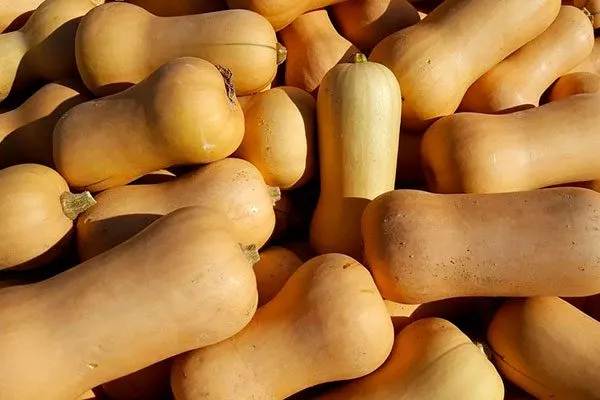
The Peanut Butter pumpkin is a nutmeg variety with a wonderful flavor and pleasant aroma. Its pear-shaped fruits are very large and shelf-stable, offering not only nutritional but also decorative value.
Description of Pumpkin Peanut Butter
The Peanut Butter pumpkin plant is vigorous and vining. The main vine reaches 4-5 m in length, with several secondary and tertiary vines branching off from it. The leaves are large and five-lobed. The seed chamber is small and located in the thickened part of the fruit.
Brief description of fruits:
- Bark colour: initially light green, becoming creamy beige as it matures.
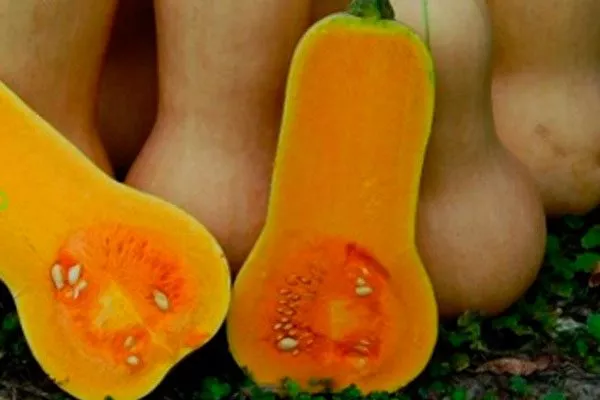
- Pulp color: orange.
- Shape: Pear or hourglass shaped.
- Fruit length: 40 cm.
- Flesh: dense and crisp.
- Bark: thin.
- Weight: 1.5-4 kg.
Up to 30 full-fledged fruits are formed and ripen on one plant.
Who developed the variety and when?
The Peanut Butter pumpkin variety belongs to the musk gourd family and is a product of German selection. The ancestor of modern "nut" pumpkins is considered to be the Butternut squash, developed by American breeder Charles Leggett in 1944 and created by crossing Gooseneck squash and Hubbard pumpkins.
After the development of the Butternut Squash, nut-butter pumpkins began their triumphant march across the globe. Breeders in every country are developing similar varieties. The Peanut Butter pumpkin, developed in Germany, is considered one of the best butternut squash varieties in Russia and is grown throughout virtually the entire country.
Taste and purpose of fruits
The flesh of the Peanut Butter pumpkin is very sweet, dense, and oily, with a smooth consistency. It has a pleasant aroma, with hints of watermelon. The flesh is fiber-free. This pumpkin has excellent flavor. It contains up to 36 mg of carotene, several times more than carrots.
The fruits have a versatile use, being eaten fresh and also used for all types of processing. This pumpkin is ideal for cooking, and its pulp is used to make juices, baby food, and dietary nutrition.
Characteristics
The Peanut Butter pumpkin is an early-ripening variety. The average yield is 6-10 kg/sq.m. The variety is resistant to most common infections. It has limited drought and cold tolerance.

Pros and cons
The Peanut Butter pumpkin variety has many advantages, which has kept it popular for a long time. However, before planting this pumpkin in your garden, it's recommended to familiarize yourself with all its pros and cons.
Landing
To grow a good, large, and delicious pumpkin, you need not only to take good care of the plants but also to plant them correctly. Pumpkins are planted either by direct seeding or from seedlings. The former is used primarily in the south, while the latter is used in other regions.
Site selection and preparation
The variety prefers warm, sunny sites, level or slightly elevated. This butternut squash grows best in black soil, sandy loam, and light loamy soils. It is unsuitable for acidic, clayey, or waterlogged soils.
The soil for planting is prepared in the fall. The soil is plowed or dug over. Compost, rotted manure, chicken manure, humus, or vermicompost are added during digging. Wood ash and mineral fertilizers such as superphosphate and potassium sulfate are also recommended.
- ✓ The groundwater level should not exceed 1.5 m from the surface.
- ✓ Optimum soil temperature for planting: +14…+16 °C at a depth of 10 cm.
Seed preparation
It's recommended to prepare seeds before planting them in the ground or as seedlings. This will increase their germination rate and result in strong, healthy plants. If the grower has already performed the pre-planting preparation, all that remains is to germinate the seeds.
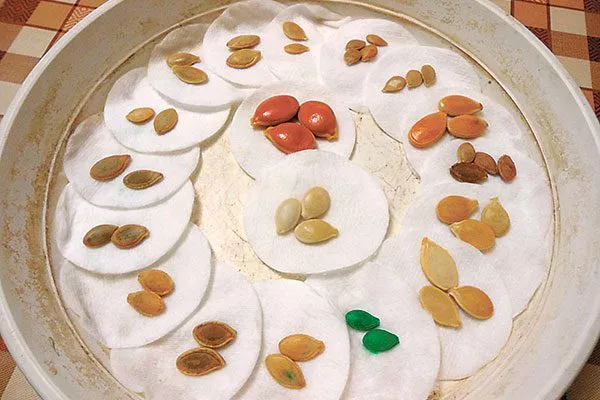
When using self-assembly, it is recommended to carry out a whole cycle of preparatory measures:
- Calibration and sorting: Seeds of uniform size are selected. This can be done manually. A salt solution helps select high-quality specimens; any non-viable seeds float to the top.
- Heating—this can be done in an oven or in the sun for 5-6 hours. The sun's rays disinfect the seeds and prevent the development of fungal diseases.
- Soaking and germination. The seeds are immersed in warm water for 10–12 hours. The swollen seeds can be sown after being dried. Alternatively, they can be germinated until small sprouts appear.
Sowing scheme
In the south, pumpkins are sown in open ground from May 10th to 15th, when the soil warms to 14–16°C. In more northern regions, this occurs in late May or even early June.
Sowing features:
- Seeds, like seedlings, are planted only in warm soil, warmed up to +14…+16 °C, the air should warm up to +18…+23 °C.
- Dig holes 5-10 cm deep for planting. The optimal sowing pattern for the Peanut Butter variety is 80x80 cm, but a more spacious option of up to 100x100 cm is also suitable.
- Place 3-5 seeds in each hole, pointed ends down. Leave 3-5 cm between adjacent seeds.
- The sowing depth depends on the soil density. In light soils, pumpkins are sown 8-10 cm deep, while in heavy soils, they are sown 4-5 cm deep.
- The seeds are covered with loose soil and lightly compacted. Immediately water the holes with warm water from a watering can, being careful not to wash away the planted seeds. Watering continues until seedlings emerge.
- The crops are covered with transparent polyethylene film. Seedlings usually emerge within 6-8 days, after which the covering material is immediately removed or holes are cut in it for the sprouts.
Growing and planting seedlings
Seeds for seedlings are sown 20-25 days before the expected planting. In the Moscow region, sowing occurs from April 20 to May 5, and seedlings are planted outdoors in early June. In southern Russia, seedlings are sown much earlier, in mid-March, and the plants are transplanted into the garden beds in the last weeks of April. In Siberia and the Urals, seedlings are planted in late June.

Features of growing pumpkin seedlings Peanut butter:
- Pumpkins react extremely negatively to transplanting. There's no need to transplant the seedlings. Therefore, seeds are planted directly into individual 300-500 ml containers.
- The seeds are planted approximately 2-3 cm deep in pre-moistened soil, with the pointed ends facing down. Sprinkle the seeds with loose soil and moisten with warm, settled water.
- Place the pumpkin seedlings in the container in the sunniest spot indoors. If light levels are low, turn on grow lights.
- Pumpkin hardening begins as soon as the seedlings emerge. Seedlings are brought outside when the air temperature is at least 18°C. Hardening begins at 1 hour, increasing the time spent outdoors by 1 hour each day.
Features of planting seedlings in the ground:
- For planting, dig holes about 15 cm deep. The hole should be approximately 5 cm larger than the peat cup or root ball in which the plants will be planted.
- Fertilizer is added to each hole, for example, a couple of tablespoons of wood ash and a couple of handfuls (250 ml) of humus.
- Pumpkin seedlings are transplanted by transshipment, taking care not to disturb the roots. There is no need to bury the root collar. After planting, the plants are watered with warm, settled water and mulched with dry straw.
- If the nighttime temperature drops below 15°C, the seedlings are temporarily covered with plastic film. Alternatively, each seedling is covered with a 5-6-liter plastic bottle with the bottom cut off.
Care Features
The Peanut Butter variety is easy to grow, like the plant itself. The only thing it doesn't tolerate is cold. This pumpkin is quite tolerant of all other weather conditions.
Watering and loosening
Peanut Butter pumpkin is a moderately moisture-loving variety. On average, it needs watering once every 7-10 days. About a month before harvest, watering is stopped to prevent the pumpkin from becoming waterlogged and rotting during storage.
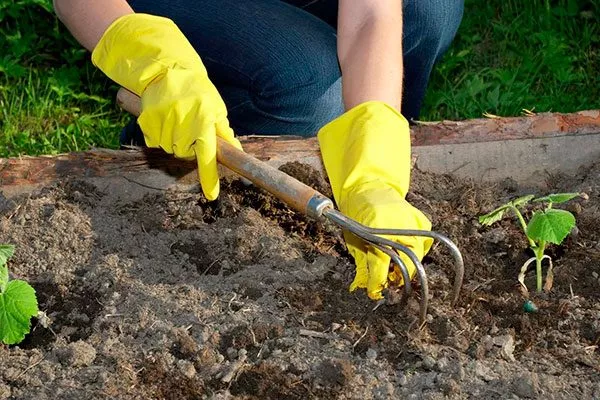
It is recommended to loosen the beds the day after watering (or rain). To stimulate the formation of adventitious roots, it is also recommended to hill the plants with slightly moistened soil. Initially, the beds are loosened to a depth of 8-10 cm; later, when the plants have 5-6 true leaves, to a depth of 6-8 cm.
Top dressing
Pumpkins are fed alternately with organic and mineral fertilizers. Two weeks after planting, the plants are fed with a manure infusion. Subsequently, the pumpkins are watered with an herbal infusion every two weeks.
- 2 weeks after planting: manure infusion (1:10 with water).
- Every 2 weeks: herbal infusion (nettle, dandelion).
- When ovaries appear: potassium monophosphate (10 g per 10 l of water).
When the plants begin to set fruit, they switch from organic fertilizers to mineral fertilizers. Monophosphate is added (10 g per 10 liters of water). Intervals of 2-3 weeks are allowed between applications.
Diseases and pests
The Peanut Butter variety has high immunity to most pumpkin diseases and is rarely affected by rot. Biological fungicides such as Gamair, Alirin-B, Gliokladin, and others can be used to protect plants from diseases.
The most dangerous pests for the Peanut Butter variety are slugs and snails. To combat them, create barriers of gravel, mustard, and special granular pesticides.
Harvesting
The harvest period is August-September, depending on the growing method and climate conditions. It's important to harvest the fruit before rain, dampness, and frost. Pumpkins are cut with sharp pruning shears, separating them from the stem along with the 10-cm-long stalk.
The fruits are wiped with dry cloths to remove any remaining soil and moisture. Any specimens with signs of rot or other defects are discarded. Pumpkins are stored in dry areas. The optimal temperature is between 10°C and 12°C. It is recommended to wrap the fruits in paper. It is best to store them on the floor in a single layer.
Reviews
The Peanut Butter pumpkin is one of the oldest and most proven varieties, reliable and productive. Growing this pumpkin guarantees a good harvest of fairly large and delicious fruits.
It's great that in your articles you mention the potential of this vegetable for baby and dietary nutrition; this is important for many. After reading the article, I decided to plant this variety. I followed the growing guidelines outlined in your article and ended up with a healthy harvest of delicious, vitamin-rich pumpkins. Thank you for your efforts!