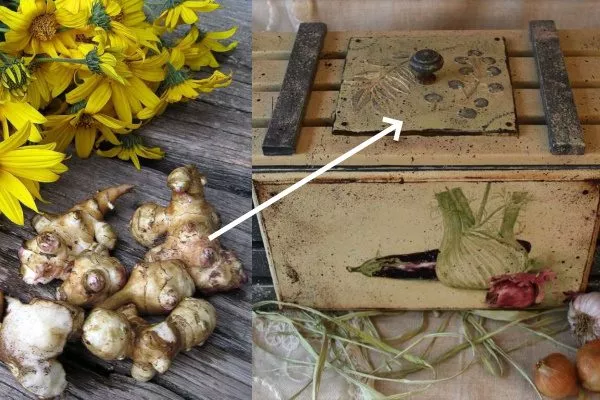
If you're planning to grow Jerusalem artichokes (Jerusalem artichokes) at your dacha, be sure to learn the proper harvesting times and storage guidelines. This will determine whether the tubers you dig up will be plump and tasty, and whether they will retain their quality and nutritional properties during storage.
Why is it important to harvest on time?
For the harvest Jerusalem artichoke If you've been pleased with the high quality characteristics of Jerusalem artichokes, dig up the tubers promptly—as soon as they're fully ripe. This ensures that your Jerusalem artichoke will be large, juicy, and delicious.
The timeliness of harvesting also affects the shelf life of the Jerusalem artichoke. By digging up fully ripe tubers in the fall, you can avoid significant losses during storage.
Untimely autumn harvesting of Jerusalem artichokes is fraught with complications:
- when harvested early – a decrease in the nutritional value of the harvest, since most of the nutrients will remain in the green parts of the plant;
- during late harvesting – withering and drying of the tops, loss of their nutritional qualities.
Late harvesting doesn't harm the tubers. They're frost-resistant and are often left to overwinter in the garden. However, digging them out of frozen soil is difficult.
It's important for gardeners to not miss the spring harvest, as tubers begin to sprout at soil temperatures of +3°C. If you miss the moment, you risk digging up Jerusalem artichokes that are unfit for consumption.
How to determine when Jerusalem artichoke is ripe?
Knowing the ripening time of the Jerusalem artichoke variety you're growing will make it easy to calculate when it's ready to be dug out of the soil:
- 110-120 days from emergence - early varieties;
- 130-140 days - average;
- 150 days and more - late.
It's easy to identify a ripe Jerusalem artichoke by its appearance. The main sign is wilting of the top.
- ✓ A change in the color of the tubers’ skin to a more intense color indicates their ripeness.
- ✓ The appearance of small root hairs around the tubers indicates readiness for harvesting.
Jerusalem artichoke harvesting times
There's no set time for harvesting Jerusalem artichoke. In temperate climates, it's common to dig up the tubers for storage beginning in the second half of October. Harvesting is completed in early November.
Follow this plan for harvesting Jerusalem artichoke from your garden beds:
- From the first ten days of October, dig up young tubers to prepare salads.
- During October, cut the tops for livestock feed.
- At the end of October or the beginning of November, collect the tubers for storage for 1-2 months.
- From November until spring harvest, dig up overwintering tubers as needed.
- In the spring (around March, as soon as the soil begins to thaw), collect the Jerusalem artichokes remaining in the garden beds after wintering for consumption or for use as planting material.
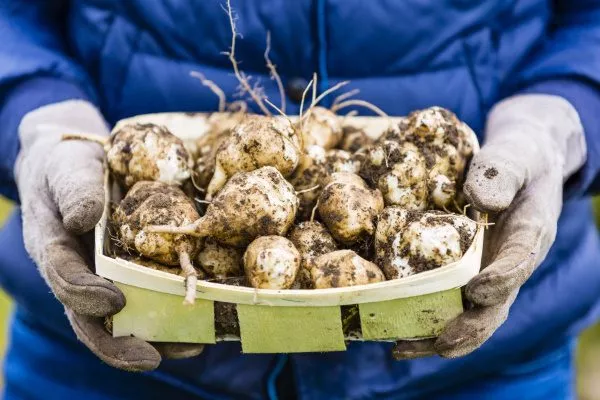
How to dig up Jerusalem artichoke?
Harvest Jerusalem artichokes on a dry, sunny day. Follow these steps:
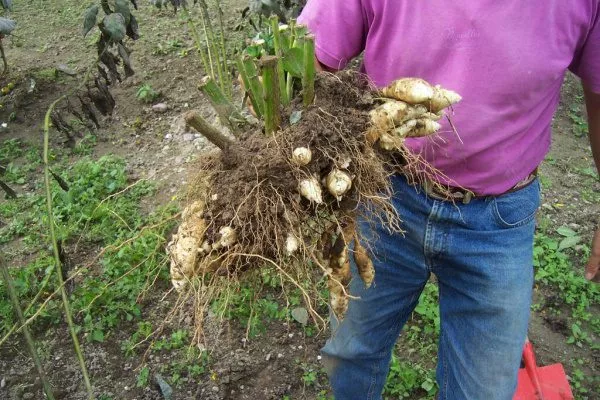
- Cut back all Jerusalem artichoke bushes in the garden beds in advance, leaving stumps 25-40 cm tall. These indicate the location of the tubers in the ground. Remove the tops of the plants, even if you plan to leave some of the harvest in the garden over the winter.
- Use a shovel or pitchfork to dig the Jerusalem artichoke out of the ground. Starting from the stump, dig around the bush on all sides. Use the tool carefully, being careful not to damage the tubers.
- Holding the bush by the cut stem, carefully remove its lower part from the soil.
- Separate the tubers, but do not cut off the stems completely to avoid shortening their shelf life. Brush off any remaining soil from the Jerusalem artichokes with your hands.
- Place the harvested crop in buckets and take them to the storage location.
Leaving a 10-15 cm rootlet attached to the tubers when digging them will improve their shelf life and ensure maximum preservation of nutrients. Drying the harvest is only necessary if the soil is moist at harvest.
How to store the harvest?
Jerusalem artichokes don't have a long shelf life at home. Their thin skin makes them poorly protected from rotting and drying out. For eating, they are usually dug up in small quantities. They spoil within a few days of being kept in a warm place.
For longer storage of Jerusalem artichokes, a special microclimate is required:
- high air humidity (85-90%);
- temperature below +4 ⁰С.
Exposure to sunlight negatively affects the taste, appearance, and shelf life of Jerusalem artichoke. Storage conditions should be kept dark.
The following storage methods will allow you to preserve the taste and nutritional properties of Jerusalem artichokes dug up in late autumn for 1-2.5 months:
- in a cellar or basement;
- on the balcony;
- in the refrigerator or in the freezer.
Drying of the harvested crop is also possible.
In the cellar
To ensure that your harvest is stored in the cellar without loss for 45-60 days, select tubers that meet the following characteristics before sending them there:
- not damaged during digging;
- no signs of damage;
- one size;
- with yellow or brown skin;
- hard and elastic.
Don't wash your harvest before storing it. Store your harvest in the cellar using the following methods:
- in the sand that fills the box (sometimes along with carrots);
- in wooden containers or plastic containers, filling the tubers with clay;
- in boxes under a layer of moss, peat or sawdust;
- in tightly tied plastic bags, folded into a sack and sprinkled with earth.
In the refrigerator
Store Jerusalem artichokes in the refrigerator for 25-30 days. This method is suitable for gardeners who have a modest harvest.
Prepare Jerusalem artichoke for refrigeration by following these step-by-step instructions:
- Wipe the selected tubers with a paper towel or napkin to remove any remaining soil from their surface.
- Dampen a piece of natural fabric in cold water. Wring it out until it's damp, but not dripping wet.
- Wrap the Jerusalem artichoke in cloth.
- Place the package in a plastic container and close it with a lid.
- Leave the container in the lower compartment of the refrigerator, intended for storing vegetables.
On the balcony
A balcony is suitable for storing harvests at home:
- open;
- glazed.
There, Jerusalem artichoke will retain its marketable appearance and taste for 45-60 days.
On a glazed balcony, store the harvest in a box under a layer of peat moss, topped with sawdust. Close the container with a lid. Do not use a clear plastic container for this purpose.
On an open balcony, store Jerusalem artichoke like this:
- Place the tubers in a strong plastic bag.
- Release the air from it and tie it tightly.
- Place the bag in a sack and fill it with garden soil.
- Take the bag out onto the balcony. Cover it with a warm blanket or an old winter jacket.
Don't worry about the tubers freezing. It won't ruin their flavor. The cold won't affect the Jerusalem artichoke's nutritional properties either.
Frozen
Freezing is a popular method of storing Jerusalem artichokes, allowing the tubers to remain fresh and tasty for 60-75 days.
Freezing should be carried out step by step:
- Wipe the tubers with paper napkins.
- Trim off stems and damaged areas.
- Cut the Jerusalem artichoke into large cubes.
- Place the sliced vegetables in a bag. Remove any air and tie it tightly.
- Leave the bag in the freezer.
In dried form
Drying extends the shelf life of Jerusalem artichokes up to 1 year. Homemakers do this in the oven. Here's how to prepare the tubers for drying:
- Clear away soil.
- Rinse thoroughly.
- Dry with napkins.
- Cut into thin slices.
Dry Jerusalem artichoke slices in the oven:
- Place the slices in one layer on a baking sheet.
- Place them in the oven for 3 hours (temperature +50 ⁰С).
- Leave the baking tray with dried Jerusalem artichoke for 24 hours at room temperature.
- Return it to the oven (+60 ⁰C). Dry the Jerusalem artichoke slices until fully cooked.
Can Jerusalem artichokes be left in the ground over the winter?
There's no need to harvest the entire Jerusalem artichoke crop in late autumn. Feel free to leave some tubers in the ground until next spring. This is a great way to keep them fresh and tasty without the need for a cellar.
After overwintering in the garden, Jerusalem artichokes retain their beneficial properties. Their flavor is also unaffected by frost—it becomes even sweeter. The nutritional value of the tubers also increases due to the conversion of their inulin to fructose under the influence of cold.
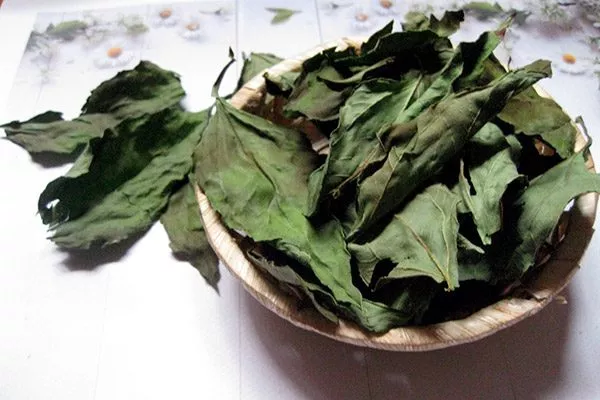
How to collect and store Jerusalem artichoke leaves?
Jerusalem artichoke leaves are a valuable raw material rich in vitamins, minerals, and amino acids. They are traditionally harvested for medicinal use in teas, decoctions, and infusions.
Collect Jerusalem artichoke leaves according to the following conditions:
- before flowers appear on the bushes;
- manually (scissors or pruning shears are not required for this);
- pluck the leaves in random order.
Store the collected plant materials in a dry form. For drying, use an oven or a special vegetable dehydrator.
Digging up Jerusalem artichoke tubers in a timely manner and storing them properly is essential if you expect to enjoy the fruits of your labor for several months. Jerusalem artichokes will keep for that long in a cellar, provided they are provided with favorable conditions.