When grown in a favorable climate and following certain agricultural practices, turnips can yield up to 3-4 kg of root vegetables per square meter of garden bed. In a cool place, they can be stored without losing their marketability or flavor until the following season. Read on to find out how to do it right.
Sowing dates
Turnips can be sown directly into the ground three times a year. The timing of sowing depends on specific climate conditions and the crop's intended growing purpose. Here are some possible sowing options:
- In the springIf you plan to grow turnips for consumption, it's best to sow the seeds between April 25 and May 10. The key is for the snow to melt and the ground to warm up slightly. Young sprouts are resistant to light frosts, so you can harvest juicy roots as early as summer. The advantage of sowing seeds in spring is that you can protect the plant from turnips' main enemy—the cruciferous flea beetle. This beetle appears when the sprouts are already gaining strength and has a clear advantage over the pest, which is unable to harm the mature plant. The flea beetle disappears in summer, allowing gardeners to harvest the crop without interruption.
- In summerIf you plan to grow turnips not only for food but also for winter storage, you can start sowing seeds from late June to mid-July. Turnips prefer temperatures between 12 and 20ºC, so they produce well in moderately warm summers. Under favorable weather conditions, seedlings will appear within 3-4 days of sowing.
- Before winterTurnips are cold-hardy crops—they can germinate at temperatures of 2–5ºC, withstanding short periods of frost. Therefore, to obtain an early harvest (2–3 weeks earlier than usual), you can sow the seeds in the fall—in October or early November (if the weather is warm). Turnip seeds survive the winter under a blanket of snow, undergo natural stratification in the soil, and germinate uniformly in early spring.
Site selection and preparation
Turnips can be successfully grown in a plot of land, but when choosing one, the following parameters should be taken into account:
- IlluminationYoung plants respond well to mild weather, sunlight, and minimal shade, so choose well-lit, warm locations for turnips, well-protected from winds and drafts. They can be located on level or slightly lowered areas to ensure the soil maintains an acceptable moisture level for this moisture-loving crop.
- SoilLarge, juicy root vegetables can be grown in level, light soils. Turnips thrive in peat, loam, and sandy loam soils, but do not grow well in clay soils. The soil pH should be low or neutral, otherwise the grown root vegetables will not store well. If necessary, liming can reduce soil acidity.
- PredecessorsLike all plants in the Cruciferae family, turnips don't grow well in areas previously occupied by their relatives (they share common diseases and pests). These include:
- watercress;
- daikon;
- horseradish;
- any types of cabbage;
- radish;
- radish;
- mustard;
- swede.
As for the best predecessors, they are:
- legumes;
- cucumbers;
- tomatoes;
- carrot;
- potato;
- pumpkin;
- zucchini;
- onion;
- strawberries.
Turnips can be sown as a second crop in beds where early ripening vegetables were previously grown.
- NeighborhoodTo prevent turnips from cross-pollinating, related crops should be planted in a different location. Legumes are best grown nearby.
- ✓ The optimal soil acidity for turnips should be between pH 6.0 and 7.0. If the soil acidity is higher, the root vegetables will not store well.
- ✓ The soil must be well-drained to avoid waterlogging, which can lead to root rot.
A plot that meets all the requirements must be properly cultivated. Regardless of the sowing season, this should be done in the fall, following this procedure:
- Dig the soil deeply, adding two types of fertilizers:
- organic – 2-3 kg of organic matter (humus or compost, but not fresh manure) per 1 sq. m;
- mineral – 15-20 g of urea, 30-40 g of superphosphate and 15-20 g of potassium chloride per 1 sq. m.
Nitrogen fertilizers should not be applied at the rates specified above, as their excess will provoke excessive growth of tops to the detriment of root crops, which will deteriorate their taste and may develop voids.
- To alkalize the soil during deep digging, add wood ash to the soil at a rate of 100-150 g per square meter. This will loosen the soil. Some gardeners use wood ash to enrich the soil by burning a fire in the garden, then scattering the charred wood remains over the fire and tilling the soil. Eggshells can also be used to neutralize soil acidity. Dry them and grind them in a blender. Sprinkle the resulting powder onto the soil before digging, at a rate of 40 eggshells per square meter.
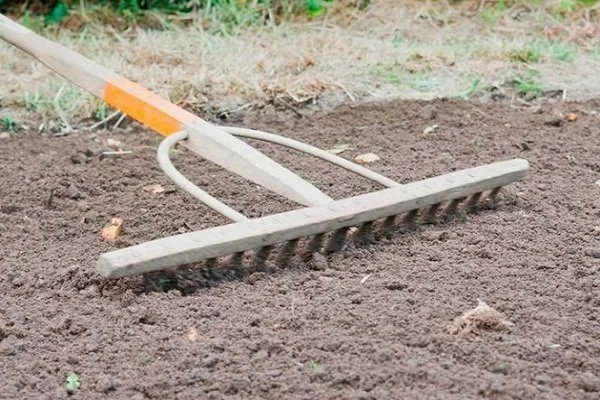
- Level the area with a rake and compact it.
How to obtain and process seeds?
Turnips are a vegetable with a two-year growing season. In the first year after sowing or planting the seedlings, they produce fruit with rosettes of leaf blades, and in the second year, the planted roots produce stalks with flowers. These stalks produce viable, germinating seeds. If the variety is not a hybrid, they can be sown the following season.
To obtain turnip seeds, it's best to use turnips grown for winter storage. These include varieties such as:
- Gribovskaya;
- Petrovskaya-1;
- Orbit;
- Purple;
- Burnt sugar, etc.
Obtaining seeds from them occurs as follows:
- From the root crops, select specimens with good varietal characteristics.
- Place the planting material in storage and bury it in sand.
- In the fall, dig up the bed and add humus to place the mother plants in fertile soil.
- In the spring, re-dig and level the area. Plant the seedlings in rows spaced 30-40 cm apart. Don't plant the roots too deep; just press them firmly into the soil.
- Tie the flower stalk to a vertical support.
- When the pod turns light yellow, begin collecting the seeds. Delaying this process can cause them to scatter on the ground and become mechanically damaged.
- Peel the seeds and dry them.
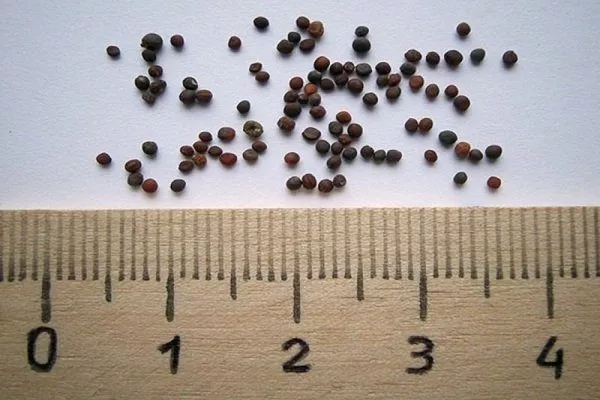
Collected or purchased seeds must be properly pre-treated to ensure viable germination. First, they should be immersed in a 5% salt solution (5 g per 100 ml of room-temperature water) and stirred to remove air from the surface. Any seeds that float to the surface should be discarded, as they are hollow, damaged, or deformed and will not produce viable seedlings.
- Check the seeds for germination by soaking them in water for 10 minutes. Remove any seeds that float to the surface.
- Disinfect the seeds by immersing them in a solution of potassium permanganate (1%) for 20 minutes, then rinse.
- Soak seeds in a growth stimulator for 12 hours to improve germination.
The seedlings that have settled on the bottom need to be disinfected, as 80% of turnip diseases are transmitted through seeds. This can be done in the following ways:
- Warming upPlace the seeds in a cloth bag and place them in a thermos filled with hot water (40–50°C) for 5 minutes. Then immediately cool them in cold water for 2–3 minutes.
- SoakTreat the seeds in a 2% potassium permanganate solution. To prepare this, dissolve 2 g of the powder in 100 ml of room-temperature water. Soak for 20 minutes. After disinfection, rinse the seeds and soak them in water for several days to swell, changing the water twice daily.
For better germination, seeds should be soaked for 24 hours in a biostimulant (Epin-extra, Zircon, Ecogel).
After calibration and disinfection, the seed material needs to be dried a little, mixed with sand and sown into the soil.
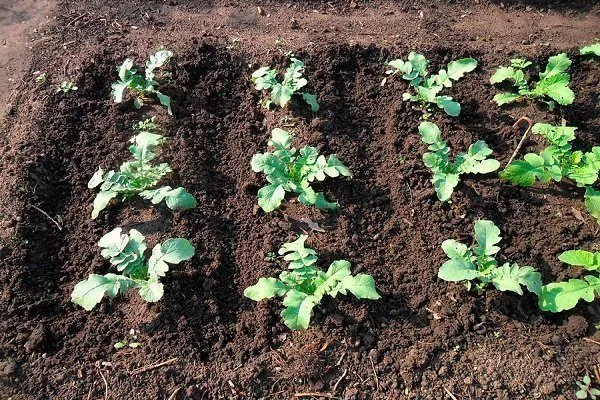
Sowing seeds in open ground
If turnips are grown without seedlings, sowing seeds in open ground is carried out according to the following instructions:
- Loosen the soil and immediately roll it lightly.
- Prepare small furrows 1.5-2 cm deep in the garden bed. The distance between them is 10 cm, and the width between rows is 20-35 cm.
- Sow seeds at a rate of 0.2-0.3 g of quality seeds per square meter or 2 seeds per 1 cm. If the seed is too small, it is advisable to sow it as ballast, pre-mixed with sand. This is a painstaking process, but the planting will not be too dense, so you won't need to thin the bushes repeatedly during care, which could damage the roots.
- Cover the seedlings with sand, then add compost, humus, coconut coir, or loose soil. Finally, water the area with water or an EM solution and cover with non-woven fabric for faster germination.
The covering material can be removed after 2 days, and the first shoots will appear a day later.
If sowing seeds in winter, the following differences from spring and summer sowing should be taken into account:
- seeds can be planted to a depth of 3-4 cm;
- It is better to sprinkle them not with frozen and hardened earth, but with pre-prepared peat or sand;
- It's worth placing stakes along the edges of the bed to quickly find the place to plant turnips in the spring.
When snow falls, it should be piled onto the garden bed. Repeat this procedure 2-3 times per season.
Seedling cultivation method
Seeds treated as described above should be sown in wooden boxes or individual cups filled with substrate approximately 30-40 days before planting the seedlings in their permanent location. Another sowing option is in peat pellets, pre-soaked to allow the soil to swell. Two seeds per pellet are sufficient.
It's best to grow seedlings in separate containers, as they don't tolerate transplanting well. Peat pellets are considered the best option – they can be planted in the soil alongside the seedlings without disturbing the root ball or damaging the plant's delicate root system.
Regardless of the container in which the seedlings were sown, proper care must be provided for the seedlings, which involves the following agricultural practices:
- Organization of an optimal microclimateAfter sowing, cover the containers with plastic wrap and place them on a south-facing windowsill to ensure adequate sunlight. Once the seedlings emerge, remove the plastic wrap. The optimal temperature for active growth and development is between 6°C and 12°C. Similar conditions can be created on a balcony or terrace, but avoid direct sunlight on the delicate seedlings.
- ThinningWhen the cotyledons of the seedlings open, thin them out—select the most developed shoots, and carefully cut the rest off at the very base (at ground level) with sharp scissors.
- Watering and looseningMoisten the soil as needed, avoiding either drying out or overwatering. Moist soil should be carefully loosened to ensure the cuttings receive the necessary amount of oxygen.
- Top dressingOn the 4th or 5th day of cotyledon opening, feed the seedlings with nitrophoska (1 tablespoon per bucket of water). The solution consumption is 10-15 ml per seedling.
- HardeningAbout two weeks before transplanting the seedlings to their permanent location, begin hardening them off. Initially, the containers with the seedlings can be placed outside or on an open balcony for an hour, but the hardening time should be increased each day so that by the 15th day, the seedlings have spent a full day outdoors.
In mid-May, the mature seedlings with 2-3 true leaves can be planted in a prepared location. The optimal distance between plants is 25-35 cm. After transplanting, the soil around them should be carefully compacted and watered thoroughly.
Planting care
To harvest juicy, large root vegetables from your garden, you need to properly care for the plant—from watering to protecting it from all sorts of adversity.
Watering
Turnips thrive on moisture. Without it, the roots develop a bitter taste, become too compact, or crack, losing their marketable qualities. To prevent these consequences, it's important to establish a proper watering regimen, adhering to the following rules:
- do not allow the soil to dry out, water the plants 1-2 times a week at the rate of 5-5-6 liters of water per 1 sq. m;
- during the period of emergence, in the phase of formation of true leaves and at the stage of maximum growth of root crops, provide the plants with the most abundant watering, increasing the water consumption to 8-10 liters per 1 sq. m;
- moisten the soil in the morning or evening, watering young shoots from a watering can with a fine sieve for even irrigation of the entire area, and taller bushes - from a hose with a regular diffuser;
- water the bushes only with warm water that has been left to stand in the sun;
- Reduce watering to a minimum after the root vegetables have gained the weight typical for a particular variety, otherwise they will crack (as a rule, this period occurs a week before harvesting turnips).
Loosening, weeding and mulching
The plant is sensitive to oxygen deficiency, so the bed should be regularly loosened while the soil is still moist. Before doing this, evenly spread wood ash to a depth of 0.5 cm to repel flea beetles. Ground pepper, mustard powder, or tobacco dust can be used instead of ash.
Along with loosening the soil, the area should be cleared of weeds and then mulched with straw or hay. A layer of mulch will slow down moisture evaporation from the soil, eliminating the need for frequent loosening and removing soil crust.
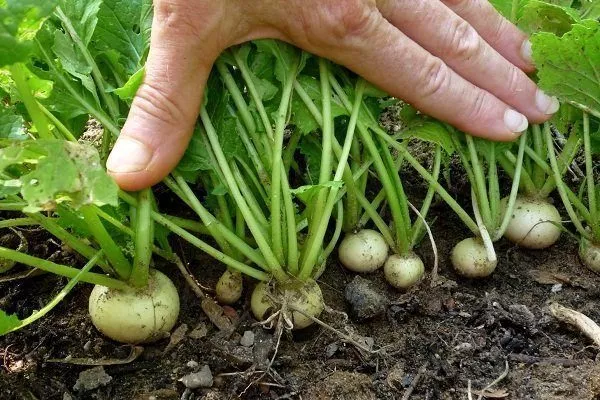
Thinning
If seedlings emerge too frequently, don't delay this procedure, otherwise the roots won't gain the required mass and will be too small. Here's the optimal thinning schedule:
- At the stage of appearance of 2-3 true leavesLeave at least 4-5 cm between bushes, removing weak and diseased specimens.
- 2 weeks after the first thinning. Increase the distance between plants to 10-15 cm.
Top dressing
If the soil was well fertilized in the fall or spring, the crop may not require additional feeding. However, if the soil is poor, it's still worth applying one or two additional applications per season, following this sequence:
- One month after emergenceFor top dressing, use complex mineral fertilizers. Nitroammophoska is effective (dilute a matchbox of it in a bucket of water and apply the resulting solution to 1 square meter of the bed). It can be replaced with superphosphate, potassium chloride, or potassium magnesium sulfate.
- Around midsummerDuring this period, turnips respond best to potassium fertilizers. If the roots are developing well, it's enough to sprinkle 250-300 g of wood ash (which contains up to 5% potassium) per square meter of the plot. If the roots are lagging behind in development, it's best to water the bed with a potassium sulfate solution (10 g per bucket of water for 1 square meter).
Experienced gardeners use organic matter to feed turnips – at the stage of formation of the first true leaves, they water them with herbal fertilizer.
Protection from diseases and pests
Turnips are susceptible to diseases that pose a threat to plants in the Cruciferae family. They are particularly susceptible to the following:
- FomozuThe fungus attacks the leaves, which first become covered with dark spots and then become fluffy. If these signs appear, the tops should be sprayed with Bordeaux mixture.
- KielIt attacks the plant's root system. Growths appear on petioles and root vegetables, causing the plant to gradually wither. To combat clubroot, water the garden bed with an infusion of horseradish leaves or roots (infuse the crushed material in water for 4 hours).
If the signs of damage are too severe, the diseased plants should be removed from the garden bed and burned, and the remaining plants should be treated with fungicides (Topsin-M, Fundazol).
As for pests, the following may pose a danger to turnips:
- Flea beetles (cruciferous, ground)They destroy young shoots and can deprive gardeners of their harvest. To prevent their attacks, you can water the beds with a Malathion solution (60 g per 10 liters of water) or sprinkle them with a mixture of equal parts ash and tobacco dust. Another option is to spray the entrances with vinegar water (1 tablespoon of 70% vinegar per 10 liters of water).
- Cabbage butterflyTurnips are susceptible to caterpillars. To get rid of them, water the seedlings with vinegar (3 tablespoons per 10 liters of water).
- Cruciferous bugThey attack leaves, sucking out their vital juices. To combat them, spray the garden bed with a yarrow decoction (pour 80 g of dried flowers into 10 liters of water, boil and strain, then add 40 g of soap shavings).
- Cabbage mothThe plant can be attacked by caterpillars that eat the leaves. To repel them, dust the turnips with tobacco dust.
If insect pests have already infested the plant, it's best to use chemicals against them, following the package instructions. The following products have shown good results:
- Malathion;
- Trichlorometaphos-3;
- Iskra-M;
- Rovikurt;
- Bankol;
- Fury.
In the early stages of infestation, it's best to use biological treatments, which can be applied up to 5 days before harvesting root crops. Effective treatments include:
- Entobacterin;
- Bicol;
- Actofit;
- Nemabact.
Why don't turnips grow?
Fewer and fewer gardeners are growing turnips, noting that they grow poorly or don't produce any fruit at all. There are two common causes or mistakes in growing this crop that can deprive a gardener of a harvest. Let's look at them separately.
Unsuitable soil
Turnips cannot grow in peat or sod-podzolic soils, as they are susceptible to clubroot. Even if the disease occurs after the roots have formed, their flavor immediately deteriorates, becoming woody and tasteless.
Before you can grow tasty and beautiful root vegetables in these conditions, you'll need to significantly improve the soil. To make it fertile and neutral, add up to 1/2 bucket of wood ash per square meter of the garden bed.
Cruciferous flea beetle
Entire colonies of pests attack young turnip seedlings, so one day a bed of crops may be completely empty. To avoid this, there are three ways to prevent this:
- Sow seeds as early as possible in the spring. Flea beetles are active in late spring, and if you sow turnip seeds at this time, the sprouts that emerge within a few days will inevitably fall victim to these pests. Better established plants sown early are better able to withstand flea beetle attacks.
- Sprinkle ash, tobacco dust, or simply road dust directly onto the seedlings. The difficulty is that these procedures need to be performed daily, making them laborious and not the most effective.
- After sowing, cover the turnips with a covering material that can be removed for weeding and thinning. This work is best done during the day, when flea beetles are resting.
To ensure that turnips grow vigorously and bear fruit, it is sufficient to grow them in fertile, neutral soil, apply a large amount of ash, and protect the planting from flea beetles with covering material.
Harvesting and storage
Root vegetables must be harvested on time, otherwise they will become tough, lose flavor, and be unsuitable for long-term storage. The following rules will help you choose the right harvesting time:
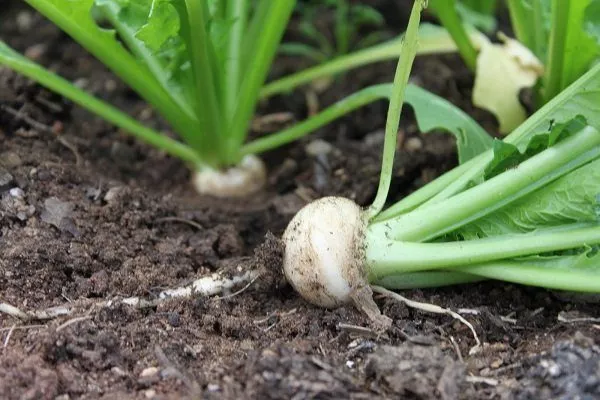
- During the summer, turnips with a diameter of 7-10 cm are considered most suitable for harvesting, but earlier harvesting is also possible when the turnip reaches a diameter of 4-5 cm;
- For winter storage, root vegetables should be harvested in late September – early October, that is, before the onset of frost (low temperatures will make the fruits soft and tasteless).
The harvest should be collected on a sunny day without rain or frost, following these instructions:
- The root vegetables can be pulled from the soil without much effort, simply by hand. If any difficulties arise, they can be lightly dug up, being careful not to damage the skin, as this will encourage rotting and negatively impact their storage.
- Carefully trim the tops from the harvested root vegetables, leaving only the petioles, 3-4 cm long. Woody roots should also be removed, otherwise they may absorb some of the beneficial elements.
- Using a dry cloth, clean the root vegetables from soil and dry them for 5-7 days in an open place, sprinkling them with hay or straw to a depth of 12-15 cm.
Dried root vegetables without any signs of damage can be used fresh for vegetable salads, warm dishes, and cough juice. Otherwise, they should be stored in a dry, dark place where the temperature is maintained between 2 and 4°C or slightly below. Therefore, a cellar or basement is the best option.
Turnips store well in cardboard or wooden boxes with the bottoms covered with dry sand or peat chips. The roots should be arranged so they don't touch each other too much. The layers between them can also be sprinkled with sand. In this way, they can be stored without spoiling for several months.
If you have a small amount of turnips, you can wrap them in plastic or cling film and then store them in the refrigerator or on the balcony. In this form, the roots can last up to a month.
Turnips can be stored indoors for no more than 2-3 weeks. Over time, the flesh of the root vegetables will become more bitter, indicating spoilage.
Video: How to grow turnips?
Turnips are an undeservedly forgotten root vegetable, says an experienced gardener, who will explain the benefits of the crop and how to grow it for autumn and winter consumption:
Turnips, with their tall, leafy stems that rise above the ground and thick, fleshy roots, can be easily grown in a garden bed using seedlings or direct sowing. They're easy to grow, so simply sow at the right time and then provide basic care.