Rutabaga is a healthy and easy-to-grow vegetable. Its roots are as nutritious and beneficial as turnips, and it can be grown throughout almost all of Russia, except the Far North.
What kind of vegetable is this and what are its properties?
Rutabaga is a biennial plant in the Brassicaceae family. It is believed to have been created by crossing turnips with cabbage. From the cabbage, rutabaga inherited the size and shape of its root, but its roots are slightly larger, denser, and sweeter.
In the first year, the plant forms a root vegetable and a spreading rosette. In the second year, seed pods appear on peduncles.
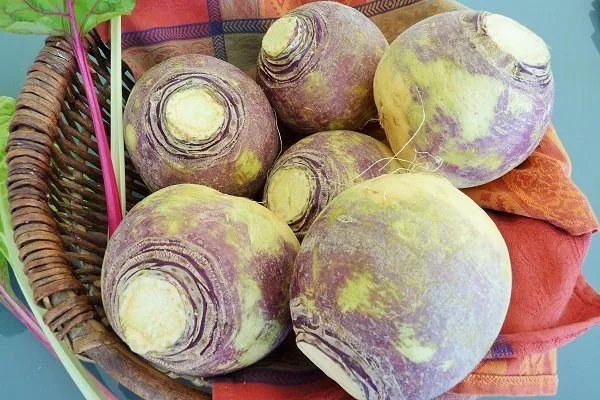
Description of the root vegetable:
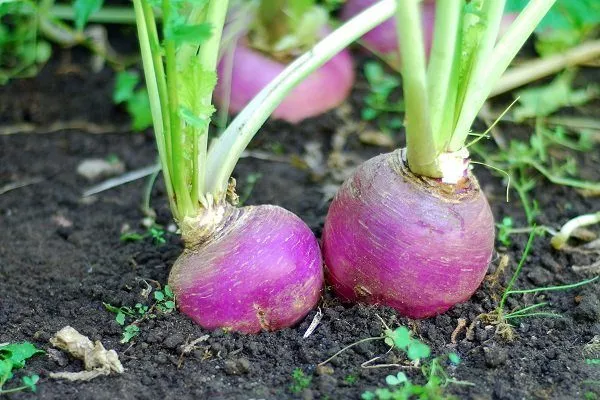
- skin color - red-violet or gray-green;
- pulp color – white or yellow;
- the shape depends on the variety and can be cylindrical, round-flat, oval or round;
- taste – spicy-sweet, without bitterness;
- weight – up to 0.5 kg.
Popular varieties:
- Hera;
- Krasnoselskaya;
- Novgorod;
- Bright dream;
- Vereiskaya.
The vegetable contains a lot of vitamin C, protein, fiber, pectin, ascorbic acid, beta-carotene, B vitamins, and essential oils. They are especially beneficial in winter, when the body is low in vitamins.
Rutabaga is contraindicated:
- for gastritis, ulcers, colitis;
- allergy or individual intolerance;
- age up to 4 years.
Are rutabaga leaves edible?
In summer, you can eat not only the roots but also the tops. In some countries, they are widely used in traditional cuisine. Rutabaga leaves are used in salads, soups, and main courses.
Rutabaga greens are slightly bitter, so they are cooked. After boiling or scalding, the leaves become soft, delicate, and have a pleasant flavor.
Features of cultivation and care
Rutabaga is a hardy and cold-resistant plant. It grows best in temperate climates.
Growing features:
- Temperature. The vegetable does not tolerate heat and drought well. For seed germination, temperatures of 1 to 3°C are sufficient, but for uniform germination, temperatures of 5 to 7°C are needed.
At favorable temperatures (15…18°C), germination occurs in 4-5 days. If spring is delayed, the plants may begin to flower later. - Growing methods. Rutabagas are typically sown by direct seeding into the ground. In regions with late springs, seedlings are used.
- Moisture. The soil in the beds should be moderately moist. The most water is needed during the first month of development.
Sowing in open ground
Sowing begins early. Its success depends on the right planting period and adherence to agricultural practices.
Soil and light requirements
Rutabaga is a long-day crop, meaning it requires 13 hours of light for flowering and fruiting. It's typically planted in well-lit areas, but it tolerates some shade quite well.
- ✓ The pH level must be strictly within 6-6.5, a deviation of even 0.5 can critically reduce yield.
- ✓ The soil should have high water-holding capacity, but without stagnant water.
Soil and site requirements:
- fertility;
- air permeability;
- high water-holding capacity;
- moderate acidity pH = 6-6.5 (on acidic soils the vegetable produces poor yields);
- The best predecessors are cereal crops, legumes, nightshades and pumpkins.
Rutabaga can grow in virtually any soil type. The roots develop best in fertile floodplain and cultivated sod-podzolic soils.
Contraindications for cultivation:
- sandy, marshy and clayey areas;
- acidic soils (they are limed before planting).
Planting dates
Turnips are sown not according to the calendar schedule, but according to the agronomic schedule, when the temperature reaches +5…+6°C. Planting at lower temperatures will result in a significant proportion of plants flowering and a lack of root crops.
Open-ground sowing occurs simultaneously with wheat, barley, and other spring cereals. Another key factor is the flowering of coltsfoot.
Approximate dates by region:
- in the middle zone: end of April – beginning of May;
- in the south: mid-April – early May;
- Siberia: mid-May;
- Far East: early to mid-May.
Sowing pattern and depth
The planting site is prepared a couple of months in advance. The beds are dug to the depth of a spade, removing plant debris, stones, and other debris.
The following is added for digging:
- 5 kg of humus per 1 sq. m;
- mineral compositions (30 g of superphosphate, ammonium nitrate and potassium salt per square meter).
The seeds are pre-prepared. They are immersed in water heated to 55°C for 30 minutes. To disinfect, they are soaked in a 1% potassium permanganate solution for 2-3 hours. They are then washed, dried, and, for ease of sowing, mixed with sand at a 1:1 ratio (e.g., 10 g of sand per 10 g of seeds).
The sowing rate is 0.2 g of seeds per 1 square meter. Farmers recommend growing no more than 20 plants per 1 square meter.
The procedure for planting in open ground:
- Prepare furrows at intervals of 30-40 cm from each other.
- Scatter the seeds and bury them deep:
- on loose soils by 2.5 cm;
- On heavy soils, 1.5 cm is enough.
- Sprinkle with a layer of soil and compact slightly.
- Water with warm, settled water.
To avoid having to thin out the bed later, the seeds are carefully laid out in furrows at intervals of 5-6 cm (approximately 20 pieces per 1 linear meter).
If there's a threat of severe frost, cover the crops with plastic. However, rutabagas generally tolerate spring cold snaps well.
Growing using seedlings
Planting young rutabaga seedlings in open ground allows for a faster harvest. The process requires more effort, but the rutabaga can be harvested 3-4 weeks earlier than when sowing seeds. This is especially important in regions with short summers and cold springs.
Timing of sowing and planting in open ground
Seeds for seedlings are sown 40-50 days before the expected planting date. Transplanting occurs when 5-6 leaves appear.
Transplant seedlings into open soil in cloudy, calm weather, either in the morning or evening. The approximate time is May, when temperatures reach 15–16°C.
How to sow rutabaga seedlings?
First, the seeds are disinfected in a solution of grated garlic (25 g per 100 ml of water). The washed seeds are placed on a damp cloth to germinate.
Sowing order:
- Prepare containers or boxes. Fill them with nutrient-rich substrate. The containers should have drainage holes, otherwise water will stagnate.
- As soon as the seeds sprout, plant them at a depth of 1-1.5 cm. Scheme:
- the distance between seeds is 2-3 cm;
- between rows 6-7 cm.
- Cover the boxes with crops with transparent material (glass, polyethylene).
- Maintain the temperature in the mini greenhouse at +17…+18°C.
- After the seedlings appear, remove the lid and move the containers to a room with a lower temperature (+6…+8°C).
- After a week, return the crops to a warm place (at a temperature of +12…+15°C).
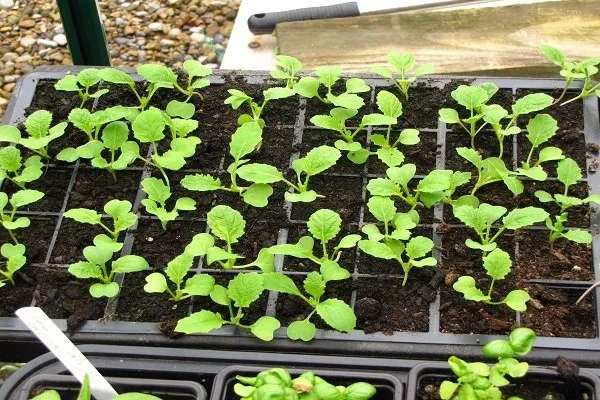
Caring for seedlings
The seedlings require about a month of care before being planted in the ground. This includes maintaining the proper temperature, soil moisture, lighting, and nutrition.
Principles of care:
- Hardening. Plants are regularly taken outside 10-14 days before planting. Initially, for 20-30 minutes to acclimate. Gradually increase the duration of these "walks," reaching 3-4 hours.
- Watering. Seedlings are watered regularly, depending on the soil condition. It shouldn't dry out, but waterlogging shouldn't be allowed. Watering frequency is determined individually, as it depends on growing conditions. The best time to water is morning.
- Loosening. To ensure air access to the roots, after watering, the soil between the rows is loosened.
- Lighting. If daylight hours are insufficient, seedlings begin to stretch. In this case, artificial lighting is used to ensure at least 13 hours of daylight.
- Thinning. Once the seedlings have developed a couple of leaves, pinch out any excess plants. The optimal distance between adjacent plants is 5-6 cm.
The vegetable doesn't transplant well, so no pricking out is necessary. Sow directly at appropriate intervals, thinning if necessary. Rutabaga seedlings are transplanted only once, directly into open ground.
Landing rules
When the weather is favorable and the seedlings reach the desired size, they begin transplanting.
Order:
- Moisten the soil in the containers to ensure the seedlings can be easily removed without damaging the roots.
- Prepare holes in the beds at intervals of 20 cm from each other.
- Water the planting areas with warm, settled water (approximately 500 ml per hole).
- Remove the plant from the planting box.
- Place the seedling in the hole so that the neck is above the soil.
- Sprinkle the roots with loose soil and compact it with your hands.
- Water (1/4 l). When the water has been absorbed, mulch with peat or humus.
How to care for rutabaga in open ground?
The plant is easy to care for. Standard care procedures include adequate moisture, weed control, fertilizing, and pest control.
Watering
If there's a lack of moisture, rutabagas grow bitter, and their flesh becomes tough. If there's too much moisture, the roots become watery and tasteless.
Watering features:
- during the growing season, water about 4-6 times;
- water consumption is 10 liters per 1 sq. m;
Roots exposed during watering are covered with soil.
Fertilizer
Rutabagas have a fairly long growing season. Therefore, they require additional feeding. The first application of fertilizer is two weeks after planting. The quantity and quality of fertilizer depend on the specific soil conditions.
Periods:
- First time. At the true leaf formation stage (around June), apply nitrogen and phosphorus fertilizers at a rate of approximately 0.3 liters per plant:
- nitrophoska 1 tbsp per 10 liters of water;
- liquid organic matter (1 kg of manure is diluted in 10 liters of water).
- Second time. During row closure, phosphorus-potassium mineral mixtures are applied. For example, superphosphate (20-30 g of granular fertilizer per 1 square meter of plantings).
- The first feeding should be carried out 2 weeks after planting, using nitrogen and phosphorus fertilizers.
- The second feeding should be carried out during the closing of rows, using phosphorus-potassium mixtures.
- Spray the tops with boric acid during the growing season to improve the quality of root crops.
During the growing season, it is recommended to spray the tops with boric acid. For foliar feeding, prepare a solution of 10 g of acid and 2 g of potassium permanganate diluted in 10 liters of water. The application rate is 1 liter of solution per square meter.
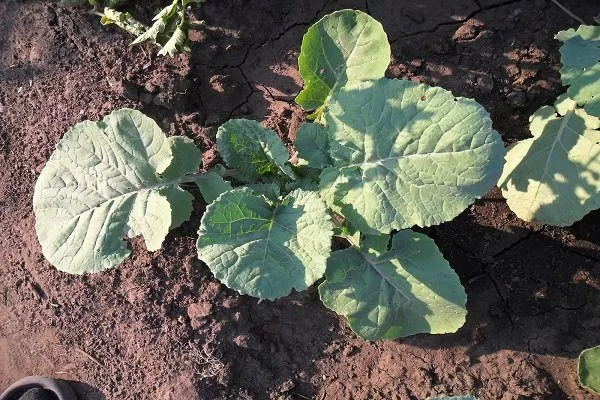
During the peak growing season, rutabaga's lower leaves may dry out and die. This isn't a symptom of disease or a response to unfavorable conditions, but rather a characteristic of the plant.
Weeding, loosening, thinning
It is recommended to perform agronomic procedures 1-2 days after watering. Hoeing should be done carefully to avoid damaging the root crops. Mulch the soil regularly to slow moisture evaporation, prevent weed growth, and reduce the need for tilling.
Thinning should be done in beds with crops planted in open ground. The weakest plants are removed, while the strong ones are left.
The procedure is carried out in 2 stages:
- The first is done when the first leaves appear. Two plants are left for every 10 cm.
- The rutabaga is thinned a second time when four true leaves appear. Leave 20 cm between adjacent plants.
Rutabagas grown as seedlings don't require thinning. They are planted directly at the designated spacing.
Treatment against diseases
Rutabaga has a strong immune system, but under unfavorable conditions and if agricultural practices are not followed, it can be affected by various diseases, most often fungal ones.
Diseases of rutabaga and treatment methods are listed in the table:
| Name of the disease | Symptoms of damage | Control measures |
| Fomoz | The leaves become covered with grey-brown spots and the roots rot. | Spraying with 1% Bordeaux mixture (1.5 l per 100 sq. m). |
| Bacteriosis | The tops turn yellow, become slippery, and smell of rot. | Treating seeds with hot water, spraying with 1% Bordeaux mixture (1.5 l per 100 m2) and sprinkling with ash (250 g per 1 sq. m). |
| Kila | Root crops become covered with growths. | Watering with lime solution (10 liters of water, in which 500 g of lime is dissolved, are used per 1 sq. m). |
| Blackleg | The root collar becomes thin and black, the leaves dry out. | Remove diseased plants, sprinkle the soil with potassium permanganate (5 g per 1 sq. m) and ash (250 ml glass) mixed with copper sulfate (1 tsp). |
Pests and their control
Insects attack all parts of the rutabaga plant. Failure to treat the plant promptly can result in complete crop failure.
Pests and control options:
- Cruciferous flea beetle. These are small jumping insects, 2-3 mm in size. They chew holes in leaves. They can be controlled by dusting seedlings with tobacco dust (20-30 g per square meter).
- Cabbage fly. The larvae are parasitic, chewing passages through the roots. Regular mulching and digging holes near the roots, into which tobacco crumbs are sprinkled (10–15 g per hole), help save the crop.
- Cabbage aphid. It settles on the above-ground parts of plants and sucks out the sap. The pest is controlled with a solution of laundry soap (150 g diluted in 10 liters of water, strained). There are no exact figures for the solution consumption. Leaves and petioles are thoroughly moistened on all sides.
- Mole cricket. A large underground insect up to 5 cm long, it eats out cavities in fruit and gnaws at the roots of young plants. Control this pest with insecticides. For example, Medvetoks (spread 30 g per 10-15 running meters) and Grom (spread 1 g per 1 square meter).
Is it possible to plant rutabagas in winter?
Vegetables can be sown not only in spring but also before winter. Seeds overwintered under snow produce seedlings with high disease resistance. They are more resilient than spring crops, grow evenly, and produce a good harvest.
Features of winter sowing:
- Sow in late autumn, after the first real frosts, when the soil freezes to a depth of 5 cm.
- Before sowing, the beds are loosened, with organic and mineral fertilizers scattered. 1-2 cm of sand is added to the bottom of holes dug at 20 cm intervals, a couple of rutabaga seeds are placed on top, and the soil is covered with compost.
- The plantings are watered with warm water, and the beds are covered with spruce branches and fallen leaves.
Cleaning and storage
Turnips intended for long-term storage are dug up in September or October, but always before frost sets in. Otherwise, the roots will rot during storage. This process is carried out in dry weather.
Cleaning and storage features:
- The fruits are trimmed so that no stalks remain. They are cleaned of soil, dried, and stored in boxes or bags. To prolong the shelf life of the rutabaga, it is sprinkled with river sand.
- Store in a basement. Optimal temperature is +5°C, humidity up to 95%.
- Root vegetables can be stored frozen, after washing, peeling, and cutting into pieces. Rutabagas can also be fermented, dried, and pickled.
Helpful tips
Growing rutabaga is simple. But to get a high-quality harvest, it's worth heeding the advice of experienced gardeners.
Helpful tips:
- After removing the film or glass from the container in which the seedlings are growing, they are not watered for 3 days.
- The seedlings are watered by spraying 1-2 times a week.
- It is recommended to plant the crop next to greens, lettuce, and medicinal herbs, but its proximity to plants of the Cabbage family (turnips, radishes, cabbage) will be unfavorable.
An experienced gardener will explain how to grow rutabagas in the following video:
Growing rutabagas isn't particularly difficult. Adherence to proper agricultural practices, timely watering, and fertilization are the key to a high-quality harvest.