How to properly grow radishes outdoors? To answer this question, you need to know more about the specifics of planting and growing the crop, as well as its ripening time. This article will cover these aspects, as well as ways to help prevent pests and diseases, and the proper harvesting and storage of the resulting crop.
Popular varieties of radish
There are many varieties of this crop that can be planted outdoors. The most common ones are listed below. For convenience, the varieties are divided into categories based on ripening time.
- ✓ Resistance to bolting in long daylight conditions.
- ✓ Adaptation to specific climatic conditions of the growing region.
Ultra-early
| Name | Ripening period (days) | Fruit shape | Fruit color |
|---|---|---|---|
| 18 days | 18 | Oblong | Red and white |
| Firstborn | 16 | Rounded | Bright red |
| Children's F1 | 14 | Round | Red |
These include:
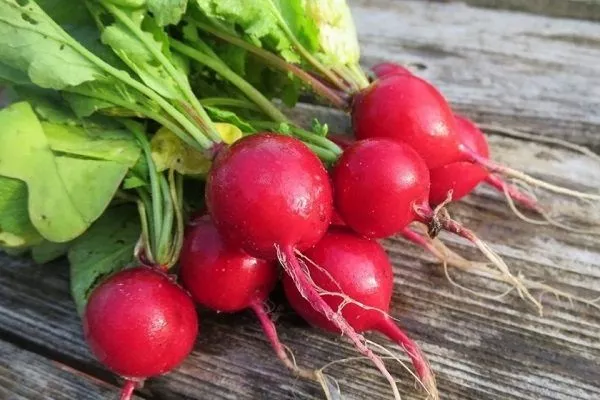
- 18 days. Ripens in less than three weeks. The fruits are oblong, red on top and white near the root. The yield is approximately 2 kg per square meter.

- Firstborn. It takes just 16 days to ripen. The vegetables are round and bright red. Up to 4 kg can be harvested from 1 square meter.
- Children's F1. The harvest is ready just over two weeks after germination. The radishes produce beautiful, round, red fruits. One square meter yields approximately 3 kg of radish.
Early ripening
| Name | Ripening period (days) | Fruit shape | Fruit color |
|---|---|---|---|
| Rondar | 25 | Spherical | Scarlet |
| Celeste F1 | 21 | Rounded | Red |
| Heat | 25 | Rounded | Red |
What varieties to pay attention to:
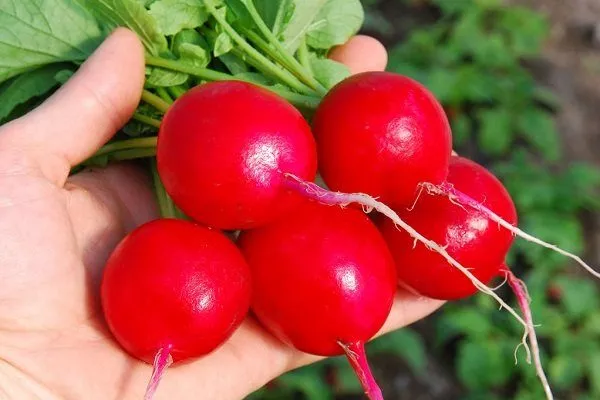
- Rondar. Ripens in 3.5 weeks. The fruits are spherical. The skin is scarlet. Only 1 kg of yield is harvested per square meter, but the yield is of good quality.
- Celeste F1.A hybrid variety. After germination, wait 21 days before harvesting, yielding approximately 3 kg per square meter. The radish is round and has red skin.
- Heat. It takes 25 days for the vegetables to fully ripen. They look like neat red balls. The yield rarely exceeds 3 kg per square meter.

Mid-season
| Name | Ripening period (days) | Fruit shape | Fruit color |
|---|---|---|---|
| Alba | 36 | Rounded, flattened | White |
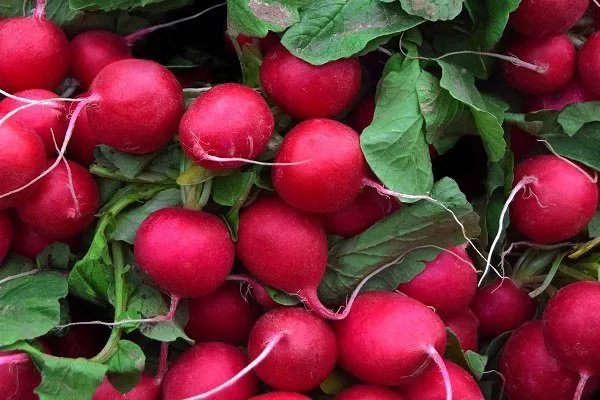
| Saxa | 30 | Rounded | Reddish with a raspberry hue |
| Zlata | 30 | Rounded | Yellowish |
Most commonly planted:
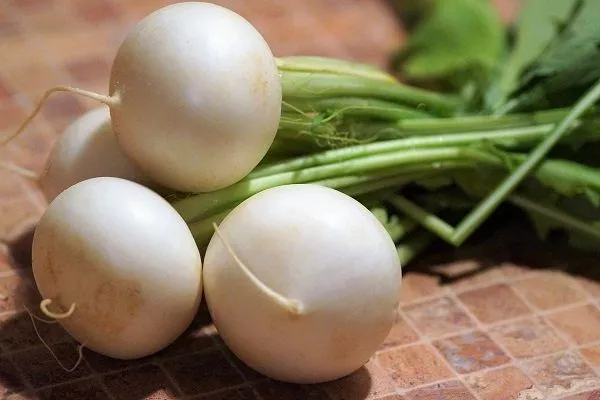
- Alba. Ripening takes up to 36 days. The vegetables have an unusual white skin and a round shape, slightly flattened in the center. Up to 2 kg can be harvested per square meter.
- Sachs. The round, reddish-red fruits with raspberry hues ripen in one month. The yield is approximately 2 kg per square meter.
- Zlata.A variety with a very unusual yellowish skin color. After germination, it takes another month for the vegetables to fully ripen. One square meter yields up to 2 kg of radish.

Late
| Name | Ripening period (days) | Fruit shape | Fruit color |
|---|---|---|---|
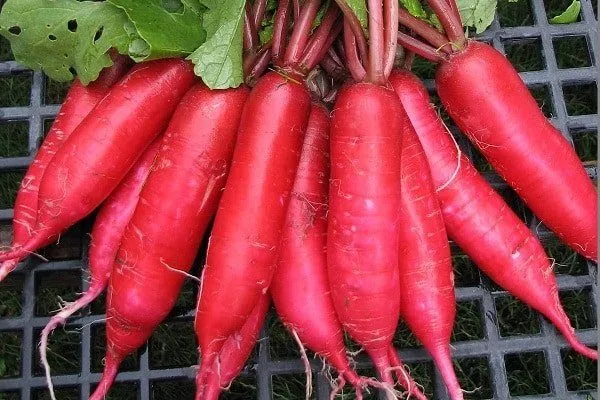
| Red Giant | 40 | Oblong | Scarlet |
| Champion | 40 | Rounded | Bright red |
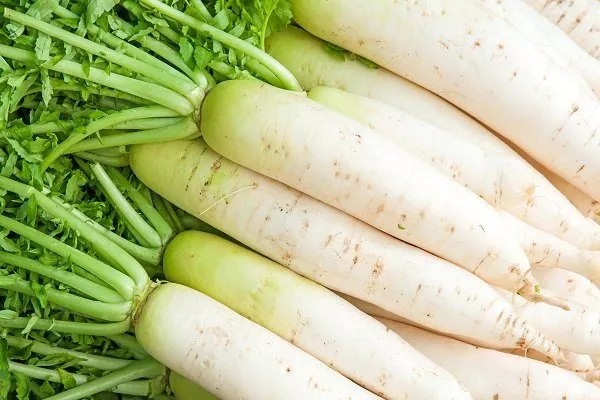
| Icicle | 40 | Oblong | Snow-white |
These include:
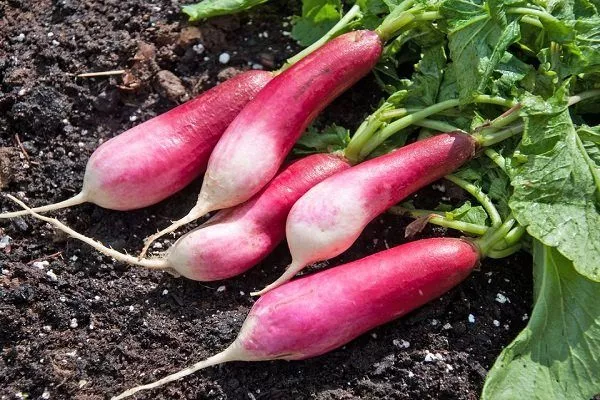
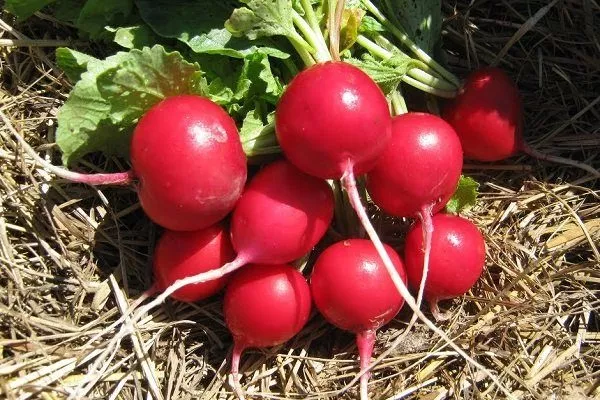
- Red giant. The fruits resemble scarlet carrots in appearance. They are oblong and taper toward the root. They take about 40 days to fully ripen. Yields up to 4 kg per square meter.
- Champion. It takes up to 40 days for the vegetables to fully ripen. Radishes are round in shape, with bright red skin. The harvest yields up to 2 kg per square meter.
- Ice icicle. The name refers to the vegetables' interesting shape and snow-white color. The variety matures in 40 days. One square meter yields approximately 3 kg of radish.
Optimal planting times
It's recommended to sow radishes when the weather warms up, after the snow has melted and the soil has warmed slightly. Regarding the time of year, this is discussed below.
In the spring
You need to focus on your region of residence:
- South. Ideally, you can begin planting as early as the beginning of March, but if the ground is still covered with snow, it’s worth waiting.
- Middle zone. Sowing begins in late March or early April. The same conditions apply to residents of the Moscow region.
- Siberia and the Urals. We'll have to wait until May.
To increase harvest volumes, you can sow ultra- or early-ripening radishes every 2-3 weeks from spring until summer.
An experienced gardener will explain how to plant radishes in the spring in the following video:
In summer
Planting is usually suspended during this period, as radishes grow less efficiently due to longer daylight hours. It's best to wait until August.
In the fall
It's recommended to sow from early September until the onset of cold weather. The final seeding is done in mid-November. The harvest will only be ready at the end of winter, but radishes will ripen 2-3 weeks earlier than any spring-planted variety.
Pre-sowing work
Preparing your crop is crucial for a good harvest. Be sure to follow the recommendations below.
Choosing a location
What to look out for:
- Soil. The soil should be loose, light, and neutral in acidity. Sandy loam or loamy soil is ideal.
- Place. In spring and fall, vegetables need good natural light. In summer, it's best to choose a shaded area that receives sunlight only until midday.
- Crop rotation. Plant in beds previously occupied by potatoes, garlic, and legumes. Avoid planting in soil after cabbage, horseradish, or mustard. Avoid planting after radishes, as this can introduce one of the crop's main diseases.
- Neighbours. Radishes are often sown next to beds of parsnips, onions, and carrots.
Seed treatment
Seeds will grow better if they are prepared properly:
- Sorting. Remove small and empty specimens. To do this, sift them through a sieve with holes approximately 2 mm in diameter, removing any fallen seeds. It's best to use material from the last harvest.
- Soak. Soak cheesecloth in plain water or a liquid with a growth stimulant added. Wrap the seeds in it and leave for 12 hours.
- Warming up. Fill a container with water at about 50 degrees Celsius. Place the seeds in it for 20 minutes, then remove and dry them on a clean cloth.
- Oxygen saturation. This is an optional procedure, but it helps promote better growth. Place an aquarium air compressor in a 1-liter container and lower the seeds into it, keeping them in constant contact with a stream of air. You can use a funnel for this.
Soil preparation
There are several recommendations for properly cultivating the area intended for sowing. Be sure to consider the time of year.
In the fall
Work should be started in advance.
What to do:
- Cleaning the garden bed. Collect all remains of the previous crop. Burn them to prevent the spread of potential diseases and pests.
- Digging. This is necessary to make the soil looser and saturate it with oxygen.
- Fertilization. Use peat or humus at a rate of 1/2 bucket per 1 square meter. If the soil is highly acidic, add lime, but do not combine it with organic additives.
In the spring
Preparation begins 2-3 weeks before planting.
How it happens:
- Cleaning the garden bed. Remove all weeds and accumulated debris. Dig up the soil.
- Application of fertilizers. You will need 1 bucket of compost and 300 g of ash for each square meter.
- Warming up. Level the area thoroughly and cover it with a layer of black plastic. Remove this immediately before using the bed.
Planting radishes
There are several ways to sow vegetables.
Classic technology
The instructions are as follows:
- Creating grooves. Make them with a shovel or hoe, moving from east to west. The depth should not exceed 2 cm; for heavier soil, 1 cm. Maintain a distance of 10 cm between furrows.
- Watering. Wet each groove thoroughly with water. To promote growth, sprinkle a little wood ash into them.
- Sowing. Space the seeds about 5 cm apart. This will help conserve seedlings and reduce the need for thinning. However, if you're used to planting vegetables in bunches, this won't be a big mistake.
- Covering with earth. Sprinkle a thin layer of dry soil on top to prevent it from hardening. Mulch with peat.
You can learn about the process of planting radishes in open ground using traditional technology by watching the video below:
Sowing with a marker
It's not much different from the standard method, but it uses a special board with teeth attached to it. It allows you to leave 1-cm-deep holes in the ground, spaced 5 cm apart, into which the seeds are then placed. The marker is placed on a flat surface, pressed firmly into the soil, then lifted and carried further.
This method allows you to increase the volume of the harvest and avoid dense planting.
Using egg trays
Another way to divide and protect crops.
What you need to do:
- Prepare containers. Regular cardboard trays are used. They need to be collected in large quantities to cover the entire plot.
- Disinfect containers. To do this, heat them in the oven at 70 degrees or wipe them with alcohol.
- Make holes. Cut off the bottoms using a regular stationery knife.
- Laying out cells. Place the trays on the loosened area, holes down, slightly deep into the soil. Secure with wire.
- Plant the seeds. Place them in the cells and sprinkle with peat.
Features of summer planting
If you don't have the opportunity or desire to wait until daylight hours shorten, you can follow the advice of experienced gardeners.
To create shade for plants:
- Use covering material. After 6 p.m., cover the seedlings with black film to artificially recreate darkness. Remove it after 8 a.m.
- Plant between rows. Ideal options would be beds of strawberries or lettuce, whose leaves will shade the crop.
How to plant radishes in autumn?
This is a good time for late varieties, which can be stored in a cool place for 2-3 months.
What are the tips:
- Apply fertilizer. After multiple previous crops, the soil may become depleted, so it needs to be re-fertilized. Use 2 kg of humus per 1 square meter. Add 1 tablespoon each of superphosphate and potassium, 1 teaspoon of urea, and 100 g of ash.
- Change the scheme. Late varieties are usually larger and require more space. Therefore, maintain a distance of 20 cm between rows and 10 cm between seeds.
Planting radishes in winter
This can be done after the first frost or with the onset of winter in frozen ground.
What to look out for:
- choose an area protected from flooding during the snowmelt period;
- use only dry seeds;
- mulch the soil with peat and compact it well;
- If there is snow, sprinkle the bed with a medium layer.
Caring for radishes in open ground
Proper care of plants will help improve their growth and increase harvest volumes.
- ✓ The water temperature for irrigation should not be lower than 18°C.
- ✓ Watering in the morning reduces the risk of fungal diseases.
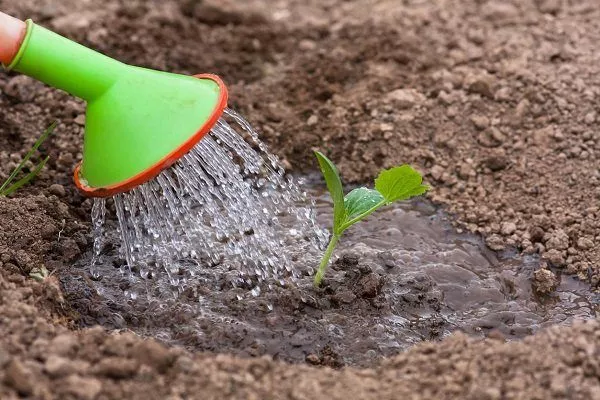
Watering
What are the recommendations:
- Frequency. Repeat this procedure every 2-3 days to prevent the soil from drying out. More frequent applications are recommended during the summer.
- Uniformity. If for some reason you missed watering, you do not need to pour double the amount of liquid onto the plant.
- Temperature. Use heated or settled water.
- Way. Produced using the drip method.
- Times of Day. Should be done in the evening.
Loosening
This should be done immediately after applying the liquid to prevent the soil from hardening. Initially, the soil should be loosened to a depth of 3 cm, then to a depth of 5-6 cm.
Weeding
This should be done as weeds emerge. If the bed was previously mulched with sawdust, the need to repeat the procedure is much lower.
Thinning
When planting plants in close proximity, it may be necessary to remove weaker shoots. This should be done very carefully to avoid damaging neighboring vegetables.
Hilling
This is necessary to prevent the crop from bolting and to give the fruit the correct shape. It is performed in conjunction with loosening.
Top dressing
Usually carried out immediately before disembarkation. Then fertilizing radishes repeat as needed to determine if nutrients are needed.
For example:
- Small fruits. Add phosphorus and potassium.
- Pale vegetables. Add nitrogen.
Helpful tips for growing
It is important to pay special attention to the advice of experienced gardeners, which will help you avoid the following mistakes:
- Bitterness of fruits. It is necessary to increase the volume of water when watering.
- The pulp structure is hard and woody. This indicates that the temperature regime is incorrect.
- Shooting. The reason is planting too closely together. This is also why radishes tend to be underdeveloped. The plants lack nutrients and grow poorly.
- Cracks. Late harvesting, where the fruits have been in the ground for too long.
- Small vegetables. Insufficient lighting.
- Empty fruits. This happens because fresh manure is used. Only rotted organic matter should be added.
- Large tops, but small vegetables. Excess of nitrogen fertilizers.
Diseases and pests
Among the parasites that can harm crops:
- Cruciferous flea beetle. These are small, dark-colored insects. They chew holes in the leaves, disrupting normal photosynthesis. This causes the plant to stop growing and die. Timely soil loosening can help prevent them. Spraying the area with red pepper powder can also help get rid of them.
- Cabbage fly. The insect larvae cause irreparable damage by gnawing furrows in the leaves. The leaves wilt and fall off. A mixture of powdered mustard and ground pepper, sprinkled on the soil around the plants, will help get rid of the pest.
- Slugs. They eat plant leaves. There are many traps against them, such as mulching the soil with crushed eggshells.
Diseases affecting radishes are:
- Kila. The disease is fungal in nature. Leaves turn yellow and wilt, and the root surface becomes covered with unsightly growths. Prevention involves planting vegetables only in neutral soil. If infection occurs, burn the plant and till the soil with lime. Avoid using the area for the next four years.
- Powdery mildew. A light coating forms on the leaf surface, darkening over time. The plant wilts and emits an unpleasant mushroom odor. Fungicide sprays are used for emergency treatment.
- Bacteriosis. Plants become covered in a sticky slime and emit a persistent rotten smell. Treatment involves spraying with Bordeaux mixture.
- Blackleg. The leaves turn brown and curl, and the base of the fruit becomes dark and unpleasant to the touch. Infected plants should be burned after they are discovered. The soil should be treated with a copper sulfate solution.
- Mosaic. The main symptom is the appearance of multicolored spots on the leaf surface. The plant dies as a result of the disease. Insecticide spraying is used as a preventative measure. This protects the crops from insects that carry the disease.
Use primarily natural treatments. Chemical solutions can make the fruit unfit for consumption.
Harvesting and storage
Cleaning consists of the following:
- Maturity test.Ripe fruits usually reach a size of 2.5 cm or more.
- Watering. The evening before harvesting, water the bed thoroughly. This will make it easier to remove the radishes from the soil.
- Time. It is better to perform the procedure in the morning when the sun is shining.
- Selectivity. If several varieties of radish are planted in a plot, the harvest must be collected based on the ripening time of each.
- Accuracy. When removing the vegetables, be careful not to damage the root. This provides the vegetables with nutrients and helps them last longer.
To keep fruits fresh for a long time, you should follow these rules:
- Cleansing. Remove the tops and remaining soil from the vegetable and rinse under running water.
- Preparing the container. Take a large vacuum bag and line the bottom with a layer of paper towels.
- Laying out radishes. The fruits don't need to be dried; they can be stored slightly damp. Cover with another layer of towels.
- Closing the package. Remove air first. Place in the refrigerator.
For owners of a basement or cellar, the instructions are as follows:
- remove the tops;
- place vegetables in wooden boxes;
- sprinkle with sand;
- If the fruits have lost their juiciness during storage, place them in ice water for 2 hours.
Vegetables stay fresh for 1 to 3 months, depending on the variety and storage method.
Don't throw away the tops. They can be used as a salad dressing or as fertilizer. For the latter, mix them with manure and add them to the garden bed. Store the tops in an airtight bag in the freezer.
Growing radishes outdoors isn't difficult. Simply choose the right time and method for planting, follow the instructions, and remember to care for the plants regularly. This is the only way to reap a bountiful, high-quality harvest.