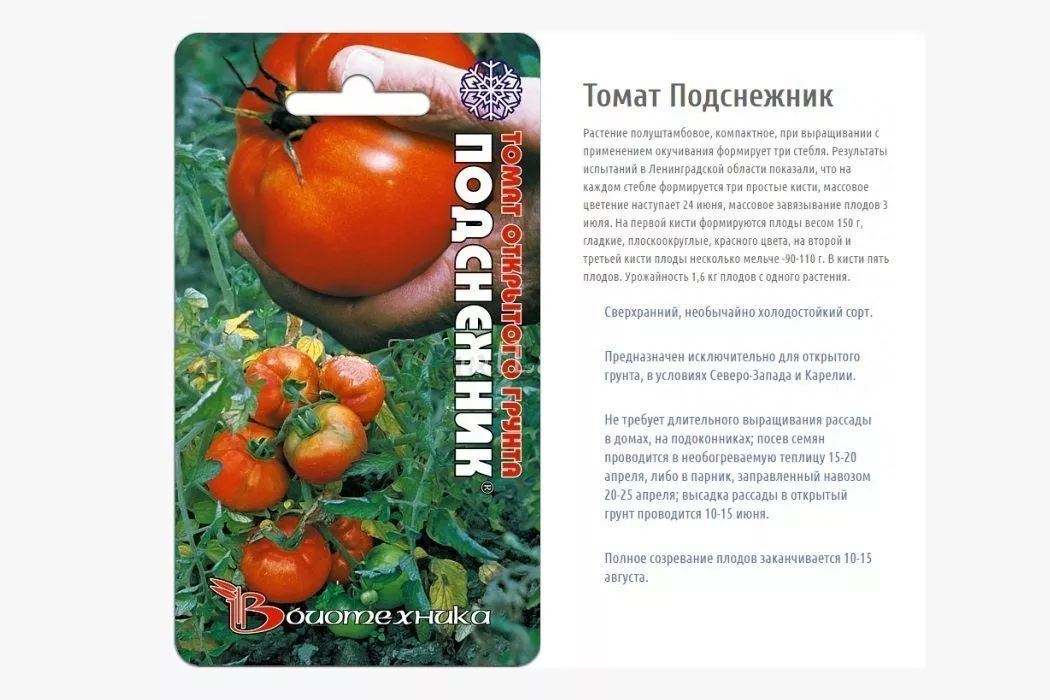
The Podsnezhnik tomato variety tolerates low temperatures, making it ideal for those living in colder regions of the country. In addition to this remarkable quality, the crop is distinguished by its high yield, resistance to pests and diseases, and unique fruit applications.
Snowdrop tomato seeds
The bush can produce a maximum of 5 kg of harvest.
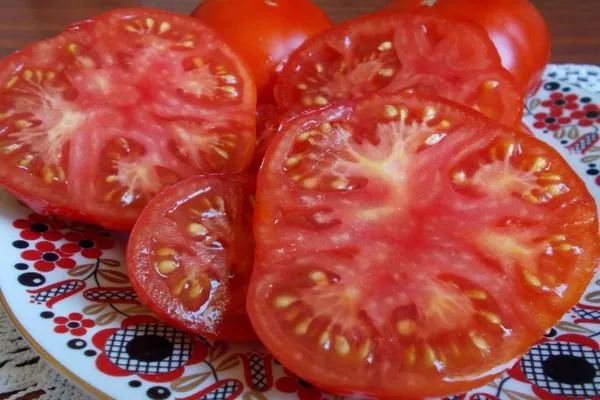
The fruits are fleshy, weighing up to 200 g each.
Origin of the Snowdrop tomato variety
Originating in St. Petersburg, Russia, the Biotekhnika agricultural firm is located in the city. The company's owners began their business with a simple laboratory, and now they have a large collection of plants they've bred themselves. Today, the company not only creates its own hybrids and varieties but also collaborates with many international breeding organizations.
Scientists conduct their own experiments in the Northwest, so almost all varieties are adapted to the harsh cold climate.
The Podsnezhnik tomato variety was developed in 2002. That same year, the plant was added to the state register of breeding works and approved for cultivation throughout Russia. In the southern regions, the seeds are sown directly into the soil, while in the northern regions, seedlings are first grown and then transplanted into greenhouses.
Description of the variety
A low-growing tomato bush, yielding approximately 1.5 kg per plant. Suitable for cultivation in the northern regions of Russia.
Bushes
The bush is determinate, meaning it will not grow any further once it reaches a certain height. The maximum height of the Snowdrop tomato is 0.6 m. The plant requires pinching and staking.
Fruit
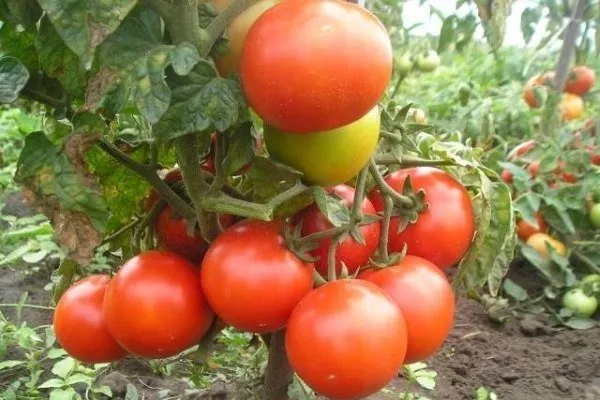
The first inflorescence forms above the 8th leaf, with subsequent ones appearing a couple of leaves later. Each cluster produces about five fruits. The first inflorescence produces the largest ones, while the others are slightly smaller. The average weight is about 120 g—a normal, standard size for tomatoes.
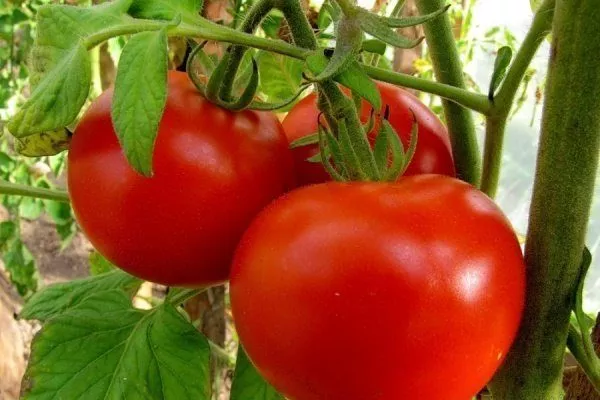
The fruits are quite large, slightly pressed at the ends. Unripe ones have a dark green spot near the stem. Ripe tomatoes are bright red.
Productivity
The harvest ripens on the bushes, with three clusters per stem. According to official estimates, approximately 6 kg of harvest can be collected per square meter.
On average, 1 bush produces at least 1.5 kg of fruit.
Regarding ripening time, when sown in mid-spring, flowering occurs in the last week of June. Fruit begins to form in July, and the final harvest occurs in the second half of August.
In which regions is it best to plant?
The Podsnezhnik tomato variety is cold-hardy and best planted in northern regions. The breeders who developed this variety claim it is suitable for all farmers living in Karelia, the Leningrad Region, and central Russia. It can be grown outdoors until the first frost.
Advantages and disadvantages of the variety
Gardeners claim that the Snowdrop tomato has no particular disadvantages; it has only advantages.
Advantages of the variety:
- frost resistance;
- high yield;
- drought resistance;
- strong immunity;
- presentable appearance of bushes;
- early ripening;
- the fruits do not crack;
- excellent taste;
- long-term storage of crops;
- possibility of transportation;
- does not require large greenhouses; a small covering tunnel will suffice.
The main disadvantage of the variety is its high demand for fertilizers, especially during the growth period of the bush.
Uses of fruits
Snowdrop tomatoes are considered a table variety, so their fruits are eaten fresh. They can be used to make purees, sauces, adjika, and more. The harvest is juicy and delicious. Try canning them as part of any vegetable platter. Some home cooks try pickling or sun-dried tomatoes, but reviews of these Snowdrop preserves aren't the best.
Opt for making juice, puree and vegetable platters.
Growing Snowdrop Tomatoes
Buying seedlings at the market from an untrusted seller is a bad idea. No one can ever guarantee that the seedlings will survive or that they will actually grow into the Snowdrop variety. The seller may have mixed up the seedlings or intentionally sold the wrong ones.
Don't risk buying seedlings – grow them yourself. Only by growing your own sprouts can you be sure of getting the fruits you desire.
Seed preparation
To ensure that seeds germinate and that future seedlings take root in open soil, the seeds must be carefully selected and disinfected.
How to process seeds:
- Select the best seeds from all your available seeds. Make a solution of water (250 ml) and salt (10 g). Place all the seeds in this mixture and wait 10 minutes. During this short time, the poor-quality seeds will rise to the top, while the good ones, suitable for planting, will sink to the bottom.
- Pour out all the water and discard the bad seedlings. Rinse the good seeds under running water to remove the salt.
- To boost the immunity of future sprouts, soak the seeds in a weak potassium permanganate solution for about 15 minutes. Some gardeners swear by aloe vera juice as a substitute for potassium permanganate.
- After treatment, soak them in nutrient-rich water for 24 hours. Use any commercially available seed treatments as a nutrient medium, or you can soak the seeds in potato juice.
- To improve germination, place a double layer of cheesecloth on a flat plate. Place the seeds on top, moisten, and make sure they don't dry out. Germinate the seeds for 3 days.
- The final step is hardening off the seeds to prepare them for transplanting into open soil. Remove the water from the cheesecloth and refrigerate the seeds for 12 hours. Remove them and let them warm up, then refrigerate them again. Repeat this process three times.
Sowing seeds: a step-by-step guide
Plant all seeds at the same time to ensure the seeds grow and develop under the same conditions. Follow these tips:
- Lightly moisten the soil with water, wait 15 minutes, and make small furrows in it, each 10 mm wide. Space the rows 40 mm apart.
- Water the furrows with cow manure and water and sow the seeds, leaving a distance of 2 cm between them.
- Lightly sprinkle the seeds with soil and moisten them. Cover the containers with plastic wrap and place them on a warm windowsill.
- Monitor the temperature (+24…+29 degrees Celsius) and humidity (80%).
- Open the film daily for 5 minutes to allow the soil to air out and excess moisture to evaporate.
- If necessary, moisten the soil with a spray bottle; the seedlings will begin to sprout on the 5th day after planting.
- ✓ Optimum soil temperature for sowing seeds: +24…+29°C.
- ✓ Required air humidity for germination: 80%.
Soil
When creating a seedling substrate, add more sand than compost. The mixture is sifted and disinfected. It's best to steam the soil in a steamer to kill any bacteria, fungal spores, etc. It's best to do this a week after planting the seeds to allow the beneficial bacteria in the soil to begin to reactivate.
The soil for the seedlings should be loose but still moisture-retentive. To improve oxygen permeability, add a little sphagnum moss to the mixture.
Instead of sphagnum, use coconut chips.
Tara
Small containers, such as simple wooden boxes with holes in the bottom, are suitable for growing tomatoes. The box should be 10 cm high. Place the boxes on trays to allow excess water to drain. Fill them with a special tomato soil mix. You can use the following soil mix: humus (2 parts), peat (2 parts), sand (1 part), superphosphate (10 g per 10 kg), and wood ash (10 g per 10 kg).
Avoid plastic containers, as the soil will quickly become suffocated and sour. It's better to choose wooden boxes.
Caring for seedlings
The most important thing is to provide the seedlings with plenty of light. If this isn't possible indoors, provide supplemental lighting (at least 12 hours a day). For the first seven days, keep the seedlings in extremely humid conditions, slightly opening the plastic wrap, but do not remove it. Moisten the soil only if it's dry; otherwise, simply mist. Protect the plants from drafts.
Water the seedlings once every 10 days with a mild guano solution or a commercial vermicompost-based mixture. Just reduce the dosage by half.
Pricking out is essential; do it 10 days after sowing the seeds. Transfer each plant to a separate small container. Move the plant along with the root ball to avoid damaging the roots.
Harden off the plants 14 days after planting. On the first sunny day, take the cups outside for about 5 minutes, then increase the exposure to 3 hours per day.
Rules for planting seedlings in open ground
Pay attention to the soil composition right away. Snowdrop tomatoes don't tolerate highly acidic clay soils. To reduce the acidity, add 20 grams of wood ash and half as much crushed chalk per kilogram of soil.
If you grew your seedlings in the last week of February, you can transplant them outdoors at the end of April. Divide the planting area into 0.4 x 0.4 m squares. Dig holes, line the bottom with compost, and fill with settled water.
Choose a cloudy day for planting. Plants planted in hot and dry conditions root poorly and, as a result, yield a poor harvest.
Once the holes have absorbed the moisture, repeat the watering process. Plant the seedlings 40 mm above the root collar, cover them with soil, and compact lightly. Pour 0.5 liters of warm water under the roots.
Caring for bushes
Mature bushes require high-quality and regular care. This consists of several components:
- Watering. Apply water to the roots. Avoid overwatering the leaves, as this can lead to fungal diseases. Water when the top layer of soil has dried out. Avoid overwatering. Cover the seedlings with plastic during heavy rainfall. During dry periods, water the tomatoes every other day or every morning. A young plant requires approximately 2 liters of water, while a mature plant requires 4 liters.
- Loosening. This procedure will slow down the evaporation of water from the soil and prevent a dry crust from forming on the soil. Don't loosen the soil too deeply, as tomato roots are close to the surface.
- Weeding. Carry out the soil loosening, as this is when weeds are more easily pulled out of the soil. Grass removal is essential, as it is considered a source of pathogenic bacteria and fungi.
- Pinching out stepsons. This involves collecting the plant's lateral shoots from the lower part of the plant and breaking them off by hand when they reach 5 cm. This should be done in cloudy, cool weather to allow the plant time to heal before the heat sets in. After planting, perform the first side shoot removal after 30 days, then every 10 days.
- Garter. Farmers use two types of supports: trellises and stakes. The former are made of a large-mesh net, making them very difficult to tie to, but the latter allows for five bushes to be supported against the trellis at once. The stakes are driven in next to each bush.
- Top dressing. Tomatoes are very sensitive to the presence of nutrients in the soil, so fertilizing is essential. The first application is made 14 days after sprouting (10 liters of water + 1 kg of mullein + 15 g of superphosphate). Approximately 0.5 liters of the solution is required per plant. The next application is made 14 days later (20 g of superphosphate + 15 g of potassium chloride + 10 l of water). Subsequent applications are made every 20 days; a weak mullein solution can be used.
- First feeding: 14 days after planting the seedlings, use a solution of mullein with superphosphate.
- Second feeding: 14 days after the first, use superphosphate and potassium chloride.
- Subsequent feeding: every 20 days, use a weak solution of mullein.
Diseases and pests
The Snowdrop tomato is resistant to many diseases and pests, but some ailments still affect it. The main ones are late blight, blossom-end rot, and mosaic. To combat these, use specialized products such as Meteor, Thiophen Extra, and Acidan.
Bacterial diseases, which are untreated, are also dangerous. Diseased plants are uprooted and burned.
The most common pests are thrips, whiteflies, wireworms, slugs, and mole crickets. Control methods include regular preventative measures and the use of pesticides such as Confidor, Karate, and Mospilan.

Reviews of the variety
The Snowdrop tomato is an excellent variety for growing in colder regions. It requires special care, but the juicy, large fruits are worth the time and effort.