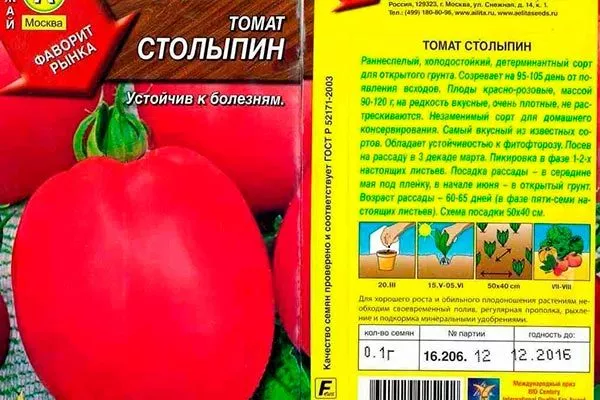
The Stolypin tomato has only recently appeared on the market, but has already gained popularity among amateur gardeners and summer residents. This plum-shaped variety boasts excellent taste and marketability, complemented by enviable characteristics and ease of cultivation.
Description of the variety
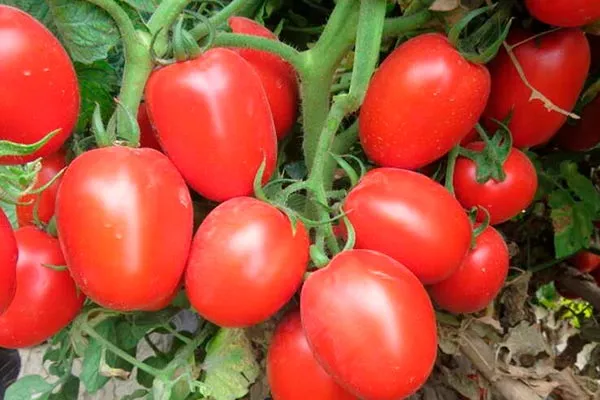
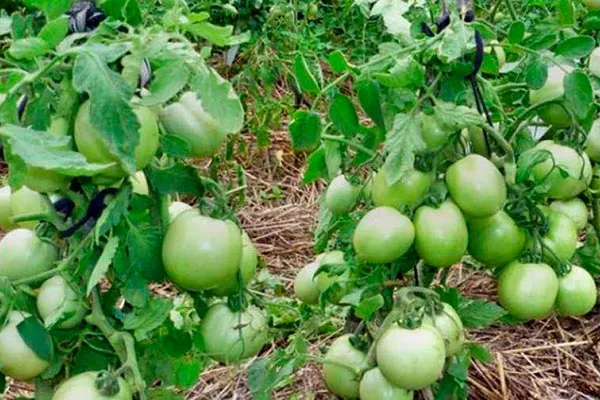
The Stolypin tomato plant is a determinate variety. It grows 60-100 cm in height. It has medium-sized dark green leaves, simple inflorescences, and jointed stems.
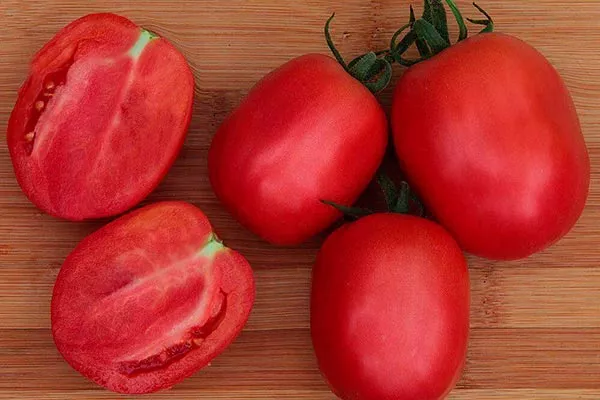
The Stolypin variety produces medium-sized fruits. They have 2-3 seed chambers and grow on clusters of 5-6. They resemble plum tomatoes in appearance.
Brief description of fruits:
- Colour of unripe fruits: light green, without a spot near the stalk.
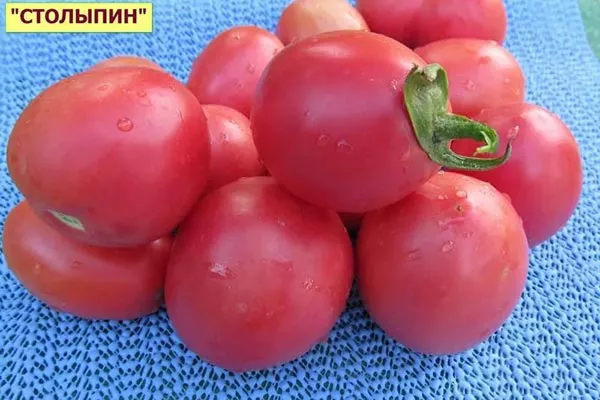
- Colour of ripe fruits: red.
- Shape: elliptical.
- Skin: smooth.
- Weight: 90-120 g.
The Stolypin variety was developed by employees of the well-known Russian firm Aelita LLC. Authors: N. V. Nastenko, V. G. Kachainik, and M. N. Gulkin. The variety was added to the State Register of the Russian Federation in 2012.
Taste and purpose of fruits
The Stolypin variety's fruits are sweet, juicy, and aromatic. The pulp's sweetness is harmoniously balanced with a slight tartness.
This variety has versatile uses: its fruits are eaten fresh, used in cooking, and used for preserves. Due to their small size, the fruits are ideal for whole canning.
Main characteristics
Stolypin has excellent agronomic characteristics, allowing it to be grown both under plastic and in open ground. This variety can be cultivated in any region of the country.
Productivity
This tomato is a high-yielding variety. When grown under cover, its yield is 8.0–8.5 kg/sq. m. One bush produces an average of 3 kg of fruit. With compact planting, you can get approximately 10 kg of tomatoes per square meter.
Ripening time
It's considered an early-ripening variety. It takes 95 to 100 days from sowing to the ripening of the first fruits. Harvest, depending on the growing region and soil type, occurs in July or August.
Immunity
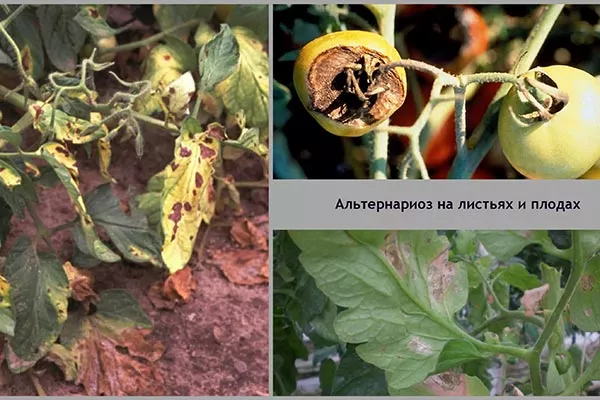
It is characterized by increased resistance to late blight and most nightshade diseases. However, during rainy periods, this tomato can be affected by macrosporiosis, septoria leaf spot, and gray mold.
It tolerates cold weather well and does not lose the ability to form ovaries in conditions of rain and low temperatures.
Pros and cons
The Stolypin tomato is, without exaggeration, nothing but a treasure trove of virtues. Even the most experienced tomato growers speak highly of this variety.
This variety has no drawbacks, except that some gardeners may find the bush formation procedure burdensome, but this feature is typical for many tomatoes.
Landing features
Successful cultivation of the Stolypin tomato depends on proper agricultural practices at every stage. It's especially important to obtain strong and healthy seedlings, which requires meticulous care for two months.
Seed preparation
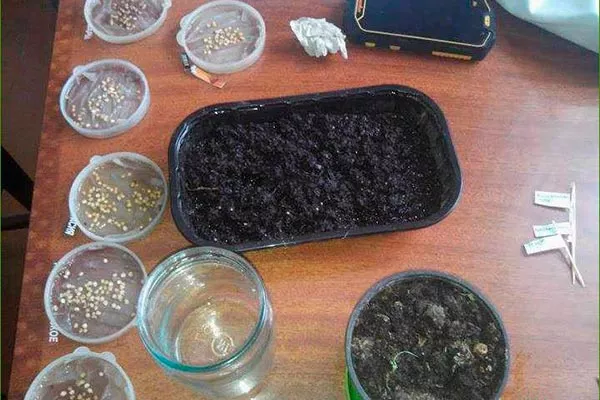
Seeds should be tested for viability by immersing them in a salt solution (1 teaspoon of salt per 250 ml of water). Good seeds will sink immediately to the bottom, while non-viable ones will float to the surface. After sorting, the seeds are washed and disinfected with a potassium permanganate solution (1 mg per 100 ml of water).
- ✓ Optimum temperature for seed germination: +20…+25 °С.
- ✓ Required seeding depth: 2 cm.
To boost the vitality of the seed, it is placed in a growth stimulant such as Epin, Zircon, or similar substances. This treatment improves seed germination, resulting in healthier, stronger seedlings that are more resilient to external influences.
Selecting a site
Stolypin tomatoes thrive in well-lit and warmed locations on the south side of the plot. They should be level or slightly elevated, free from shade, and well protected from drafts and northerly winds. Keep in mind that insufficient light can negatively impact the flavor of the fruit.
- ✓ Area illumination: at least 6 hours of direct sunlight per day.
- ✓ Wind protection: presence of natural or artificial wind barriers.
Nightshade crops should not be grown in the area where tomatoes are to be grown. Three to four years should pass between planting tomatoes and growing potatoes, eggplants, and peppers. Tomatoes grow well after onions, cabbage, cucumbers, and squash.
Soil preparation
Soil preparation begins in the fall. It is dug to a depth of 30-35 cm, adding nutrients and other components that can improve the soil structure or adjust its acidity. Ideally, the pH should be between 5.5 and 6.5. You can measure acidity using litmus strips, which are available at garden supply stores.
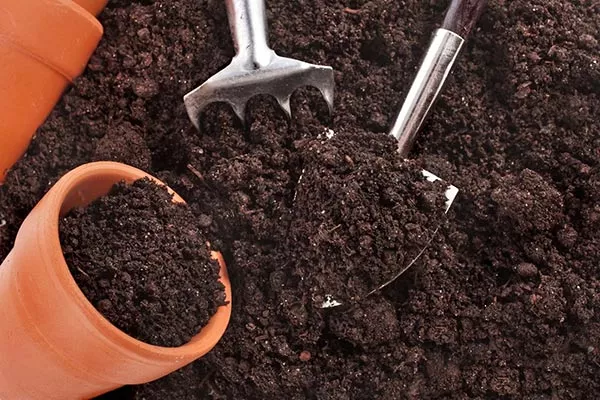
In the fall, add organic matter—compost, humus, rotted manure—as well as mineral fertilizers such as superphosphate, potassium salt, and so on, before digging. If you weren't able to prepare the plot in the fall, you can do so in the spring. To loosen heavy and clayey soils, it is recommended to add sand at a rate of 10 kg per square meter.
Growing seedlings
Seedlings are sown based on the climate conditions and soil type in which the tomatoes will be grown. Generally, sowing occurs between late February and mid-April.
- ✓ Temperature conditions after emergence: during the day +18…+25 °C, at night +8…+10 °C.
- ✓ Hardening off period for seedlings: 1-2 weeks before planting.
Features of growing seedlings:
- Before filling with soil, disinfect the planting containers by rinsing them with boiling water or rinsing them with a solution of potassium permanganate or hydrogen peroxide. The containers should be approximately 15 cm high and must have drainage holes. Seedlings can be grown not only in containers, trays, and cups, but also in peat pots. This is a more expensive method, but it allows for stress-free transplanting of seedlings into the soil, along with their containers.
- Planting containers are filled with store-bought or homemade soil. This can be made, for example, by mixing peat, humus, and garden soil. Sand or vermiculite is added to the mixture for loosening.
- Sow 2-3 seeds in each cup, and make shallow furrows in the containers, spacing the seeds 1 cm apart. Leave 2-3 cm between rows. Plant at a depth of 2 cm. Sprinkle the seeds with a thin layer of soil, 1 cm thick. Cover the seedlings with plastic and place them in a warm, sunny spot to encourage germination.
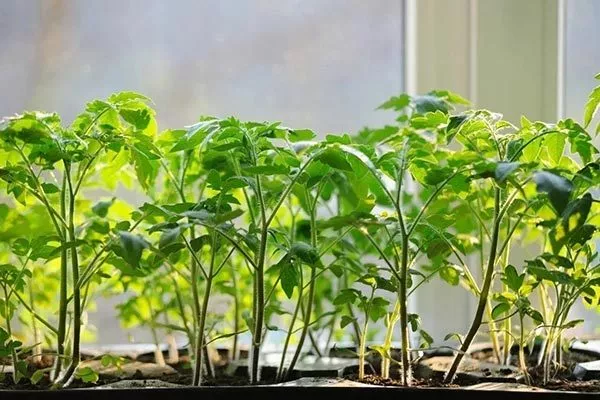
- When seedlings emerge, the film is removed. If the temperature was maintained at +20…+25°C before emergence, it is then lowered to +10…+15°C. At night, it should drop to +6…+7°C. The seedlings are kept in this harsh temperature regime for a week. This prevents the seedlings from stretching. Subsequently, daytime temperatures are increased to +18…+25°C, and nighttime temperatures to +8…+10°C.
- Once the seedlings have at least a couple of true leaves, they begin transplanting into individual (or larger) containers. Use containers of at least 0.5 liters for transplanting. Fill them with the same soil mixture as before transplanting.
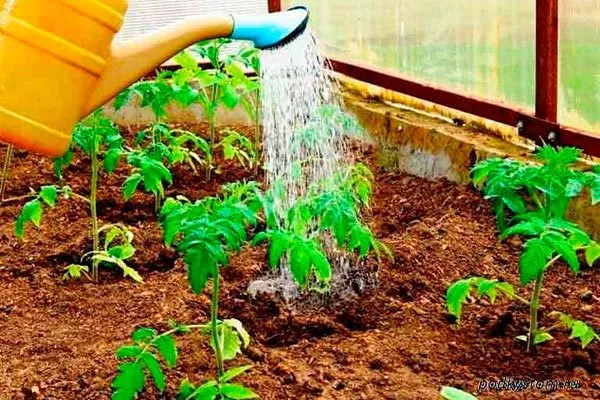
- While the seedlings are growing, water them regularly. Watering should be moderate, allowing the soil to dry out between waterings. The best time to water is in the morning. By evening, the soil should dry out. Use warm, settled water. Gently pour it from a watering can under the roots, being careful not to get it on the leaves and stems of the seedlings.
- The seedlings are fed for the first time 2-3 weeks after the first true leaves appear. A complex seedling fertilizer dissolved in water is added to the roots. Subsequently, feeding is repeated every 2-3 weeks.
- One to two weeks before planting, seedlings begin hardening off. They are gradually acclimated to the cold by taking them outside for short periods of time, initially 15-20 minutes, and then gradually increasing this time to 3-4 hours. You can even leave the seedlings outside overnight before planting, but only if the temperature doesn't drop below 10°C.
Transplanting seedlings
Seedlings are planted taking into account established daytime and nighttime temperatures—they should not fall below +8…+10°C. During the day, the air should warm up to +16…+18°C. The soil should warm up to a depth of 10-15 cm to +14°C.
Features of planting seedlings:
- Before planting, the seedlings are watered so that they can be easily removed from the planting pots.
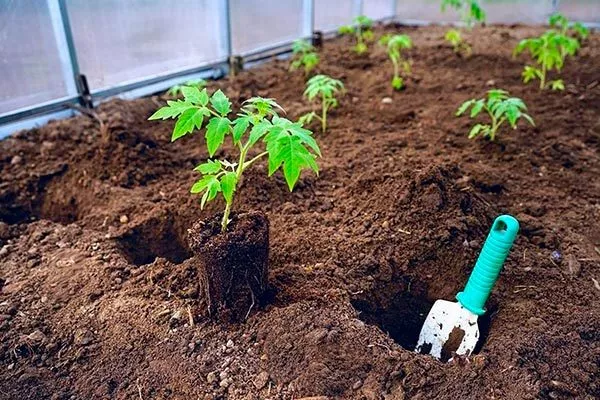
- Prepare planting holes approximately 15 cm deep and 20 cm in diameter. The recommended planting pattern is 50 x 40 cm.
- Planting is best done in the morning, evening or in cloudy weather.
- A handful of wood ash is sprinkled into the holes; if the soil is poor, mineral fertilizer is added. Then the holes are watered and left for the water to soak in and the soil to settle slightly—about an hour.
- The seedlings are placed in the holes, the roots are covered with soil, and the soil is compacted. If the seedlings are slightly overgrown, 2-3 lower leaves are removed and they are then planted at an angle, with the tips facing south. The stems are left no more than 20 cm above ground, and then hilled up to a depth of 3-4 cm. The planted tomatoes are watered again, making sure to use settled, warm water; cold water can promote disease.
Nuances of caring for the variety
The Stolypin tomato requires standard care. The quality and quantity of the harvest directly depend on the regularity of watering and fertilizing. It's also important to regularly apply preventative sprays and monitor the condition of the plants.
Watering and loosening
After planting, tomatoes are not watered for 10-12 days to promote root development. Watering then becomes regular, 1-2 times a week, depending on weather conditions.
Top dressing
If tomatoes are grown in fertile soil, they don't require any additional fertilizer; the nutrients provided in the fall and at planting are sufficient. However, after watering, it's recommended to sprinkle the spaces between the rows with sifted wood ash—this is both a source of potassium and a preventative for fungal diseases.
In poor soils, regular phosphorus-potassium fertilization is recommended—once every two weeks. You can also feed the bushes with potassium sulfate during fruit set. For maximum effectiveness, apply fertilizing immediately after watering.
Shaping and garter
It's recommended to train the Stolypin tomato into 1-2 stems. The bushes also need to be tied and side-sonned—removing shoots growing in the leaf axils.
Pest and disease control
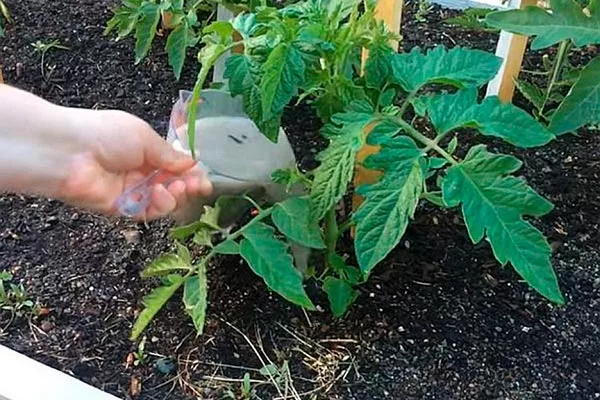
To prevent bushes from being affected by pathogens, it is recommended to regularly carry out preventative measures—when growing seedlings and transplanting them into the ground (or greenhouse). Sprinkle the soil with boiling water or copper sulfate, observe crop rotation requirements, and spray the bushes with various infusions and solutions prepared according to traditional recipes.
When disease symptoms appear, it is recommended to use boric acid solution, copper sulfate, and effective fungicides such as Alirin-B or Gamair. Fitosporin-M and other biological products can also be used for disease control.
To combat aphids, whiteflies, and small mites that can infest bushes, use garlic or tobacco infusion. For large pest infestations, use insecticides such as Fosbecid or Citcor.
How to harvest and store crops?
The fruit harvest occurs in July and August. Because there are many tomatoes and they ripen one after another, ripe ones need to be picked every day to prevent them from becoming overripe. It's best to pick the tomatoes in dry weather, in the morning or evening.

Unripe tomatoes can retain their marketability and quality for 1.5-2 months. Their thick skin allows them to be stored well without losing their nutritional value or flavor. Tomatoes are stored in boxes, no more than two layers deep, in a cool place. The optimal temperature is 10 to 11°C. Humidity: 80-85%.
Reviews
The Stolypin tomato, named after the great reformer, deserves your full attention. This is a truly interesting and promising variety with virtually no flaws. It will definitely appeal to those who prefer varieties with low bushes and small, plum-shaped fruits, ideal for whole-fruit canning.
Thank you for the informative article. Yes, the information provided is accurate—I've been growing this variety for 5-6 years now. My bushes were infested with whiteflies almost every year, but last year I sprayed them with garlic infusion and managed to avoid the problem.