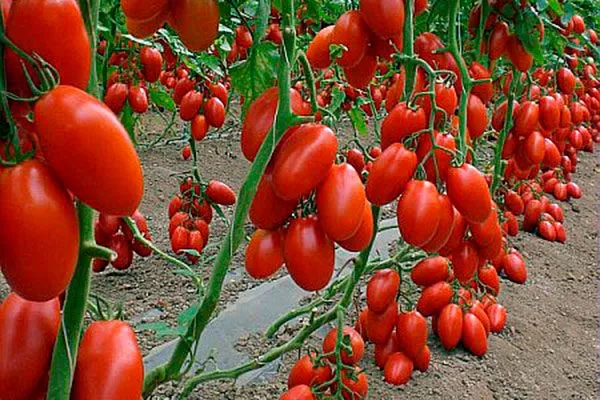
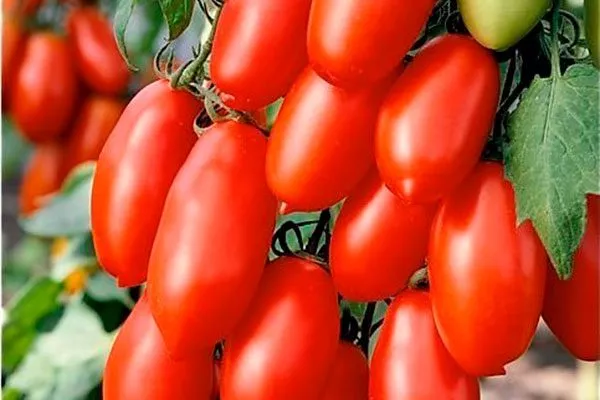
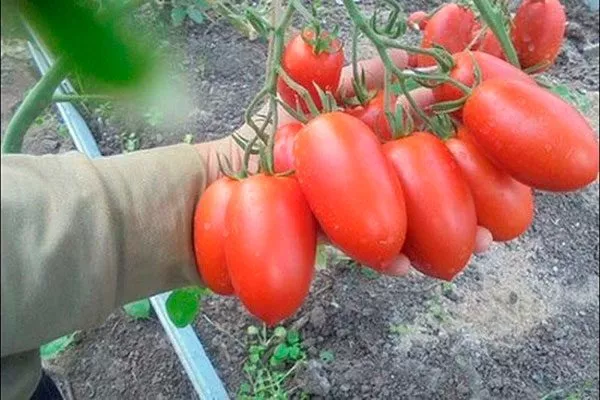
The Sir Elian tomato boasts not only a noble name but also a unique appearance. These tomatoes are characterized by an elongated shape and light weight. They are juicy and firm, making them suitable for fresh eating and canning. This variety attracts gardeners with its strong immunity, excellent shelf life, and superb taste.
Description of the bush and fruits
The plant is tall, reaching approximately 200 cm. It belongs to the racemose varieties, the fruits ripen on bunches throughout the season.
Distinctive characteristics of the culture:
- internodes – medium length;
- leaves - small, dark green in color, moderate foliage;
- inflorescences – have a simple structure;
- root system – powerful and well developed;
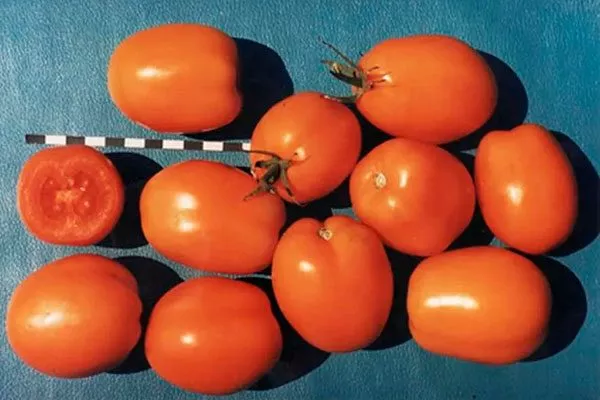
- tomatoes - when unripe they are green in color, but as they ripen they acquire a rich red hue;
- weight - fluctuates between 57 and 107 g;
- length - approximately 10 cm;
- pulp – dense and fleshy;
- peel – smooth with a matte finish.
The tomatoes have an elongated, ovoid shape, allowing them to warm evenly in the sun. Each cluster produces 6 to 8 fruits, and a bush produces 7 to 9 clusters. Each ovary produces 8 tomatoes, which ripen simultaneously, allowing them to be harvested all at once.
Main characteristics of the Sir Elian tomato
Sir Elian was developed in France by breeders from the renowned seed company Vilmorin SA. In 2017, it was added to the State Register and approved for cultivation.
Features and key qualities:
- This variety is mid-season, with a ripening period of 110-120 days.
- The yield is high – with proper care, gardeners can harvest 14-16 kg of ripe and juicy fruit per square meter.
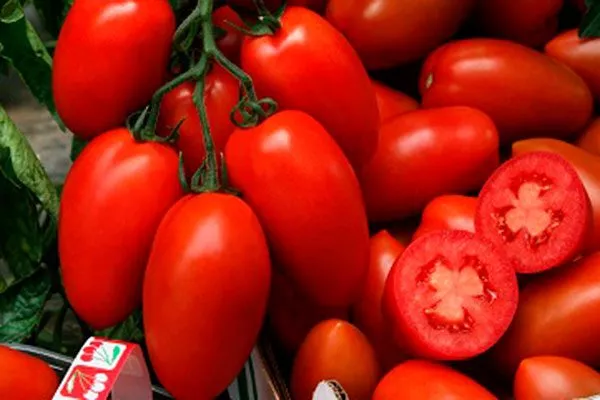
- Tomatoes have a rich sweet and sour taste.
Tomatoes are most often eaten fresh, but they are suitable for canning, adding to salads and various dishes.
Cultivation of the variety
Sir Elian produces excellent results both in open beds and greenhouses. To obtain a bountiful harvest, it's important to properly prepare the seedlings, provide comfortable conditions for the plants, and adhere to proper agricultural practices.
Growing seedlings
This variety performs best when grown from seedlings, as this allows the plants to become stronger and begin bearing fruit earlier. Before sowing, prepare the planting material to improve germination and disease resistance.
Perform the following procedures:
- Disinfection. Soak the grains in a 1% potassium permanganate solution for 20-30 minutes, then rinse with clean water. You can also use Fitosporin or hydrogen peroxide.
- Germination. Place the seeds on a damp gauze or cloth, wrap them and leave for 12-24 hours to swell, which speeds up their germination.
- Hardening. To increase resistance to temperature changes, place the seeds in the refrigerator for 2-3 days at +2…+5 °C.
The optimal sowing time is 55-60 days before planting in the ground. Sow the seeds in a loose, nutrient-rich substrate, which you can prepare from a mixture of garden soil, peat, humus, and sand (2:2:1:1).
Step-by-step instructions:
- Fill the container or box with soil mixture and moisten it.
- Make grooves 1-1.5 cm deep at a distance of 3-4 cm from each other.
- Place the seeds at intervals of 1.5-2 cm and sprinkle with a thin layer of soil.
- Spray with warm water, cover with film or glass to create a greenhouse effect.
- Place the container in a warm place (+22…+25°C) until seedlings appear (usually 5-7 days).
- ✓ Optimum soil temperature for planting seedlings: +14…+16°C.
- ✓ The need to use phytolamps when there is insufficient natural light: at least 12-14 hours a day.
When sprouts appear, remove the covering and move the containers to a bright room. Create favorable conditions:
- temperature - in the first days +16…+18°C, then +20…+22°C;
- lighting – at least 12-14 hours a day, use phytolamps if necessary;
- watering – moderate, as the top layer of soil dries out, best with warm, settled water;
- picking – transplant the seedlings into separate cups when 2-3 true leaves appear;
- top dressing – 10-14 days after moving with complex fertilizer (nitrogen, phosphorus, potassium).
Planting in the ground
Transplant the seedlings outdoors or into a greenhouse when the soil warms to 14–16°C and the threat of frost has passed. By this point, the plants should have 6–7 true leaves and a strong stem.
Follow these recommendations:
- Selecting a location. It should be sunny, with loose, fertile soil. Beds that previously grew onions, carrots, cabbage, and legumes are best.
- Preparing the soil. 1-2 weeks before the event, dig up the soil, add humus, wood ash and superphosphate.
- Planting diagram. Leave 50 cm between bushes, and the distance between rows should be at least 60 cm. This arrangement will ensure good air circulation.
- Landing. Place the seedlings in prepared holes 15-20 cm deep, sprinkle the roots with soil, compact lightly and moisten with warm water.
Install supports or trellises near the bushes, as this variety is tall.
Features of agricultural technology
After transplanting seedlings into open ground or a greenhouse, tomatoes require care. Follow standard care procedures:
- Watering. The plant does not tolerate excess moisture but requires regular soil moisture. 5-7 days after planting, water for the first time to allow the roots to establish. The optimal watering schedule is 1-2 times a week, and up to 3 times every 7 days in hot weather. Water in the morning or evening with warm, settled water.
- Top dressing. Provide the bushes with a comprehensive nutritional supplement throughout the growing season. 10-14 days after planting, apply a solution of mullein (1:10) or chicken manure (1:20). During flowering, apply phosphorus-potassium fertilizers: superphosphate (20 g per 10 l of water) or wood ash (200 g per 10 l of water).
During fruiting, feed the plants with complex substances containing potassium and calcium; you can use an ash infusion (200 g per 10 liters of water). - Formation of a bush. Remove side shoots (stepchildren), leaving one or two main stems. Do this once a week. Tie the stems to trellises or stakes to prevent them from lodging and protect the tomatoes from contact with the ground.
Gradually remove the lower leaves, starting when the vegetables are setting - this will help improve air circulation and reduce the risk of disease.
Pest and disease control
The crop has good immunity, but if not properly cared for, tomatoes can face a number of problems. Common diseases and insects:
| Disease/Pest | Signs | Methods of control |
| Late blight | It is characterized by a brown coating on the leaves, dark spots on the fruits and rotting of the stems. | Use copper-containing products such as HOM, Ordan, and Ridomil Gold, as well as folk remedies such as whey or garlic solutions. Avoid planting tomatoes after potatoes. |
| Alternaria | It appears as brown spots with a yellow border on the leaves and a black coating on the stems and fruits. | Use fungicides such as Topaz, Skor, and Fundazol, watering only at the roots and avoiding contact with the leaves. Ventilate the greenhouse and remove diseased plants. |
| Gray mold | Gray fluffy coating on stems and leaves, wet spots on fruits. | Remove affected parts of the bushes and spray with Switch and Horus fungicides. Improve air circulation in the greenhouse. |
| Blossom end rot | Dark, sunken spots appear on the tops of tomatoes. They dry out and rot. | To prevent this, apply calcium fertilizer (spray with calcium nitrate) and water regularly. Reduce soil acidity. |
| Tobacco mosaic | Characterized by a mosaic pattern on the leaves and deformation of the shoots. | Remove infected plants and disinfect seeds before planting. Treat bushes with a whey solution. |
| Aphid | It feeds on leaf sap and lives on the underside of leaves, causing them to curl and wither. | Use garlic infusion or soapy water, as well as insecticides - Fitoverm or Actellic. |
| Spider mite | Leaves small light spots on the leaves and a web. | Acaricides such as Akarin and Neoron are effective. |
| Whitefly | Small white moths and sticky coating on leaves. | Set up sticky traps and spray with Iskra or Confidor. |
| Mole cricket | It gnaws at roots and stems, which leads to the wilting and death of seedlings. | To prevent pests, add repellents to the soil, such as pepper infusion, ash, or mustard. Medvetoks and Grom are effective. |
Pros and cons
To prevent various problems, carefully study the advantages and disadvantages of the Sir Elian tomato. It has many advantages:
Among the disadvantages, gardeners note poor resistance to weather changes, the need for tying, and the need for care in the early stages of growth.
Similar cultivars
Several varieties are similar to Sir Elian, sharing the same characteristics and qualities. Below are the most popular varieties:
| Name | Description |
| Soviet | The plant is tall, reaching 2 meters. The tomatoes are red with a raspberry hue, ripening 4 months after germination. They are large, with fleshy and tasty pulp. The yield is approximately 9 kg per square meter. |
| Monomakh's Cap | An indeterminate variety with a bush height of up to 1.5 m. It is resistant to temperature fluctuations and produces the best yield in greenhouses or under plastic. The fruits are pink, large, and sweet, weighing 500-800 g. Productivity can reach 7.5 kg per square meter. |
| Hospitable | A determinate variety of domestic selection with a plant height of 80 to 100 cm. The bush is spreading and resistant to fungal and viral diseases, but can sometimes develop double leaves outdoors. The fruits are bright red, weighing 350 to 600 g. |
Reviews
Sir Elian is a productive tomato suitable for both home gardeners and those who sell it. Although sensitive to weather changes, this variety is worth the effort and time invested, delighting with high-quality tomatoes and regular fruiting throughout the season. Proper care is the key to bountiful harvests.