The Pudovik tomato is a worthy representative of Siberian selection. This large-fruited variety combines excellent taste with enviable resistance to any weather conditions—it withstands cold, heat, and drought.
Description of the Pudovik variety
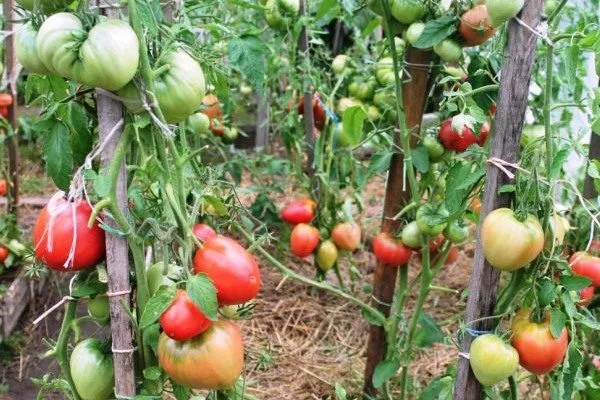
The Pudovik tomato plant has medium-sized, spreading, moderately branched bushes, and is an indeterminate variety. The bushes grow to a height of 1.3-1.5 m. In open ground, they reach a height of 1-1.2 m, and in a greenhouse, 1.7-1.8 m.
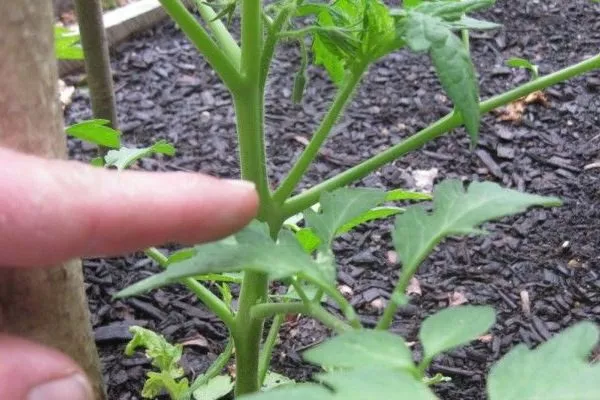
The leaves are standard-shaped, medium to large, and dark green. The stems are quite fragile and can break under the weight of the fruit. The inflorescences are simple, and the peduncles are not jointed.
Brief description of fruits:
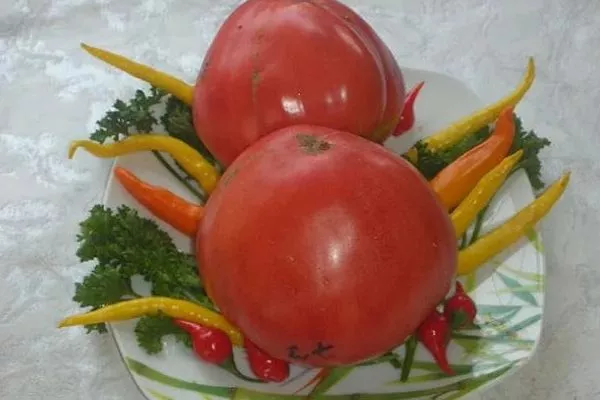
- Color of unripe fruits: green.
- Color of ripe fruits: crimson.
- Form: heart-shaped, ribbed.
- Skin: smooth, dense, thin.
- Weight: 300-500 g.
Individual specimens can reach a weight of 800-1000 g.
History of creation
The Pudovik variety is the fruit of the labors of Novosibirsk breeders. Its authors are V. N. Dederko and O. V. Postnikova. The variety was added to the State Register in 2007. It is suitable for cultivation in all regions of the country. Another name is Sevryuga.
Taste and purpose of fruits
The fruit has a moderately sweet, salad-like flavor with a slight, pleasant tartness. The flesh is moderately juicy and medium-firm.
These tomatoes have a universal purpose: they are eaten fresh, used to prepare salads and all kinds of culinary dishes, juices, sauces and ketchups.
Characteristics
The Siberian variety Pudovik has excellent agronomic characteristics, allowing it to be grown in a wide range of climatic conditions and soil types.
Productivity
The Pudovik tomato is a high-yielding variety. With proper care, a single bush can yield up to 5 kg of ripe fruit. The average yield of this variety is 15 kg per square meter.
Ripening time
The Pudovik tomato is a mid-season variety. Its growing season is 110-115 days. This is the time it takes from germination to the ripening of the first fruits.
Cold and drought resistance
The Pudovic tomato is very hardy, boasting exceptional cold and drought tolerance. The bushes tolerate prolonged cold spells, prolonged rains, heat, and drought.
Immunity to diseases
The variety has a very high immunity and is practically not affected by common diseases of nightshade crops.
As a preventative measure, it is recommended to apply mineral fertilizers throughout the growing season. These not only promote the growth and health of tomato plants, but also help them cope with pathogens.
Pros and cons
The Pudovic tomato attracts gardeners not only for the size of its fruits; this remarkable Siberian variety has other advantages as well. It's also helpful to familiarize yourself with all the disadvantages of this tomato before planting to determine whether it's suitable for your needs.
Landing
The Pudovic tomato is grown using seedlings. The seedlings are grown indoors, on windowsills, or in heated greenhouses.
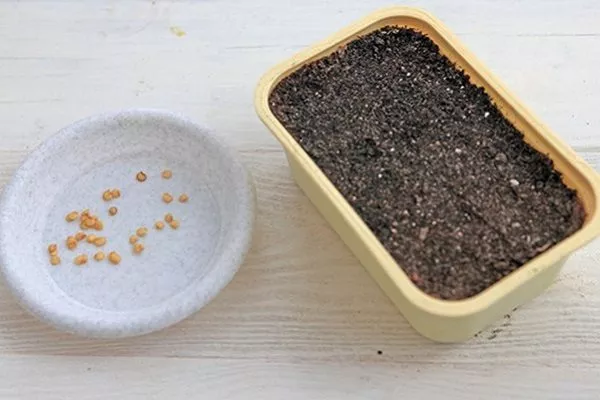
How to prepare seeds?
To ensure 100% germination, seeds should be tested in a saltwater solution—good seeds will sink to the bottom, while bad ones will float to the top. It's also recommended to disinfect home-grown seeds by soaking them in a pink solution of potassium permanganate for about 20 minutes.
- ✓ Optimum temperature for seed germination: +22…+25 °C.
- ✓ Required soil moisture for seedlings: 75-80%.
After disinfection, the seeds are washed and dried, then placed in a growth stimulator to increase germination. The seeds are then wrapped in wet cheesecloth and waited for sprouts to emerge. Once the seeds sprout, they can be sown in prepared containers.
How to grow seedlings?
Sow seeds so that favorable conditions for planting occur within 60-65 days. The timing varies by region and climate zone, depending on the soil type and climate. In the south, seedlings are sown early—in late February or early March—while in central and northern regions, a few weeks later.
Features of growing seedlings:
- Use any convenient container for sowing, including containers, individual plastic cups, peat pots, or tablets. New containers are thoroughly washed, and old ones are disinfected by rinsing with boiling water. Drainage holes are made in the bottom; for example, cups should have three to four.
- The planting containers are filled with store-bought substrate or homemade potting mix. The garden soil used for growing seedlings must be disinfected—frozen, treated with potassium permanganate, boiled over steam, etc.
- The soil mixture can be prepared, for example, from equal parts of peat, sand, and humus (or compost). Add 1 liter of wood ash and 1 liter of wood shavings to 30 liters of the mixture. Pour boiling water over the mixture and let it sit for 24 hours. Then, fill the planting containers with it.
- Sow 2-3 seeds in each cup, planting them 1 cm deep. In larger containers, sow in rows, spacing them 3 cm apart, with 1.5-2 cm between adjacent seeds. Water the seeds gently with a spray bottle and cover with plastic wrap.
- After a few days, seedlings emerge. The film is immediately removed, and the temperature is lowered by a few degrees. For a week, the seedlings are kept in a room with a temperature of +14…+15°C. Then, the temperature is raised to +20…+22°C. Nighttime temperatures should be between +16…+17°C.
- During the first few days, seedlings are recommended to have 24-hour light, so supplemental lighting is needed. By the fourth or fifth week of growth, daylight hours are reduced to 11-12 hours.
- When the seedlings have two true leaves, they are transplanted into separate containers, pinching out the roots, and then pricked out. Seedlings sown in cups are transplanted into larger containers.
- For the first three weeks, water the seedlings sparingly—once a week is sufficient—then increase watering to three to four times a week. Humidity in the room is maintained at 75%; higher humidity increases the risk of rot and blackleg (an incurable fungal disease).
- The seedlings are first fed after two true leaves appear. A urea solution is added (1 teaspoon per 1 liter of water). Subsequently, ready-made mineral fertilizers designed specifically for vegetable seedlings are applied every 10 days.
- When 1-2 weeks remain before transplanting into the ground, begin hardening off the seedlings. They are taken outside every day, gradually increasing their time outside to several hours.

Site requirements
Choose a well-lit area for planting; shade, waterlogged soil, lowlands, drafts, and gusty winds are contraindicated for the Pudovic tomato. Tomatoes are planted on level or slightly elevated areas; lowlands are not suitable.
When planting tomatoes, it's important to follow crop rotation rules, which prohibit planting this crop immediately after nightshade crops such as peppers, potatoes, eggplants, etc. Legumes, various greens, cabbage, cucumbers, and carrots are considered good predecessors.
How to prepare the beds?
The Pudovic tomato requires fertile, loose soil with good water and air permeability. It should be slightly or neutrally acidic—you can test it with special test strips.
Soil preparation for tomatoes begins in the fall. The soil is dug deep, after being sprinkled with organic matter—rotted manure, humus, and compost. The organic matter is worked into the soil to prevent it from being washed away by the melting snow.
To loosen heavy and clayey soils, use coarse sand, and to deoxidize, use wood ash or slaked lime. In the spring, the soil is dug again, leveled with a rake, and the beds with planting holes are prepared.
Planting seedlings in the ground
Pudovik tomato seedlings are planted outdoors after the threat of frost has passed. Each region has its own planting time. In the south, for example, planting occurs in May, while in regions with a cold spring and short summer, it occurs in June.
- ✓ The soil temperature for planting seedlings should be at least +15 °C.
- ✓ Distance between bushes when planting: 50-60 cm.
Features of planting seedlings:
- Transplanting of seedlings is carried out in the morning or evening, when the sun is less active, or on a cloudy day.
- Holes are dug immediately before planting. They are sized to comfortably accommodate the seedlings' root systems. Three to four plants are planted per square meter.
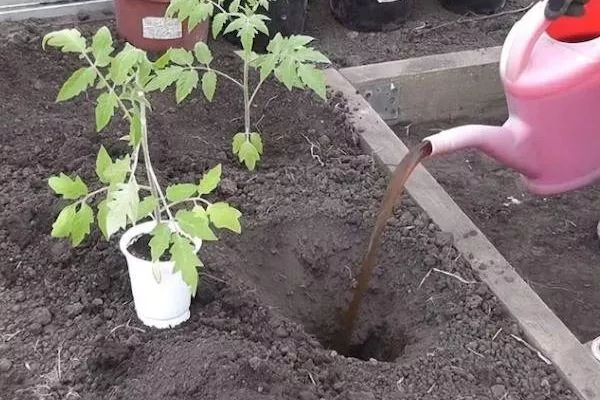
- Add a handful of wood ash and potassium salt to the bottom of the holes, then sprinkle some soil on top to prevent burning the roots. Then water the holes (3-5 liters of water is sufficient) and leave for half an hour to allow the soil to settle slightly.
- The seedling is placed in the hole, the roots are covered with soil and it is carefully compacted. The planted seedlings are watered with warm, settled water.
Care
The Pudovik variety requires standard care. The bush's yield, as well as the taste and size of the fruit, directly depend on its regularity and quality.
Watering
Water the Pudovic tomato moderately, maintaining a balance between overwatering and overdrying, which are both harmful to the plant. After planting, do not water the seedlings for a week to allow them to establish quickly and effectively. Subsequently, water them about once a week.
In hot weather and during droughts, watering should be more frequent—up to 2-3 times a week. The recommended watering rate is 4-5 liters per plant. It is recommended to water in the evening, being careful not to splash water on the leaves and stems. A lack of water can be detected by the plant's appearance—its leaves will become dark and wilted.
Top dressing
The Pudovic tomato is fertilized approximately once every two weeks. Before planting the seedlings, the soil is fertilized with urea. Nitrogen-containing fertilizers are applied before flowering, and phosphorus and potassium fertilizers are applied during flowering and fruit formation.
Loosening
The soil in tomato beds is loosened after heavy rains and the day after watering. Loosening prevents the formation of a hard soil crust, which prevents oxygen from reaching the roots.
After planting tomatoes, the soil is loosened deeply—at least 10 cm deep—and then loosened more shallowly, to 4-5 cm. Weeds are removed at the same time. Mulching with hay, straw, peat, etc. is also recommended.
Garter and shaping
The Pudovic tomato requires staking and shaping. Stake the plants near the bushes and tie them to them with soft twine or nylon rope. It's important not to compress the stems.
Diseases and pests
The Pudovik variety is highly resistant to various pathogens, but under unfavorable conditions and poor agricultural practices, it can be susceptible to late blight, mosaic, and brown spot. To prevent these diseases, spray the bushes with Fitosporin, Polycarbacin, and a potassium permanganate solution.
The Pudovic tomato is most often attacked by spider mites, Colorado potato beetles, and various caterpillars. Insecticides and folk remedies, such as wormwood or hot pepper infusions, are used to control these pests.
Harvesting
This variety is characterized by a wavy and prolonged fruiting period, with the fruits ripening gradually. In regions with short summers, it is recommended to pinch the main stem in August to ensure all the fruits have time to ripen before frost.
Pudovic tomatoes don't store well for long periods of time due to their very thin skin. They can be stored indoors for two days, and in the refrigerator for a week.
Reviews
The Pudovik tomato fully lives up to its resonant name and its affiliation with the renowned Siberian selection. This remarkable large-fruited variety is sure to appeal to lovers of pink giants—sweet, juicy, and meaty.