The Marusya tomato variety grows throughout Russia. It produces a bountiful harvest of tasty, oblong fruits. The plant can be grown from a seed from a previous harvest. It requires little care and has strong immunity to common diseases. It retains its beneficial properties even in long-term storage. It also transports well.
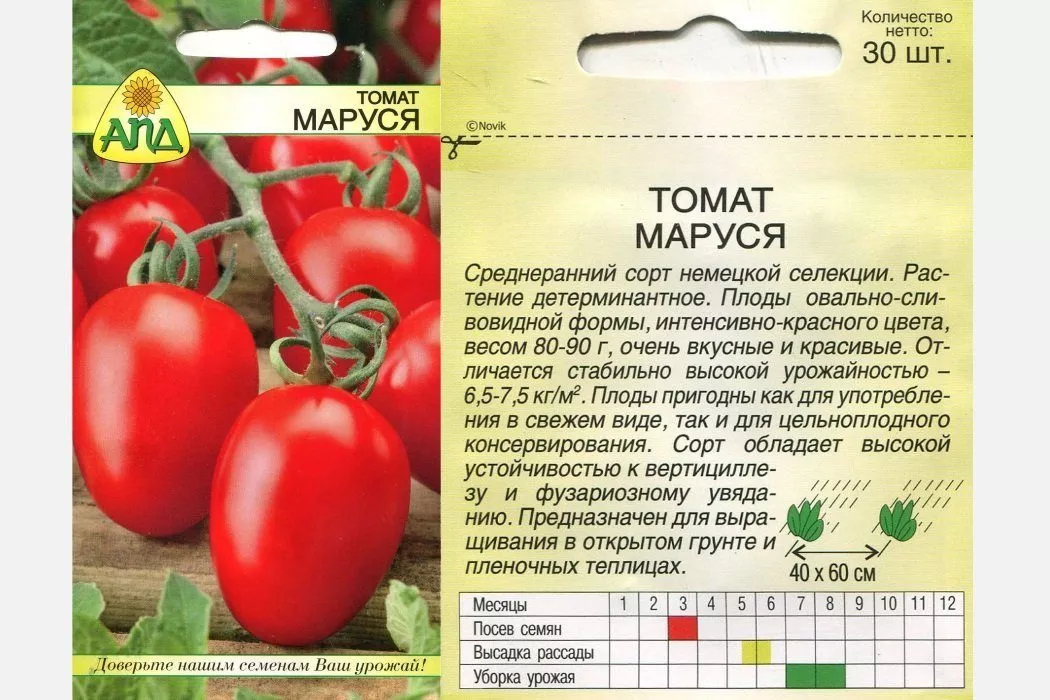
Marusya tomato seeds
The variety is suitable for producing delicious ketchup and tomato paste
Origin of the variety
The Marusya tomato was originally developed by German breeders representing Satimex QUEDLINBURG. Its Russian representative, Agroplaneta LLC, submitted a request to the breeding committee for permission to adapt the plant to Russia's climate.
After approval, she began testing in 2006 and became the originator of the variety. In 2007, the Marusya tomato was added to the state register as a variety intended for cultivation throughout the country.
Description and characteristics of the Marusya tomato
This annual plant is a mid-season, determinate variety that ceases growing after the ovary and fruit form at the end of the shoot. It is suitable for planting in open ground and greenhouses. It tolerates summer heat and lower nighttime temperatures well.
Does not require special care.
Appearance
It grows to a maximum of 1 m in greenhouse conditions and up to 55-85 cm in open ground.
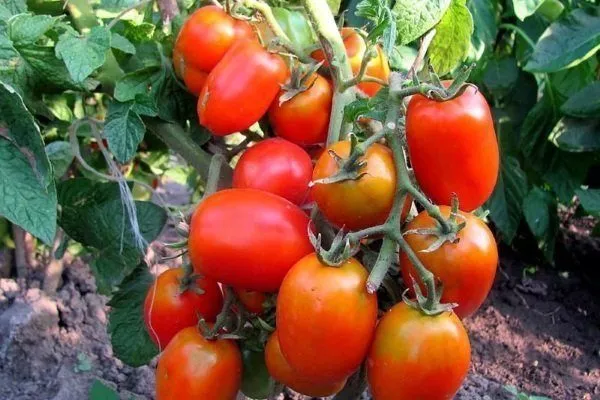
The bush is covered with green leaves and fruits, gathered in clusters like grapes. During fruiting, it must be tied to a support.
The stem is dense, consisting of 1-2 scapes. It bears petioles with medium-large, rich green leaves. The leaf structure is odd-pinnate. It is fleshy, divided into small lobes, and covered with fine hairs.
The leaf stalks are conveniently positioned. They protect the fruits from bright sunlight and prevent sunburn, but still allow enough light to allow the tomatoes to develop properly.
A fruiting raceme forms between each leaf, starting with the sixth. It bears 4-8 small yellow flowers, which form a simple inflorescence.
Description of fruits
This medium-sized tomato weighs 60-80 g. Its shape is plum-shaped, slightly elongated. All the fruits are almost the same size.
The tomato is covered with a thin, durable skin that is resistant to cracking. The surface is smooth. The color is bright red.
The inside of the fruit is divided into 2-3 chambers. The pulp is dense and fleshy. The flavor is rich. It contains a large amount of dry matter.
The fruit of the Marusya tomato holds firmly to the bush and does not fall off.
Productivity and fruiting
Harvesting can be done 105-110 days after planting. This may take up to a week depending on the regional climate and growing conditions.
It takes 1-1.5 months from fruit set to maturity. Harvest time is late July to early August, depending on the length of the summer.
One bush yields up to 2 kg of tomatoes, and 6.9-7.5 kg per square meter. This is a good yield for a medium-fruited variety.
The harvest can be increased by using pinching at the right time or by growing in favorable and stable greenhouse conditions.
Application of fruits
The Marusya tomato is grown for both home use and retail. The fruits have a long shelf life, retaining their freshness, nutritional properties, and flavor.
They are eaten raw and used in cooking. They are also used to make juices and ketchup. Tomatoes retain their flavor even when canned.
Resistance to diseases and pests
Please note the following features:
- The variety is immune to fusarium wilt and verticillium wilt.
- If a plant is affected by whitefly, it is treated with a special preparation called Confidor.
- If slugs are found on the fruit, reconsider your watering frequency. Dig over and treat the surrounding soil with a mixture of ash, tobacco dust, and lime.
- Spider mites can be removed by spraying the bushes with Karbofos.
Growing from seeds
Planting begins with preparing and germinating the seeds. This variety is not a hybrid, so seeds can be harvested from the fruits of the previous harvest. Alternatively, they can be purchased from a specialty store.
Seed germination should begin 60-65 days before planting in a permanent location in open ground or a greenhouse. This should be in mid- to late March, depending on the length of the summer season.
Seed preparation
This involves processing them. First, the most viable seeds that will produce a good harvest must be selected. The selection process takes place in a specially prepared liquid.
Add a pinch of salt to a glass of water, add the seeds, and stir thoroughly. Let sit for a few minutes. Eventually, all the empty seeds should float to the surface.
Next, disinfect them. For a quicker process, prepare a weak solution of potassium permanganate. Soak the seeds in it for 20-30 minutes.
To improve germination, create strong immunity in young seedlings, and increase the yield of mature plants, prepare the following solution:
- dilute baking soda;
- add 4 drops of Fitosporin and aloe juice;
- Place the seeds in this mixture overnight.
The solution also provides disinfection.
The purchased seeds do not require processing.
The seeds must be hardened. They are wrapped in damp cheesecloth and placed in the refrigerator for 24 hours.
Sowing seeds
For planting you will need a small container in the form of a wooden box or a peat cup.
The soil composition should be light and contain organic matter. The soil can be purchased ready-made or prepared yourself. Preparation begins two weeks before use.
To prepare the soil you will need:
- 2 parts of turf soil;
- 1 part each: sand, ash, rotted manure and peat.
After this, the soil is disinfected by baking it in an oven and soaking it in a manganese solution. The soil is dried and wrapped in plastic. It is then stored in a dark place to restore beneficial microflora.
Steps to plant seeds:
- fill the container 2/3 full with soil;
- put 2-3 seeds in one place;
- keep a distance of 3 cm between seeds;
- sprinkle a layer of soil on top;
- moisten the soil with a spray bottle;
- cover with plastic wrap.
Place the containers in a dark place. The ambient temperature should be around 25°C.
Read more about germinating tomato seeds for seedlings here.
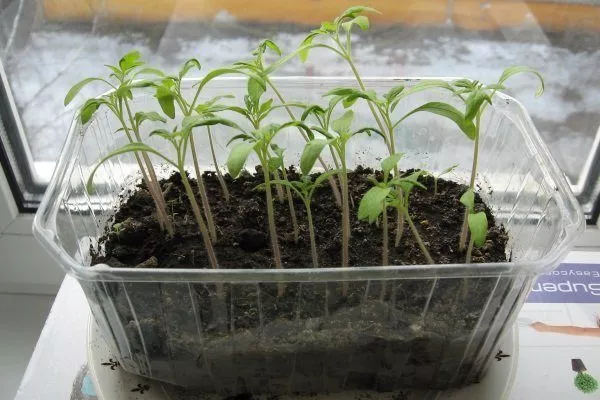
Caring for seedlings
After 4-7 days, seedlings will appear. The container with the greens is moved to a cooler location for hardening. The temperature should not drop below 16°C (61°F). A balcony, veranda, or similar area is suitable for this.
The film should be removed gradually to give the seedlings time to adjust to the new temperature. Start with 2-3 hours of daylight and gradually increase the exposure.
The ambient temperature shouldn't be too high. Otherwise, the seedlings will begin to grow rapidly, which will lead to poor adaptation and plant survival after transplantation.
Care for seedlings includes:
- Lighting. Good growth is ensured by constant natural light for at least 16 hours a day. If there is a shortage of natural light, you need to extend the daylight hours using artificial lamps.
- Watering. Water the soil under the young shoots using a spray bottle.
- Top dressing. Two weeks after germination, apply the first fertilizer. Use a diluted natural organic fertilizer such as manure or bird droppings.
When caring for delicate seedlings, try to prevent moisture from getting on the leaves.
Transplanting seedlings
The next step in seedling care is picking. This involves transplanting young shoots into a larger container (200-500 ml). This is done 8-14 days after the plant has developed two leaves.
This procedure can be omitted if the seeds were initially planted in separate large cups. This will give them enough space to grow fully and prevent them from touching the leaves of neighboring seedlings.
The sprout is transplanted into soil with the same composition as for germinating seeds. The seedling should be removed with a lump of soil around the roots. A small spoon can be used for digging.
Be sure to harden off the seedlings. This should be done 2-3 weeks before transplanting them outdoors. Take the seedlings outside daily. Start with 5-10 minutes and gradually increase the time.
Gradually, the seedlings should harden off enough to be outdoors for the last few nights without freezing.
Growing in open ground
About 1.5-month-old seedlings are planted outdoors in late April or early May. The exact time depends on the region and temperature conditions. Proper planting practices and guidelines guarantee a good harvest.
- ✓ Optimum soil temperature for planting: 16-18°C at a depth of 25 cm.
- ✓ Distance between plants: 40-60 cm in a row, between rows 65-75 cm.
Growing conditions in open ground
The weather must stabilize, and the night temperature must not fall below 15-16 C. Even short-term frosts can destroy young shoots.
The surface layer of soil up to 25 cm deep should warm up to 16-18 C.
Tomatoes should be planted when there's little to no sun. Morning or evening is best. It's best to have dim or no sun in the following days.
You can learn more about growing tomatoes in open ground from this article.
Soil and fertilizers
Tomatoes grow best if carrots, legumes, zucchini, or cruciferous vegetables were previously grown in the same spot. The soil should be prepared and fertilized in advance in the fall.
In spring, dig the bed to a depth of 15 cm and add organic fertilizer, such as vegetable compost or mature humus, 1-2 weeks before planting. Mineral fertilizers are also suitable for additional enrichment. Mix the applied fertilizer thoroughly with the soil. Water the soil thoroughly afterward.
You can’t use manure, it can burn the fragile root system.
The day before planting, water the soil to completely saturate it with moisture.
Selecting seedlings
It's worth making a selection. The young plant should be healthy, with numerous succulent, rich green leaves on a thick, strong stem and a fully developed root system. The seedling should have its first flower cluster before the bud opens.
If the weather has not yet settled, and a flower stalk has appeared on the seedlings, it must be carefully pinched off.
Landing
Tomatoes are planted in rows, spaced 65-75 cm apart. Each row consists of holes spaced 40-60 cm apart. The holes are 15-20 cm deep and 10-15 cm wide.
Step by step process:
- Place the seedlings into the prepared hole together with the lump of earth 1-2 cm deeper than their growth level in the container.
- Sprinkle with soil and water generously with warm, settled water.
- Prepare a sturdy wooden stake for each hole to support the plant as it grows. Place it 7-9 cm from the future plant.
When planting the plant in the hole, you can shorten the main root slightly. This will stimulate lateral root growth. The tomato plant will grow stronger in the future.
Care Features
This tomato variety doesn't require much care. All efforts should be focused on shaping the bush, ensuring timely watering, and maintaining the soil.
Watering
Basic rules of watering:
- The soil should be watered regularly. Do not allow it to dry out or become stagnant.
- Use only warm and settled water.
- Water in the morning or evening hours.
- Direct the stream of water only at the roots. Under no circumstances should it hit the leaves.
The need for watering is easily determined by the drying out of the top layer of soil. Insufficient moisture during the ripening period can lead to reduced fruit size and cracking.
Loosening the soil and weeding
After each watering, the soil should be loosened to restore air circulation. At the same time, weeds, which rob the tomato plant of nutrients and cause disease, should be pulled out.
To better retain moisture, especially in summer, you can mulch with straw or sawdust.
Pinching out side shoots and garter
Pinching is the timely removal of side shoots to increase yield. For Marusya tomatoes, only those branches located below the first flower cluster should be removed.
It is also helpful to cut off the leaves on the lower stem of the bush to allow air circulation.
Staking is necessary to support the plant during fruiting. As soon as the bush begins to form ovaries with clusters of the first fruits, it's time to apply the first staking.
The tree trunk is carefully secured to the support in 2-3 places. As the plant grows and develops, the staking levels are adjusted.
Top dressing
During growth, tomatoes actively absorb nutrients from the soil, quickly depleting it. Fruit formation and ripening also occur quickly, making this the time when the plant especially needs additional nutrition.
- First feeding: 2 weeks after planting, use bird droppings or mullein.
- Second feeding: 10-14 days after the first, use mineral fertilizers or a homemade mixture.
- Subsequent feeding: every 2 weeks, use yeast feeding or feeding containing phosphorus/potassium.
Two weeks after planting the tomato plants outdoors, the first fertilizer should be applied. Bird droppings or cow manure work well.
Apply the second feeding after 10-14 days. Use ready-made mineral fertilizers or prepare your own mixture.
For 10 liters of water take:
- 60 g superphosphate;
- 1 g boric acid;
- 25 g ammonium nitrate;
- 15 g of potassium salt.
Subsequent fertilizers are applied every two weeks. You can use yeast fertilizers containing phosphorus or potassium. However, avoid nitrogen, which encourages excessive foliage growth.
Disease and pest prevention
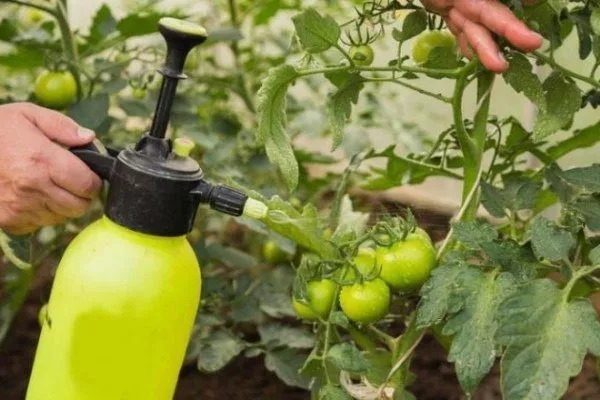
As a preventative measure, it's advisable to inspect the mulch for slugs. Also, spray the bush periodically. A soapy solution is used for this purpose. However, it shouldn't be used if the plant is less than six weeks old. If necessary, spray every 2-3 weeks. Preventative treatment should be completed one month before harvest.
Spraying with milk whey with 1-2 drops of iodine added will help against fungal diseases.
Or use a ready-made solution called Fitosporin. It will protect the plant from bacterial diseases.
Harvesting and storage
The fruit is picked from the bush as soon as it is ripe. Ripeness is determined by its deep, bright red color.
If frost hits early, be sure to harvest all the tomatoes, otherwise they will spoil. If some are unripe, they should be moved to a warm, sunny spot.
Ripe fruits can be stored for no more than 2 weeks. Unripe fruits can be stored for up to 3 weeks.
Rules for storing tomatoes:
- Do not use the refrigerator (low temperatures reduce the aroma).
- Remove all dry leaves from the fruit.
- Place in a single layer on a wooden or plastic tray.
- Place dry sawdust under and between the fruits.
- Use a dry and dark room.
To speed up the ripening of some harvested tomatoes, it is worth placing them next to ripe ones.
Gardeners' reviews of the Marusya variety
The Marusya tomato is easy to grow in any climate. It's suitable for beginning gardeners. It resists diseases well and produces a consistent, high yield. It's suitable for long-term storage and transportation. The fruit can be eaten fresh or used for winter preserves.