The Queen F1 tomato is not only beautiful but also exquisitely delicious, rich in juice. Considered a beefsteak tomato, it is quite meaty. In this regard, beefsteaks are second to none. The fruits are distinguished by their large size. The agricultural world has many regal figures: the Market Queen, Elizabeth, the Kolkhoz Queen, and others, which should not be confused with the Queen F1.
History of selection
The Queen tomato variety is a recent development that immediately gained popularity thanks to its impeccable fruiting and excellent flavor. The hybrid was created in 2019 by specialists at the Partner agricultural firm, and was developed by V. I. Blokin-Mechtalin.
General characteristics of the Queen tomato
This variety falls into the LSL (Long Shelf Life) category, which refers to the fruit's ability to be transported and stored for extended periods.
Appearance of bushes
The Queen tomato is an indeterminate cultivar. It grows to a height of 170 cm, with bushes sometimes reaching 200 cm.
Varietal parameters:
- The plant is distinguished by a strong central stem, flexible lateral branches, moderate foliage with dark green leaves, and a developed root system.
- The first batch of fruits appears above the ninth or eleventh leaf.
- A mature plant produces 4-5 ovaries, each of which produces 4-6 tomatoes.
- Each fruit has a visible articulation with the stalk.
Description of the Queen tomato fruit
Queen is a tomato variety with large fruits, weighing between 250 and 300 g. By carefully selecting the number of fruits per branch, you can grow particularly large specimens.
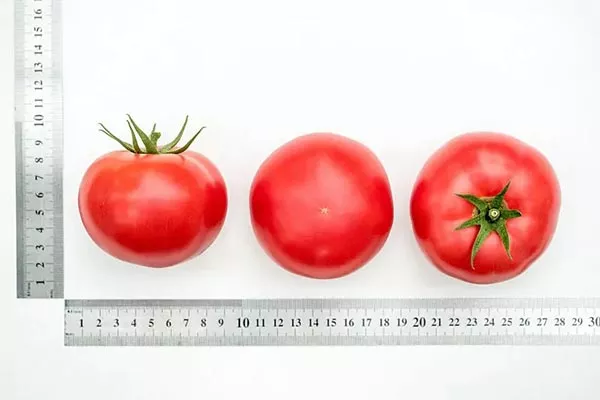
Hybrid characteristics:
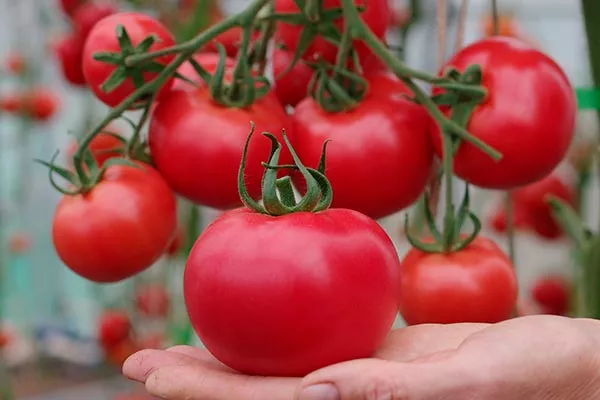
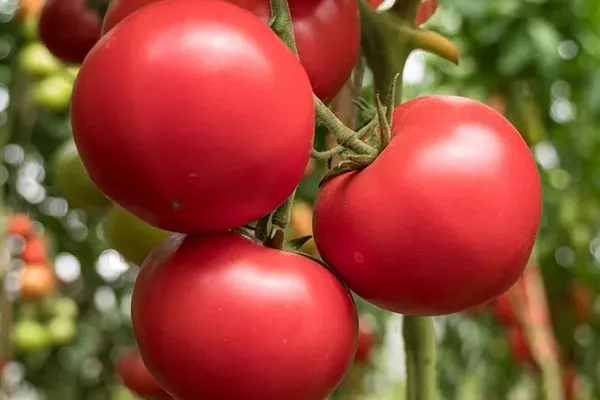
- The tomatoes are perfectly round, with a bright shine and clearly defined ribs.
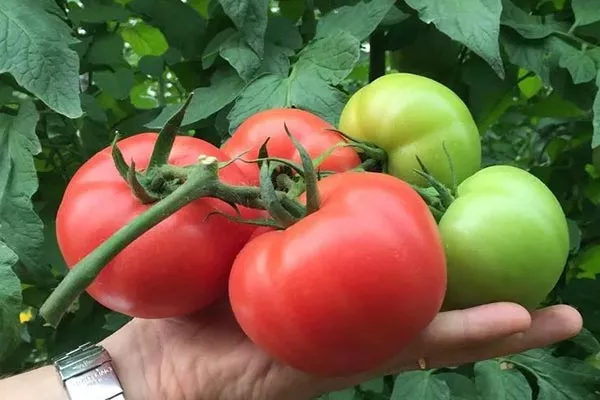
- During the ripening process, they initially have a milky-greenish hue, and when fully ripe, they acquire a rich pink tone, sometimes with a reddish tint.
- There are no greenish spots at the base of the fruit.
- The flesh is light pink in colour and has a firm, tender and at the same time juicy texture, protected by a strong skin.
- Contains multiple seed chambers.
Taste indicators
The taste of Queen tomatoes is distinguished by a harmonious flavor, where sweetness predominates and smoothly flows into a delicate sourness, combined with a light spicy aroma.
Timing of planting seedlings and transplanting into the ground
Beef tomatoes are usually propagated using seed buds. It's recommended to sow them between February 20 and March 10. If you choose to grow them in communal containers, you'll need to transplant them when the seedlings develop four true leaves. To avoid this difficult and precise process, it's best to use peat pellets.
For optimal seedling development, maintain a room temperature between 20 and 23 degrees Celsius. Regular ventilation is essential, but avoid sudden cool drafts. Young plants should be watered with room-temperature water.
Once the seedlings reach 30 cm in height, they can be transplanted to their permanent location. This usually occurs 55-60 days after sowing. By this time, the plants have formed seven leaves, and their roots are sufficiently developed to adapt to the new conditions.
Ripening time and productivity
The Queen hybrid variety boasts a medium ripening time—105-115 days from sowing to harvest. This variety promises an impressive harvest: each bush yields approximately 5-6 kg of tender and juicy fruit, and almost 18-19 kg per square meter.
Cultivation regions
The hybrid's resistance to unpredictable weather conditions and insensitivity to sudden temperature changes make it ideal for cultivation in various regions of Russia.
Features of using fruits
Fresh tomatoes are ideal for eating straight from the vine. However, preserving whole tomatoes can be challenging due to their large size.
Queen tomatoes are the basis for delicious fresh salads. Their juicy flesh can be used to make large quantities of tomato juice or ketchup. Large tomatoes are ideal for slicing and using in potato casseroles, which ensures their juiciness.
The intricacies of planting and growing tomatoes
This hybrid is grown using seedlings, like most other crops. Several months before the planned transplantation to its final location, it's time to begin planting the seeds.
By this point, it is important to have tomato seeds, suitable substrate, containers for seedlings, and to prepare a space for their growth, including the installation of phytolamps and reserve containers for transplanting.
Sowing seeds for seedlings
Sowing seeds is a quick process, taking only half an hour. But the real challenge lies in the careful preparation: selection, disinfection, and germination, acquiring and treating soil and containers, monitoring the quality of the embryos, and acclimatizing them. Learn more about the preparatory stages and the sowing itself:
- Sample. Calibrate the seeds. Take a glass of hot water and add 1 teaspoon of salt. Once it's completely dissolved, let the seeds sit in the solution for half an hour. Any that float to the surface are not suitable for sowing and can be discarded. Rinse and dry the remaining seeds that sink to the bottom.
- Disinfection. The health of the future plant depends on the quality of the seeds. They need to be disinfected. Take a container of water and prepare a pink solution of potassium permanganate. Soak the seeds in it for 30-40 minutes.
- Germination. To stimulate seedling growth, do the following: take a piece of cloth or a cotton pad, spread the seeds on it, soak it in room temperature water and put it in a warm place for a couple of days.
- Purchase of substrate. While you're waiting for your seeds to sprout, take a quick trip to the store and choose the best brands of potting soil (ideal for flower crops):
- Bogatyr.
- BioGrunt Ecoflora.
- Strongman.
- Gardener.
- BioGrunt Keva.
- Preparing the soil mixture. It may contain harmful microorganisms or even insect larvae. To completely eliminate the risk of seed contamination, it is recommended to microwave the soil for 60 minutes or boil it and its packaging in water.
- Selecting capacity. For sowing seeds, use wide, shallow containers with drainage holes to remove excess moisture. Purchased containers should be treated with boiling water or washed in a hot soapy solution. For disinfection, soaking them in a solution of potassium permanganate can be helpful.
The same applies to transplant containers, which should not exceed 300 ml in volume. Alternatively, peat cups or tablets can be used.
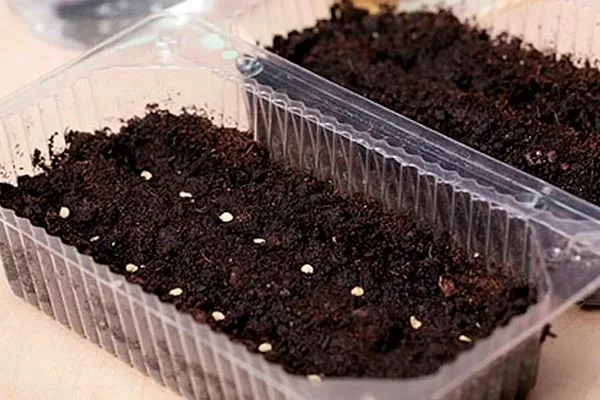
The process of sowing and growing seedlings is as follows:
- First, pour vermiculite into the container.
- Then make shallow grooves in the vermiculite, about 1.5 cm wide. The distance between the seeds is about 1-1.5 cm, and between the grooves - about 2-2.5 cm.
- After placing the seeds, carefully fill the furrows with a 1 cm layer of soil and lightly compact it.
- Moisten the prepared soil mixture with a spray bottle, then cover the container with transparent film and move it to a warm and bright place.
- In a few days, the first green shoots will appear, but they need to be provided with sufficient warmth and air. To achieve this, set the temperature between 24-26 degrees Celsius and regularly ventilate the containers by opening the film.
- Once the seeds have sprouted and become established, move the container to a windowsill. In this new location, the growing seedlings will require more light but less heat. If there's insufficient light, the seedlings will seek out the light source, resulting in weak and brittle stems. For optimal growth, 14-16 hours of light per day is necessary. Therefore, install artificial lighting at night.
- When the plant has two or three fully formed leaves, transplant the seedlings into individual, slightly larger containers. Before removing the seedlings from the soil, lightly moisten them and gently tug them, being careful not to damage the root system.
- Two weeks before the seedlings reach a height of 30-35 cm and the first flower buds begin to form, harden them off. This step is necessary to allow the plants to better adapt to the external conditions.
To do this, take the seedlings out into the cool air every day, starting with a short period of half an hour and gradually increasing the time to the whole day.
Transplanting seedlings into a greenhouse
Before transplanting plants indoors, there are a number of important considerations. The greenhouse should be thoroughly prepared in advance, ideally in the fall:
- Dig up the soil thoroughly, remove all plant debris, including diseased and affected weeds.
- Replace the old soil with fresh soil.
- Fertilize the soil.
- Conduct a complete cleaning and disinfection of the premises.
- In the spring, repeat the cleaning process and dig the area. Wait until the soil temperature reaches the optimal level.
- Dig holes, water the soil, and add the necessary fertilizer. You can use commercial fertilizers or any organic matter.
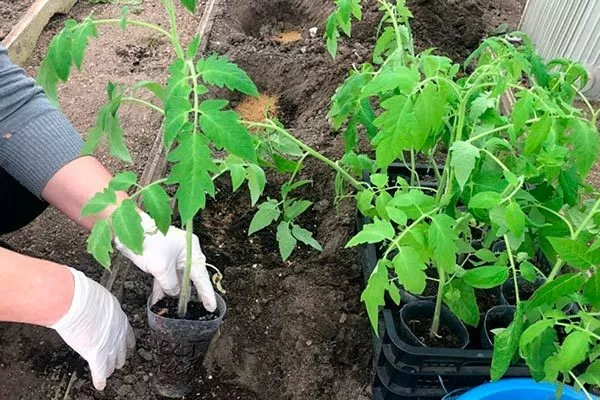
- Replant the seedlings and provide additional water. The interval between plantings should be up to four plants per square meter.
- ✓ The optimal soil temperature for transplanting seedlings should be at least +15°C.
- ✓ The distance between bushes when planting should be at least 50 cm to ensure sufficient space for growth.
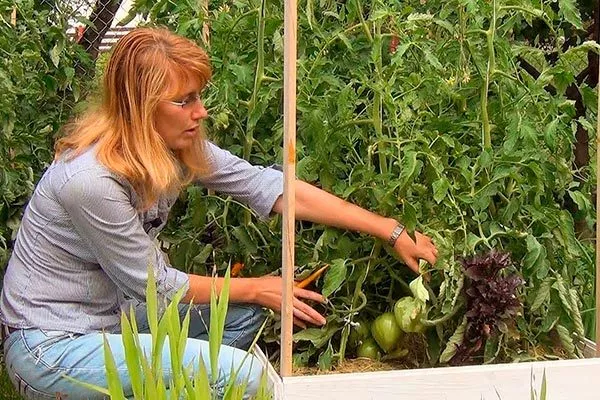
Further care of tomatoes
Leave the seedlings alone for a few weeks after planting them in the ground. Don't worry about them wilting—they thrive in the greenhouse. The plants need time to adapt to the new conditions and soil. Basic care includes:
- Watering – Watering should be done generously but infrequently to prevent rot. Twice a week is recommended, with approximately 5-7 liters of water per bush.
- Loosening – It must be carried out immediately after watering to provide the soil with the necessary level of moisture and the ability of the roots to access nutrients.
- Weed control – They compete with crops for nutrients and light. They also serve as a haven for pests. Therefore, it's important to regularly remove weeds, pulling them out by the roots, immediately after loosening the soil.
- Using mulch in a greenhouse – This will eliminate the need for regular loosening and watering. Dark non-woven material, dry manure, hay, leaf litter, or sawdust can be used as mulch. Furthermore, a layer of mulch prevents pests and weeds.
- Top dressing – These can be carried out several times during the season. At the beginning of the growing season, nitrogen and phosphorus mixtures are preferred, as they promote foliage development and strengthen the root system.
During the flowering period, it is recommended to spray with boric acid, and during the ripening and storage phase of tomatoes, potassium and phosphorus are recommended to obtain sweet and juicy fruits.
Disease prevention and pest control
Queen, like most hybrid varieties, has good resistance to common tomato diseases. It is resistant to such devastating diseases as verticillium wilt, fusarium wilt, and tobacco mosaic virus.
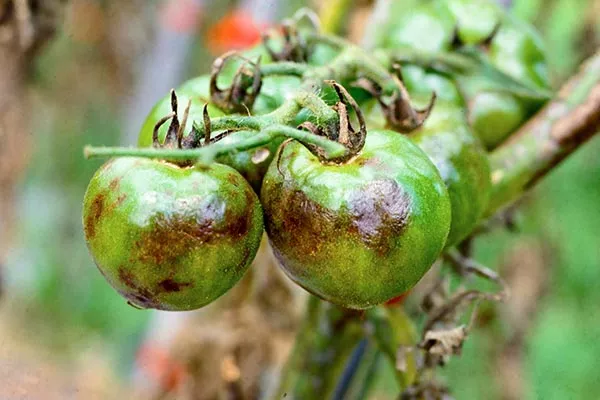
However, in case of improper care, excessive humidity or lack of necessary ventilation, the hybrid may be susceptible to fungal or viral infections:
- Viral diseases can be identified by dry and curled leaves, discoloration, and slow growth, flowering, and fruiting. Poisoned plants should be destroyed.
- Fungal diseases cause dark spots to appear on stems, leaves, and fruits. In such cases, treatment with Bordeaux mixture or copper-based fungicides can help.
Tomatoes can be attacked by pests such as whiteflies, aphids, and spider mites, and their roots can be damaged by mole crickets. To combat these pests, you can use specialized insecticides available at gardening stores.
To prevent problems, please follow these rules:
- Plants must be prepared for planting in advance, which includes disinfection of seed material.
- The greenhouse must be prepared no later than autumn, thoroughly cleaning and disinfecting it.
- It is important to periodically dig up the soil in the greenhouse.
- While growing bushes, regularly aerate the greenhouse to prevent moisture accumulation and air stagnation.
- To protect plants from white moths, it is recommended to use fly traps.
Pros and cons
This hybrid tomato variety has earned the favor of farmers and home gardeners thanks to its numerous advantages that distinguish it from other varieties. Key benefits include the following:
Reviews
Among the many tomato varieties, the Queen hybrid hasn't been left behind. Its good productivity and ease of cultivation attract the attention of both specialists and tomato enthusiasts. Its excellent appearance, transportability, and flavor appeal to consumers and buyers.