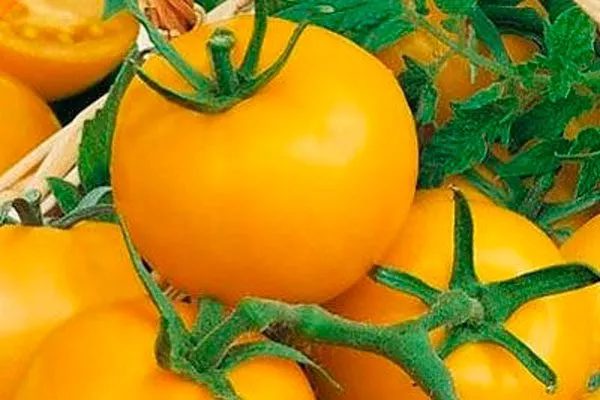
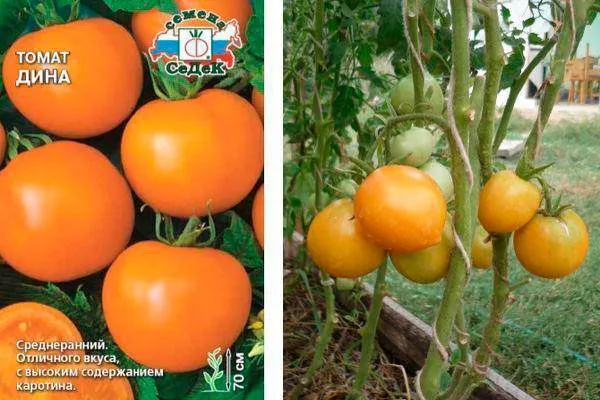
The Dina tomato variety is excellent for eating raw and preserving for the winter. Its fruits have a yellow-orange hue and are highly productive. It is suitable for both home gardening and commercial cultivation. Due to its lack of anthocyanins and rich carotenoid content, this tomato variety is valued in dietary nutrition and does not cause allergies.
Regionality, origin
This tomato variety was developed by a team of scientists from the Federal State Budgetary Scientific Institution of Science, the N.I. Vavilov Institute. Among the developers are:
- Zhidkova V. A.;
- Mikhed V. S.;
- Altukhov Yu. P.
The variety was officially registered in the State Register of Breeding Achievements in 1996 and received permission for cultivation in certain climatic zones:
- Central;
- East Siberian;
- Ural;
- Far Eastern.
Dina tomatoes can only be grown outdoors in the areas listed above. In other regions of Russia, greenhouse cultivation is recommended for maximum yield.
Description of the bush and fruits
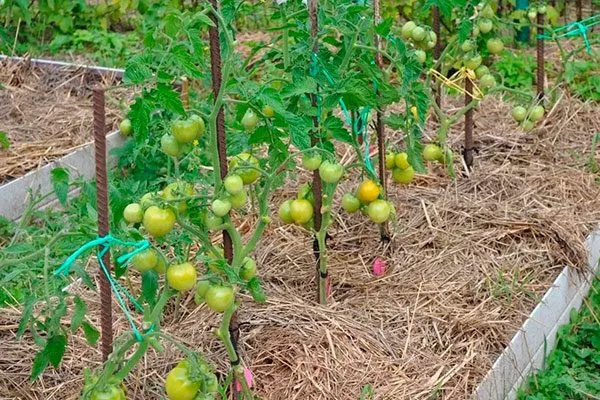
Dina is characterized by a determinate growth pattern, which stops after the inflorescences form. The plant doesn't grow very tall—in open ground, it rises 55 cm above the ground, but in greenhouses, it can reach a maximum of 70 cm. Note other varietal characteristics:
- The flower clusters are simple racemes, each containing 4-5 buds. The first cluster appears after 6-7 leaves have formed, with subsequent clusters appearing every two leaves.
- The foliage is medium-sized, light green, and moderately wrinkled with stipules.
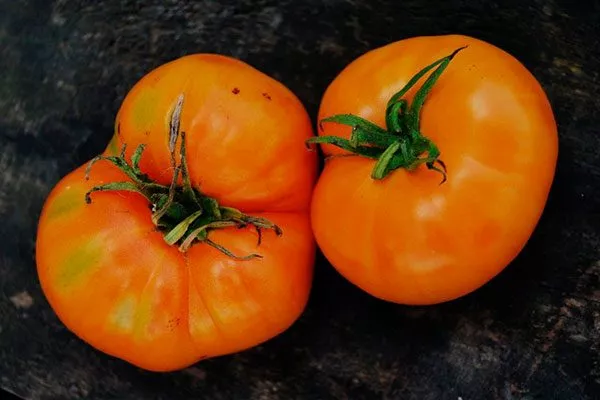
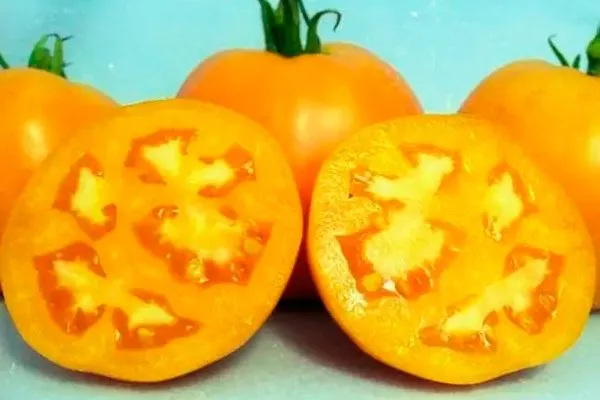
- Tomatoes of this variety are smooth and round. When unripe, they are greenish in color, turning orange as they ripen.
- Tomatoes on the bush weigh approximately 100-130 g - the more favorable the conditions for their growth, the larger they become.
- Each tomato contains approximately 4-5 seed chambers. The pulp is meaty, juicy, very firm, and rich in micronutrients, antioxidants, and vitamins.
Characteristics of tomato varieties
Dina is ideal for cultivation in various types of greenhouses and hothouses, as well as in open ground.
Ripening period, yield
This variety is classified as a mid-early crop – the period from germination to maturity takes 100 to 125 days, but requires stable temperatures and the absence of sudden cold snaps or heavy rains. When grown in gardens, the ripening process is accelerated.
Performance nuances:
- each bush can yield a harvest of 3 to 4.5 kg of bright orange tomatoes;
- Planting 3 to 4 plants per square meter ensures productivity in the range of 9 to 16 kg, which is a high figure for determinate varieties.
Purpose and application
Dina tomatoes have a harmonious, pleasant, and slightly sweet flavor. Their versatility allows them to be used in a variety of dishes, including:
- fresh slices and salads;
- soups and borscht;
- for drying and curing;
- for pickling, salting and preserving;
- production of sauces, tomato paste, ketchup and juice.
This makes the Dina variety an ideal choice for those who value variety and quality in tomatoes.
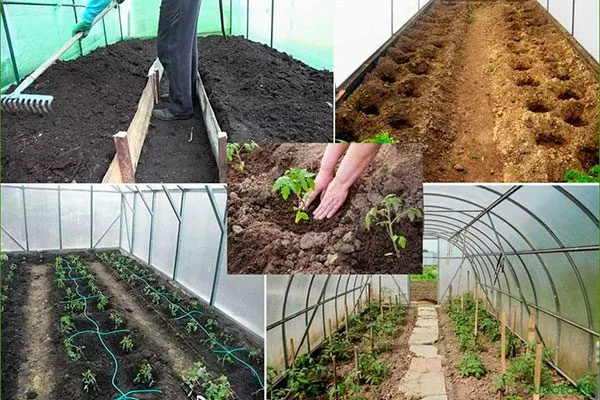
Agricultural technology of Dina tomatoes
Caring for tomatoes isn't difficult, but it does require careful adherence to all instructions. Key stages of growing these vegetables include preparing the planting site, seed treatment, creating the ideal soil mix for seedlings, caring for the seeds, and then transplanting them.
- ✓ Optimum soil temperature for planting seeds: not lower than +15°С.
- ✓ Soil pH should be between 6.0-6.8 for maximum nutrient absorption.
Preparing a landing site
It's not recommended to plant tomatoes in areas previously planted with potatoes, peppers, zucchini, or eggplant. However, tomatoes produce high yields if they were previously grown with grain crops, legumes, root vegetables, cucumbers, cabbage, and other non-nightshade vegetables.
Remember that following crop rotation rules helps prevent diseases and maintain soil fertility.
Even in small areas, you can achieve success by using a clever technique:
- After harvesting, the beds are plowed and then sown with green manure – grasses or grain crops, which are subsequently used as organic fertilizer.
- In winter, this green mass is dug up again, which helps fertilize the soil and provides the tomatoes with an ideal predecessor.
If crop rotation is properly organized, it is best to add humus, chicken manure, weed compost, and other organic components such as sawdust or vegetable peels to the beds.
Areas for future tomato cultivation should be well lit, provide sufficient air flow and have access to watering.
Seed treatment
An important stage of preparation is the treatment of planting material, which prevents diseases at the stage of the first green leaves appearing, builds immunity in future plants, and promotes the accumulation of energy for rapid germination.
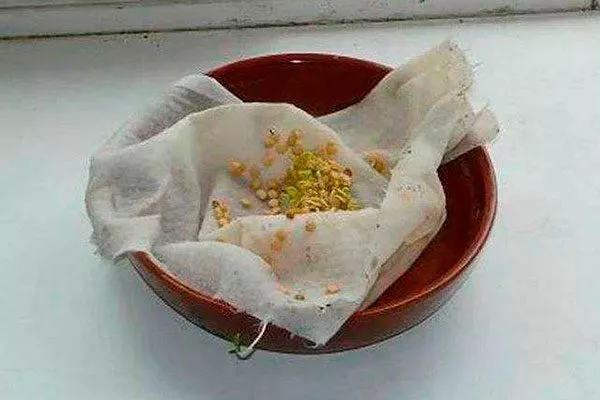
At this stage, the seeds undergo disinfection treatment and the use of a growth stimulant:
- Disinfection is the process of disinfecting seeds. A solution of potassium permanganate containing 2% of the active ingredient is often used, in which the seeds are immersed for 20-30 minutes.
- A modern approach involves soaking in a fungicide solution; Agat-25 is the best option for this purpose. It not only has antifungal properties but also accelerates seed germination, making it a versatile product.
To prepare a working solution, 7 g is required per 1 liter of water, which is enough for 500 g of seeds. - To stimulate tomato growth, you can also use the rooting agent Zircon. Add 4 drops to 200 ml of water to create a working solution, in which you soak the seeds for up to 6 hours. After treatment, do not wash the seeds; simply dry them gently on a windowsill.
Preparing a soil mixture for seedlings
The soil for growing tomatoes should be as fertile, loose, and breathable as possible. It's best to create a mixture of equal parts peat, turf, compost, and sawdust. For every 10 kg of this substrate, add 300 g of wood ash, 3 tablespoons of superphosphate, 2 tablespoons of potassium salt, and 1 tablespoon of urea.
It is equally important to disinfect the soil, as it inevitably contains pest larvae and fungal spores.
There are different processing methods:
- Thermal methods include:
- Freezing. The mixture is placed in a cold place for five days, then transferred to a warm place to awaken the pests. After keeping it in a warm place for one or two days, it is taken out into the cold again. This process is repeated for one to two months.
- Calcination. Containers with soil are left in the oven for 30 minutes at a temperature of up to 80-100 degrees.
- Steaming. The bags with soil are exposed to a steam bath for 40 minutes so that the steam can treat all the soil.
- Chemical methods include: fungicide treatment. The soil is watered with a solution of any fungicide intended for tomatoes, for example Quadris, Ridomil, Agat, which also promote seed growth.
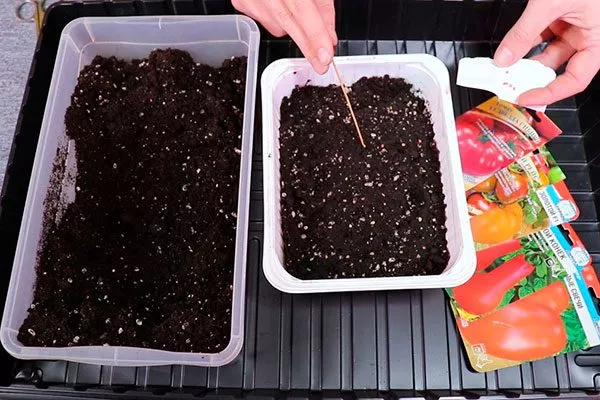
Sowing seeds
Now you can start planting the seeds. The procedure is simple:
- Choose a suitable container and fill it with the substrate, then make indentations in it.
- Place the seeds at a depth of about 1 cm and carefully cover them with soil.
- Water the crops with soft water, warmed to a comfortable temperature.
- Cover the containers with plastic film to create a greenhouse-like microclimate and keep this cover until the first green shoots appear.
Caring for seedlings
You'll see the first green shoots appear 8-10 days after sowing. However, to achieve this, you'll need to carefully monitor soil moisture levels and mist the seedlings regularly. Then, follow these guidelines:
- For feeding young plants, a superphosphate solution is suitable (dilute according to the instructions), which promotes the development of the root system and increases resistance to diseases.
- When the seedlings develop a second leaf, they should be pricked out, transplanted into separate containers and the planting depth increased.
- To stimulate plant growth, it is recommended to use additional lighting by installing fluorescent lamps in the room with seedlings.
- Two weeks before transplanting, begin acclimating the seedlings by placing the pots on the balcony or outside. The acclimation process begins with short periods of time, gradually increasing them to several hours.
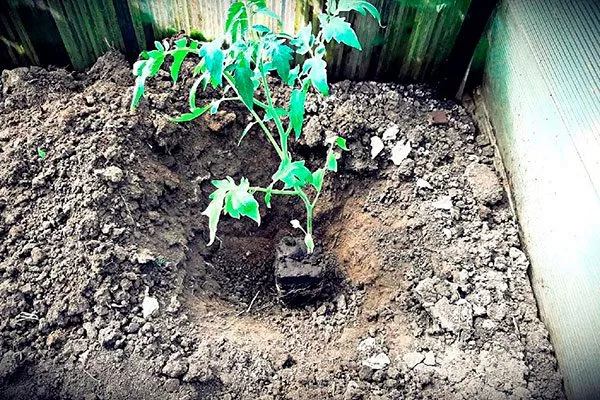
Planting in open ground and caring for seedlings
The procedure for transplanting Dina tomatoes to permanent beds is standard. It consists of several steps:
- First, dig holes, the number of which corresponds to the amount of seedling material.
- Then add 1-1.5 liters of water to each of these holes.
- Remove the leaves located at the bottom.
- Water the tomato pots, wait about two hours, and then carefully remove the plants along with the soil ball.
- Place the seedlings in the center of each hole, deepening it to the level of the cotyledon leaves.
- Fill with soil and water again. If the soil has settled significantly, remember to add a little more soil.
The spacing parameters between plants depend on the seed producer and are contained in the information on the packaging:
- "Search" - 60x60 cm;
- "SeDeK" – 40x60 cm.
Further care of tomatoes
To ensure the plant's root system can develop freely and receive sufficient oxygen, it's necessary to loosen the soil in the beds every 2-3 weeks. The tool used for this procedure should penetrate the soil to a depth of at least 10 cm. If the soil is very compacted, the procedure should be repeated more frequently.
What else to do:
- Weed removal. This process can be combined with soil loosening to protect plants from pests. Weeds retain moisture, creating favorable conditions for disease development, and densely planted beds are poorly heated and ventilated.
- Watering. Tomatoes should be irrigated directly at the roots, avoiding flooding the foliage. Using a drip system makes it easier to control humidity levels in garden beds and greenhouses. Tomatoes especially need water during the period of ovary and fruit formation.
- Fertilizer. The Dina variety requires regular supplemental nutrients. Fertilizing should be done as follows:
- 2 weeks after transplantation. Use organic infusions based on bird droppings or mullein with the addition of wood ash. This period coincides with the beginning of bud formation, and the addition of fertilizer will have a positive effect on the development of fruit buds.
- 10 days after the first feeding. At this time, the second fruit cluster opens. Use organic infusions with a mineral complex (phosphorus and potassium).
- At the stage of ripening of the first fruits. Prepare the same infusion as during the second feeding, but reduce the amount of working liquid by 2 times.
- 2 weeks after the third feeding. Buy the industrial product Agricola and add Superphosphate to it.
- Care of shoots. The Dina variety doesn't tend to actively grow lateral shoots, so they should be removed no more than twice a month. Removing side shoots that reach 5 cm in length involves cutting them off or pinching them off about 1 cm from the main stem.
It's important to proceed carefully to avoid significant damage to the plant. It's recommended to perform this operation in the morning.
Treatment against diseases and pests
Tomatoes of the Dina variety are subject to some problems:
- Late blight causes leaves to become covered in brown spots, which subsequently spread to vegetables, causing them to deform and rot. Bordeaux mixture and specialized products such as Quadris and Fitosporin can help combat this problem.
- Soft rot causes the fruit pulp to decompose, forming a watery mass. To eliminate it, the affected parts must be promptly removed and treated with insecticides.
- In cases of blossom-end rot, dark spots appear on the top of the fruit, which then become pressed inward, causing the fruit to become dry and hard. Calcium nitrate is effective in these situations.
- Dina tomatoes are susceptible to insect attacks, including Colorado potato beetles, spider mites, and aphids. To control them, use specialized pesticides such as Proteus and Confidor.
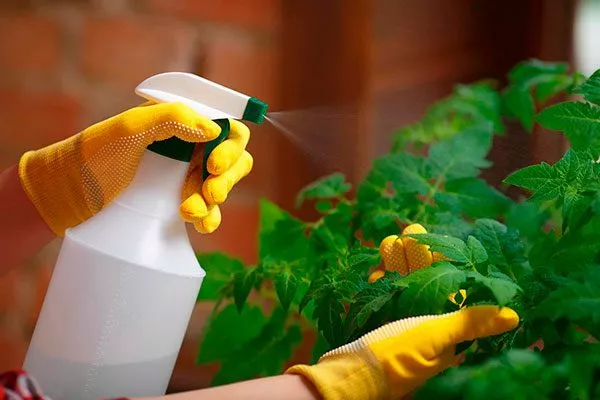
Preventing diseases in this crop requires regular preventative care. Experienced gardeners use traditional treatments and ready-made preventative products. It's important to monitor soil moisture levels and the overall condition of the plants.
Pros and cons
Tomato Dina is a very successful variety, especially considering that yellow-fruited industrial tomatoes are still not very common.
Reviews
The Dina tomato is a relatively old variety that has been popular among both private gardeners and large farmers for over a quarter of a century. This variety is chosen for its high productivity, easy care, transportability, long shelf life, and pleasant flavor.