More and more gardeners are choosing exotic and unusual tomato varieties. The dark-fruited Chernomor variety is one such variety. To successfully grow these tomatoes and reap a bountiful harvest, it's important to follow care recommendations and understand the characteristics of these varieties. In this article, we'll cover the key points and stages of growing Chernomor.
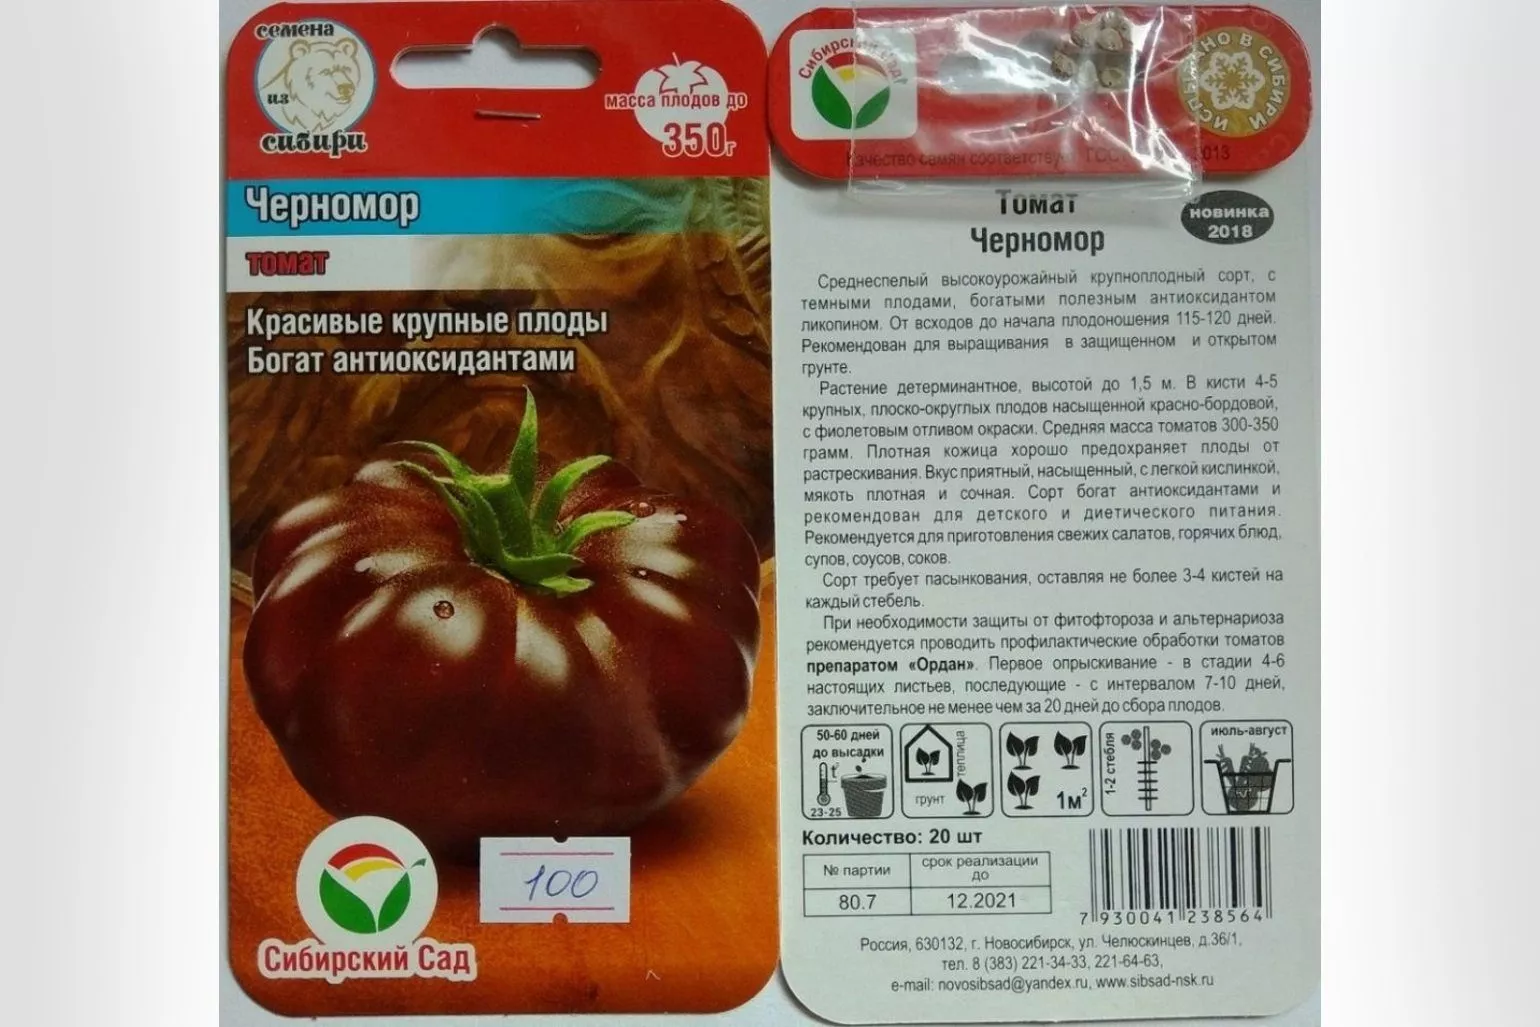
tomato variety "Chernomor"
tomato seeds of the "Chernomor" variety
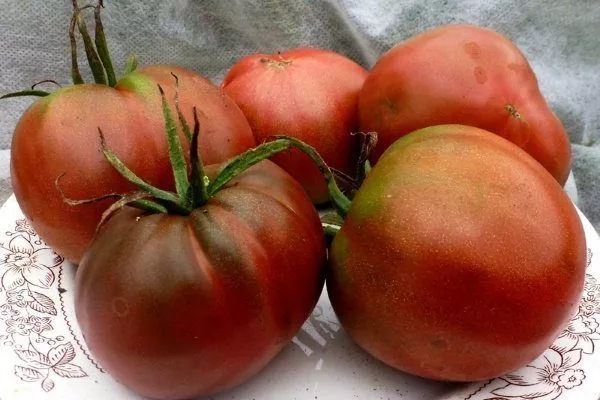
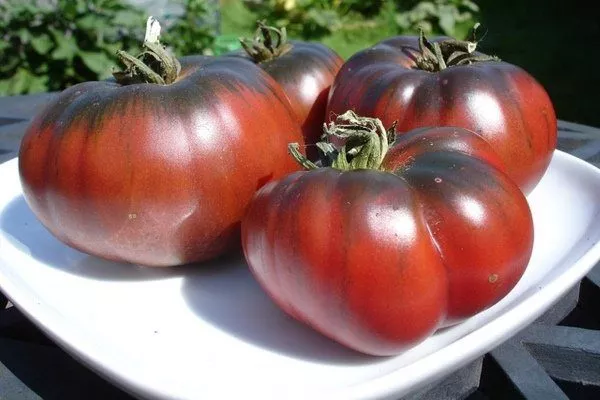
The Chernomor variety has beautiful, exotic, large tomatoes with excellent taste.
Description of the variety
The Chernomor tomato was originally bred in China. Since 2000, it has been approved for cultivation in Russia and is gaining widespread popularity among home growers. It is a mid-season, high-yielding variety. Its main distinguishing feature is its dark purple fruit and rich flavor.
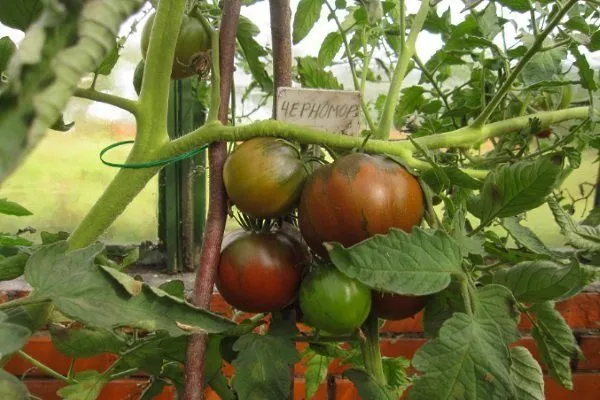
Chernomor is a semi-determinate variety suitable for growing in a wide range of climates, except northern latitudes. It can be planted both in open ground and in greenhouses. The bushes reach one and a half meters in height, with a thick, strong trunk.
Characteristics and yield
The variety's fruits are large, slightly ribbed, and rounded. The tomato skin is thick, maintaining its shape well and preventing cracking during growth and storage. As the tomato ripens, its color changes from light green to burgundy; ripe tomatoes have purple areas and a darker color around the stem.
The average weight of one tomato is 250-300 g. The yield of Chernomor is above average, with one healthy bush producing up to 15 kg of fruit.
Tomatoes can be harvested before they are fully ripe, as they retain their most vibrant color and rich flavor even when separated from the stem. The harvested crop tolerates transportation well, and the firm fruits retain their appearance and store well.
This variety has a distinctly sweet flavor with a pleasant tartness, and the tomatoes are fleshy and juicy. These tomatoes are ideal for eating fresh, adding to salads, and snacks. Their ample pulp makes them ideal for stewing and baking. Juice yields a large amount of juice per kilogram.
Advantages and disadvantages of Chernomor
Like any other variety, Chernomor has its own characteristics and advantages that should be considered before growing. The main advantages of this tomato include:
- aesthetic appearance and noble color of fruits;
- pleasant taste and dense pulp;
- good yield with proper care;
- high content of vitamin A and suitable for dietary nutrition;
- possibility of cultivation in open ground and greenhouse conditions;
- resistance to transportation and long-term storage;
- the relative unpretentiousness of the bushes to temperature changes.
The variety does not have many significant disadvantages, among them are:
- susceptibility to fungal disease - late blight;
- the need for regular feeding and fertilization of the soil;
- the need for tying and constant monitoring of the bush due to the weight of the fruits.
In comparison, this variety has more advantages, and similar disadvantages are inherent in many types of tomatoes and can be easily neutralized with due attention.
Selecting seedlings
The Chernomor variety can be successfully grown from both seeds and purchased seedlings. To choose the right seedlings, pay attention to several important criteria:
- Chernomor tomatoes should be planted outdoors or in a greenhouse by mid-May. If warm weather hasn't arrived by then, planting can be postponed until late May or early June. Seedlings should be purchased immediately before planting. It's best to have all the plants purchased and planted at the same time.
- Suitable seedlings should be no more than 30 cm tall. Since Chernomor is a tall variety, up to 10 leaves are allowed per bush. A large number of leaves indicates accelerated growth with nitrogen fertilizers, which reduces the bush's subsequent yield.
- The plant's trunk should be strong and able to hold the bush upright. It should be free of mechanical or disease damage.
- The root system is free of visible damage and rot. This variety has a wide root system, so the seedlings should be placed in a spacious container large enough for normal plant development.
- The plant's appearance is healthy. Leaves should not be yellowed, curled, have blackened spots, or have other signs of disease. An infected bush will spread the disease to other seedlings through the soil. If even one plant shows any signs of disease, do not purchase seedlings from that seller, as there is a risk of infection even in healthy-looking bushes or the soil beneath them.
- There are no parasitic eggs, larvae, or aphids. Inspect the undersides of the leaves and trunk for pests.
- Signs of overgrown bushes include abundant foliage, tall growth, and the presence of active inflorescences. It's important to ensure that the bush isn't too mature. If you must purchase seedlings with inflorescences, it's best to carefully remove them, as the inflorescences will drain the plant's energy and nutrients.
Soil and fertilizers
Chernomor, like other tomato varieties, requires rich, nutrient-rich soil. Its extensive root system requires permeable, loose soil that doesn't contain a lot of clay.
- ✓ Soil pH should be between 6.0-6.5 for optimal nutrient absorption.
- ✓ The soil must contain at least 3% organic matter to ensure the necessary structure and water-holding capacity.
To plant seedlings in the ground, prepare the soil in advance. When choosing a site, avoid beds where nightshade crops such as tomatoes, potatoes, or eggplants were grown in previous seasons. It's best to choose areas where cucumbers, cabbage, onions, or carrots were planted.
A complete soil improvement and preparation should include:
- Liming to reduce acidity. During spring tilling (1-2 weeks before planting), add lime powder to the soil at a rate of up to 0.8 kg per square meter of bed. For this method to be effective, it's important to dig up the top layer of soil along with the powder, as lime on the surface won't penetrate to the plant roots.
- Sanding. This procedure is best done well in advance, in the fall. One bucket of sand is required per square meter of soil.
- Copper sulfate treatment for disinfection. The water for the solution should be 70-80 degrees Celsius. One liter of solution is added per square meter.
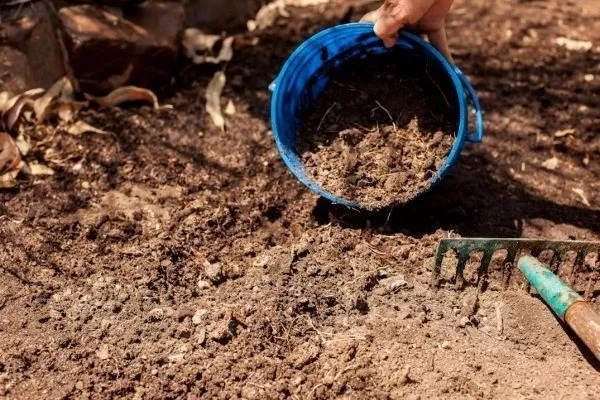
- Adding organic matter such as compost or humus. For best results, apply 3 to 7 kg per square meter.
Mineral fertilizers must be applied to the soil before planting. The mixture is placed at a depth of 15-20 cm during digging. The optimal fertilizer mix per square meter of soil is presented in the table below.
| Fertilizer | Volume per 1 sq. m of soil |
| Potassium sulfate | 10-20 g |
| Superphosphate | 50-60 g |
| Ammonium nitrate | 2 g |
Preparing the soil for planting requires careful attention to the proportions of fertilizers and top dressing. The best results can be achieved by beginning the preparation with autumn tilling.
The Chernomor root system can grow up to 50 cm wide, so each individual bush requires ample space and a deep hole. Plants should be planted in rows, 30 cm apart. Adjacent rows should ideally be spaced 45-50 cm apart.
Planting in prepared soil is only possible when the climate is warm and frost-free. The optimal temperature for tomato growth is 22-28 degrees Celsius. If the nighttime temperature drops below 20 degrees Celsius, the plants will require additional protection. Covering the beds with plastic at night can replace greenhouse conditions.
Water the plants regularly but moderately. Before the fruit ripens, Chernomor is drought-tolerant; however, severe moisture stress can damage the ovary. The ideal soil moisture level is around 70%.
Tomatoes require bright daylight and thrive in sunny weather. At night, the plant rests from the bright rays, during which time the bush and fruit buds actively develop.
General soil care during the growing process includes timely watering, loosening the soil, removing weeds and applying fertilizers.
Growing seedlings from seeds
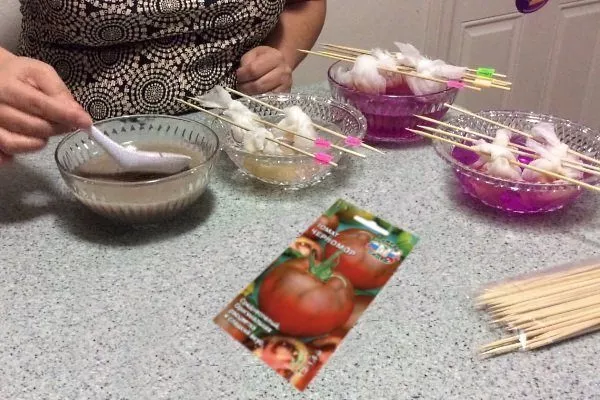
The surest way to get high-quality seedlings is to grow them yourself. Seeds should be purchased in advance and can be stored for up to several years. It's best to choose seeds from trusted sellers. These could be either people you know who have already grown the Chernomor variety, or large, established sellers in the gardening market.
Read the article about How to grow tomato seedlings.
When purchasing seeds, it is important to keep track of several factors:
- Description and marking. The seeds are stored in a package containing the label, name, and brief description of the variety, as well as legal information and the manufacturer's contact information.
- Quality of packaging. Thick paper bag, clear printing and legible text, colorful and clear image of the variety.
- Condition of packaging. There are no signs of moisture or dampness. The package is unopened, undamaged, or wrinkled. There is no strange odor or deformation. The expiration date has not been exceeded.
The best solution when purchasing seeds is to choose a specialized store, where the seller will be able to provide recommendations and the exact variety you need. The products will also be stored under appropriate conditions.
Seed preparation
The first thing to do is check the condition of the seeds. They should be clean, uniformly yellow, and free of mold and dryness.
Seed treatment involves two stages: heating with hot water and disinfection with potassium permanganate. After harvesting, the seeds are doused with water heated to 55-60 degrees Celsius. A 1% potassium permanganate solution is then prepared and the seeds are soaked in it for 24 hours. These procedures help protect the seeds from the development of existing bacteria.
Soaking seeds can be done with plain water or a nutrient solution. At home, folk remedies are used. The table below presents some of them.
| Solutions for feeding and soaking seeds | Application |
| Aloe Vera Mixture | Store aloe leaves in the refrigerator for 1-2 weeks, then squeeze out the juice and mix it with water in a 1:1 ratio. Soak a cloth in the mixture and wrap the seeds in it for 24 hours. Then soak the seeds in water until they germinate. |
| Wood ash | Dissolve 2 tablespoons of ash in a liter of water and let it steep for two days. Then place the seeds in a flat container and add a small amount of the solution. Let it sit for 4-6 hours before soaking. |
| Mushroom broth | Pour a liter of boiling water over the dried mushrooms and let cool. Soak the seeds in the strained broth for 4 to 6 hours before soaking. |
| Honey solution | Dissolve 1 teaspoon of honey in 250 ml of water, place the seeds and solution in a shallow container so that the liquid barely covers the seeds. Leave for 5 hours. |
Hardening the seeds by changing the climate is also effective. During the 5-day soaking period, the seeds are alternately kept in the refrigerator and at room temperature. The cold soaking period is 19 hours, and the room soaking period is 5 hours.
Contents and location
To plant seeds, prepare soil enriched with natural fertilizer—humus. The soil should be well-warmed, so keep it at room temperature for 1-2 weeks before planting, mixing and loosening it.
Before planting, place the soil in seedling containers. If a single container is prepared for all the seedlings, ensure the seeds are spaced at least 1.5-2 cm apart. During germination, the containers should not be exposed to excessive cold.
Planting Seeds: A Step-by-Step Process
The entire process of planting tomato seeds in boxes with soil is divided into several steps:
- Selection of seeds for planting. Only sprouted seeds are selected; empty and spoiled ones are discarded. It's best to prepare 30-40% more seeds than planned, as some will be unsuitable for growing, and some will die in the seedlings.
- Marking the container with soil. The optimal distance between rows is 3 cm. Seeds in a row are located at a distance of 1.5-2 cm from each other.
- Landing. Using tweezers, place the seed into the holes, but do not push it deep into the soil. Place a thin layer of soil on top.
- Watering. Gently water the planting with warm water from a watering can, without disturbing the soil. After watering, cover the box with plastic wrap and leave for 4 days.
Caring for seedlings
The quality of care for the seedlings will be the determining factor in the future growth and development of tomato plants. The first shoots will appear 7-10 days after sowing. The temperature should be constant, maintaining a warmth of 20 to 22-24 degrees Celsius during the day and at least 17-18 degrees Celsius at night.
Place the seedling container in the brightest spot, such as a windowsill or balcony. During early planting, sunlight is still insufficient, so artificial light is essential.
If the rays fall only from one side, the seedlings stretch toward the light source, causing stem deformation. For successful seedling development, the daily light, including the artificial light source, must be at least 16 hours.
According to N. Yu. Tugarova, round-the-clock illumination of seedlings during the first three days after planting gives the best results for further growth.
Watering should be done once every 7 days during the first two weeks. Maintaining high humidity is essential, which is achieved by constantly covering the plants with plastic film. The plastic film is gradually uncovered during the second week after planting. Once the sprouts are fully exposed, watering should be reduced to every 5 days.
Fresh air is beneficial for seedling emergence. If the daytime temperature on the window or balcony is around 15-20 degrees Celsius, the container with the seedlings should be taken out. This procedure can be repeated up to two days after the seedlings emerge.
After two days, the seedlings become vulnerable to UV rays and are at risk of scorching. Three to four days after germination, the growing seedlings are gradually exposed to sunlight for 5 minutes a day.
Picking seedlings
Picking – This is the process of transplanting shoots into individual containers. If the seeds are planted in a common container, pricking out helps accelerate growth and prevent root tangling. This procedure is performed 7-10 days after germination, when the first two leaves appear. One shoot, along with the root ball, is placed in a 200 ml container.
The second transplant of seedlings occurs after 3 weeks, but the pot size for planting should be at least 1 liter. If the seeds were initially placed in individual containers, then transplanting into larger pots will be the initial transplant 2-3 weeks after germination.
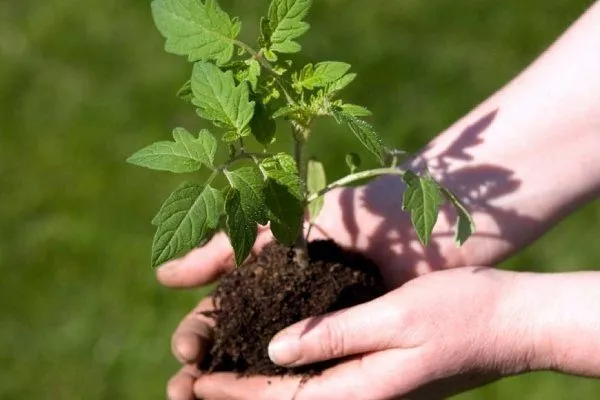
Transplanting seedlings into the ground
Seedlings are planted in the ground 50-60 days after germination. The first flower clusters on the seedlings allow for a more accurate determination of the time. After these appear, planting should take place no later than 10-15 days.
For planting, choose a cloudy, cool, but calm day, away from strong, hot sun. Prepare the soil and beds in advance. Leave at least 50 cm between rows and at least 30-40 cm between tomato plants.
A few hours before planting, water the seedlings lightly. This will allow the root ball to be easily separated without damaging it.
Plant at the same depth as in the containers. If the plant stem is taller than 30 cm, you can increase the depth or plant the bush at a 45-degree angle. This will shorten the trunk and create additional root shoots.
After planting, water the beds moderately with warm water. Avoid getting water on the plant's leaves and stems, as this can cause scorching.
- ✓ The appearance of a purple tint on the leaves indicates a lack of phosphorus.
- ✓ Curling leaves may be a sign of overwatering or high temperatures.
Care and cultivation of Chernomor tomatoes
This tomato variety is heat-loving and produces its best harvest in southern regions with a stable climate without extreme fluctuations or cold spells. Therefore, this variety is suitable for growing outdoors from seed in warm and temperate climates. For successful germination, care and additional protection are required.
Open ground conditions
Although the variety is tolerant of minor fluctuations in heat and cold, young tomato seedlings may not survive spring nights in open soil. To maintain these conditions planting in open groundThey are produced only in the presence of greenhouses or hotbeds. Materials for greenhouses and mini-hotbeds include glass boxes, film for covering beds, and polycarbonate with translucent properties.
Uniform lighting is essential for the plant throughout its growth cycle. Therefore, the beds should not be placed in the shade, under trees, or close to buildings or structures.
When choosing a site, use clean soil, free from contamination from building materials or clay compounds. Also, avoid planting tomatoes in areas where any nightshade crops were previously grown.
Planting seeds in the ground
Prepare the soil in the standard manner. It's best to plant the seeds in a row—dig a trench up to 3 cm deep along the entire row. Water the planting area until the soil becomes creamy. Place the seeds in a line, 25-30 cm apart. Cover with soil, leaving no more than 2 cm of cover over the seedlings.
Immediately after planting, cover the bed with plastic film and secure it with weights around the perimeter. Once the seedlings emerge, raise the film using a frame to create a greenhouse.
Watering
Since spring soil contains a lot of moisture, watering rates are determined by how much of the topsoil dries. Water carefully, using gentle pressure and room-temperature water.
Once the sprouts emerge and sunny weather sets in, water the plants once a week. Monitor the soil to prevent drought. A typical amount is 40 to 60 liters of water per 7-8 plants. Apply the water directly to the soil, avoiding the foliage.
Loosening the soil and weeding
Black Sea sage has a voluminous root system, and its development requires soil aeration, so loosening is necessary regularly. After watering or rain, wait until the soil absorbs the moisture and then lift the top layer by 4-8 cm using a cultivator or hoe. Remove weeds by the roots by hand. Repeat the procedure after the next watering or if the soil becomes compacted.
Pinching out stepsons
To promote proper bush growth and increase yield, lateral shoots are removed from the leaf axils. This method allows the young plant to direct the flow of nutrients to the fruit and ovaries.
Side shoots are removed when they reach 6 cm. The cuttings are made by hand or with fine pruning shears. A 1 cm shoot is left at the base to prevent damage to the plant stem. It is best to remove the side shoots on a sunny day, allowing the cut to dry and heal. Repeating the procedure is not necessary.
Top dressing
The soil in the middle zone quickly becomes depleted, especially if the area has been used for several years, so additional nutrition is necessary for the normal development and fruiting of plants.

Fertilizing tomatoes is carried out in three stages:
- 10-14 days after planting;
- at the beginning of the flowering period;
- after the first tying of the bushes.
For feeding seedlings Use a mixture of 15 g of ammonium nitrate, 20 g of superphosphate, and 15 g of potassium sulfate, diluted in 10 liters of previously settled water. The recommended dose per bush is 1 liter of solution. Ammonium nitrate can be replaced with 0.5 liters of chicken manure.
Once the fruit sets, you can feed the tomatoes with 1 tablespoon of superphosphate, first dissolving it in 10 liters of water. Use 10 liters of solution per 1 square meter of tomato bed.
Garter
Chernomor is a tall tomato with heavy fruits, so it requires staking. The first stage is performed when the plant reaches 20-30 cm in height.
The main purpose of shoring up a bush is to ensure uniform pressure from branches and fruit on the trunk, preventing stem breakage and plant death. Insulating the plant also protects it from slugs and soil pests and improves ventilation, which is essential for pollination.
Types of structures for garters:
- horizontal trellis;
- vertical trellis;
- metal or wooden pegs;
- a small fence around the plant;
- garter to the fence.
Chernomor can grow up to 2 meters, so vertical support is most effective. In a greenhouse, this can be done with a cord attached to the ceiling. In the open ground, it can be attached to a fence or a tall horizontal trellis.
The main trunk is tied to a cord using soft, plant-friendly straps. Heavy fruit-bearing branches can be attached to additional cords and suspended from the straps. As the tree grows, the straps are tightened and moved to the most vulnerable areas.
Harvesting and storage
The tomatoes begin to be harvested as early as 110-120 days after planting. You can re-harvest them every 3-4 days as they ripen. If you plan to eat the tomatoes immediately after harvesting, choose those that have already acquired a dark plum hue. This indicates full flavor ripeness.
Black Sea berries ripen well even after being removed from the bush, so for long-term storage, it's best to choose slightly unripe fruits. They're less susceptible to crushing, spoilage, and cracking.
For transportation and storage, tomatoes are placed in spacious boxes in 2-3 layers. The bottom layer should contain the largest and firmest tomatoes, less ripe ones. Ripe and soft tomatoes are placed on top.
Avoid storing infected or damaged tomatoes, as moisture and bacteria will spoil adjacent tomatoes. Place thick paper or fabric between the layers. Avoid using plastic as a layer, as this can lead to rot and mold in the tomatoes.
Store tomatoes in a cool, dry, well-ventilated area. Under these conditions, they will keep for up to three weeks.
Pests, diseases and prevention
Tomatoes are susceptible to several diseases. For Chernomor, the most dangerous is late blight. Prevention of this and other infections is presented in the table.
| Diseases of the Chernomor tomato | Symptoms | Treatment/prevention |
| Late blight | Appears as dark spots on the surface of the stem and leaves. | Spray with Fitosporin for prevention. For treatment, use Famoxadone solution. |
| Mosaic | Whitish lesions on the surface of leaves. The vector is the garden aphid. | There is no cure; affected areas are removed. For prevention, spray with aphid repellent. |
| Blackleg | Infection begins with blackening of the trunk at the soil surface. Gradually, the plant wilts. | The most effective composition for treatment is “Pseudobacterin-2”. |
Possible problems and recommendations:
The most common pests are the larvae of garden aphids, mole crickets, and cockchafers. Traps and poisonous compounds are used to control them.
The main recommendation for successfully growing Chernomor is timely and regular care. The variety thrives in a garden as long as the temperature regime is maintained, pests are protected, and the soil moisture levels are maintained.
Sunlight is the main source of growth and development for the bush, so avoid permanent shade. Choosing the right planting location will eliminate this problem.
Don't neglect feeding and fertilizing. Nutrients must be applied according to a schedule and in precise proportions; overdosing on chemical fertilizers can lead to plant death.
One of the most common problems with this variety is ovary and flower drop. This is the tomato's first reaction to many external factors. If watering and sunlight are sufficient, consider feeding—nitrogen-rich fertilizers are best.
Reviews of the variety
The Chernomor variety has been successfully grown by Russian gardeners for many years. The dessert tomato flavor lends itself well to culinary experiments! With proper care and proper cultivation, the harvest will be bountiful and will become one of the most sought-after varieties for years to come.