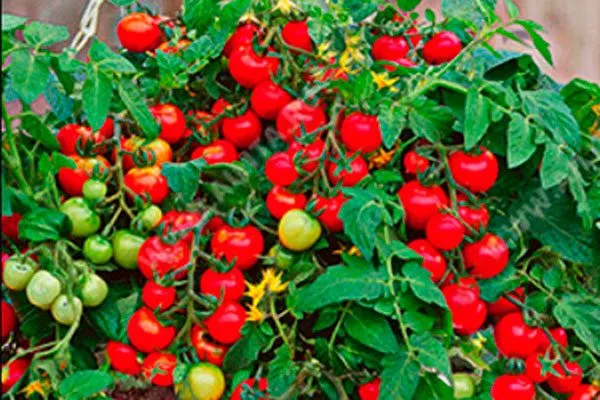
Ladybug tomatoes get their name from their compact size and attractive appearance. Gardeners appreciate them for their high productivity, versatility, and excellent flavor. These small tomatoes are ideal for canning and eating fresh, and they maintain their size throughout the season.
Description of the bush and fruits
This is a determinate variety. After the flower clusters form at the tops of the stems, plant growth stops.

Features and key characteristics:
- The bushes are low-growing, reaching 30-50 cm in height. The shoots are covered with small green leaves and numerous miniature, dense tomatoes. In their early stages, the bushes are used as decorative landscaping.
- The intermediate-type inflorescence is located on a peduncle with articulation. The first ovaries appear after the development of 67 full-fledged leaves, and subsequent shoots form from the lower shoots in the leaf axils.
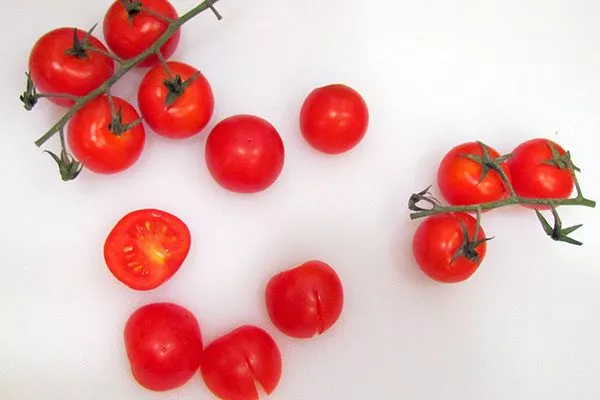
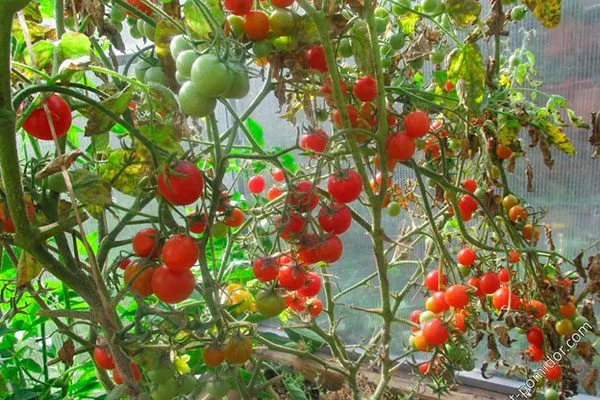
- The tomatoes are round in shape, classified as cherry tomatoes and weigh 20-25g. When unripe, they are light green in colour, but turn a deep red as they ripen.
- Beneath the smooth, tough skin lies dense, juicy and sweet flesh.

The variety is self-pollinating and does not require additional pollinators.
Main characteristics and history
The ladybug was created by breeders N. V. Nastenko, V. G. Kachainik, and A. V. Kandoba (Agrofirma Aelita LLC). In 2008, the variety was officially registered and approved for cultivation throughout the Russian Federation.

Ripening and fruiting, productivity
Tomatoes begin to ripen from the bottom. A pleasant feature is that the vegetables don't shrink as they ripen, remaining as firm as when first picked. This is an ultra-early variety—the harvest begins in just 75-80 days. Fruiting continues for two months—July and August.
When grown under plastic cover, productivity reaches up to 9 kg per square meter, and a single bush yields over 3 kg of fruit. However, achieving these results requires proper care. If the plants become too elongated, only a single cluster will form instead of several.
Scope of application
Ladybug tomatoes are eaten fresh, sliced, and used as a garnish. They make a wonderful addition to salads and store well for up to three weeks in a dark, dry, draft-free place. Unripe tomatoes ripen under the same conditions.
Tomatoes are suitable for pickling and canning. They produce aromatic juices, ketchups, and sauces. Due to their compact size, they are used whole for preserves.
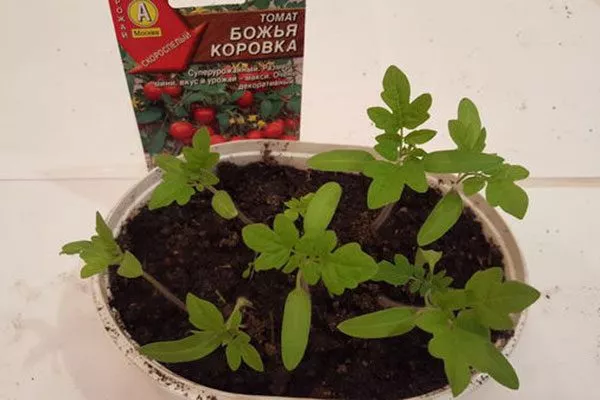
Growing seedlings
Depending on the regional climate, seeds for seedlings are sown in mid- to late March. For cooler regions, this should be done no later than the first ten days of April. From germination to maturity, the seedlings take no more than 80 days. If sown in February, the harvest can be harvested in May.
Follow these recommendations:
- Prepare shallow wooden boxes (6-7 cm) or plastic containers with holes in the bottom. If you have a small number of tomatoes, use plastic containers.
- Purchased soil, specially designed for seedlings, based on peat, is suitable.
- Seeds already coated do not require pre-germination or disinfection; sow them dry. Soak uncoated seeds for 20 minutes in water at 53°C (131°F), then let them cool and plant immediately.
- It is not necessary to use growth stimulants; experienced gardeners often do without them.
Sowing process:
- Fill the containers with moist soil, leaving 2 cm to the edge.
- Carefully compact the substrate, especially at the edges, so that the seeds do not fall through after planting and watering.
- Make furrows on the soil surface at a distance of about 1 cm and sow the seeds sparsely in a 1x1 cm pattern.
- Sprinkle with a 2 cm layer of dry soil and compact lightly with a spoon.
- Cover the container with glass, ventilate regularly and water with a spray bottle.
Germination depends on the quality of the seeds, and the time it takes for sprouts to appear depends on the temperature:
- +28-32°С – 3-4 days;
- +24-26°С – week;
- +20-23°С – 7-10 days;
- +18°С – 14 days or more.
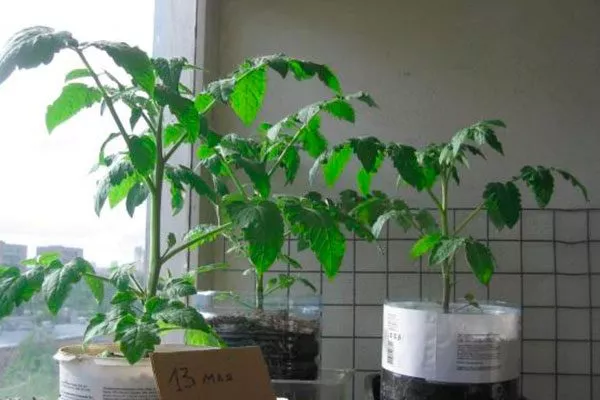
Once sprouts appear, remove the glass and move the container to a bright room or windowsill. Create suitable conditions:
- For normal growth, temperatures should be 16-18°C during the day and 12-14°C at night. Remove any seedlings that appear 4-5 days late. After a week, increase the temperature by 3-4 degrees.
- Tomatoes require periodic feeding from the moment they are transplanted, when they have 2-3 true leaves. Transplant the seedlings into individual containers or a large box, leaving sufficient space between plants. Pinch back long roots by 1/3.
- A week after picking, apply fertilizer, continuing watering, but avoiding over-watering to protect the seedlings from developing black leg.
- ✓ Formation of flower brushes at 6-7 internodes, which requires special attention to lighting to prevent the development of leaves instead of fruits.
- ✓ High resistance to most nightshade diseases, but risk of late blight in warm regions.
Lighting should be intense, about 12 hours a day. If there's insufficient light, provide supplemental lighting. Flower clusters begin to form at the 6th-7th internode. If there's insufficient light, leaves will develop instead, leading to elongated plants and delayed ripening of the vegetables.
Planting in the ground
To ensure a bountiful harvest, it's important to transplant the seedlings correctly to their permanent location. Ladybug is a compact, determinate variety, but it requires fertile soil, suitable growing conditions, and timely care.
Key recommendations:
- Choose a sunny, wind-protected site with loose soil. Avoid areas where other nightshades (tomatoes, potatoes, peppers) were previously grown.
- Dig over the bed, remove weeds, and add humus or compost. Add wood ash and superphosphate to nourish the plants.
- Harden off the seedlings: 10-14 days before planting, begin taking the seedlings out into the fresh air, gradually increasing the time spent there.
- Plant at the optimal time – wait until the soil warms up to +15°C and the threat of night frosts has passed.
- Place the bushes in a 40x50 cm pattern to ensure that the plants receive enough light and air.
- Plant the seedlings deep down to the first true leaves to form a strong root system.
- Immediately after planting, water the plants generously with warm, settled water.
- Mulch the soil by sprinkling the beds with peat, humus or dry grass to retain moisture and prevent weed growth.
- If cold weather is possible, cover the plants with agrofibre or film at night.
- ✓ The optimal soil temperature for planting seedlings should not be below +15°C, which is critical for preventing stress in plants.
- ✓ The distance between bushes should be at least 40×50 cm to ensure sufficient lighting and ventilation, which directly affects the yield.
Proper planting will ensure rapid growth and good survival of the seedlings. In just a few months, you'll be enjoying delicious, juicy vegetables.
Care instructions
After planting the seedlings outdoors, it's important to help them adapt to the new conditions. Young plants may appear wilted during the first few days, but this is a natural process.
Shade the bushes from the bright sun to avoid sunburn, and don't water them right away—this will encourage the roots to dig deeper into the soil. After a few days, the tomatoes will strengthen and begin to obtain moisture on their own.
Further care of plants:
- Provide sufficient lighting. Daylight hours must be at least 12 hours, otherwise development will slow down.
- Water moderately. Once a week with warm water, but drip irrigation is preferable, as it reduces the risk of diseases.
- Tie up the bushes. The variety produces a lot of fruit, so without support the brushes may break off.
- Stepson regularly. Remove side shoots every 10 days so that the plant does not waste energy on excess greenery.
- Loosen and mulch the soil. After a few hours of watering, loosen the soil, remove weeds, and renew the mulch layer to retain moisture.
- Apply phosphorus fertilizers. This element promotes root development and increases productivity.
Pest and disease control
The Ladybug variety is highly resistant to most nightshade diseases. However, in warmer regions, there is a risk of late blight midseason.
Possible diseases:
- tobacco mosaic virus;
- white and gray rot of fruits;
- anthracnose;
- brown spot.
Main pests:
- Colorado beetle;
- whitefly;
- mole cricket;
- tomato leaf miner;
- scoop.
Pros and cons
This variety evokes mixed reviews among gardeners. Even when all the agronomic requirements are met, the expected results are not always achieved. It is important to study all the main characteristics of the variety to avoid potential difficulties.
Despite some difficulties in care, Ladybug remains a popular variety among gardeners due to its high yield, attractive appearance and good storage quality.
Reviews
The Ladybug variety combines many positive qualities: good productivity, high disease resistance, and versatility. This variety is an excellent choice for growing in areas with limited space—its miniature bushes don't take up much space, yet produce large volumes of high-quality tomatoes.