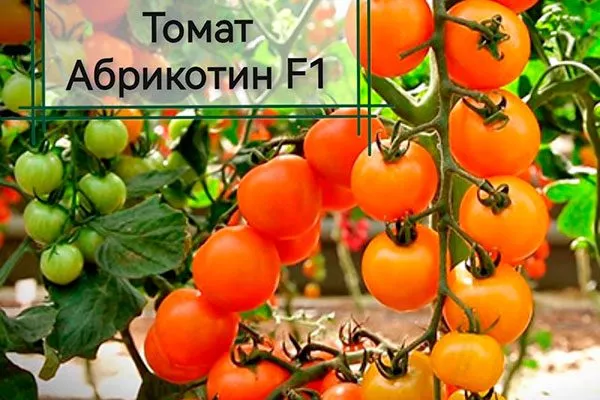
The Abricotin F1 tomato is an early-ripening hybrid of domestic selection, designed for growing in plastic greenhouses. It produces small cherry-shaped fruits with an unusual apricot color and an excellent dessert flavor.
Description of the plant and fruits
The Abricot tomato bushes are indeterminate and reach a height of 150-170 cm. The leaves are medium-sized and dark green. The inflorescences
simple, and the fruits are small.
Brief description of fruits:
- Unripe fruit color: light green.
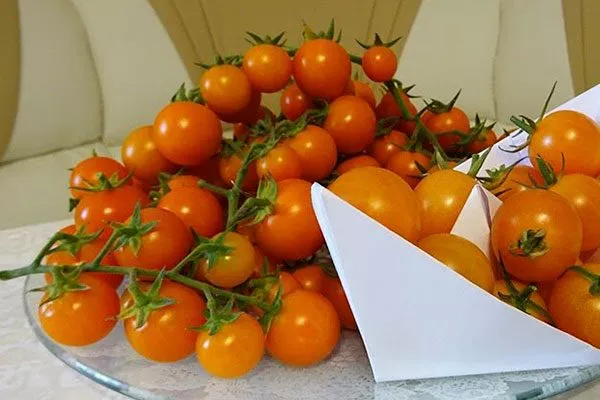
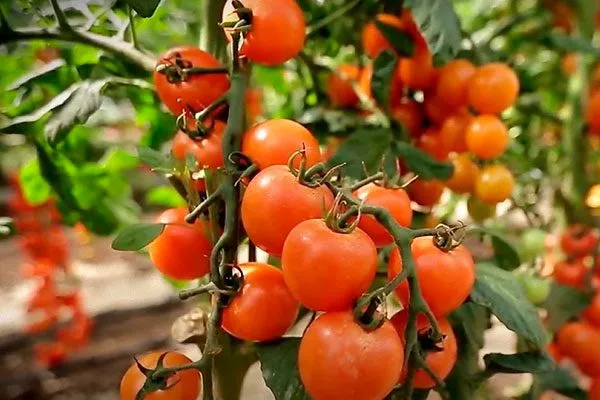
- Color of ripe fruit: light orange.
- Form: rounded.
- Pulp: medium density.
- Number of chambers (sockets): 2.
- Weight: 15-20 g.
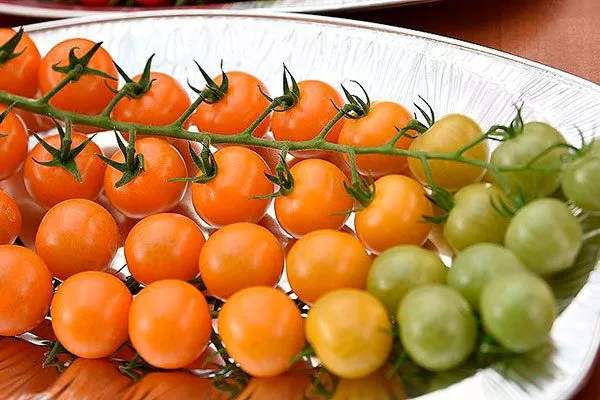
12-14 fruits are formed in clusters.
The History of the Abricot Tomato
The Abricotin F1 tomato is a hybrid cherry tomato variety bred in Russia. Authors: A. N. Khovrin, T. A. Tereshonkova, N. N. Klimenko, and E. V. Titova.
The hybrid was approved for use in 2017. Recommended for indoor cultivation in all regions.
Taste and purpose of fruits
The Abricot tomato has a pleasant, sweet and sour flavor with hints of fruit. This dessert cherry variety is versatile and can be eaten fresh, pickled, and canned whole. It's also suitable for salads, vegetable slicing, and stewing.
Characteristics
The Abricot tomato is a mid-early variety. It takes 95-100 days from germination to ripening of the first fruits.
The hybrid is resistant to Fusarium wilt. The Abricotin tomato yield is 3.2-4.2 kg/sq. m.
Pros and cons
Cherry tomato lovers who want to plant an "apricot" tomato in their garden will be able to better understand whether this hybrid is right for them if they become familiar with all of its advantages and disadvantages.
Landing features
The hybrid tomato Abricot is grown from seedlings. You can purchase seedlings or grow them yourself—in a heated greenhouse or indoors.
Selecting a site
The Abricot tomato is grown in greenhouses located in areas with a groundwater level of at least 1.5 meters above the ground surface. Greenhouse structures are recommended to be placed on elevated sites. If the site has predominantly clay soil, it is recommended to create a sand and gravel "cushion" under the fertile soil layer to ensure greenhouse stability.
Low-lying areas are not recommended for greenhouses and plastic structures used for growing tomatoes, as they will be cool and damp, increasing the risk of fungal diseases. If your garden doesn't have a level area, you can build a greenhouse on a raised platform with a slight slope of no more than 5-7 degrees.
The greenhouse should be well-lit from all sides, and there should be no tall trees, shrubs, structures, or other greenhouses nearby that could shade it. Protection from the north is desirable, such as a fence, hedge, etc.
Soil preparation
The soil in the greenhouse is prepared in the fall. Plant debris is removed, and weeds are pulled out along with their roots. The soil is dug to a depth of 6-8 cm. It is important to dig up the top layer, which harbors pathogenic microorganisms and fungal infections.
A mixture of neutral, deoxidized peat (60%), coarse river sand (10%), and vermicompost/humus (20%) can be used as soil. It is also recommended to add mineral fertilizers and other soil-improving components.
In the spring, when the ambient temperature reaches above zero and the soil in the greenhouse warms up to at least +12°C, it is necessary to water it with a solution containing beneficial microorganisms (Trichoderma or hay bacillus).
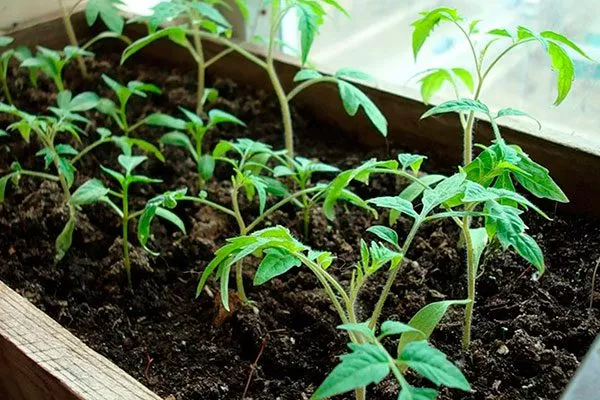
Growing seedlings
Abricot tomato seeds are sown for seedlings in February or early March. The seedlings grow for 60-65 days, and by planting time, they should have 5-7 true leaves.
Features of growing seedlings:
- Use only store-bought seeds. Self-sowing hybrids is not suitable for planting, as the seeds do not retain their varietal qualities. Store-bought planting material does not require any treatment; simply germinate it by wrapping it in damp cheesecloth.
- Sow in any convenient container. You can use empty containers filled with growing medium or peat pots. Large containers are the most convenient, as after three weeks the seedlings will still need to be transplanted into individual 350-500 ml cups.
- To fill empty containers, use store-bought seedling substrates or homemade potting mixes, such as equal parts peat, fine-grained river sand, and humus/compost. Add 1 liter of wood ash and 1 liter of wood shavings per 30 liters of mixture.
- The soil in the planting containers is moistened and marked using a mesh with 1-2 cm mesh. Alternatively, rows are made at 3 cm intervals. Leave 2 cm between adjacent seeds. Plant at a depth of 1 cm. Cover the seeds with a thin layer of soil, moisten again (using a spray bottle), and cover with a transparent covering material.
The seeds are kept in a warm, bright room at a temperature of 22 to 25°C. The plastic wrap is removed daily to allow air to air them out. Seedlings will begin to emerge within 5 to 7 days. As soon as this occurs, the plastic wrap is removed and the containers are moved closer to the light. At the same time, the room temperature is lowered to 14 to 16°C for 5 to 7 days.
Features of seedling care:
- Lighting. During the first stage, for 3-5 days, seedlings require 24-hour light. Therefore, supplemental lighting is necessary, which can be achieved with fluorescent lamps or phytolamps. After a week, reduce the daylight hours to 18-20 hours, and after a month, to 11-12 hours.
- WateringBefore transplanting, wait 3 weeks. Water the seedlings no more than 1-2 times a week. After transplanting, double the watering frequency. Use only settled, room-temperature water. Water the roots.
- PickingThis is carried out when the plants have two true leaves. The seedlings are transplanted from their common container into individual containers—plastic or peat cups, pots, or any other suitable container with a capacity of 350-500 ml.
- Top dressingFertilization begins a couple of weeks after transplanting. Growing tomatoes only need to be fertilized a couple of times, preferably with complex fertilizers designed specifically for seedlings. "Aquarin, Cimus, Agricola, etc."
- HardeningHardening off seedlings planted indoors helps them adapt to new conditions more easily. Without hardening, seedlings are more vulnerable to a variety of factors, including changes in light levels or humidity. Hardened seedlings root and adapt more quickly to their new location, are less susceptible to disease, and grow more vigorously.
Harden off Abricotin seedlings using the standard method: take them outside, increasing the time spent outdoors each day. Start with half an hour, gradually increasing to 8-12 hours. Hardening off begins 1-2 weeks before transplanting the seedlings into the greenhouse.
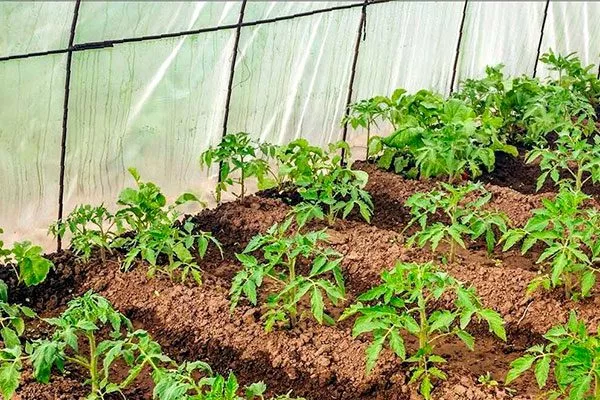
Transplanting
Seedlings are planted in a greenhouse or hotbed after the end of the frost period, in April-May - the timing depends on the climatic conditions in the region.
Features of planting tomato seedlings Abricotin.
- The acceptable temperature range for growing the hybrid is 15 to 25°C. By the time of planting, the soil should also warm up to 12 to 14°C.
- The holes are dug according to the following pattern: 40 x 60 cm. They can be placed in a checkerboard pattern or in rows.
- The size of the holes depends on the size of the root ball or peat pot—they should fit comfortably in the excavated holes. The average hole depth is 15 cm, with a diameter of 20 cm.
- Add a couple of handfuls of humus and wood soil to the holes, along with mineral fertilizer, such as 1 tablespoon of superphosphate. Sprinkle the fertilizer over the soil, and add 3 liters of warm, settled water.
- Thirty to sixty minutes after watering, when the soil has settled slightly, the seedlings can be planted. Place the seedlings vertically, fill the empty space with soil, compact it, and water again. Once the water has been absorbed, mulch the soil around the seedlings, for example, with straw, grass clippings, or peat.
Care Features
The Abricot tomato isn't particularly demanding or fussy, but to get a good harvest, the bushes require a fair amount of care—in addition to watering and fertilizing, they require staking, shaping, and preventative treatments.
Watering and loosening
The Abricot tomato is watered infrequently but thoroughly, usually once or twice a week. The day after watering, the soil is loosened and weeded.
Fertilization
The bushes are fed with complex mineral fertilizers. Foliar feeding with calcium nitrate and Purshat tomato fertilizer is also possible.
At the roots of the bushes, add magnesium sulfate, chlorella suspension, Sotka Chernozemya or Flora S fertilizers.
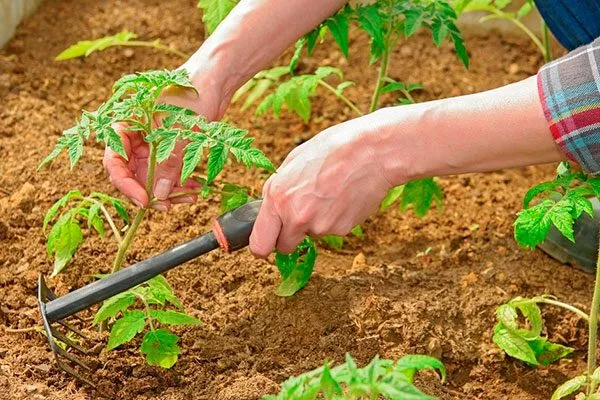
Shaping and garter
The Abricotin F1 tomato is formed into 1–2 stems; this is the solution that allows the bushes to show optimal yield.
This hybrid also requires regular pinching and tying to supports.
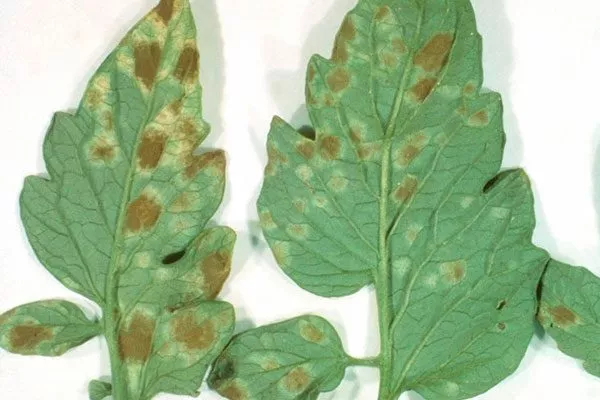
Diseases and pests
The Abricotin hybrid is fairly resistant to many common nightshade diseases. In particular, it rarely suffers from brown leaf spot and fusarium wilt. Disease prevention can be achieved with folk remedies and bio-preparations such as Fitosporin, while chemical fungicides such as Skor and Quadris are used for treatment.
The Abricotin tomato can be susceptible to attacks by cutworms, aphids, and spider mites. To combat these pests, you can use Liposam, which creates a film that repels insects. In general, the choice of pesticide depends on the pest type. For example, the biological product Antivreditel is effective against whiteflies and spider mites, and Mycorad Insecto 1.1 (1.2) is effective against soil pests.
Harvesting
The Abricot tomato is harvested in July and August. The bunches are harvested whole, cut with garden shears. The harvested tomatoes are stored in a single layer in shallow boxes, wide basins, etc.
Reviews
The Abricot tomato is a great option for lovers of cherry tomatoes with an unconventional color. The sunny orange fruits are not only beautiful but also delicious, and most importantly, they're perfect for any occasion—from salads to pickling.