The Zdorovye pepper quickly gained popularity due to its early maturity, good productivity, and ease of care. With minimal care and simple farming practices, you can reap bountiful harvests.
Origin
Developed by breeders M. B. Goncharova, A. V. Alpatyev, and V. V. Khrenova. The variety was approved for use in 1986.
Characteristics of the appearance of the plant and fruits
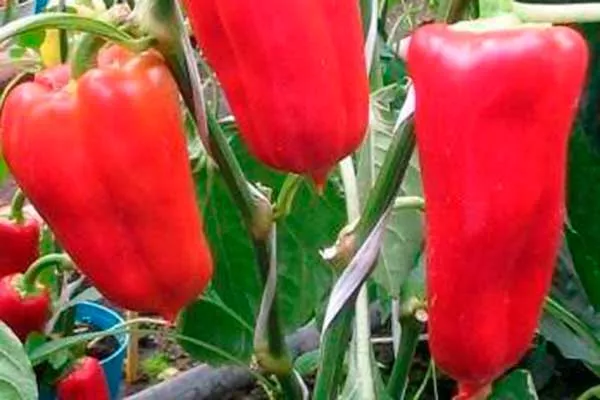
The bushes are vigorous, reaching heights of 140-170 cm, making them stand out among other sweet pepper varieties. The semi-spreading plants are often tied to make efficient use of greenhouse space. A single bush can produce up to 15 hanging fruits at a time.
Distinctive features of vegetables:
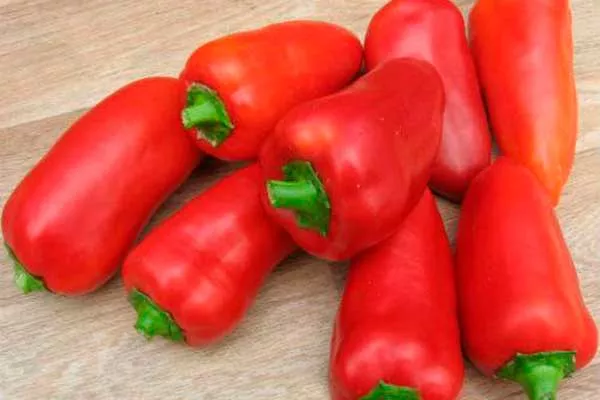
- Size - medium, 8.5-12 cm long and 5-6.4 cm in diameter.
- Form - prismatic.
- Weight - varies from 33 to 41 g.
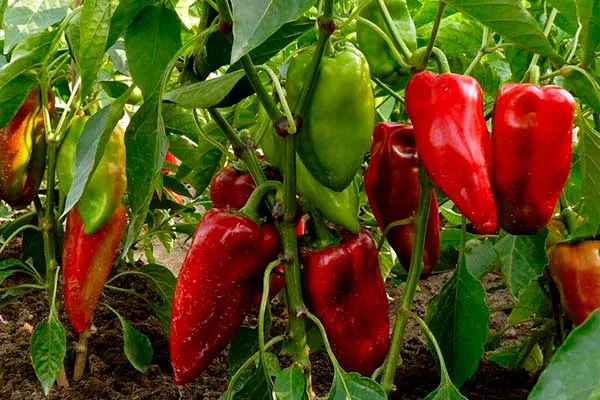
- Color - As they ripen, they change color from green to light green, and then to bright red when fully ripe. At this time, the seeds for future seedlings are collected.
The surface is slightly wavy, and the wall thickness is 3-4 mm. It resembles a hot pepper in appearance, but under favorable conditions, it grows juicy and fleshy with a thin skin that is almost imperceptible.
Purpose and taste
Professional tasters have praised the variety's flavor, calling it excellent. This sweet and crunchy vegetable is often eaten fresh, enjoying its natural flavor. It's ideal for preserves.
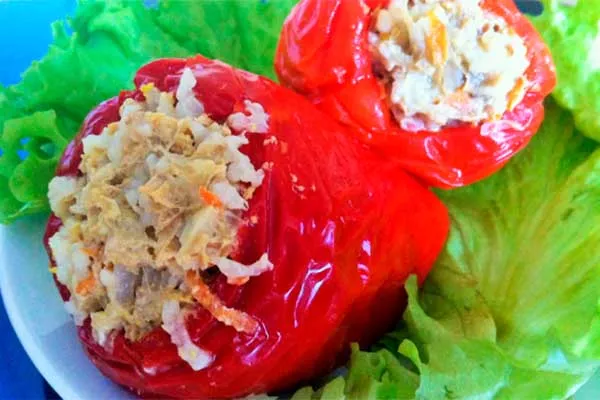
For pickles and marinades, red fruits that have reached full ripeness are usually used, while for other dishes, specimens are collected at the stage of technical ripeness, when they are light green in color.
Characteristics of the variety
Seedlings are planted in greenhouses, where they thrive and bear fruit, even in northern regions. This is possible due to the plant's tolerance to low light.
Ripening time
It's an early-ripening variety, harvested from July to August. The period from first germination to fruiting is 78-87 days, depending on growing conditions.
Productivity
The crop is renowned for its high productivity. On average, 1 square meter yields 4 to 4.6 kg of vegetables, and in some cases, up to 5 kg. Despite the peppers being abundantly covered, the plants are relatively light, making the shoots resistant to damage.
Regions of Admission
The variety is approved for use in several regions – the North and Northwest.
Disease resistance of the variety
It's considered one of the most disease-resistant varieties. However, despite its good immunity, preventative measures remain essential to maintain plant health.
Features of growing sweet peppers Health
Sweet peppers require warmth. To ensure a productive harvest, gardeners in most regions of Russia prefer to grow the crop using seedlings.
Sowing dates
This is an early-ripening variety—approximately 90 days pass from planting to harvesting the first fruits. Seedlings should be 50-60 days old by the time of planting, so plan your sowing time based on these dates, taking into account the region's climate.
In the Urals, Siberia, and the Northwestern regions, cultivate the plants from early to mid-March. In the temperate zone, begin in mid-February, and in the southern regions, from early February. Do not allow the seedlings to overgrow. The optimal time for transplanting is when the shoots begin to form buds.
Preparing seeds and soil
Peppers thrive in loose, nutritious, and neutral soil. You can use ready-made potting mixes or make your own.
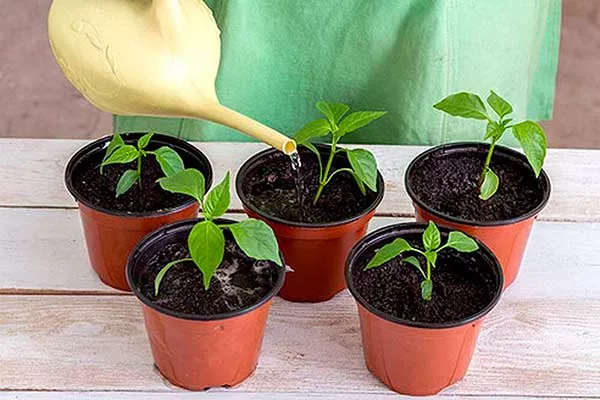
Since the crop does not tolerate picking well, sow the seeds immediately into separate containers, such as peat cups, pots or bags.
- ✓ Optimum temperature for seed germination: +25°C, with a possible decrease to +15…+17°C after emergence to prevent elongation.
- ✓ The need to use growth stimulants for seeds not treated by the manufacturer.
Follow these recommendations:
- Disinfect the planting material with a potassium permanganate solution and soak it in a growth stimulator. Treated store-bought seeds require no further treatment.
- Place them in pots, cover with plastic wrap, and place them in a warm location with an optimal temperature of 25°C. The first shoots usually appear within 7-10 days, so take this time into account when planning your sowing.
- When the seedlings emerge, remove the plastic wrap, move the pots to a bright spot, and reduce the temperature to 15–17°C, which helps prevent the seedlings from stretching. A week later, increase the temperature again to 22–25°C and maintain this temperature until planting the seedlings in their permanent location.
Caring for seedlings
Water the plants with warm water, carefully monitoring the soil moisture level to avoid both overwatering and drought. Pay particular attention to irrigation. Fertilize 2-3 times using potassium humate and complex fertilizers. Provide the seedlings with additional lighting.
Landing at a permanent location
Once the threat of frost has passed and warm weather sets in (17…18°C), begin preparing the seedlings for planting. Harden off the plants 10-14 days beforehand by placing them on a balcony, veranda, or loggia.
Plant the seedlings in pre-prepared holes, spacing them at least 50 cm apart. Add a complex fertilizer to each hole, then water the soil and carefully place the seedling with the root ball, covering it with soil.
Transplanting into a greenhouse and caring for the plantings
Maintain the correct temperature (22-25°C) and humidity. Make sure the soil is well prepared: loose, fertile, and enriched with organic matter.
Follow the recommendations:
- Plant the seedlings in a staggered pattern, 30-40 cm apart and 50-60 cm between rows. This will ensure good air circulation and light access.
- When replanting, carefully remove the plants from their containers, being careful not to damage the roots.
- Place the seedling in the hole, cover the roots with soil, and gently compact it. Water with warm, settled water.
- Water the sprouts regularly, but avoid overwatering. The best method is to apply water at the roots to avoid wetting the leaves. The water should be warm (20-22°C).
- Apply the first fertilizer 2-3 weeks after repotting, using a complex mineral fertilizer high in potassium and phosphorus. Repeat every 2-3 weeks.
- Remove excess side shoots (stepchildren) to direct all the plant's energy toward fruit formation. This is important for improving light and ventilation.
- Pinch the tops when they reach about 30cm in height to encourage branching and more vegetable production.
- Regularly inspect plants for pests (aphids, spider mites) and diseases. Apply preventative insecticides and fungicides if necessary.
- Ensure good ventilation to avoid excessive humidity and the risk of disease. On hot days, open doors and windows.
Caring for peppers in a greenhouse requires attention and regularity. Proper replanting and adherence to agronomic recommendations will help you achieve a bountiful and high-quality harvest.
Agricultural technology
Proper care of sweet pepper plants is crucial for producing high-quality vegetables. It's important to nurture the crop and pay due attention to strengthen its immunity and increase yields.
Watering
Provide regular and ample water. However, too much moisture can cause problems, so maintain a balance. Water the seedlings with warm, settled water, preferably at the roots. It's best to use special watering furrows to avoid exposing the roots.
The frequency of watering depends on weather conditions, greenhouse characteristics, and the condition of the plants, but should be no less than 2-3 times a week. The best time to water is between 9 and 11 a.m. Insufficient moisture can cause the plants to drop flowers and ovaries.
Formation of bushes
When the stem begins to fork, remove all lower leaves and buds up to the fork. Train the plant into one or two stems, but if you choose the latter, leave only the strongest shoot.
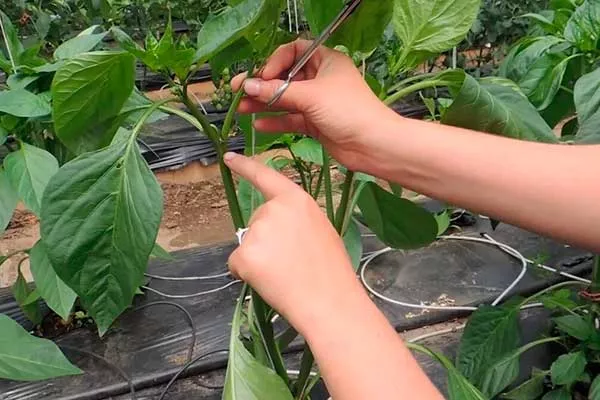
Trim off any remaining side shoots, leaving a small stump about 1 cm long. Since the Health variety grows tall, provide support and tie the bushes for stability and proper growth.
Top dressing
Caring for the crop includes regular fertilization. At the beginning of the growing season, use nitrogen-rich compounds, such as mullein or bird droppings diluted in water. As flowering begins, add phosphorus, preferably superphosphate. Apply potassium during the early fruiting phase.
- First feeding: 2 weeks after planting, nitrogen fertilizers for growth.
- Second feeding: at the beginning of flowering, phosphorus fertilizers for the development of the root system.
- Third feeding: during the fruiting period, potassium fertilizers to improve the quality of the fruit.
Fertilizing intervals can be 10-12 days, but avoid overfeeding. Additionally, add wood ash to the soil. Combine this with loosening the soil.
Diseases and pests: how to deal with them
The plant has a strong immune system, but if not properly cared for, seedlings can be susceptible to various problems. Follow these recommendations:
- To get rid of spider mites, use the preparations Fitoverm, Kraft, Kleschevit and Akarin.
- To combat aphids Introduce natural enemies of this pest, such as ladybugs, into greenhouses, or use Actellic and Fufanon. Alternatively, a folk remedy such as a solution of 40 ml of liquid soap diluted in 10 liters of water will work. Mix the resulting solution thoroughly and spray generously on branches and leaves.
- For destruction slugs Scatter shag over the soil and plant tobacco nearby.
- Cutworm caterpillars They feed on stems and leaves. Various traps are effective against them. Experienced vegetable growers advise thoroughly loosening the soil weekly and digging it deeply in the fall as a preventative measure.
- At black leg The root collar darkens, and the bush becomes wilted. To treat, loosen the soil well and treat the plants with Zaslon.
- At late blight Hard black spots appear on the fruit. Oxychom and Barrier can help combat this disease.
- When infected stolbur The fruits are deformed and the leaves are turning yellow. Remove the affected plants, loosen the soil, and clear it of weeds.
- Spotted wilt The disease starts at the top of the plant, and the leaves turn blue and take on a bronze tint. In this case, spray with Fundazol.
Carefully inspect your plantings for insects and diseases to eliminate the problem promptly.
Harvesting peppers
The Zdorovie variety retains its qualities, allowing you to prepare fresh fruit salads throughout the fall. Ripe fruits are ideal for preserves and whole-fruit canning.
Harvest vegetables at any stage:
- Technical maturity (green, having reached optimal weight and size).
- Biological maturity (red).
At the technical maturity stage, peppers are not yet fully ripe, although they are still edible. Harvest them and store them in boxes or on racks to ripen. Harvesting these peppers increases yield, as waiting for ripening on the vine slows the growth of other fruits.
Positive and negative qualities
The "Health" variety has several undeniable advantages over other varieties. Advantages of this crop:
Some gardeners note the peppers' small size, thin walls, and the need for staking as disadvantages. Despite this, the Zdorovie variety is an excellent choice for northern regions, where growing sweet peppers can be challenging.
Reviews
The Zdorovye pepper is an excellent choice for gardeners who want fresh, tasty vegetables from early spring to fall. Its low maintenance and disease resistance make it ideal for growing even in challenging climates. Following the care recommendations will help you achieve excellent results and a bountiful harvest.