Chili peppers are an interesting, vibrant ornamental plant that produces fruit well on a windowsill. The flavor is indistinguishable from pods grown in the ground or in a greenhouse. They require much less maintenance and look great in a home.
Suitable varieties of chili for growing on a windowsill
| Name | Ripening period | Fruit color | Productivity |
|---|---|---|---|
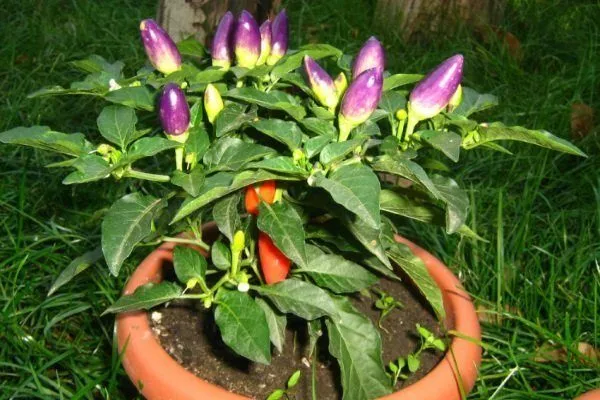
| Indian summer | 3 months | white, purple | high |
| Confetti | all year round | green, scarlet, purple | average |
| Aladdin | early maturing | green, bright red, purple | high |
| Bell | 5 months | red | low |
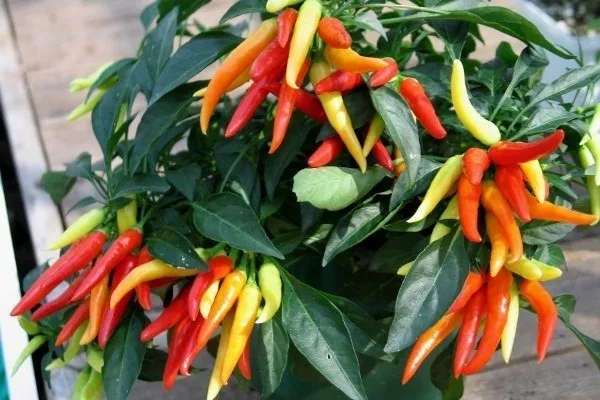
| Firework | all year round | red, orange | average |
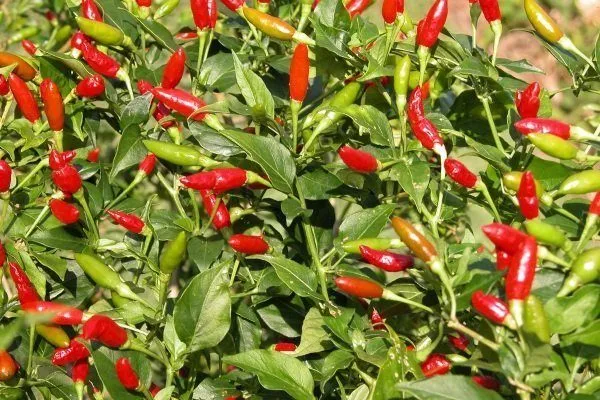
| Tabasco | rapid growth | red | high |
| The Queen of Spades | mid-season | green, orange, red | average |
- ✓ Resistance to low light in apartment conditions.
- ✓ Self-pollination ability for easy care.
Before setting up a small garden at home, choose the right chili variety. The selection is vast, but not every vegetable will grow well indoors or suit the gardener's taste. The most suitable options are:
- Indian summerThis pepper variety ripens in 3 months, produces white and purple flowers, and is tart and hot.
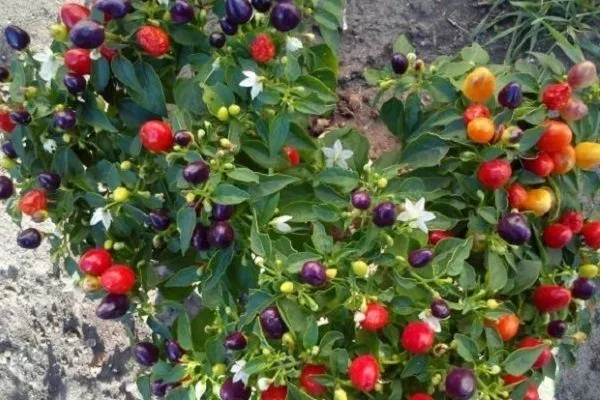
- ConfettiThe fruits ripen year-round, with pods up to 7 cm long. The inflorescences are green, scarlet, or purple, depending on the degree of ripeness.
- AladdinThis variety is equally suitable for greenhouse and open ground cultivation, and is considered early maturing and easy to care for. The green fruits ripen to a bright red or purple. The bush bears fruit year-round.
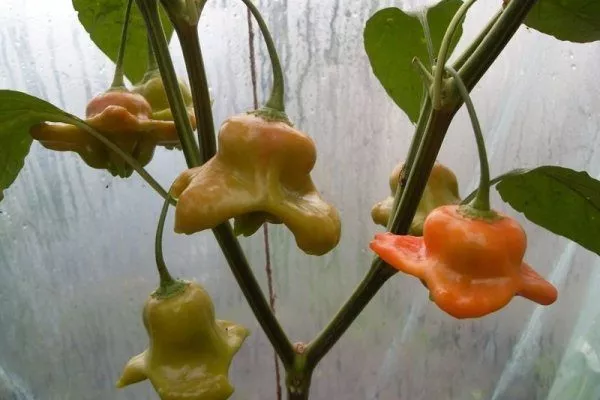
- BellThe fruits ripen in 5 months. The main drawbacks of the variety are uneven pungency and a small yield.
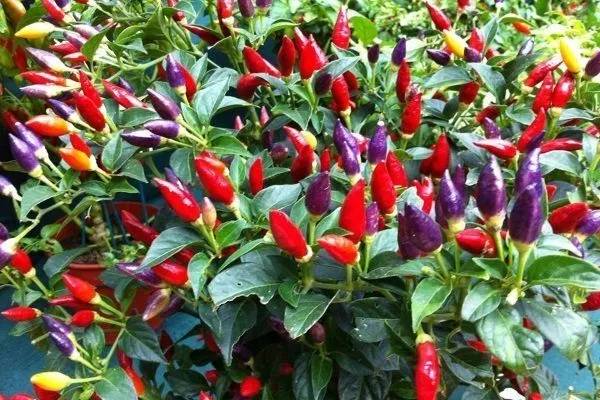
- FireworkThis is a compact windowsill shrub with red and orange fruits all over its crown.
- TabascoThe variety is highly valued for its rapid growth and productivity; its flesh has a pungent, tart taste.
- The Queen of SpadesThis mid-season bush bears fruit year-round. As it ripens, the fruit turns from green to orange and red.
Indian Summer Chili Pepper
Chili Pepper Confetti
Aladdin Chili Pepper
Bell Chili Pepper
Chili Pepper Salute
Tabasco chili pepper
Queen of Spades Chili Pepper
The final choice of variety depends on the gardener's wishes and taste preferences. The microclimate in the apartment also plays a role.
Rules for planting chili on a windowsill
This vegetable can be grown from young seedlings or seeds. The latter option offers a better chance of obtaining a bountiful harvest and the flavor you originally planned. It's important to choose the right soil and container for planting chili, follow the care instructions, and provide the plant with a suitable microclimate.
Planting dates
Sow pepper seeds Peppers can be grown year-round. Experienced gardeners say that spring sowing (early or mid-March) yields the most fruitful results. The harvest is abundant, and the peppers are uniformly hot and spicy. Planting timing is determined individually, taking into account the characteristics of the specific variety.
The following varieties are distinguished:
- Early ripening varieties They are planted in mid-February and bear fruit in late May–June. Early varieties include Ogonyok, Medusa, Aladdin, and Tabasco.
- Mid-season They are planted in early to mid-March. These include the Sharp-leaved Fish and the Queen of Spades.
- Late varieties Sown in the second half of March. These are Confetti, Bell, Salute, and Variegated Troll.
Traditionally, Ogonyok, Tabasco, and Kolokolchik varieties are grown on the windowsill. Other varieties are less popular for indoor use.
Choosing a location
The vegetable bears fruit well. in greenhouse conditions and in open ground. Under favorable conditions, the harvest is abundant, the pods are uniform and attractive in appearance. Valuable recommendations:
- Maintain an optimal temperature in winter – 18 degrees, in summer – 20-25 degrees.
- Grow the shrub in light, but avoid exposure to ultraviolet light, otherwise its yield will decrease.
- Avoid drafts; when airing, temporarily move the pot to a quiet, windless place.
Preparing the container and soil
An excellent option for planting chili is compressed peat cells. Each seedling should have its own container, as the plant needs space. Alternatively, you can use wooden boxes, plastic containers, disposable utensils, or medium-sized flower pots.
A mandatory requirement is a 3-4 cm layer of drainage at the bottom of the container. Alternatively, river sand, expanded clay, charcoal, or crushed slate are recommended. The root system needs to be able to breathe, as stagnant moisture will promote further decay.
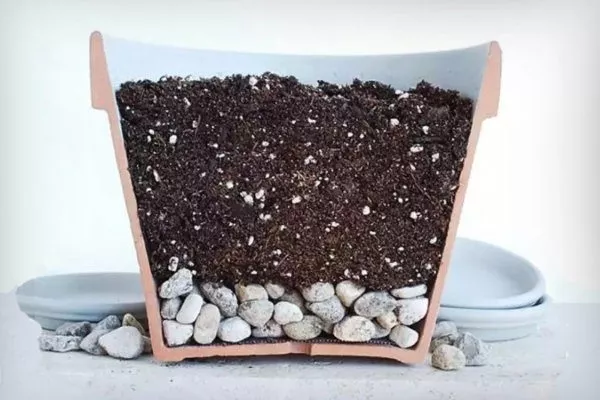
Yield depends on soil quality. To prepare a nutrient mixture, mix 2 parts peat, compost, and turf soil with 1 part vermiculite and sand. Mix well and place over the drainage layer, but do not compact.
The soil must be disinfected before planting. Read on to find out how. Here.
Selection, preparatory activities and planting of seeds
Before purchasing, make sure the seeds are suitable for indoor growing. Commercial varieties are more often used for open fields and greenhouses. They definitely won't produce fruit on a windowsill.
Buy seeds from reputable producers; don't skimp on them. After opening the package, carefully examine each seed. They should be large, light-colored, and free of any suspicious spots, plaque, or deformations. Don't use questionable seeds; they won't yield a good harvest.
Disinfect the seeds before planting. To do this, soak them in a weak solution of potassium permanganate for 15 minutes. Remove and dry naturally. To increase the viability of each seed and the chances of germination, place them in pre-moistened cheesecloth until the young sprouts appear.
Once the seeds grow into healthy seedlings 10-15 cm tall, transplant each one into a separate pot. Follow these planting guidelines:
- Place a 3 cm layer of drainage on the bottom.
- Add a small amount of soil on top.
- Make holes 5-7 cm deep.
- Place the plant with its roots in the ground in the center.
- Fill in and secure the stem.
- Water thoroughly with water at room temperature.
- Cover the container with cling film until the first shoots appear.
- The next watering is after 7 days, when the roots have spread out.
If seedlings are overwatered during the first week, the root system begins to rot, and chili pepper growth stops. Severe drought is also harmful, inhibiting growth and reducing yield.
Picking
Once the seedlings have strengthened and a young plant with 2-3 leaves has formed, transplant it into a separate pot. This process is called pricking out. Immediately after transplanting, the plant's growth temporarily slows. So why is this necessary? Pricking out strengthens and expands the root system, which positively impacts future yields.
Valuable recommendations before and after picking:
- water the seedlings to transplant the plants with the root system in a lump of earth;
- plant the seedlings with their roots in the central part of the permanent pot;
- After replanting, water generously and leave it for a week;
- Make sure that the soil above the root system does not dry out after picking.
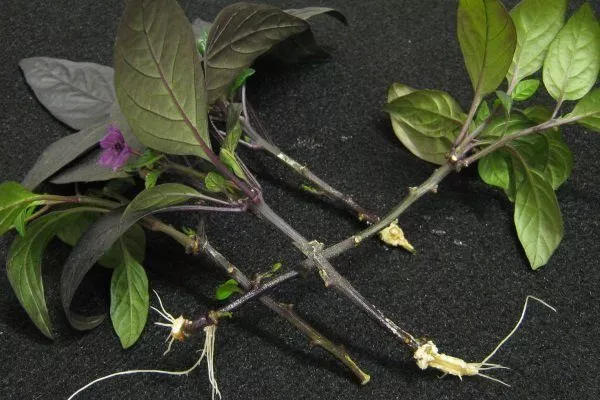
Growing peppers by cuttings
To preserve all the properties of the chili pepper variety you've chosen for planting, replace seed sowing with cuttings. Here's how:
- Cut cuttings up to 10 cm from young shoots without fruits.
- Before planting, soak the branches in a zircon solution for 24 hours (3 drops per 0.5 glass of water).
- Plant in the ground to a depth of 5-7 cm.
- Cover with soil and compact lightly.
- Water the plant generously.
- Replant as it grows (each time choose a container larger than the previous one).
Maintenance and care
Chili peppers don't like sudden temperature changes or drafts; they ripen faster in moderate humidity, light, and warmth. These are the essential growing conditions:
- daytime temperature – 23-25 degrees, night temperature – not less than 18 degrees;
- daylight hours – from 15 to 18 hours;
- the soil is moist, loose, but without excess moisture.
To ensure trouble-free pepper care, use only healthy seeds or strong seedlings. Otherwise, even if you follow the planting guidelines, you won't get a bountiful harvest.
Temperature and lighting
This vegetable is best grown in the spring and summer, as the days are longer and the plant requires light. Without light, the ovaries fail to set, the plant is small, and rarely produces fruit. If you're planting peppers in the fall or winter, provide supplemental lighting—one hour each morning and evening using special lamps (fluorescent, infrared or LED).
The plant is a heat-loving plant, so maintain a room temperature of 22-25 degrees Celsius. You can harden off the seedlings when they develop their sixth leaf by placing them on the balcony for 15-20 minutes, gradually increasing this time interval. This way, the chili pepper will better tolerate seasonal cold snaps.
Watering and humidity
Water the soil as the top layer dries out. Don't overwater, or the roots will rot. After watering, allow the excess water to drain into the tray, then remove it immediately.
The plant suffers in low humidity. To maintain its vitality and fertility, mist the leaves regularly with a spray bottle. Use room-temperature water. Water the bushes daily in summer and 3-4 times a week in winter.
Top dressing
With regular feeding seedlings The bush bears fruit better. Fertilizer composition depends on the chili pepper's growth stage:
- for intensive growth of green mass, choose organic or mineral fertilizers with nitrogen;
- During the formation of buds and fruits, give preference to fertilizers with a high concentration of potassium and complex fertilizers with fluoride.
- The first feeding is 2 weeks after picking - nitrogen fertilizers.
- The second feeding at the beginning of flowering is potassium-phosphorus fertilizers.
- The third feeding during the fruiting period is complex fertilizers with microelements.
Feed the plant once a week. Always dilute concentrated fertilizers with water at a rate of 3-4 g per 1 liter of water.
Shaping and pinching
In the fall, after harvesting, trim the crown by a third. This rejuvenation stimulates future growth and fruiting. Over the winter, the root system and branches strengthen, allowing the pepper to regain its strength after the harvest season.
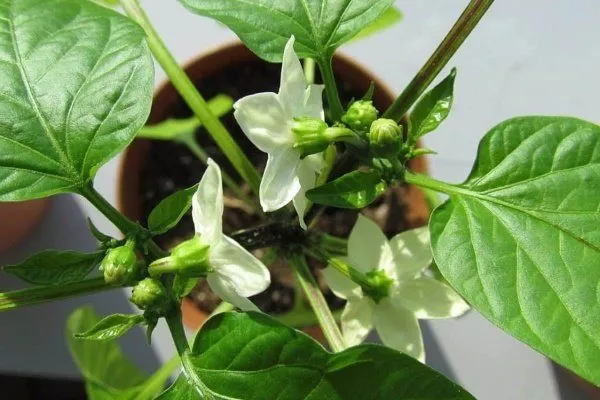
Flowering and pollination
There are two types of chili: those that are self-pollinating and those that require forced pollen. For balcony growing, the former is recommended. Self-pollinating varieties include Medusa, Babie Leto, Ogonyok, and Ryabinushka.
Exotic varieties such as Filius Blue, Variegated Fish, Tabasco, and others require additional pollination. In this case, shake each bloom to ensure pollen reaches the mother plant and helps the ovary of future fruits form.
When the chili pepper is flowering, shake the pot periodically. This will increase the plant's fruiting.
How to get seeds?
When growing chili, prepare the seeds for planting. Take a ripe chili, cut it in half, and shake out the contents. Soak the seeds for a few minutes, then spread them out and let them dry naturally. Immediately remove any misshapen or unsightly seeds.
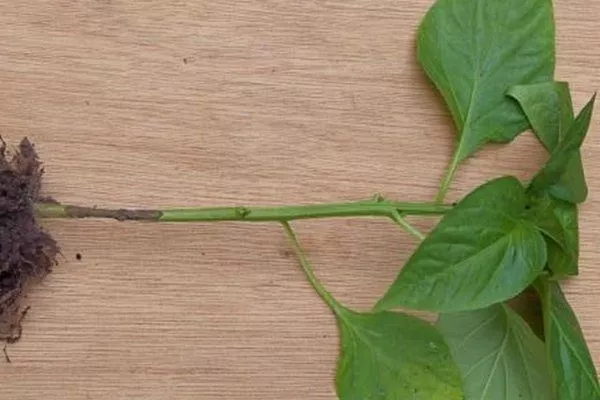
Reproduction
Chili peppers of any variety reproduce in 2 ways:
- CuttingsTo do this, young shoots are cut and kept in water until the root system develops. They are then planted individually, like a young plant.
- SeedsThey are purchased at gardening stores, treated, planted in soil, and watered. All that remains is to wait for the first shoots to emerge. The seedlings are transferred to a new, larger pot.
Chili peppers are recommended to be replanted annually into a larger container, otherwise the plant will stop producing fruit. This doesn't happen immediately, but the yield noticeably decreases with each season.
Harvesting
Yield depends on the variety; for example, small-fruited peppers produce up to 100 pods per season. The plant doesn't bear fruit immediately. The first harvest can only be obtained after 2-3 years (with proper and regular care). On average, fruiting lasts for 5 years. Later, the number of pods per season decreases significantly.
Chili pods have several ripening stages, distinguished by their color—they're initially green but then turn red. Stored in a cool place, the pods can be stored for several months without losing their beneficial properties. They can be frozen, pickled, or eaten fresh, if desired.
What to do when the leaves fall off the peppers after harvesting?
Chili peppers ripen in late July and August. The fruits turn a deep red and glossy. Twist them carefully from the base and rinse thoroughly with water. Then use as directed.
When the bush loses its leaves, trim the shoots by a third. This will allow the plant to overwinter until next season. Water it 3-4 times a week.
Diseases and pests of chili peppers
Peppers have a strong immune system. Due to their distinctive aroma, the risk of pests is also minimal. However, under certain conditions, the plant can become infected and die. Factors that can trigger the disease include:
- BlacklegThe cause is overwatering the bush. Saving the pepper is difficult, so it's best to determine the timing and frequency of watering right away.
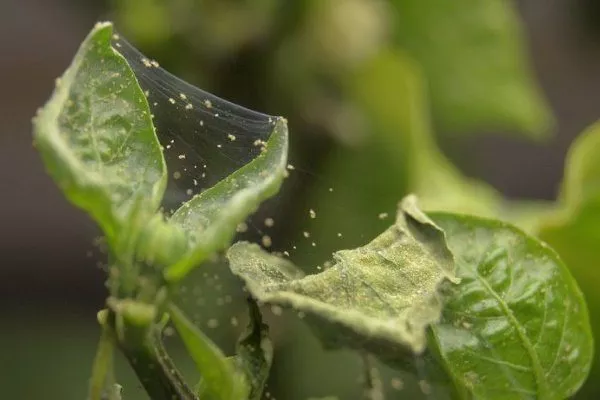
- Spider miteThe cause is the parasite's activity in dry air. Due to a lack of oxygen, the leaves turn yellow, dry out, and fall off. Treatment is effective using fungicides.
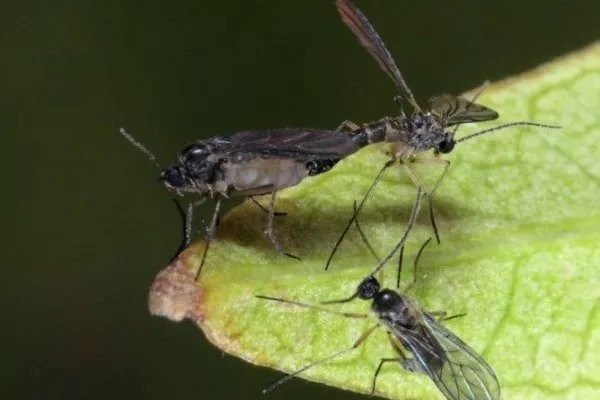
- MidgesThe cause is insects appearing from neighboring crops. The plant must be thoroughly treated with a soapy solution.
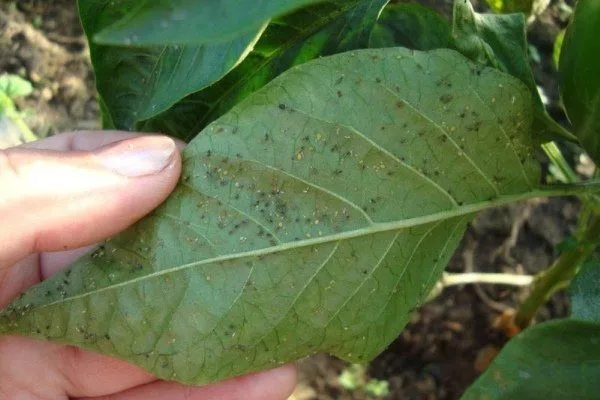
- Plant aphid. The cause is a violation of the care regimen. The parasites feed on young shoots and can cause the death of the entire shrub.
Black leg in pepper
Spider mite on pepper
Black flies are the enemy of many plants, and peppers are no exception.
Aphids on a pepper leaf
To minimize the risk of disease, carry out preventative spraying of bushes with weak concentration fungicidal preparations.
Secrets to Growing Chili Peppers
For novice gardeners, the plant doesn't begin bearing fruit even after three years. To avoid mistakes, follow the advice of professionals:
- In winter, place the pepper on a south-facing windowsill, and if there is not enough light, use artificial lighting.
- When flowers appear, keep chili pepper plants at a distance. To promote fruit set, shake the crowns regularly.
- To ensure that seedlings germinate quickly, place them on a well-lit surface and increase daylight hours.
- To speed up fruiting, monitor watering. The soil shouldn't be dry, but excess moisture is also harmful.
Advantages and disadvantages of growing at home
Before you decide to start your own windowsill garden, consider the pros and cons of such a venture. Start with the positives:
- good harvest without nitrates;
- excellent taste of home-grown pepper;
- fruiting for 5 years;
- ease of care;
- strong plant immunity;
- aesthetic appearance of the bush;
- prevention of viruses, flu, acute respiratory viral infections.
There are some disadvantages that you should also keep in mind before buying chili peppers:
- small fruits;
- fruiting once a year;
- need for space on the windowsill;
- additional lighting;
- not always the desired taste.
Reviews
Before growing chili peppers on your windowsill, choose the variety, prepare a suitable container and soil, and follow the plant care and maintenance instructions after planting. This way, you'll enjoy a bountiful harvest every year.