Growing peppers is a fun and creative activity. One unique variety that attracts the attention of both experienced and novice gardeners is the Pilot pepper. Proper care is essential to ensure good yields.
Basic properties of the Pilot variety
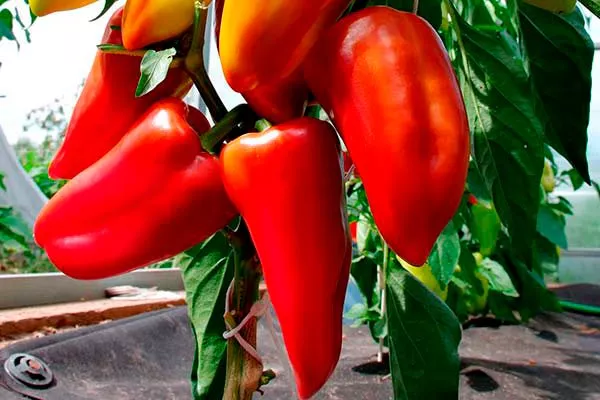
The Pilot pepper is a vibrant, disease-resistant variety that tolerates a wide range of temperatures and ripens early. Key characteristics of this hybrid include:
- The bush reaches 75-85 cm in height, covered with numerous leaves and strong branches that securely hold the fruits.
- The foliage is moderately dense, has the shape of an elongated triangle with an oblong tip, leathery, with a rich dark green hue.
- The peppers themselves are large, weighing up to 155 g, with smooth sides and a conical shape, 13-15 cm long, with walls 6 mm thick, and covered with an orange-red skin. When fully ripe, the skin takes on a cherry hue.
- The flesh of the Pilot pepper is moderately sweet, has an excellent pepper aroma, is juicy and tenderly crunchy, and is ideal for use in salads.
Advantages and disadvantages
As a result of extensive breeding work, the Pilot variety has several notable advantages.
Key points of landing
The Pilot pepper is primarily intended for successful cultivation in central Russia. According to the provided characteristics, this variety thrives in black soil with a pH of 6-6.4.
- ✓ Optimum soil temperature for planting: +16°С.
- ✓ Soil digging depth before planting: 60 cm.
Developing soil for seedlings
Begin preparing the soil for planting Pilot pepper seedlings 2-4 days before germination. First, dig the top 60 cm of the bed. Mix the fertile soil layer with a mixture of turf, peat, and coarse sand.
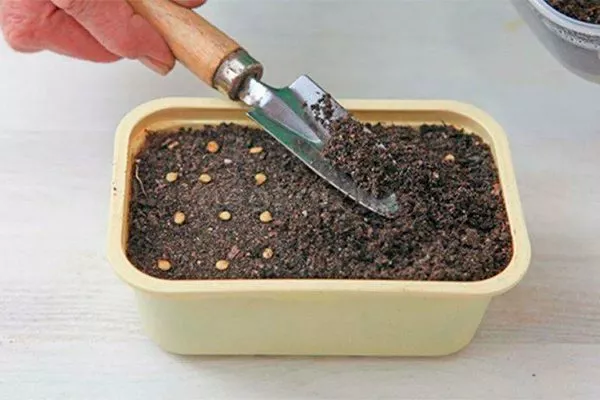
Germination of seed material
Peat tablets are ideal for germinating pepper seeds. The process begins between February 25th and 29th. Place one seed, pre-soaked in Ecogel solution, into each tablet, covered with 1.2 cm of sandstone.
- ✓ The ideal period to start germination: from February 25 to 29.
- ✓ Seeding depth: 1.2 cm.
Maintain the temperature for Pilot seedlings at 25°C from the moment they sow the seeds until the second leaf appears, then reduce it to 18°C over the next 1.5-2 weeks. Take the seedlings outside for 25-35 minutes each evening, and on the 63-65th day, transplant them into soil for continued development.
- ✓ Temperature before the second leaf appears: +25°С.
- ✓ Temperature after the second leaf appears: +18°С.
Planting seedlings in a garden bed
Pilot, as the originator's description indicates, requires warmth in the early stages of development. Plant the seedlings no earlier than mid-May. Plant the pepper plants vertically in soil warmed to 16°C.
The distance between seedlings should be approximately 35 cm, while it is better to widen the row spacing to 1 m. Plant the seedlings deep enough so that the root collar partially emerges above the soil surface.
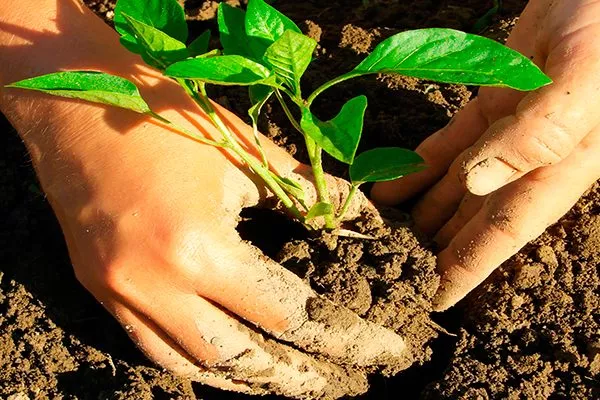
Planting pepper seedlings in open ground beds is an important step that can significantly impact the plants' development and future harvest. Here are step-by-step instructions:
- Before planting, ensure the seedlings are well-developed and have strong stems. If possible, harden them off a few days before planting by placing them outside for a few hours.
- Choose a sunny location for the garden bed with good protection from the wind.
- Dig holes approximately 10-15 cm deep and wide for each plant.
- Carefully remove the seedling from the container and place the root system in the hole. Fill in the soil around the plant, firm the soil around the roots, and water.
- If there's a risk of frost, consider temporarily covering the seedlings. Ensure protection from potential pests.
- After planting, water the seedlings regularly, especially during the first few weeks. Pay close attention to weeding and fertilizing the plants.
By following these steps, you will ensure successful planting of pepper seedlings in open ground beds and create favorable conditions for their further growth and development.
Principles of cultivation
During cultivation, Pilot proves to be a plant that requires little attention and is resilient to adverse factors. Timely watering and balanced fertilizers are key to the successful development of this pepper.
Features of irrigation
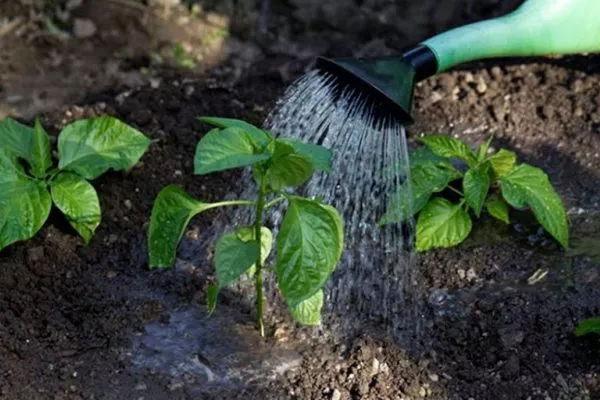
It's more effective to water plants in a way that retains maximum moisture in the soil. Daytime, when evaporation is high, is not the best time. Water plants early in the morning or in the evening.
To ensure peppers receive the required amount of moisture, watering requires special attention. Using various auxiliary devices can significantly facilitate this process. When choosing a method, it's important to consider growing conditions, plot size, and accessibility of water sources.
Popular options include:
- Automated watering. Irrigation systems with control allow you to regulate the volume and frequency of watering. This method is particularly effective in hot southern regions and ensures uninterrupted access to water and electricity.
- Mechanized irrigation. Use drip irrigation systems or sprinklers with adjustable valves and a water reservoir. Drip irrigation is suitable for providing moisture to the root zone, especially where water resources are limited.
- Manual watering. Watering with a garden watering can through a diffuser. Although it requires additional effort, this method is suitable for small areas or mixed plantings.
The choice of irrigation method depends on the time and effort required. It's important to adapt the irrigation system to the specific needs of pepper cultivation, ensuring regular and effective moisture.
Watering frequency is key depending on the plant's development stage. Recommendations for different stages of pepper cultivation are as follows:
- After planting in the ground. During the first 10-14 days after planting, be careful with watering. The plants are adapting to the new conditions, and too much water can interfere with this process. Apply 150 ml of water per plant daily during this period.
- After rooting. After 10 days, return to your normal watering schedule – once a week, using approximately 10 liters of water per square meter. As temperatures rise, increase the frequency to every 3-4 days. Maintain this schedule until buds form.
- During flowering. During this period, monitoring soil moisture levels is crucial, as insufficient water can cause bud drop. Twice-weekly watering with up to 15 liters of water per square meter is recommended.
- During the fruiting period. After fruit set, limit watering to once every 3-4 days, applying 5-5.5 liters of water per bush. During the period of intense fruiting and ripening, water once a week.
To prevent the soil from drying out, regularly loosen the soil and mulch the plantings. Mulching with dark film, peat, or sawdust 5-10 cm thick will help retain moisture in the soil, and water directly over the mulch.
Methods of fertilizing
To provide the Pilot with the necessary nutrients, use balanced fertilizers, mainly mineral ones with the addition of a small amount of organic matter.
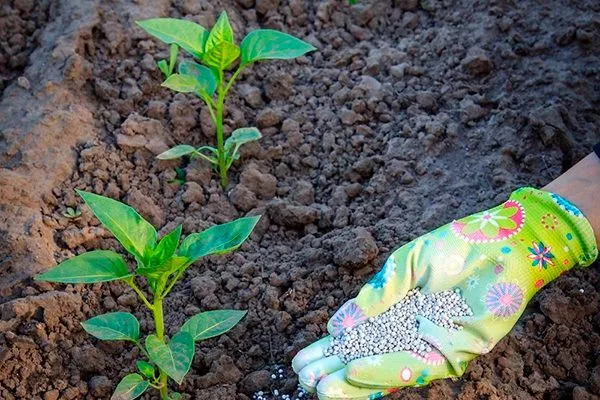
Apply fertilizer according to the instructions:
- 5 days after planting the seedlings in the beds. Use ash pre-crushed in a solution with azophoska.
- At the initial stage of flowering. Use humus from meadow grass with the addition of potassium sulfate.
- Before the bush begins to bear fruit. Add potassium salt, liquid compost and superphosphate.
Diseases and pests
The Pilot variety is rarely susceptible to disease, maintaining a high immunity under favorable conditions. However, a lack of natural moisture can lead to powdery mildew infestation. Plants are also susceptible to certain pests.
Powdery mildew
In dry conditions, the spread of solanaceous powdery mildew can cause a grayish-white coating to appear on the leaves. To prevent crop loss, immediately treat peppers with Alirin-B or Amistar. As a preventative measure, use horsetail tincture.
Whitefly
A greenish-white butterfly often attacks greenhouse peppers. Oval, yellowish-white eggs attached to the underside of Pilot pepper leaves indicate the presence of whiteflies. To get rid of this pest, treat the plants with Applaud or Klimper.
owl
Cutworms attack peppers by feeding on the leaf edges, leaving a powdery coating. Treat with Decis, Baktofit, or elderberry tincture to eliminate this pest. Maintain close spacing between plants to prevent cutworm infestation.
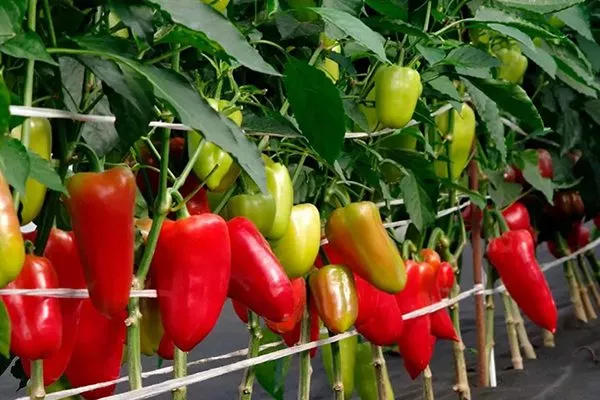
Nuances, timing and technology of harvesting
Beginning in early August, begin harvesting ripe Pilot peppers. Ripe fruits are distinguished by their raspberry-red hue and shine. Cut the peppers from the branch at the stem using pruning shears. Dry them thoroughly with a paper towel and place them in a basket or transparent bag.
Harvest every evening, approximately 15 minutes after systemic watering. The Pilot variety keeps well for 3-10 days at temperatures between 3°C and 10°C.
Growing Pilot peppers isn't just about enjoying fresh, delicious fruits; it's also a process that requires patience, attention to detail, and knowledge. Reliable and disease-resistant, this variety offers the opportunity to reap a bountiful harvest with minimal effort.