The Yellow Kapia pepper is a variety that has won the hearts of gardeners with its unique appearance, inimitable flavor, and abundant harvest. This bright and juicy pepper has become a true hit in the gardening world thanks to its versatility and excellent characteristics. Let's look at the key steps for successfully growing peppers to ensure a bountiful harvest.
Description of the variety: characteristic features, origin
This variety was registered in the State Register of Breeding Achievements of the Russian Federation by the Turkish company May Tohumculuk. In 2010, it received official recognition and was approved for cultivation in all regions of the country.
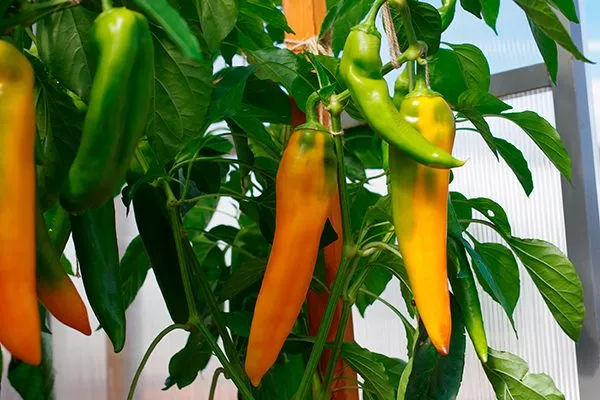
The Yellow Capia pepper plant produces a sturdy bush with a height ranging from 70 to 100 cm. The bush has a dense structure and is covered with medium-sized, green leaves that are slightly wrinkled.
Fruits, their taste and purpose
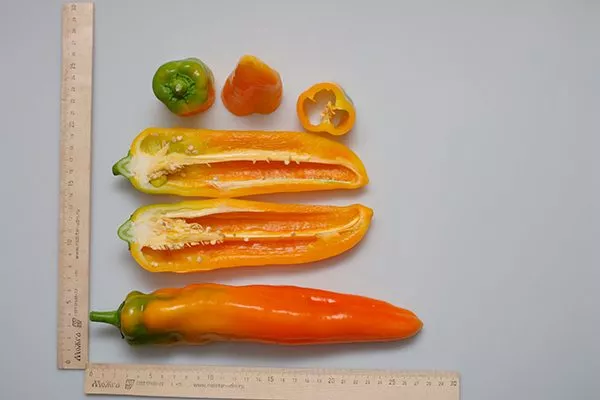
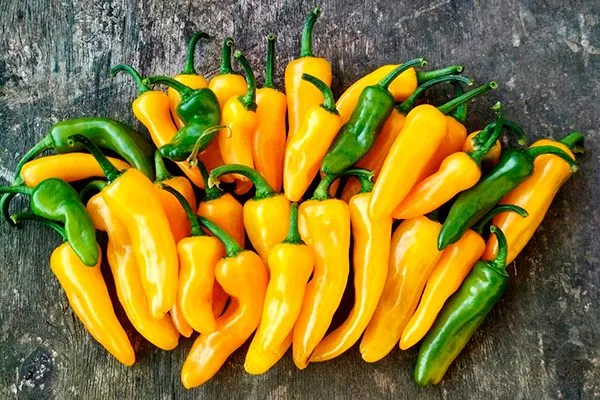
The average fruit weight is 60-100 g. These peppers are easily recognizable by their unique shape and dark red color at biological maturity. At technical maturity, the fruits are green and glossy.
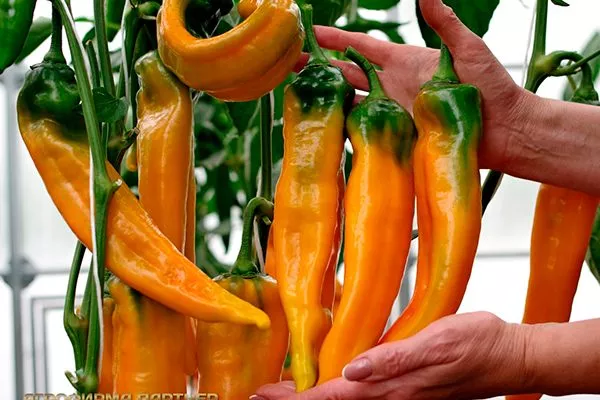
The peppers develop a drooping shape, and their walls are dense (up to 6 mm thick). With a well-balanced flavor and pleasant aroma, these peppers are a versatile vegetable.
The Yellow Capia pepper has a wide variety of uses, making it popular and sought after among gardeners. Its main uses include:
- The fruits are eaten fresh, added to salads, appetizers and vegetable dishes.
- Pepper is ideal for preparing a variety of culinary dishes, including soups, sauces, side dishes, etc.
- Its sweet flavor and dense flesh make it a wonderful ingredient for a variety of culinary experiments. It's used for preserving, including marinades, sliced peppers, tomatoes, and other preserves. Its flesh preserves its texture and flavor, making preserves vibrant and aromatic.
- The fruits can be frozen for long-term storage, while retaining their beneficial properties and taste.
| Parameter | Technical maturity | Biological maturity |
|---|---|---|
| Color | Green | Dark red |
| Wall thickness | 4-5 mm | Up to 6 mm |
| Fruit weight | 50-80 g | 60-100 g |
| Taste | Neutral | Sweet, balanced |
| Aroma | Weak | Pronounced |
The bright and rich color of the Yellow Capia makes it an excellent decoration element for dishes, adding brightness and appetizing flavor to culinary compositions. Start of form
Ripening and yield
The Yellow Kapiya pepper variety is distinguished by its early maturing characteristics, requiring only 90-100 days from germination to the first harvest. Ripening occurs during the summer-fall period, from July to October. This vegetable variety exhibits a long fruiting period.
Pepper's high yield makes it very attractive to gardeners. When grown under plastic cover, the expected yield averages 7.2 kg of fruit per square meter of planting area.
Advantages and disadvantages of culture
To avoid problems when planting a crop, it's important to understand its positive and negative qualities. This variety has many advantages:
Features of agricultural technology for gardeners
After careful planning, begin sowing the seeds to grow seedlings. When planting in the garden bed, maintain a planting density of no more than 4-5 plants per square meter. This will ensure optimal space for each plant to grow and prevent overcrowding.
Monitor weather conditions and provide seedlings with sufficient light and warmth.
Feeding schedule
- 14 days after planting: azophoska (20 g/10 l)
- In the budding phase: potassium monophosphate (15 g/10 l)
- When fruits ripen: calcium nitrate (25 g/10 l)
- Every 3 weeks: foliar feeding with microelements
By following these guidelines, you will create favorable conditions for the health and development of Yellow Capia peppers, which will ultimately lead to a successful and abundant harvest.
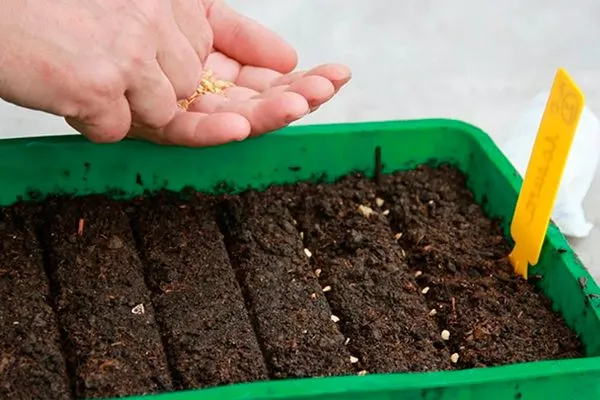
Sowing seeds for seedlings
Purchase high-quality seeds from reputable producers or suppliers. Use specially prepared seedling soil or prepare a soil mixture of humus, peat, and sand.
Helpful tips:
- Use shallow pots, trays or special cells for seedlings.
- Fill the containers with prepared soil. Plant the seeds at a depth of about 0.5-1 cm. Maintain the recommended seed spacing for the chosen variety.
- Cover the crops with film or glass to create a greenhouse effect. Maintain a constant temperature of 22-25°C.
- Once the seedlings emerge, remove the cover. Provide bright light, for example, by using grow lights or placing the containers in a window.
- When the sprouts grow and form a pair of true leaves, transplant them into separate pots or cells.
- Water the seedlings regularly, maintaining soil moisture. Fertilize the seedlings according to the package directions.
- ✓ Soil: pH 6.0-6.5 (check with litmus paper)
- ✓ Planting depth: 0.8-1 cm (no deeper!)
- ✓ Germination temperature: +25…+28°C
- ✓ Illumination: 12-14 hours/day (15,000 lux)
- ✓ Picking: when there are 2 true leaves
Once the time is right and the seedlings have reached the desired height, transplant the peppers into open ground.
Planting seedlings in a hotbed/greenhouse
Planting pepper seedlings in a greenhouse or open ground is an important step in the growing process. Step-by-step instructions for planting seedlings in a greenhouse:
- Prepare to plant once all risk of frost has passed.
- Make sure the greenhouse is prepared and cleared of any residue from previous crops.
- Amend the soil in the greenhouse by adding compost or humus.
- Place the pots with seedlings in the greenhouse, taking into account the recommended distance between plants.
- Transfer the seedlings to holes prepared in advance in the soil.
- Remove the plant from the pot, carefully holding the root ball to avoid damaging the roots.
- Plant the seedlings deep enough so that the soil level around the plant matches the height of the soil in the pot.
- Water the seedlings generously after planting.
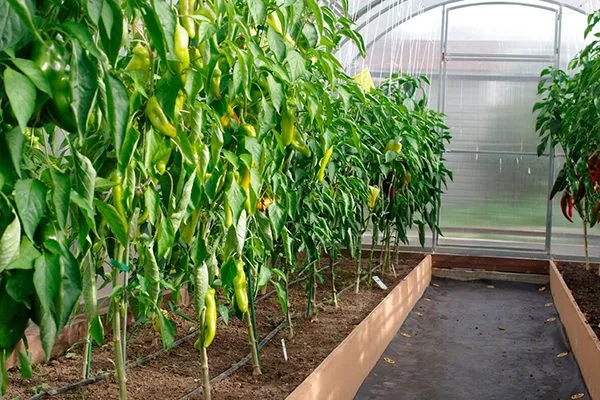
Provide regular watering and control humidity in the greenhouse.
| Parameter | Greenhouse | Open ground |
|---|---|---|
| Landing dates | May 1-15 | June 5-20 |
| Soil temperature | +15°C | +18°C |
| Planting diagram | 40×60 cm | 50×70 cm |
| Depth of the hole | 12 cm | 15 cm |
| Water standard | 1 l/plant | 1.5 l/plant |
Planting seedlings in open ground
Planting seedlings outdoors is an important step in growing peppers. Here are step-by-step instructions for planting seedlings outdoors.
To plant seedlings in open ground, follow the instructions:
- Choose a site with good sunlight and prepare the soil.
- Loosen the soil and add compost or fertilizer.
- Dig holes that correspond to the size of the seedling's root.
- Remove the plants and place them in the holes, covering the roots with soil.
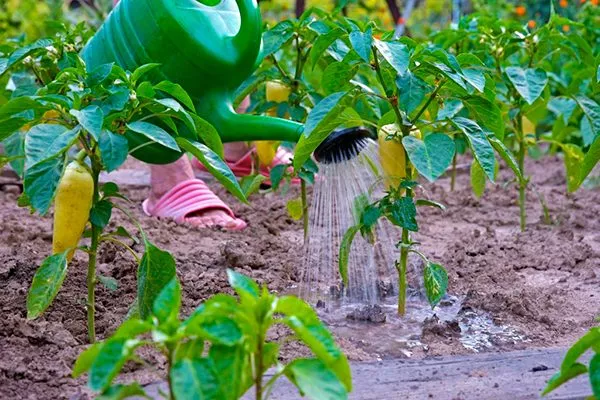
- Water the seedlings generously after planting. Gradually reduce watering as the plants become established. Keep the soil around the plants loose and sort the seedlings as needed.
- Mulch around the trunks of plants to retain moisture, suppress weed growth and keep the soil warm.
- Install stakes or supports to support plants, especially when growing tall varieties.
- Feed plants with fertilizers, following the recommendations for type and dosage.
- Take necessary measures to protect plants from pests and diseases, especially during periods of increased vulnerability.
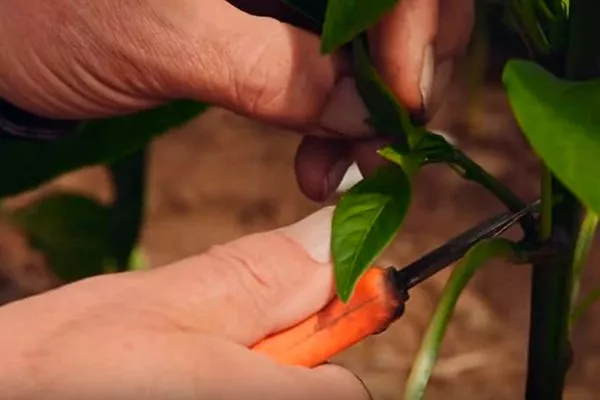
Pinching out stepsons
Pinching peppers is the process of removing extra shoots (side shoots) to ensure better ventilation and development of the plant's main stem. Here are the rules for pinching peppers:
- Start pinching out the side shoots when the plant reaches a height of approximately 20-30 cm and the first flower stalks appear.
- Carry out the procedure regularly, depending on the growth rate of the plants.
- Use a sharp knife or scissors to remove the side shoots.
- Carefully remove the side shoot, starting from the top of the stem where it connects to the main stem.
- Leave 1-2 leaves on the side shoot to prevent injury to the main stem and to provide some photosynthetic surface.
- Remove any shoots that may interfere with normal ventilation inside the bush to prevent the development of diseases.
- Maintain the overall shape of the bush, removing excess branches to ensure uniform lighting and ventilation.
Harvesting in a greenhouse and in an open area
Pepper harvesting is an important step in the growing process, and the timing depends on the variety, growing conditions, and consumer preferences. Recommendations for harvesting peppers in a greenhouse:
- Harvest peppers when they reach full maturity.
- Check plants regularly, especially in late summer and early fall when the fruits are ripe.
- Remove fruit from the plant carefully, using sharp scissors or pruning shears, to avoid damaging the stems and other fruit.
Harvesting in open ground:
- Harvest the fruits when they are fully ripe. This is determined by their color, size, and firmness.
- It is preferable to collect the fruits in the morning, when they are still cool and moist.
- Harvest peppers regularly to encourage additional blooms and new fruit production.
Overripe peppers on the plant can lose their flavor and quality. Try to harvest them promptly. Avoid damaging the plants during harvesting to maintain their health.
After harvesting, continue to care for your plants, ensuring proper watering and maintenance to keep them healthy and promote new blooms.
Reviews from gardeners
Growing Yellow Kapia peppers is an exciting adventure for any gardener who strives to grow vibrant and delicious fruits. From carefully selecting seeds to meticulously caring for the plants, every step plays a role in ensuring a successful harvest.