Growing Tabasco peppers is a fun and rewarding pastime for anyone looking to add a little spice to their culinary life. By following the planting, care, and fertilizing guidelines, you can create a truly spicy paradise in your garden.
Who developed the variety and when?
It is known that this cultivated plant was first discovered in Mexico and is still found in the natural environment in this area.
Features, pros and cons
Tabasco peppers possess a number of outstanding qualities. Their pleasant aroma, aesthetic appeal, distinctive appearance, and abundant vitamin content make them exceptional.
The distinctive fiery element adds a special charm to this variety. No significant flaws have been identified.
Description of the plant
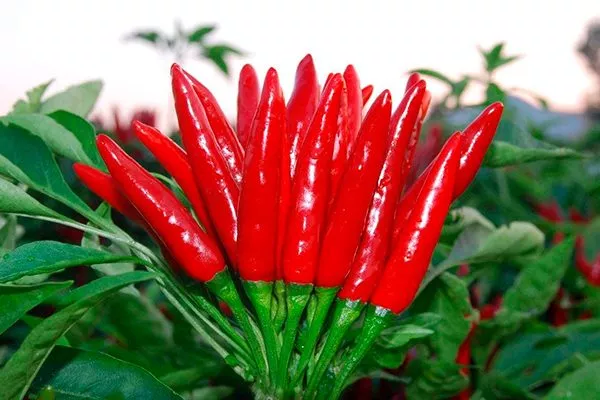
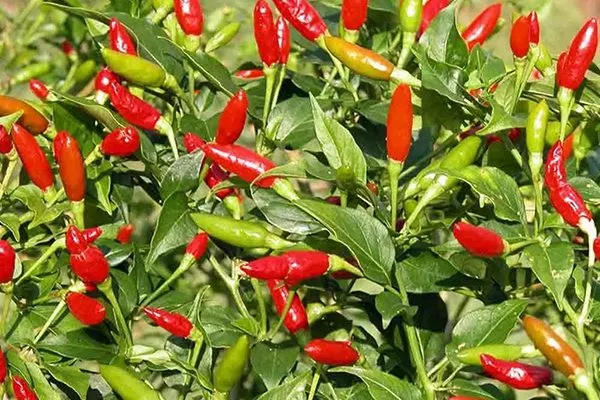
Tabasco peppers thrive as robust bushes with a variety of heights, depending on growing conditions. Typically, plants reach 130 to 150 cm in height, but in containers, they often remain compact, reaching 50-60 cm. The bushes have a compact growth habit, giving the fruit an upright stance.
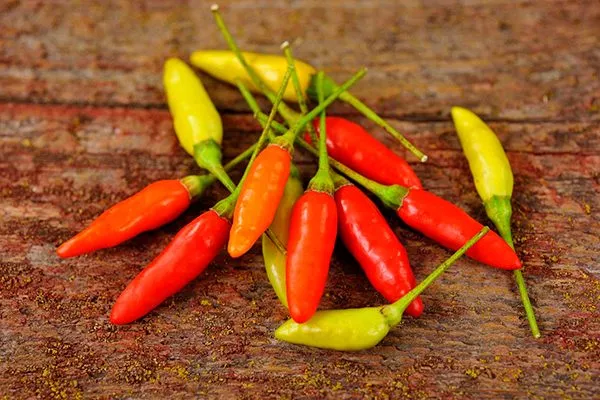
The fruits of this variety ripen to a miniature size, rarely reaching more than 5 cm in length. They are characterized by a conical and elongated shape, and their color evolves as they ripen.
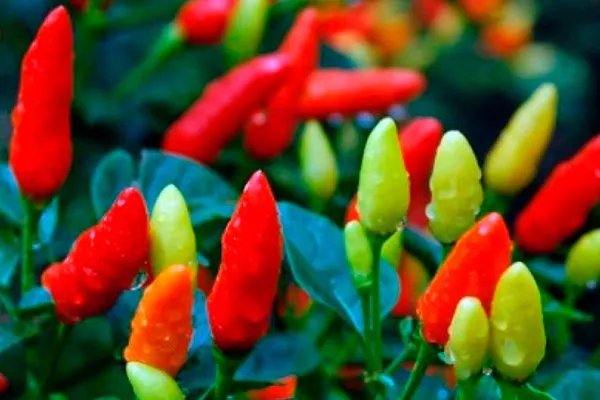
At the initial stage, the fruits are green, then acquire a yellow-orange hue to finally become a deep red.
- ✓ Wrinkles on the top of the fruit are a unique characteristic of the Tabasco variety.
- ✓ Evolution of fruit color from green to yellow-orange and then to deep red.
Fruits, their taste and purpose
Tabasco peppers offer a delightful combination of rich flavor and aroma. A hint of smoke adds to their appeal. The heat level of this variety ranges from 30,000 to 50,000 Scoville units. These aromatic peppers are rich in vitamins A and C.
Their exquisite flavor makes these hot peppers versatile. They can be eaten fresh or dried. These peppers are often used in the production of hot spices and sauces, imparting a unique, piquant flavor to dishes.
Ripening and yield
The first fruits typically appear on the bushes after 110 days. Favorable conditions and proper agricultural practices allow for an earlier harvest, in 80-100 days.
Tabasco pepper yields remain quite high, with an average yield of approximately 3 kg per square meter. Plant performance is highly dependent on adherence to all agricultural practices and regulations. Proper care plays a key role in ensuring abundant pepper harvests.
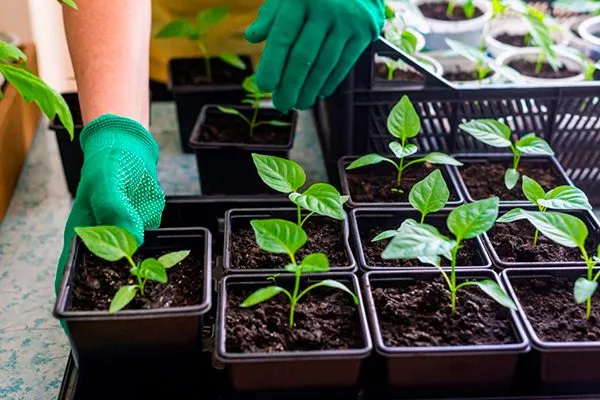
Growing seedlings
Because of their high heat requirements, hot peppers are usually grown using seedlings. It's important to select a suitable site with good soil and sow the seeds correctly.
Soil for sowing
Sweet peppers don't prefer heavy, cold soils, so to improve clay soil, dig the area to the depth of a spade and add peat and humus. If the soil is light and permeable, fertilize it in the fall with well-rotted manure at a rate of 30 kg of organic matter per square meter.
Add fertilizer directly into the hole when planting seedlings.
Sowing seeds
Sow seeds for seedlings in February or March in cooler regions, and in January or February in warmer regions. To prepare the soil, you can use a ready-made soil mix from the store or make your own by combining non-acidic high-moor peat moss, compost, and river sand in equal parts.
Sowing recommendations:
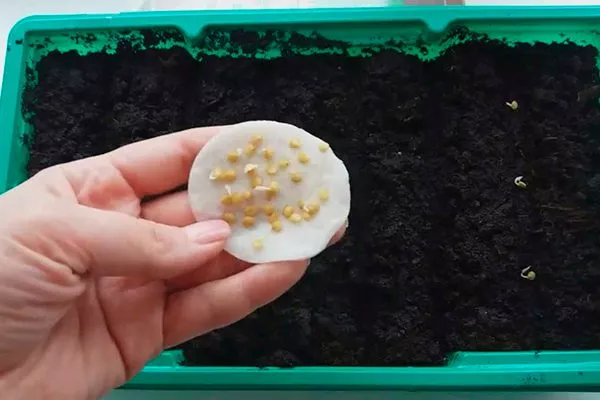
- Prepare hot pepper seeds before sowing: soak them in a weak solution of potassium permanganate for half an hour.
- Wrap in a damp cloth and leave at a temperature of +25°C until sprouts appear.
- After this, carefully, so as not to damage the sprouts, place the seeds in moist soil to a depth of 5-10 mm with an interval of at least 5 cm between them.
- ✓ Optimum soil temperature for seed germination: +25°C to +30°C.
- ✓ Required air humidity for seedlings: 60-70%.
Sow in boxes or peat pots, then cover them with film or glass and keep them in a warm place until seedlings appear.
Lighting
Seeds of different varieties of hot peppers germinate at different rates. As soon as seedlings appear, move the seeds into the light. If the plants don't receive enough natural light, install a grow light or other light source 25-30 cm above the plants.
For normal seedling development, at least 18 hours of daylight are needed; otherwise, the seedlings may become elongated. Keep the soil slightly moist, avoiding overwatering. Regularly loosen the soil to oxygenate it.
Hardening
Two weeks before planting, harden off the hot pepper seedlings. This process involves "walking" them outdoors daily.
Begin this process with short intervals, starting with 15-20 minutes. Gradually increase the duration of exposure until the young plants are able to spend a full day outdoors.
Once the plants have adapted to their growing environment, they can be safely transplanted into the garden. Good precursor crops for hot peppers help maintain healthy soil, reduce the risk of disease, and increase yields.
Good predecessors:
- Beans (beans, peas). They enrich the soil with nitrogen, which has a positive effect on the growth of peppers.
- Brassicaceae (cabbage, broccoli). They improve soil structure and can help control pests.
- Onion crops (onions, garlic). May act as a repellent to pests such as onion flies.
- Carrot. Carrots and peppers complement each other well, and growing them next to each other can be mutually beneficial.
Bad predecessors:
- Pepper. Growing hot peppers a second year in the same area can increase the risk of disease and deplete the soil.
- Tomatoes. Both crops are susceptible to some common diseases and pests, so growing them in sequence can be risky.
- Eggplants. Like peppers, eggplants are susceptible to similar diseases and should be avoided as precursors.
It is important to consider crop rotation and follow crop rotation principles to maintain soil health and prevent disease and pest problems.
Planting diagram
To plant hot peppers, create holes 40-45 cm apart, keeping the row spacing between 50-60 cm. It is also possible to plant using the nesting method:
- According to the 60x60 scheme, where two seedlings are placed in one hole at once.
- According to the 70x70 scheme, where each hole has space for three bushes.
Growing hot peppers near sweet peppers is not recommended. Planting these crops close together can lead to cross-pollination, which will negatively impact the flavor of the fruit. Maintain a distance of at least 3 meters between the bell pepper and hot pepper plots.
Planting seedlings in the ground
Add 20 grams of mineral fertilizer to each hole, mixing it thoroughly with the soil. Carefully remove the seedling and its root ball from the pot and transplant it into the hole. Then fill the hole halfway with soil, or slightly more, add a third of a bucket of water, and when the water is absorbed, fill the hole to the top with soil.
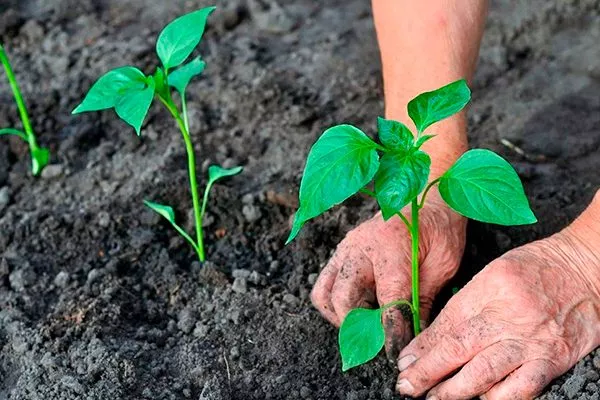
After planting, mulch the bed with peat and, if necessary, tie the bushes to supports. If nighttime temperatures drop below 13-14°C, use non-woven fabric draped over the dug-in hoops to cover the pepper bed. Plant the seedlings on a cloudy day or in the late afternoon, after sunset.
Agricultural technology
Caring for Tabasco peppers is straightforward. They require regular watering, fertilization, and attention to side shoots.
Watering and humidity
Peppers are moisture-loving plants, especially during flowering and fruit formation. It's important to prevent the soil in the garden from drying out too much, so water your peppers regularly during the summer—daily, and even twice a day during periods of extreme heat.
It's preferable to use warm water for watering. To do this, place a large container in bright sunlight so the water has time to settle and warm up during the day. After watering, loosen the soil between the plants and remove weeds.
Plant care and formation
Peppers have fragile stems, so tie the plant to a support and water it immediately after planting. Further care includes regular watering, gentle shallow loosening, and light hilling to stimulate additional root growth.

Helpful tips:
- To form bushes, remove the first bud to promote branching and the formation of additional shoots. Leave 3-4 stems on the plant, from which select the two strongest shoots, making sure to tie them up. Use the remaining shoots only for the first harvest, leaving no more than two fruits on each.
- When the pepper plants are actively growing and buds are appearing, pinch off any side shoots. To create a compact chili plant, remove the flowers at the top of the plant.
- When the pepper plant reaches 25 cm in height, prune the central shoot, lightly trimming its tip. This method encourages the active development of lateral branches. Leave 4-6 of these, carefully removing any excess to stimulate overall growth.
A single chili plant can produce up to 25 large fruits. If an excess of fruits is produced, remove the excess to prevent them from draining the plant's energy.
Fertilizers and dressings
Apply the first fertilizer two weeks after planting the seedlings, using a mullein infusion (1:10) or fermented grass. Apply the second fertilizer 7-10 days later, using a specialized fertilizer for tomatoes and peppers or another phosphorus-potassium fertilizer.

Reviews
Lovers of spicy food are increasingly turning to Tabasco peppers. This variety is known for its piquancy and unique flavor, adding a unique zest to dishes. Proper care is essential to ensure a bountiful harvest and a strong, healthy plant.