The Ogonyok hot pepper, grown indoors, attracts many gardeners with its distinctive characteristics and colorful fruits. It's used not only as a piquant addition to dishes but also for treating ailments. Ogonyok is a true ornamental plant that can enhance any kitchen.
History of the Ogonyok hot pepper variety
The year the variety was submitted to the state register of breeding works was 1999. Its creators were scientists from the Moscow company "Russian Seeds" and representatives of the Institute of Agriculture. In 2006, the variety received the status and standard, and was approved for cultivation throughout the Russian Federation.
Description and characteristics of pepper
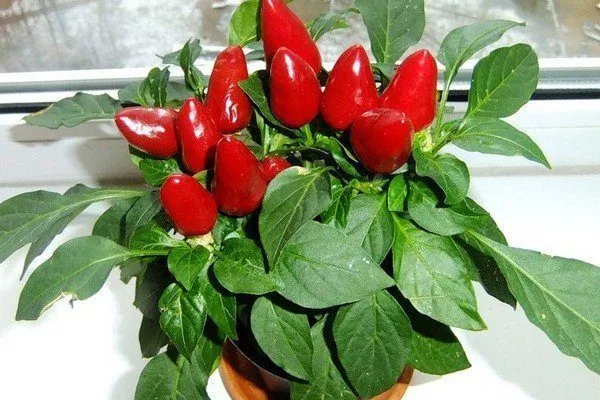
The Ogonyok pepper can be planted in any environment. In a garden bed, the bush reaches a height of approximately 0.4-0.5 m, and in a pot, 0.3-0.4 m. The plant is pyramidal in shape and ripens mid-early. The first harvest can be obtained 3.5-4 months after planting.
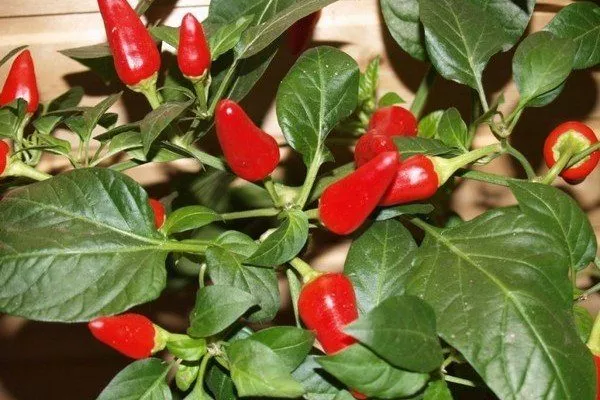
The plant displays both flowers and pods simultaneously. Yields are 3.8 kg per square meter. The fruits are elongated, narrow cone-shaped, weighing 20 g each, with walls 1.5 mm thick. The pods are slightly twisted and turn dark red when fully ripe.
- ✓ The real Ogonyok pepper has fruits that are exclusively dark red in color when fully ripe.
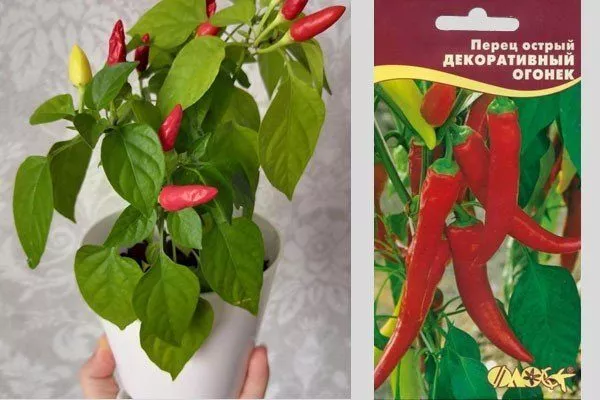
- ✓ The leaves of the plant should be bright green, without yellowing, with the exception of natural aging of the lower leaves.
Many companies sell completely different varieties under the name Ogonyok, with fruits that are yellow, small, or protrude too far upward. They often mix various spicy varieties together, which don't correspond to the actual description of Ogonyok.
Advantages and disadvantages
The Ogonyok pepper has its pros and cons, which should be taken into account when growing the plant.
Advantages:
- the ability to grow not only in open ground, but also at home;
- small crown of the plant;
- strong immunity;
- bright aroma and sharp taste;
- decorative appearance;
- uneven ripening of fruits – harvesting can take a long time;
- there is no need to shape the plant's crown.
Disadvantages of the variety:
- confusion with seeds, different varieties are sold under the same name;
- average ripening period, after planting it is necessary to wait more than 3 months to get a harvest, this characteristic is not suitable for residents of northern regions;
- average yield.
Planting and growing
Growing Ogonyok in open soil or on a windowsill is not difficult, but before planting the seeds, you need to learn all the rules to achieve good results.
Seed preparation
Before planting, germinate the seeds in a moist environment. Take damp cheesecloth or cotton pads, place the seeds in them, and carefully wrap the cheesecloth. Place them in a container and cover to prevent moisture from evaporating.
- ✓ The germination temperature must be strictly maintained within the range of +25…+27 degrees Celsius to ensure maximum germination.
- ✓ The moisture content of gauze or cotton pads should be such that no water is released when squeezed, but the material remains moist to the touch.
To germinate, place the seeds in a dark, warm place (25–27 degrees Celsius) for two days. Open and check the seeds periodically. As soon as they begin to sprout, transplant them into soil. Do not allow the soil to dry out excessively, or they will die.
You can plant the seeds without any preliminary preparation, but it is better to germinate the seeds in advance.
Planting dates
Hot peppers take a long time to grow, so keep this in mind. They can be sown at any time, all year round. For example, if you plant in winter (December-January), you can harvest the first fruits in early summer.
Choose a growing site carefully. This variety thrives on full sun, so choose a south- or southeast-facing windowsill. Provide shade during periods of intense sunlight. During the summer, bring your indoor pepper outdoors, but avoid any drafts.
Hot peppers do not tolerate winds and drafts, so when airing a room, keep them away from balconies, vents, and windows.
Soil preparation
Sow the seeds You can use a commercially available substrate. However, it's better to prepare your own nutrient mixture, which consists of peat, river sand in a 2:1 ratio, and perlite.
Before planting seeds treat the soil against various fungal diseasesFor this purpose, it's best to use a weak solution of potassium permanganate. Or simply heat the soil in the oven (at 200 degrees Celsius for 20 minutes).
When growing this plant, pay special attention to the container you choose. Hot peppers develop a small root system that grows close to the soil surface. For growing this plant, choose containers with a capacity of approximately 3 liters, or better, 5 liters.
Peppers are always grown from seed, so use wide, shallow pots for the first few weeks, then transplant the seedlings into individual containers. Drainage is essential to remove excess moisture. Before planting, add a 25 mm layer of drainage material to the bottom.
You can see how to soak and sprout Ogonyok peppers in the video below:
Planting seeds
Sow the seeds to a depth of no more than 10 mm. Maintain a temperature of 25 degrees Celsius. The plant will germinate within 10 days.
Transplanting seedlings
The sprouted seedlings are placed in a bright location with a temperature of at least 22 degrees Celsius. As soon as the pepper plants sprout their first leaves, they are transplanted into separate pots. After two months, the Ogonyok peppers can be planted in the lawn.
Features and rules of care
If you follow all the rules, caring for the plant will not be difficult.
Stimulating flowering and fruiting with fertilizers
Flowering is promoted by the high potassium content in the soil. During this period, apply dry potassium or urea: 1 tablespoon per 5 liters of water. Nettle infusion also has a beneficial effect on flowering.
During the warmer months, you can add mineral fertilizers, such as Dachnik or Ecoguminate, which are excellent for fruit set. These fertilizers are used dry. After applying the fertilizer, be sure to water the plant.
For information on caring for the Ogonyok pepper at home, including watering, fertilizing, and growing tips, watch the video:
Organic matter will help improve the soil structure, increase fertility, and protect against harmful insects. To create the fertilizer, collect one bucket of young leaves and fill it with cold water. Let it sit for 10 days until the solution begins to ferment and the leaves sink to the bottom. Then strain the mixture and water the peppers with this infusion once every 10 days.
During fruiting, it's best not to fertilize peppers at all, especially if the pods and leaves are healthy. Further fertilization is done after harvesting.
Lighting requirements
Peppers need long-term light for development, approximately 14-16 hours. In summer or spring, Ogonyok can do without it. special phytolamps, but in winter and autumn it is impossible to do without additional lighting.
If the amount of light is insufficient, the plant begins to shed its leaves.
Temperature conditions
In spring, temperatures should not drop below 20 degrees Celsius, and in winter, 18 degrees Celsius. During warmer months, move potted plants outdoors.
Watering
The Ogonyok pepper requires moderate but regular watering. The soil should not dry out. Avoid overwatering, as this can lead to root rot and the death of the pepper.
If air humidity is insufficient, mist the plants. Use room-temperature, settled water for irrigation.
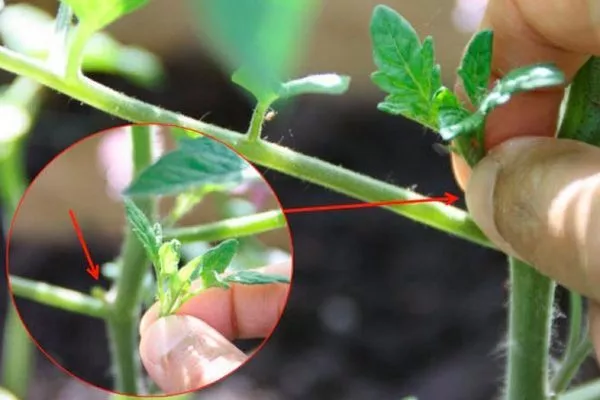
Crown formation
The Ogonyok pepper doesn't require crown shaping. You can pinch the tops of the shoots to make it more decorative. This will make the bush much fuller. If you want larger and longer fruits, remove a few flowers.
Harvesting and seed collection
Determining the time of full ripening of this plant's fruits is not difficult, as the pepper has a distinct red color. The main signs of ripening of Ogonyok fruits are:
- The pods acquire a characteristic bright red color.
- The pepper leaves turn yellow and the lower leaves dry out.
- Ripe peppers contain a large amount of bitter substances. Rub the pod on the back of your hand; if you feel a burning sensation, the pepper is ripe and ready to harvest.
The main sign of full ripening of pepper is bitterness,how she brighter expressed,those longer will be able to saveIf you harvested the pods earlier than expected, you can use them for canning.
Unripe fruits can also be placed in a warm place to ripen. For seed collection, use only ripe pods.
Reproduction
There are two main ways to propagate this plant: by seeds and cuttings. Let's look at them in turn.
Seeds
Cut the pepper and remove the seeds. Dry them in the sun and place them in paper. These seeds can be used later to propagate your indoor hot pepper, Ogonyok. Just remember that the seeds don't last forever, so they should be planted as early as possible.
By cuttings
To ensure daughter plants retain all the characteristics of their parents, it's best to propagate peppers by cuttings. Cut sprigs from green, young shoots without pods, approximately 70 mm long. Each cutting should have a leaf, or preferably two. Before planting, soak the cuttings in a zircon solution (7 drops per 250 ml of water) for 24 hours.
Growing Ogonyok pepper in a pot at home
When growing indoors, be sure to repot the Ogonyok pepper plant in a new pot with fresh soil every two years. In the spring and throughout the summer, add various complex fertilizers to the soil (once every two weeks).
Pay close attention to the plant during flowering; many gardeners report that it's precisely when grown indoors that the Ogonyok begins to drop its ovaries. If this happens, the main cause is insufficient pollination. This can be easily remedied by gently shaking the plant during flowering (rocking the pot from side to side).
Diseases and pests
Ogonyok is a hardy plant. It contains special elements that fight disease, so some ailments don't attack the plant at all.
If the leaves have become slightly paler or have started to fall off, the cause isn't disease, but rather a lack of daylight. Two pests pose the main threat: aphids and spider mites. They can attack peppers from other plants or fly through a window onto your windowsill.
How to get rid of spider mites and aphids:
- Take a couple of peppercorns and put them through a meat grinder.
- Fill the mass with water (1:10).
- Let the mixture sit for 24 hours.
- Strain through cheesecloth.
- Add crushed laundry soap (1 teaspoon per 1 liter of water).
- Spray the pepper with this solution every 4 days.
To prevent spider mites from attacking your plant, simply maintain the humidity in the room. The pest prefers a cool, humid climate, so spraying will prevent it.
Reviews of the Ogonyok pepper
The Ogonyok indoor pepper is a unique ornamental plant that will delight any homemaker. The pods are used in a variety of dishes and are also added to preserves. With proper planting and care, the pepper will yield a healthy and tasty harvest year-round.