Shchedrik cucumbers are popular with both novice and experienced gardeners. This hybrid boasts excellent flavor and resistance to most common diseases. The cucumbers remain intact during transportation and have excellent shelf life. Adherence to proper growing practices guarantees a bountiful harvest.

Introduction to the variety
The crop thrives in open areas, under temporary plastic covers, and even on indoor windowsills. It boasts high yields and an indeterminate growth habit.
Who developed the variety and when?
Breeders S. F. Gavrish, A. E. Portyankin, A. V. Shamshina, N. A. Prutenskaya, and V. N. Shevkunov worked on its creation. The resulting hybrid is characterized by robustness, high yield, and immunity to many dangerous diseases.
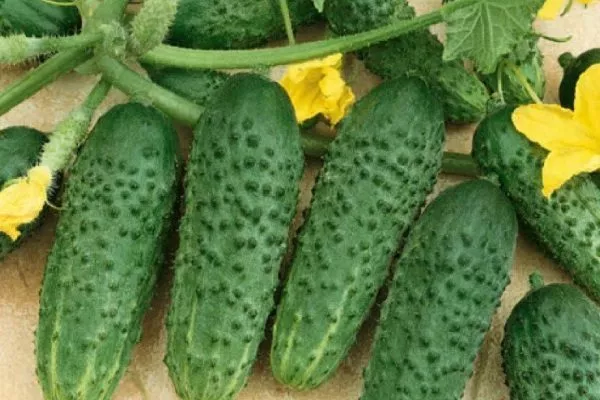
Characteristics of the appearance of the plant and cucumbers
The bushes are medium-branched and covered with medium-sized green leaves. The cultivar produces female flowers, with each cluster producing approximately three or more gherkins. The cylindrical fruits reach 10-12 cm in length and 3.5-4 cm in diameter, with most specimens weighing 90-100 g.
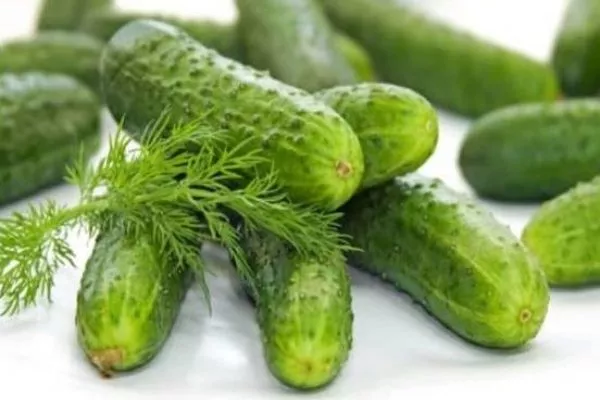
Taste and purpose
The taste is excellent. The cucumbers lack any unpleasant bitterness, and the flesh has a delicious crunch. Ripe vegetables are used in salads, canned, pickled, and salted. They are also suitable for eating fresh.
The chemical composition, nutritional value, and benefits of cucumbers
Cucumbers are rich in vitamins (A, B1, B2, B4, B5, B6, B9, C, E, H, K, PP) and minerals (calcium, silicon, potassium, sodium, magnesium, sulfur, phosphorus, chlorine, iodine, iron, manganese, selenium, copper, chromium, fluorine, zinc). Nutritional value (per 100 g):
- caloric content – 14 kcal;
- proteins – 0.8 g;
- fats – 0.1 g;
- carbohydrates – 2.5 g;
- water – 95 g;
- fiber – 1 g.
Vegetables help quench thirst, relieve heartburn, and improve digestion. They replenish vitamins and minerals, reduce swelling, lower cholesterol, and whiten skin.
When ripe, the yield
This popular hybrid attracts gardeners with its early ripening time. From the moment the first shoots emerge to the start of fruiting, it takes just 42-45 days, which is excellent. With proper care, approximately 12.8 kg of delicious vegetables can be harvested per square meter.
Advantages and disadvantages
Before planting a crop in your garden, carefully consider its positive and negative qualities. Shchedryk has many advantages:
There is only one drawback: intolerance to high temperatures in the greenhouse and excess moisture in the soil.
Landing features
The hybrid is grown using seedlings in regions with cool summers and direct seeding in the ground in southern regions. This crop prefers light, fertile, loamy soil.
- ✓ The soil pH level should be strictly within 6-7; for accurate measurement, use a pH meter.
- ✓ The depth of the fertile layer should be at least 30 cm; if it is insufficient, add humus or compost.
Preparing the soil and planting site
The plant prefers sunny, well-lit areas protected from cold winds. Choose a location with at least 6-8 hours of direct sunlight per day.
Avoid planting in the same spot two years in a row. The best predecessors for cucumbers are legumes, potatoes, cabbage, and onions. Avoid planting them after cucurbits (pumpkins, squash), as they are susceptible to similar diseases and pests.
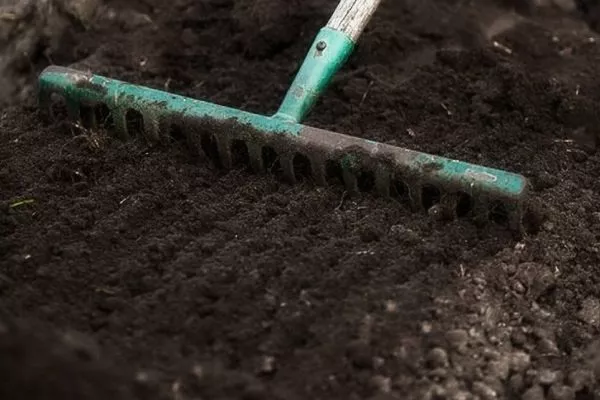
Soil preparation:
- Remove all weeds and plant debris.
- In autumn or early spring, dig the soil to a depth of 20-30 cm. This will improve the structure and increase its water permeability.
- When digging, add organic fertilizers such as compost or rotted manure at a rate of 5-10 kg per square meter. This will improve soil fertility. In the spring, before planting, apply mineral fertilizers: superphosphate (20-30 g per square meter) and potassium salt (15-20 g per square meter).
Approximate planting dates
The timing is determined by the soil warming to at least 15-16°C. For central Russia, seeds are sown in protected soil in mid-May and in open ground at the end of the month. For greenhouse seedlings, sow seeds in early April, and for direct seeding, in the second half of the month.
Preparation of planting material
Pre-prepare the seeds before sowing them. This procedure involves several steps that must be followed.
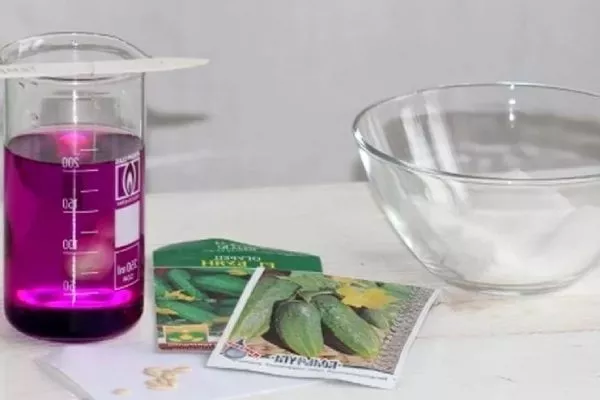
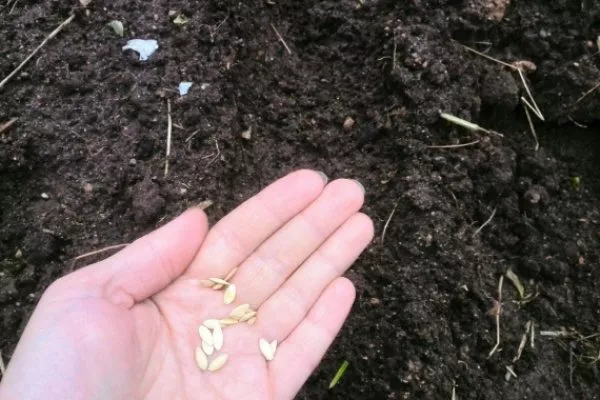
Selection of high-quality seeds
To ensure quality, purchase seeds from reputable producers. Recommended agricultural companies include Gavrish and Aelita. If in doubt, test the seeds: soak them in a saline solution (20 g of salt per 1 liter of water) for 15 minutes. Non-viable seeds will float.
Disinfection
Disinfecting cucumber seeds is an important step before planting, as it helps prevent diseases and improve germination. Here are a few methods:
- Heat treatment. Place the seeds in a cheesecloth or fine mesh bag. Submerge them in warm water at 50-55°C for 15-20 minutes. Then cool them by placing them in cold water for 2-3 minutes.
The second method involves immersion in water at 70°C for 3-5 minutes, followed by cooling in cold liquid. - Treatment with chemicals. Use potassium permanganate: prepare a 1% solution (1 g per 100 ml of water) and soak the seeds for 20-30 minutes. After treatment, rinse the seeds thoroughly in clean water.
Use Fitosporin: dilute the preparation according to the instructions, soak the seeds for 1-2 hours. Rinse thoroughly after treatment.
Always use freshly prepared disinfectant solutions. Treat the seeds just before planting to prevent them from drying out. After disinfection, apply additional growth stimulants to improve germination.
Hardening
This process helps plants adapt to external conditions and reduce stress. Follow these recommendations:
- Start hardening off 10-14 days before the expected planting in open ground or a greenhouse.
- Make sure the seedlings are healthy and have a well-developed root system.
- During the first week, reduce the nighttime room temperature to 15-18°C. Reduce the daytime temperature to 18-20°C.
- Begin gradually increasing fresh air intake by opening windows or doors for several hours a day.
- Make sure that the seedlings are not exposed to direct drafts.
- Gradually take it outside to a protected place, first for 1-2 hours, increasing this time daily.
- Avoid direct sunlight during the first few days. A location with partial shade is best.
Over the course of a week, gradually increase the time spent outdoors to a full day.
Growing by direct sowing
Sow the seeds in the soil to a depth of 2-3 cm and gently moisten. Cover with plastic wrap or a thin layer of soil to prevent a crust from forming on the surface when the soil dries. Sprouts will appear in 1-2 weeks. Pinch out weak plants.
Seedling method of cultivation
This method is especially good if you want to harvest as early as possible. Opt for peat pots, which you bury in the soil along with the plant (the pot decomposes in the soil).
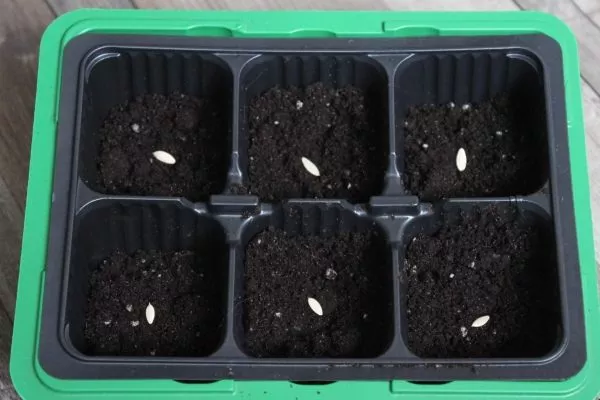
Step-by-step instructions:
- Sow the seeds into the substrate to a depth of 2 cm and moisten.
- Cover the container with plastic wrap to create greenhouse conditions. Germination requires a temperature of 25°C.
- Once the sprouts appear, reduce the temperature to +20°C to prevent the plants from stretching.
- After two leaves appear, place the seedlings in a well-lit area (such as a windowsill). They should receive at least 15 hours of daylight. If there's insufficient light, use fluorescent lamps.
- Water the plants with a solution prepared from 45 g of nitrophoska per 3 liters of water.
- After 20-30 days, when the seedlings have developed 3-4 true leaves, they are ready for transplanting. Don't delay planting to avoid overgrowing the seedlings and impairing rooting.
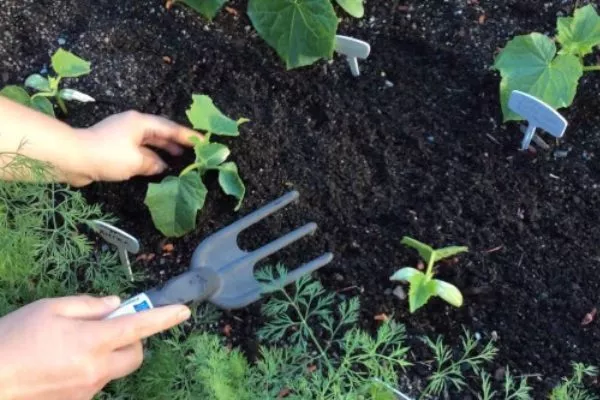
- Place the peat cup with the seedlings in the hole at a depth of 6 cm (remove the plastic container). Fill with soil up to the bottom leaves, water with warm water, and cover with plastic wrap for a few days.
- Leave a distance of up to 50 cm between seedlings and approximately the same distance between rows.
To develop a strong root system, remove the first ovary on the 4 lower nodes after transplanting.
Care
By following proper agronomic practices, you can easily achieve high yields. Follow simple care procedures to strengthen your plant's immune system and improve yields.
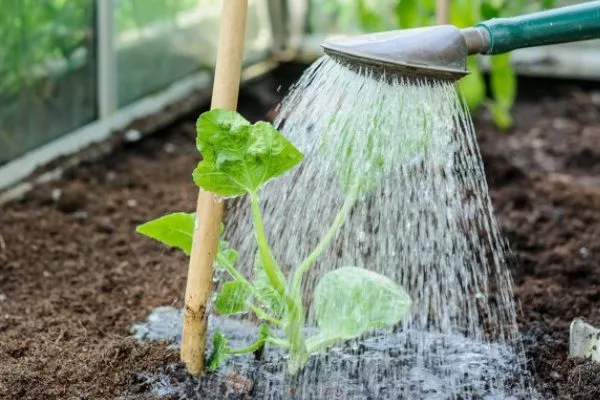
Watering
When caring for your crop, follow the watering guidelines. Follow these recommendations:
- Use warm water. Cold water can cause root rot. Water the bushes early in the morning or in the evening, when the heat has subsided. Use a watering can with a spray nozzle, as a bucket or hose can wash away the soil and damage the roots.
- In extreme heat (above 25°C), cucumbers may drop their ovaries. During such periods, sprinkle the plants to reduce the temperature on the leaves.
- During the fruiting period, continue watering as usual, but increase the amount of water. The amount of water directly affects the yield. On cool or cloudy days, reduce watering to avoid stagnant water.
Weed control, loosening
Proper care includes regular weeding and loosening the soil. Begin only after the sprouts appear. Repeat these procedures every 10 days.
Weeding is essential to remove weeds that can choke crops and compete for nutrients in the soil. Loosening the soil allows roots to have access to air and promotes the efficient use of dry fertilizers, such as wood ash.
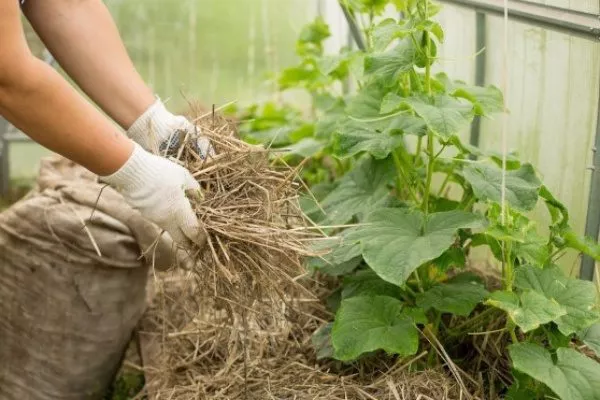
Mulching
This is an important agricultural practice that helps make gardening easier by conserving soil moisture and reducing weeding. For mulching, use grass clippings, hay, peat, sawdust, or black agrofibre.
Garter
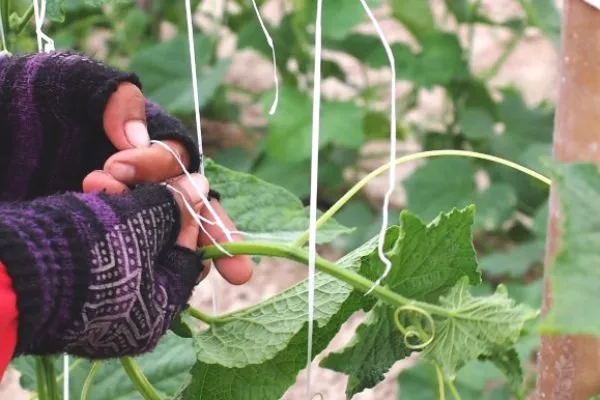
Shchedrik grows and develops best when grown on a trellis. This allows for better ventilation and keeps the fruit clean. For growing on a trellis, use a mesh with a 15x15 cm mesh. Stretch it vertically and install it before the shoots begin to actively grow.
Carefully guide the vines toward the mesh so they can catch on the mesh. Begin tying them up when the plant reaches the first horizontal support, but don't overtighten the vines so the top of the plant can grow freely upward.
Bush formation
Begin the process after 8-9 leaves appear, approximately 7-8 days after planting the seedlings. Shaping is necessary for several reasons:
- Improving ventilation. Without proper training, the bush can become too dense, which will impede air circulation and can lead to diseases.
- Optimization of sunlight. The lower parts remain in the shade, which disrupts photosynthesis processes and reduces overall productivity.
- Increasing the number of ovaries. Excessive development of shoots and side shoots diverts resources from the formation of ovaries and fruits.
Many gardeners recommend training cucumbers into a single trunk. Here's a step-by-step guide:
- Remove leaves that are too close to the ground to avoid contact with the soil and prevent disease.
- Remove all flowers, side shoots and ovaries from the axils of these leaves to concentrate nutrition on the main fruits.
- Remove side shoots to reduce stress on the plant and increase yield. Leave 2-3 side shoots on the upper part of the trunk and pinch them off above the second leaf.
- If the main trunk is growing too slowly, pinch it back when it reaches 150 cm (59 in). If growth is vigorous, throw the vine over the trellis and pinch it back at 60 cm (24 in) above the top wire.

Top dressing
To ensure plants actively grow green mass and maintain good productivity early in the season, properly select and alternate organic and inorganic fertilizers. The main steps for fertilizing are:
- Period of active growth. Use ammophoska (dilute 20 g in 10 liters of water) and bird droppings (500 ml per 10 liters of water). At this stage, add sifted wood ash – evenly scatter it over the moistened soil.
- During flowering. During this period, nitrogen requirements decrease, so focus on phosphorus and potassium. Prepare a solution of 30 g of ammonium nitrate, 40 g of superphosphate, and 20 g of potassium nitrate, diluted in 10 liters of water.
- During the fruiting period. During this phase, the crop requires potassium and additional nutrients. Use potassium nitrate (25 g) and urea (50 g), dissolved in 10 liters of water.
To extend the fruiting period and obtain fresh cucumbers before the first frost in the fall, carry out foliar feeding: dissolve 15 g of urea in 10 liters of water and use for spraying.

Possible diseases and pests, ways to get rid of them
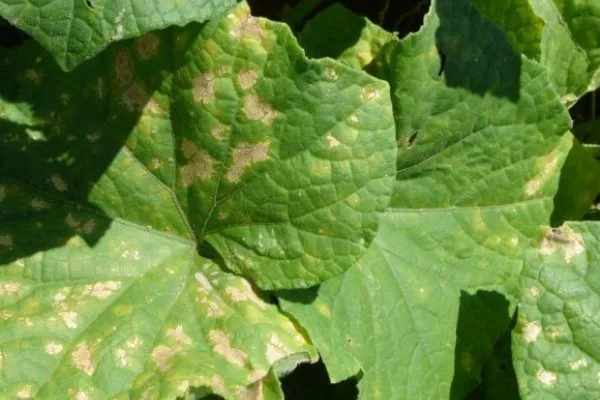
The hybrid is resistant to most diseases, but can be susceptible to downy mildew. Below are the main symptoms of this disease, its causes, prevention, and treatment methods.
The disease is accompanied by small brown or yellow spots on the leaves, the appearance of a gray-purple coating or yellow-brown formations, which leads to dryness and leaf fall.
Causes of downy mildew:
- high air humidity and air temperature below +9°C;
- excessive watering with cold water;
- high alkalinity in the soil.
Downy mildew prevention includes tilling the soil and disinfecting with copper sulfate, potassium permanganate, Gamair, or Fitosporin. Remove and burn infected bushes, weed and cultivate the soil, and practice crop rotation.
Treatment of peronosporosis:
- Chemical agents. Treat the plantings with a 0.5% solution of Bordeaux mixture, Ridomil or Oxyhom.
- Folk remedies. Use an ash solution: dissolve 400 g of ash in 750 ml of boiling water and let steep for 4 hours. Strain and add water to make 10 liters. Spray the bushes once every 7 days. A solution of iodine and milk is effective: 10 drops per 1 liter, bring the volume to 10 liters. Spray once every 7-10 days.
Chemical insecticides are popular for controlling insects such as melon aphids, spider mites, and mole crickets:
- Fitoverm;
- Aktara;
- Thunder;
- Actofit;
- Nemabactin;
- Commander.
Traps made from beer cans will help against slugs. A solution of ammonia (80 ml per 10 liters of water) applied to the garden beds at night is also effective. To repel slugs, scatter tobacco dust, rosemary, or ground hot pepper around the area.
Harvesting and storage
To achieve maximum yield, harvest cucumbers regularly. This will increase the number of ovaries and prolong the fruiting period. In a cool place, cucumbers will retain their flavor and shelf life for up to three weeks.
Reviews from gardeners
Shchedrik cucumbers are one of the most popular varieties among gardeners and homesteaders. This parthenocarpic hybrid attracts attention not only for its disease resistance but also for its good productivity and excellent taste. It's important to provide the crop with timely care and follow simple agricultural practices.