If you plant onions in the spring, you can reap a good harvest in the fall. However, to achieve this, you need to time the planting correctly and ensure proper care. This process is not labor-intensive, but it does require adherence to specific agricultural practices and growing guidelines. Read on to learn more.
When to plant?
To determine the optimal time for planting in the spring, it is necessary to take into account both specific weather conditions and suitable dates according to the lunar calendar.
Climate conditions
Onions can be planted only after frosts have passed and stable warm weather has set in. The soil should warm to a depth of 5-8 cm, reaching 12-14°C, otherwise the onions will sprout into stalks, and the greens will grow larger than the bulbs themselves.
Suitable weather typically arrives in late April or early May. The exact timing varies by region:
- southern regions – second ten days of April;
- regions of central Russia and the Moscow region – the third ten days of April;
- Siberia and the Urals – first ten days of May;
- Altai Krai – from early to mid-May.
Residents of central Russia are beginning to grow a vegetable with flowering bird cherry.
If onions are grown in a greenhouse, planting can be done 2-3 weeks earlier than the specified dates.
Regardless of where you live, don't delay planting onions. High temperatures and a lack of natural moisture will slow the bulb's development, which could lead to a reduction in your intended yield.
According to the lunar calendar
To accurately determine planting dates, many gardeners rely on the Lunar Calendar, which states that favorable periods for planting onions in the spring are:
- April 25 and 26;
- from May 10 to May 20;
- May 23.
Onions planted these days produce large bulbs and juicy greens.
What varieties can be planted?
| Name | Ripening period | Yield (kg/m2) | Taste |
|---|---|---|---|
| Centurion F1 | Early ripening | Up to 5 | Sharp/semi-sharp |
| Stuttgarter Riesen | Mid-season | Up to 5 | Bright and sharp |
| Red Baron | Early | Up to 3 | Semi-sharp |
| Sturon | Early ripening | High | Soft semi-sharp |
| Hercules | Mid-early | High | Spicy and tangy |
| Stardust | Mid-early | High | Slightly semi-sharp |
For spring planting, medium-sized onions, reaching 14-21 mm in diameter, are preferred, as this shape prevents bolting and is easier to establish. As for specific varieties, the following are suitable:
- Centurion F1An early-ripening hybrid that produces uniform, slightly elongated fruits weighing up to 175-180 g. Their flavor can be spicy or semi-spicy. The variety is highly disease-resistant and has a good shelf life.
- Stuttgarter RiesenA mid-season variety characterized by high yields—up to 5 kg of large, round, slightly flattened bulbs per square meter. Their average weight is around 150 g, but some weigh 200-250 g. The fruit has a bright and distinctly spicy flavor.
- Red BaronAn early variety yielding up to 3 kg per square meter, it produces round, red-violet fruits weighing up to 150 g. Their flavor is pleasant and semi-sharp.
- SturonEarly ripening Sturon variety A stable and high-yielding variety that produces medium- to large-sized bulbs with a mild, semi-sharp flavor.
- HerculesA mid-early hybrid with a high yield, producing bulbs weighing 155-160 g. They have a wide elliptical shape and a piquant, sharp taste.
- StardustA mid-early variety characterized by good germination and high yields. The fruits are large, smooth and round, and have a pleasant, slightly spicy flavor.
Onion Centurion F1
Bow Stuttgarter Riesen
Onion Red Baron
Onion Sturon
Bow Hercules
Stardust Bow

Experienced vegetable growers choose these varieties for their quality characteristics and ease of cultivation.
Processing of planting material
The preparation required depends on whether you're using seeds or sets as planting material. We'll look at each option separately.
Seeds
To grow green onions, they need to be planted from seeds. Seed cultivation can begin 25-28 days before planting. Follow this procedure:
- To test onion seeds (nigella) for germination, place them in a cheesecloth bag and immerse them in hot water (45…55°C) for 12-16 minutes. Discard any unsuitable seeds.
- For hardening purposes, after the first stage, immediately dip the seeds in cold water for 1.5-2 minutes.
- To allow the seeds to swell and remove germination-inhibiting substances, wrap them in a damp natural cloth and leave them there for 22-26 hours, regularly moistening the wrapping. After this, soak the seeds in room-temperature water and store them for 2-3 days in the bottom compartment of the refrigerator or another cool place. Change the water daily.
- After soaking, drain the water, dry the nigella on a paper towel and mix with sand or sawdust.
After such treatment, you can obtain strong, small onion seeds that will be suitable for uniform sowing.
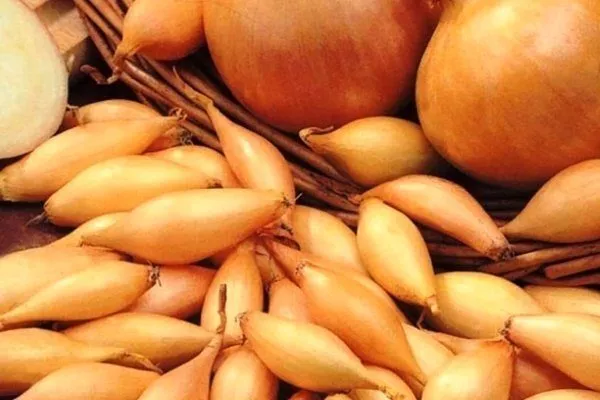
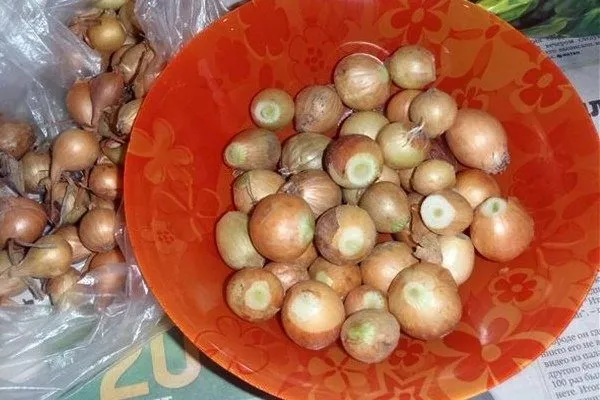
Onion sets
When growing onions for bulbs, you need to plant them from sets. These can be purchased at a garden center or grown from nigella seeds, preferring regional varieties. In any case, bulbs with the following characteristics are suitable for spring planting:
- have dimensions of 14-21 mm;
- are dry and elastic;
- have good density and a pleasant onion smell.
Bulbs with the following characteristics are not suitable for planting:
- wet;
- covered with mechanical damage and rot;
- smells like mold;
- have white roots or emerging green shoots.
To ensure that home-grown onion sets are suitable for planting in the spring, they must be stored properly over the winter – at a temperature of 15°C and 70% humidity.
Processing of the seedlings should begin a month before planting. This involves the following steps:
- Discard any dry or rotten bulbs and sort the remaining ones by size—large, medium, and small. Planting should begin with small and medium bulbs so they produce a harvest of bulbs by fall. Large sets should be planted at least two weeks apart to prevent them from bolting prematurely. You can use them green or save them for nigella, depending on your preference.
- If the onion sets were stored in a cellar or other cold place, they need to be warmed and dried 2-3 weeks before planting; otherwise, they will rot in the soil or bolt. Spread the sorted onion sets out thinly and keep them in direct sunlight, such as on a south-facing windowsill. Alternatively, keep the onion sets near a heat source at 35°C to 42°C for 3-4 days.
- After drying and warming up, place the onions in hot (70°C) water for 4-5 minutes, and then in cold water for the same amount of time.
- For quick germination, soak the seed onions for 8-10 hours in a weak solution of complex fertilizers or nitroammophoska (15-20 g per 10 l of water).
- After a mineral bath, to disinfect and protect the plantings from fungal diseases, soak the onion sets for 10-15 minutes in a solution of potassium permanganate (1 teaspoon per 10 liters of water) or copper sulfate (10-15 g per 10 liters of water). If diseases or pests were observed while growing the onion sets in the garden, the planting material should also be soaked in an ash solution (1 tablespoon per 1 liter of water).
- Rinse the onion sets under running, non-cold water, dry and plant in the soil.
- ✓ Use only wood ash from burning deciduous trees to ensure high potassium and phosphorus content.
- ✓ Avoid ash from burning treated wood or plastic, as it can harm plants.
If you plan to grow feathers, you need to cut off the tops of the bulbs before planting.
Selecting a site and preparing beds
The location for planting onions should be chosen in the fall. It should be a well-lit area, as bulbous plants struggle in the shade and require plenty of direct sunlight. If the onions grow without it, the bulbs will be very small.
It is equally important to take into account crop rotation rules when choosing a site:
- The best predecessors for onions are those crops whose roots loosen the soil and enrich it with nutrients. These include:
- rye;
- pumpkin;
- peas;
- beans;
- peppers;
- eggplants;
- zucchini;
- cabbage;
- tomatoes;
- potato.
- The worst predecessors are cucumbers, garlic, beets, and carrots. After these, onion bulbs will grow very slowly, and the yield will decrease. Onions can only be returned to their previous location after three years.
- It's best to plant carrots next to onion beds. They will repel onion flies, while onions are an excellent preventative against carrot flies.
As for the soil, it should be loose and slightly acidic. Onions grow best in black soil or loamy soil that allows for good air and moisture drainage.
A selected site with suitable parameters must be properly prepared. This procedure can be divided into two stages:
- In the fallDig the bed up to the depth of a bayonet, without breaking up the clods. This is a good pest and disease control measure—the soil will freeze deeper, so fewer larvae will survive until spring.
Moreover, when the snow melts, moisture will remain in the soil longer. When digging, fertilize the soil by adding 5 kg of rotted manure or compost per square meter. As for mineral fertilizers, add 30 g of superphosphate and 15 g of potassium chloride per square meter.By spring, all applied fertilizers will dissolve and soil fertility will be restored.
- In the springA week before planting, evenly distribute ammonium nitrate over the bed surface at a rate of 20 g per square meter, and shallowly loosen the soil, followed by harrowing. Immediately before planting, water the dug-up beds with a dark pink solution of potassium permanganate for disinfection.
Planting onions in the ground
The planting pattern depends on the type of planting material used to cultivate the vegetable crop.
Sowing seeds
It is produced according to the following scheme:
- width between holes – 1.5-2 cm;
If you leave less than 1 cm between the holes, you will be able to get good greens – the greens will grow larger than the turnips.
- distance between rows – 12-18 cm;
- planting depth – up to 1.8-2 cm.
After sowing, the soil should be watered and mulched with sawdust or straw. The seedlings themselves should be covered with dark plastic to prevent them from drying out.
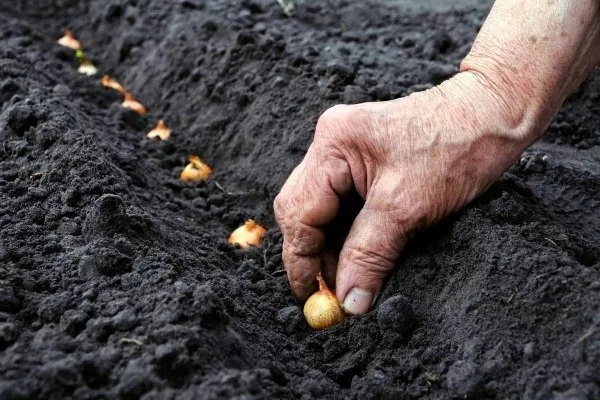
Planting onion sets
Before planting, prepare beds 25-30 cm apart. The distance between furrows depends on the size of the seed heads:
- large – 10-12 cm;
- medium – 8-10 cm;
- small – 6-8 cm.
Don't plant onion sets too deeply. Once roots emerge, they'll be drawn even deeper into the soil, meaning the wait for seedlings will be even longer, and the harvest will be small and weak. The optimal planting depth for onion bulbs is 4.5-5 cm, leaving a 2.5-3.5 cm layer of soil above the onion shoulders.
After planting, the bed should be watered and mulched with straw or sawdust to ensure moisture is retained in the soil longer until the bulbs sprout.
The video below explains the intricacies of sowing onion sets throughout May:
Caring for spring planting
To obtain a good harvest, it's important to follow proper plant care guidelines. These include timely implementation of a number of agricultural practices.
Watering
Insufficient moisture in the spring will cause the onions to take on a bluish or white tint, and the tips will dry out and curl. However, excessive moisture should be avoided, otherwise the onions will become pale and thin, and the quality of the resulting onions will deteriorate. Therefore, it's crucial to provide moderate watering, following the following schedule:
- In May-June, water the beds no more than 1-2 times a week at the rate of 7-11 liters of water per 1 sq. m.
- During the onion bulb maturation period, reduce watering to once every 1.5-2.5 weeks. However, during dry weather, water more frequently while reducing water usage.
- As the turnips begin to ripen, reduce watering to a minimum, just enough to keep the soil moist. Excess moisture will stimulate leaf growth and delay the ripening of large onion bulbs.
- Avoid watering when cutting the bulbs. However, during severe drought, lightly moisten the plantings; otherwise, the onion tips will lose color, curl, and turn white at the tips.
Loosening
Loosen the soil at least every 2-2.5 weeks after watering or rain. This is an important procedure that should not be neglected for the following reasons:
- gives the onion bulb a lot of air and light, and therefore the strength to “get out” to the surface;
- improves the air-moisture regime, preventing the soil from becoming excessively compacted;
If you allow an impermeable crust to form on the soil surface, the onion will begin to suffocate and lag in development, and the feathers will turn pale and even yellow.
- helps keep the planting clean - it fights weeds that grow rapidly as the roots and leaves of the bulb slowly grow.
Top dressing
If pre-planting soil fertilization was performed correctly, additional fertilization is only necessary in poor soil. However, even with proper preparation, onion growth may be sluggish. In this case, summer fertilization of the planting to stimulate leaf growth will help. This is done using a solution prepared from the following ingredients (per bucket of water):
- 15-20 g urea;
- 250-280 g of organic matter (mullein or bird droppings).
This mixture should be applied to the roots of plants at a rate of 3-3.5 liters per 1 square meter. The application can be repeated after 12-16 days.
If after feeding the greenery begins to grow actively and shoots up, they will need to be removed immediately.
Protection from diseases and pests
To prevent the development of fungal diseases, when the onion feathers reach a height of 12-16 cm, it is necessary to carry out preventive treatment - spray the beds with a solution of 5-8 g of liquid laundry soap and 15-20 g of copper sulfate per 10 liters of water.
If vegetable crops are not treated, they may be affected by the following pathogenic fungi:
- PeronosporosisIt is carried by wind, insects, and even humans. It manifests itself as light spots on the feathers. If these signs are detected, the plant should be sprayed with a Polycarbacin suspension or a 1% Bordeaux mixture. This treatment should be performed three times, 10 days apart. The last treatment should be performed 20 days before harvest.
- Rust diseaseIt leaves swollen, orange, round spots on the stems. To prevent this disease from developing, weed the garden regularly. During heavy growth, spray the onions with a copper oxychloride solution at a rate of 30 g per 10 liters of water. You can also add a little liquid soap. Spray the plantings with the solution twice, 7 days apart.
- Fusarium rotIt manifests itself as rot of feathers and turnips. To prevent the disease from developing, it is advisable to treat the soil with Iprodione before planting, and soak the seeds in a solution of potassium permanganate. Also, do not plant onions in the same area two seasons in a row.
As for pests, the following pose a particular danger:
- WirewormsTo repel them, proper agricultural practices must be followed.
- Onion flyCreolin will help fight it.
- Onion weevilTo combat this, onions can be sprayed with insecticides containing nicotine sulfate.
- Before planting, treat the seed onions with a salt solution (1 tbsp. per 1 liter of water) as a preventative measure.
- Once every 2 weeks, spray the plantings with an infusion of tobacco dust or ash to repel pests.
- Alternate rows of onions with carrots for natural protection against onion fly.
To protect your onion bed from attacks by any pests, you need to thoroughly clear the garden of plant debris and other debris.
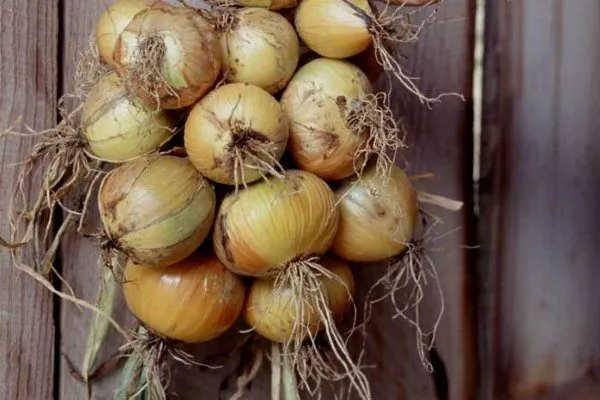
Harvesting and storage
Onion harvesting can begin between the 2nd and 3rd week of August and early September. The following signs indicate the harvest is ripe:
- the greenery has stopped growing;
- the pen fell down;
- new feathers stopped forming;
- the leaves have turned yellow and are drying out;
- heads with a characteristic color and scales of a ripe appearance were formed.
Harvesting cannot be delayed, otherwise the heads will begin to grow again, and the onions will become unsuitable for storage.
Harvesting should begin on a sunny day or in cloudy but dry weather. If the stems are difficult to remove, the onions and sets can be pulled out by hand. To avoid damaging the onion bulbs, carefully dig them up with a pitchfork.
The harvested onions and sets need to be dried. In sunny weather, they can be spread directly on the beds. Mature turnips will dry naturally in 7 days, and sets in 3-4 days. If the weather is cloudy, the harvested crop will need to be dried under a canopy with good air circulation.
After drying, the bulbs should be trimmed of their stems, leaving 3-4 cm long necks. Next, they should be properly sorted so that the larger bulbs can be eaten, and the smaller bulbs (up to 3 cm in diameter) can be saved as seeds for green foliage.
Video consultation
An experienced gardener shares his experience growing onion sets in the spring in the following video:
Once the winter frosts have passed and spring has arrived, you can begin planting onions. Following the recommendations above, even an inexperienced gardener can handle this task. The key is to properly prepare the seed and the garden bed, and then ensure proper care for the crop after planting.