
The Indigo potato is one of the most common varieties. With its unusual purple flesh and distinctive flavor, it attracts the attention of both novice and experienced gardeners. The crop is resistant to many pests and thrives in any climate. Abundant harvests are possible with proper agricultural practices.
Who developed the variety and when?
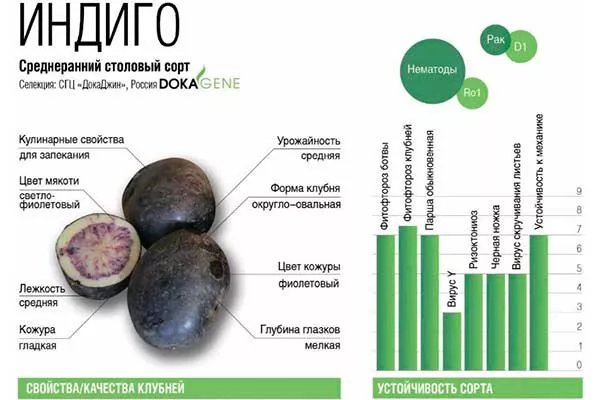
The variety was created in 2019. The authors are scientists Klyukina E. M., Shanina E. P., Banadyseva S. A., and Chuenko A. M. In addition to the unusual color of the peel and pulp, the variety has other important advantages, making it attractive to both summer residents and commercial farm owners.

Description of the plant and tubers
The bushes are tall and semi-erect. Distinguishing characteristics of the variety:
- The leaves are medium in size, dark green in color.
- The corollas of the flowers are small, weakly anthocyaninated on the inside.
- Each bush produces up to 10 fruits.
- The approximate weight of one tuber is from 98 to 167 g.
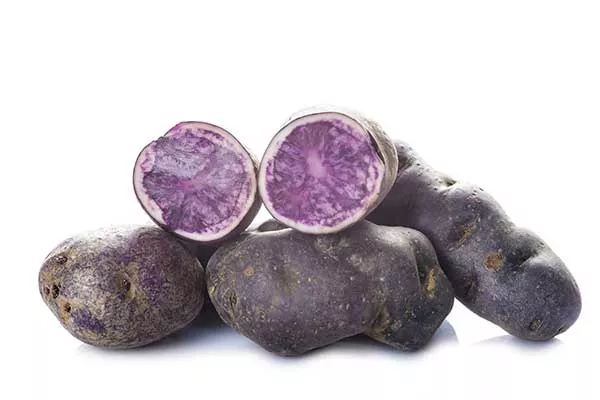
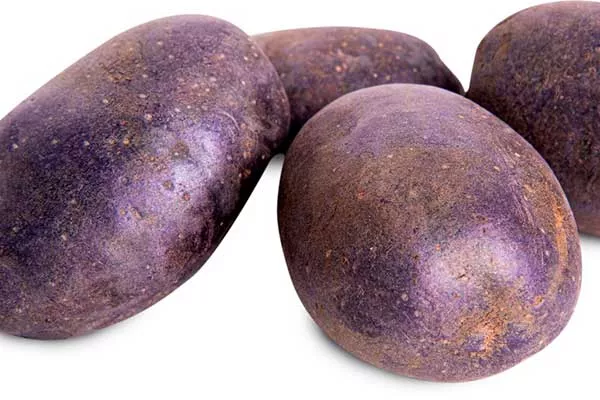
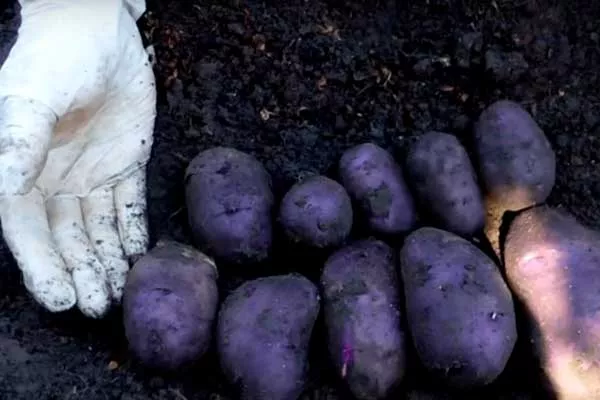
- The potato has a regular oval-round shape, smooth yellow skin with small superficial eyes.
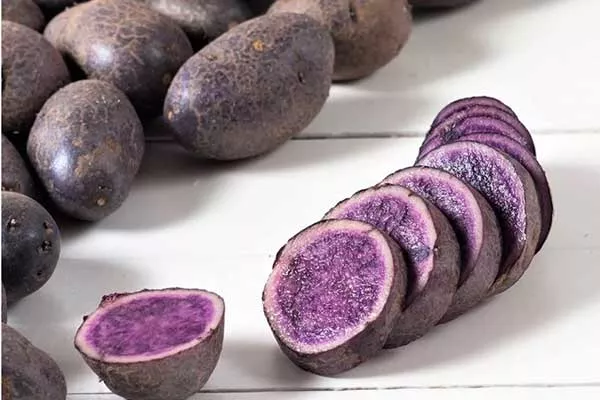
- ✓ Purple flesh with a variegated texture.
- ✓ Smooth yellow skin with small superficial eyes.
Taste characteristics and purpose
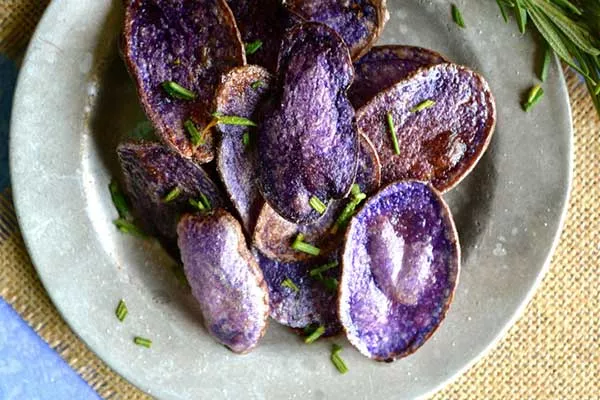
It has a pleasant traditional flavor and lends itself well to any culinary experiment. It cooks moderately, making it ideal for salads. The harvest makes delicious side dishes, and it can be fried or baked. The flesh is not watery, so any dish containing this vegetable is always a success.
Dietary properties of tubers
Nutritionists recommend including a variety of antioxidant-rich fruits and vegetables in your daily diet. This includes beets, broccoli, greens, and other vegetables. Now, this list has been expanded to include potato varieties with colored flesh, including Indigo. In addition to antioxidants, it's rich in vitamin C.
For dietary use, tubers are cooked gently, such as boiling, preferably in their skins to preserve the skin. Steaming is the gentlest cooking method, ensuring maximum preservation of nutrients.
Ripening and yield
This mid-early variety has an approximate growing season of 65-80 days. On average, 1 hectare yields 136 to 231 centners of fruit, with the maximum yield reaching 377 centners. The tubers have good shelf life. This variety is well suited for transportation.
Required climatic conditions and regions
The Indigo variety can be grown in any region of Russia. It produces fruit in the central and northwestern parts of the country, the North Caucasus, and some other regions.
Conditions for a successful landing
The best soil for this variety is aerated black soil, protected from heavy rains and winds. Optimal predecessors for potatoes are pumpkin, peas, or beets.
- ✓ Soil pH should be between 5.5-6.5 for optimal growth of Indigo potatoes.
- ✓ The soil must be well-drained to avoid water stagnation and rotting of the tubers.
Follow the recommendations:
- To ensure that plants adapt well and grow faster, plant the seedlings in soil that has been dug to a depth of 65 cm in the fall and sprinkled with ash.
- Disinfect the soil with copper sulfate in early autumn.
- Two days before planting, loosen the soil again, removing all weed roots, and enrich the area with a liquid mixture of ammophoska and humus.
- Spray the bed with Lazurit 6 hours before planting.
- Plant tubers in late spring, when temperatures rise above 18°C. Indigo is typically planted between May 5th and 10th, early in the warm evening. For planting, use tubers that have sprouted for three weeks, with sprouts that are 3.5 cm long.
Subtleties of agricultural technology
Growing the exotic purple Indigo potato is easy. The cultivation techniques are straightforward:
- Irrigation. Indigo doesn't require frequent watering, which can actually be harmful. For full development, watering every three days is sufficient. Evening watering, when the heat has subsided, is preferable. Each plant requires 3 liters of water. To avoid weakening its immune system, water should be at room temperature.
- Top dressing. The plant requires frequent feeding to develop its flavor and characteristic purple hue. When the plants begin to grow, apply a nitrous sulfate fertilizer with compost slurry. After the first blooms appear, add peat moss with monophosphate. After mid-flowering, apply sodium sulfate with ground ash.
During the formation of vegetables, use mullein with dissolved nitrophoska. To avoid damaging the developing vegetables, apply all fertilizers at the same time as watering. - Mulching. The best mulch is regular straw, as this variety prefers organic matter. For mulching, use thoroughly dried and cleaned straw, which effectively controls weeds and helps control moisture.

Spread straw over the beds 24 hours after planting, creating a 15-20 cm thick layer. As it decomposes, replace the layers with new ones to prevent the formation of a greenhouse. Remove the straw after the tops have been destroyed.
Diseases and pests
The variety's characteristics highlight its particularly strong immune system, making it resistant to most common threats. Under stressful weather conditions, such as heavy rains or temperature fluctuations, the immune system may weaken. In such situations, potatoes are sometimes susceptible to disease.
Late blight
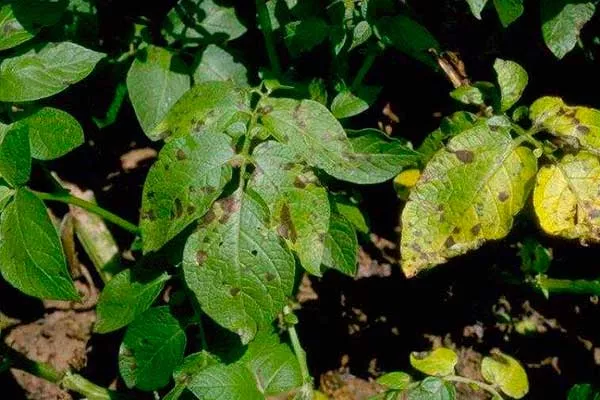
During prolonged rainfall followed by high temperatures, the crop can become infected with late blight. The main symptom of the initial stage is gray-brown lesions, which cause the leaves to shrink and dry out. To combat the disease, treat the plants three times with Efal or Thanos.
Blackleg
During periods of prolonged rainfall, potatoes can be attacked by potato rot bacteria. Characteristic signs of infection include rotting stems and curling of lower leaves. To prevent crop loss, treat the beds with Vitaros or Energen.
At the initial stage of the disease, use iodine-milk tincture.
Wireworm
Orange beetle larvae prefer dense, dense plantings. They settle on weakened stems, causing them to droop, turn pale, and cause the leaves to dry out. Planting marigolds around the bushes is a natural preventative against the pest.
If wireworms have already infested an area, they can be destroyed by spraying with Imidalite or Provotox.
Collection and storage procedure
Digging is usually done at the end of July. The first sign of readiness is yellowing of most of the foliage. When it turns yellow, remove it completely, and begin harvesting in 10-11 days.
After digging, place the entire harvest on a light mat in the shade and dry for up to two days. Then sort the tubers, and place the largest, undamaged tubers in a darkened cellar, where you should maintain a microclimate of 5-6°C.
Advantages and disadvantages
Gardeners who grow Indigo potatoes note a number of significant advantages of this variety.
Reviews
The Indigo potato's unique characteristics have attracted the interest of agronomists worldwide. These unique properties make it an attractive choice for cultivation in any location. A bountiful harvest and high-quality tubers are possible with proper care.