Hilling potatoes It's very difficult to cultivate and plant garden beds yourself, but a homemade hiller makes life much easier for a farmer. The construction process is quite simple.
Operating principle
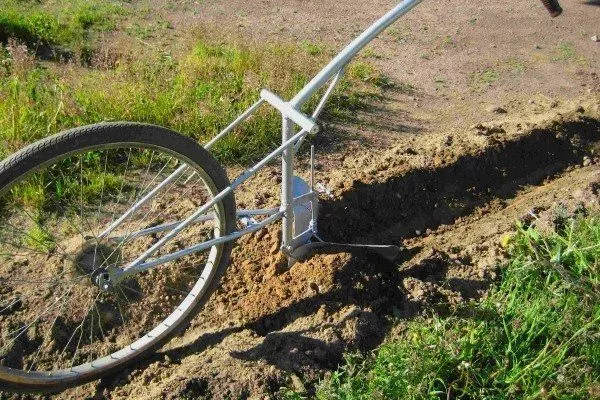
The key component of a hand-held hiller is the cultivator or plow. It does what a hoe or mattock does by hand—tilling the soil. This plow, using its sharp end ("nose"), digs slightly into the soil and distributes it laterally, covering the potato rows with soil.
If the hiller is a homemade model made from a bicycle, the cultivator will be attached to its frame. By slightly modifying the structure of the unit, you can steer the device by gripping the handlebars, directing it in the desired direction. The hiller itself is propelled by a single wheel at the front of the frame.
The operation of a manual hiller can be summarized more briefly using the following algorithm:
- the cultivator cuts into the ground;
- the operator of the device uses the steering wheel to direct the hiller in the desired direction and moves it forward;
- movement is carried out by means of the existing wheel.
What do you need to make a hiller?
First of all, you will need certain equipment and materials:
- frame of an unnecessary bicycle (necessarily with handlebars and one 26-28 inch wheel);
- a cultivator (plow), which can be purchased or made by yourself;
- welding devices;
- wrenches for nuts and bolts (if the cultivator will be screwed to the mount).
At the same time, you will need a little patience and the ability to work with a welding machine.
Preliminary actions
First, prepare the bicycle frame: handlebars, saddle, pedals, and the rear wheel are removed. The rear wheel is disassembled and cleaned—only the metal rim is needed.
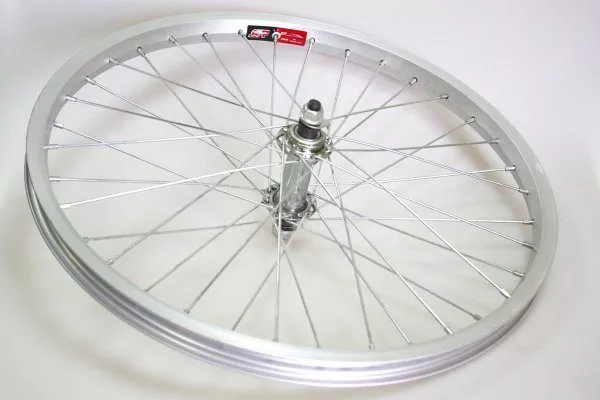
The metal rim penetrates the soil better, giving the hiller much greater stability and maneuverability than a rubber-mounted unit. Controlling the machine becomes significantly easier.
The process of creating a hiller
The manufacturing process can be divided into 5 stages:
- The rear wheel mount is cut so that the end result is just a "triangle" from the bicycle frame.
- The cultivator will be placed instead of the wheel, and it needs to be fixed there.
- Screw or weld the cultivator in place. This should be done carefully, as this part of the hiller will bear the heaviest load.
If the cultivator is bolted on, tighten the nuts as tightly as possible, otherwise the hand-held hiller won't last more than a couple of days. This is where both a nut and bolt wrench come in handy. Using both wrenches simultaneously will ensure a secure and lasting attachment.
- Next, adjust the cultivator's reach (how far/close it is). This is done for ease of use during hilling, to avoid tripping over the cultivator blades.
- The previously removed steering wheel is tightly screwed into place on the saddle.
Creation of a cultivator section
If you were unable to find/buy/remove a cultivator, you can make one yourself.
Building a basic cultivator is fairly simple. It's essentially the same as a plow. Two plates are attached to the base, forming a forward-facing angle (toward the wheel). As the cultivator moves, the plates will divide the soil into two sections and use the raised soil to hill up the potato rows.
However, the following requirements for this part should be adhered to:
- the total width of the blades should be equal to 2/3 of the spacing between the rows of potato bushes;
- the cultivator should go 10-15 cm under the soil;
- The angle of the blades should be close to 90 degrees - this way they will pick up the soil perfectly.
After completing the full range of work, you should have a fully functional manual hiller that will do its job perfectly during potato growing.
To learn more about the device and how to properly make such a homemade hiller, you can watch the following video:
Helpful tips
If two people operate the hiller, the hilling process will be significantly simplified and the efficiency of the work will increase significantly. To use a manual hiller with two people, attach a standard belt to the front of the machine.
A load can be attached to the rear of the machine. This improves penetration into the ground, which again increases operating efficiency. However, this also makes it more difficult to move the machine forward due to the increased weight.
Other types of hillers
There are many different ways to create hillers. Let's look at some other methods below.
| Type of hiller | Materials | Difficulty of manufacturing | Efficiency | Ease of use |
|---|---|---|---|---|
| From a bicycle frame | Bicycle frame, cultivator, welding materials | Average | High | High |
| From a bicycle wheel and fork | Fork, wheel, pipes, cultivator | Low | Average | Average |
| From a children's bicycle | Children's bicycle, cultivator blades | High | Very high | Low |
From a bicycle wheel and fork
If you have a front bicycle fork and a wheel for it, you can create a hiller using this technology:
- 2 pipes need to be welded at an obtuse angle;
- a bicycle handlebar is attached to a long pipe (it would be wiser to weld it so that it doesn’t fall off during work);
- A cultivator is attached/welded to the joint of both pipes at the bottom.
The final result of the work will look like this:
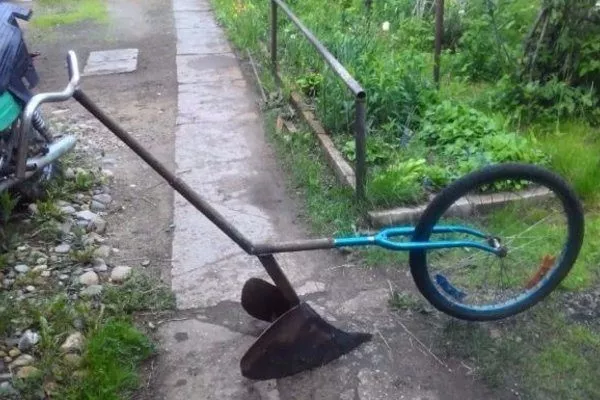
Building a hiller like this is much easier than the one mentioned previously. However, different types of units should be used for different purposes.
From a children's bicycle
You will need a metal bicycle with 3 wheels:
- the saddle and front wheel are removed and stored;
- cultivator blades are welded to the inside of the frame near the wheels;
- the angle of their placement is selected individually (affects how the hiller will move: along the rows or between them).
It's recommended to weld the blades so that the corner faces the operator's feet and opens at the front. This way, the hiller will move along the row itself, not between rows, as with previous varieties. The advantage is that each cultivator blade will work the row from both sides at once:
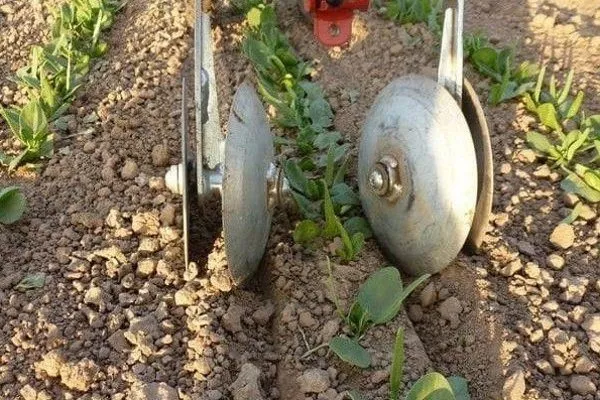
But it is important to remember that if the children's bike is too low, then the higher the potato plants, the more difficult the hilling process will be (damage to the sprouts will directly affect the health of the tubers).
This completes the homemade potato hiller, and you can begin hilling your beds. Making this device isn't difficult, especially in comparison: a little welding and you'll get tremendous efficiency, compared to hilling each bed yourself.