Many gardeners use the "under-the-shovel" method to grow potatoes in their gardens. This is the basic method for sowing tubers, as all the work can be done by hand, without the need for specialized equipment. What is the essence of this method and how to plant potatoes correctly? Let's explore further.
The essence of the method
When planting tubers in small beds, many gardeners use the "under-the-shovel" method. This means planting the potatoes in open ground to the depth of a spade.
This planting method is often used in light and loose soils where groundwater is quite deep. After planting potatoes this way, many gardeners create small mounds of soil around the plant stems, as the bulk of the productive stems are located deep in the ground, and there's no need to pile a lot of soil onto the plant.
Choosing a landing site
Before choosing this planting method, you need to make sure that the site is suitable for growing this vegetable crop:
- Soil characterChernozem soils are ideal because they provide the plant with all the necessary nutrients. These soils also have good water and air permeability. Potatoes can also be planted in clay and sandy soils. To improve the quality of clay soil, it's worth amending it with sand or peat, while sandy soil can be improved with peat. Optimal conditions for different soil types
Soil type Recommendations for improvement Notes Black soil Does not require improvement Excellent water and air permeability Clayey Add sand or peat Improves soil structure Sandy Add peat Increases moisture capacity - Soil reactionIf buttercup or plantain grows among the weeds in a garden bed, the soil is acidic, while if birch or sow thistle grows, the soil is neutral. Acidic soil needs to be converted to neutral soil, and this can be achieved by adding chalk, ash, or lime at a rate of 1-2 kg per square meter of soil.
- Predecessor culturesPotatoes should be planted in a plot previously occupied by crops such as sunflowers, beets, corn, cucumbers, or pumpkins. However, if potatoes were previously grown in the same plot, they should not be planted there for another 4-5 years. Failure to do so will make the potatoes susceptible to disease and may also be infested with wireworms.
Overall, the plot should be small, as this planting method is labor-intensive. It should preferably be well-drained and easily watered. It's also recommended to choose a location near which groundwater doesn't accumulate or where there are no other causes of stagnation.
- ✓ Good sunlight exposure
- ✓ Accessibility for irrigation
- ✓ No stagnation of groundwater
How to prepare the soil?
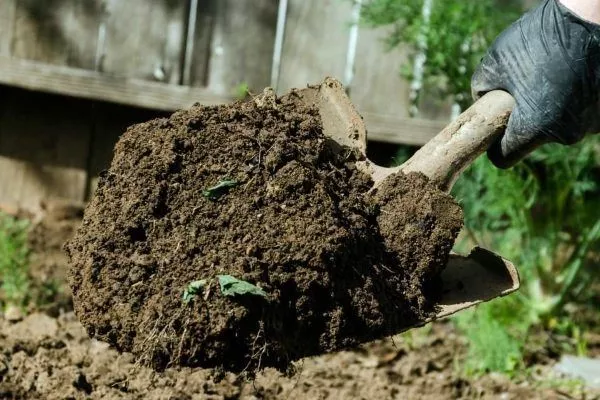
To plant potatoes, you need to prepare the soil first, which can be done in two ways. In either case, preparation begins in the fall, as the actual planting takes place in the spring.
Continuous application of fertilizer
Gardeners spread manure, bird droppings, or compost over the beds, then dig and rake the soil. It's also recommended to remove any weed roots that may be present.
To prepare excellent fertilizer for potatoes, you can use this method:
- Remove all unnecessary material from the garden in the form of various plant remains, weeds, roots and other plant components.
- Place all of this in a compost heap or pit - a specially designated place where the collected compost will rot.
- Over time, it will make an excellent fertilizer.
Another way to obtain organic fertilizer is to plant green manure crops in the fall, then mow them down and bury them by hand in the spring. The crops will soon begin to rot, fertilizing the soil, so after two weeks, you can plant potatoes with a shovel.
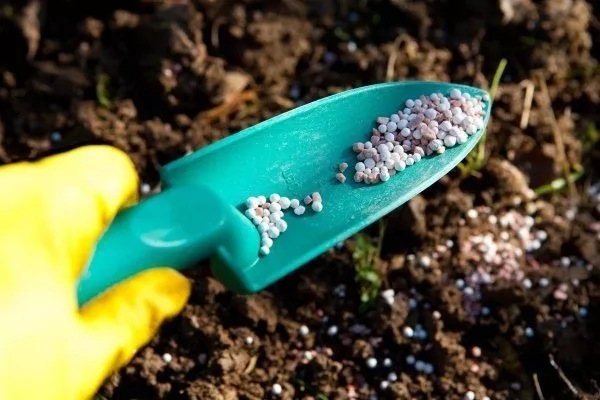
If you were unable to prepare organic compost, you can use mineral fertilizers, which are sold in stores.
Fertilizer application in rows
If you need to dig up the soil and apply fertilizer at the same time, you can use this method:
- Simply dig up the area with a bayonet shovel, removing all the weed roots so that they don’t grow further, otherwise you’ll have to spend a lot of time weeding in the summer.
- Apply fertilizer to the dug row, distributing it evenly with a shovel so that there are no gaps.
- When digging the next row, cover the first one with soil so that the fertilizer remains in the bed, not on the surface, and nourishes the potatoes during their growth and germination.
- In the spring, when digging up the area, mix everything thoroughly again.
To ensure active growth of potatoes, you can use a fertilizer mixture, which is prepared by mixing 5 kg of manure and no more than 30 g of potassium phosphate.
Preparation of planting material
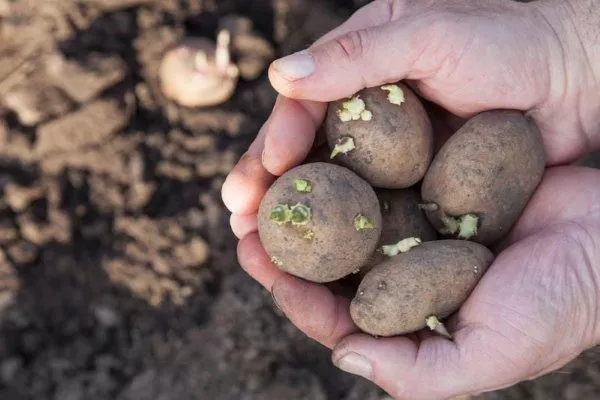
Potato yield depends entirely on the type of tubers planted in the spring. Therefore, it's important to purchase good varieties of the plant and then begin processing the tubers, which is done in three stages:
- In the fallSort the planting material, removing any small or damaged tubers. Then, spread the potatoes in a single layer and keep them in a light place, but not in direct sunlight, for 2-3 weeks. The tubers will soon turn green and be disease-resistant. Keep in mind that planting one hundred square meters requires 500 to 700 tubers. Planting material preparation plan
- In autumn: selection and greening of tubers
- In spring: checking for diseases and germination
- Before planting: treatment with growth stimulants
- In the springOne month before planting, inspect the tubers and remove any that show signs of rot or disease. Move healthy potatoes to a cool, damp place with full sunlight. If the room humidity is low, mist the tubers sparingly with water. They can be kept outdoors as long as the temperature is at least 10 degrees Celsius.
- Just before landingPotatoes can be soaked in a solution of potassium permanganate or boric acid for 20 minutes, which will make them more resistant to pests. To stimulate plant growth, the tubers can be sprayed with biostimulants.
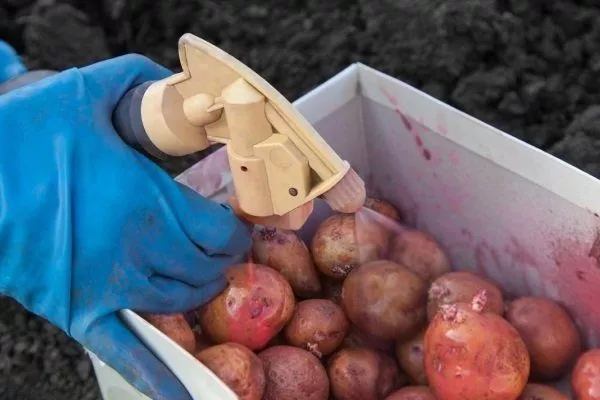
Popular methods of pre-sowing potato treatment can be found in the table:
| Processing method | Benefit | Features of the technology |
| Gibberellin or Heteroauxin | Increases yield by 65 kg per hundred square meters. | A few days before planting, spray the tubers with a solution of the preparation in a ratio of 7 mg per 1 liter of water. |
| Ferric chloride | Protects the crop from scab, which reduces the marketable appearance of potatoes and shortens their shelf life. | Spray the potatoes with a weak solution of ferric chloride 2-3 days before planting. |
| Succinic acid | Helps retain nutrients in root vegetables, improving their biochemical composition and taste. | A few hours before planting, treat the tubers with a 1% solution of succinic acid. |
| Wood ash | Increases starch levels and nourishes the plant. | Treat the tubers before planting by dusting them with ash at a ratio of 1 kg of ash per 50 kg of potatoes. |
| Microelements | Nourishes potatoes with useful elements. | A few hours before planting, spray the tubers with a solution of macronutrients containing boron, manganese, and copper in a ratio of 0.5 teaspoon of solution per half a bucket of water. |
Large tubers can be cut before planting, but in any case, they should have strong and not too long sprouts that will not break off during the planting process.
Time and methods of planting
Potatoes are typically planted in mid-April. Depending on whether spring is early or late, planting time may shift to the beginning or end of the month. The nighttime temperature should be above 10 degrees Celsius.
Potatoes can be planted using three schemes:
- Square-nestedThe bed is divided into squares, with a hole (nest) made in the center of each square for the potato plant. The distance between the holes is 50 to 70 cm.
- ChessThe holes are arranged like a honeycomb, meaning that each subsequent row should begin with a shift of half the distance between the bushes.
- Two-line (according to Mittlider)Two rows (lines) are dug, close together. Holes are made in each row approximately 30 cm apart. A gap of up to 1 m can be left between each line for access. The holes in the two adjacent rows should be staggered, as in the previous diagram. Comparison of planting patterns
Scheme Distance between holes Advantages Square-nested 50-70 cm Uniform distribution of plants Chess 50-70 cm Optimal use of space Two-line 30 cm Saving space
Square-nest method of planting potatoes
The checkerboard method of planting potatoes
Mittlider's two-row potato planting method
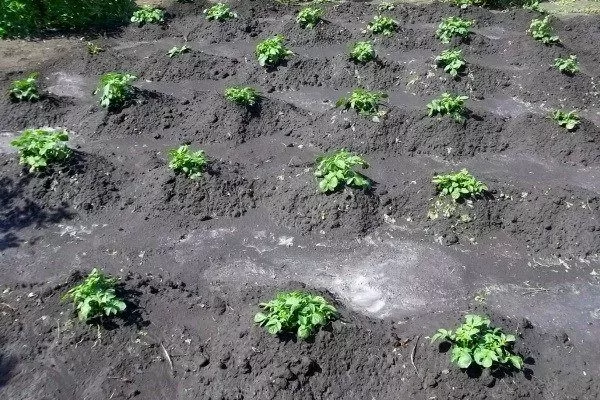
The bed should be positioned from south to north to achieve maximum illumination for the potatoes, as this will help them warm up and develop faster.
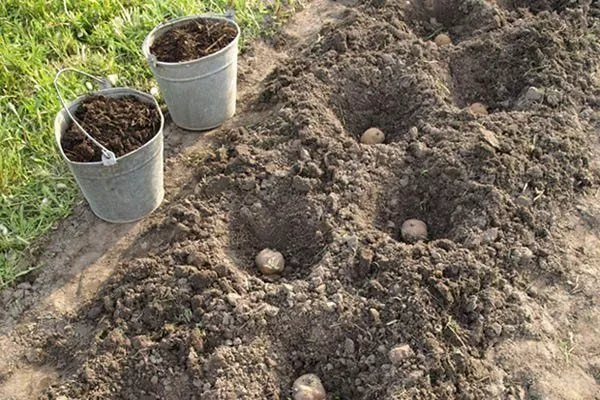
Regardless of the chosen scheme, potatoes should be planted under a shovel according to the following instructions:
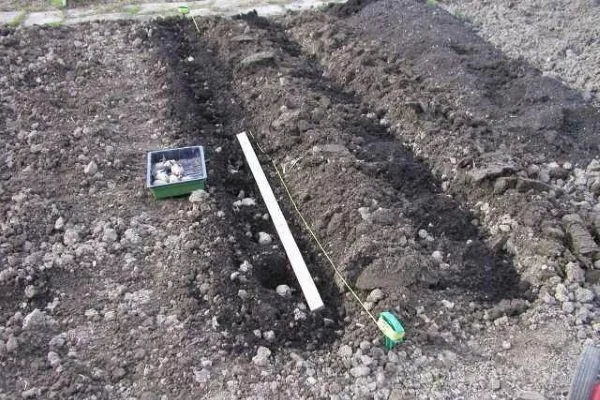
- Drive pegs into the ground and stretch a rope or cord between them to dig even rows.
- It's best to have at least two people planting: one to dig the hole, and the other to plant the potatoes. The optimal hole depth is 10-15 cm. First, add a handful of compost, then add the potato sprouts. Some gardeners resort to this trick: adding bush bean seeds along with the potatoes, as this not only enriches the soil but also increases the yield. When working with potatoes, be careful not to damage the sprouts.
- Use the soil dug for the next row to fill in the holes in the previous row. If you have a third helper, they can level the soil with a rake after planting, which will reduce moisture loss.
In general, it's recommended to maintain at least 50 cm between rows and 20 to 30 cm between holes to ensure each plant receives optimal nutritional coverage. Of course, the distance between rows and holes can be adjusted depending on the potato variety and soil fertility.
If you have large tubers, you can prepare deeper holes for them, and the optimal distance between them is from 25 to 35 cm.
Caring for potatoes
To get a good harvest, you need to take a competent approach to plant care, from watering to fertilizing.
- ✓ Watering during the growing season
- ✓ Regular loosening of the soil
- ✓ Hilling for tuber formation
- ✓ Fertilizing
Watering
The plant is watered during the growing season:
- When the first shoots appear. This usually occurs within a week after planting. Before this, watering is not required, as the tubers have sufficient moisture in the soil.
- At the budding stage.
- After flowering.
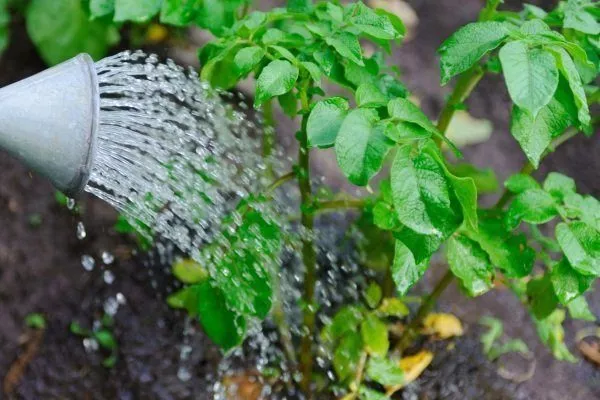
Potatoes are watered quite infrequently: once a week, and twice during dry periods. If sufficient rainfall occurs, watering can be discontinued. Watering should be stopped completely two weeks before harvest.
Under no circumstances should the plant be allowed to overwater, as the soil should remain slightly moist and loose.
Loosening
Ten days after planting potatoes, the first loosening of the soil should be done to remove excess moisture and prevent tuber rot. It's important to remove weeds, including their roots, as they thicken the soil, making it less breathable and more susceptible to infectious diseases. Furthermore, weeds hinder the full development of potatoes. Loosening should be done regularly.
Hilling
It is essential to carry out 1-2 hillings per season, as this ensures normal conditions for the formation of tubers – it helps get rid of the soil crust, saturates the soil with air, allowing the plant to “breathe,” and protects it from frost.
The first hilling is done after the potato tops reach 10 cm in height, and the second one is done a week later, when the tops reach about 40 cm. For manual hilling, use a long-handled hoe, a mattock, or a cultivator. When hilling, simply lift the soil upward toward the potato sprouts, gradually forming furrows.
Fertilizer
During the entire plant maturation period, it is enough to apply 2 additional fertilizers according to the following scheme:
- The first time - a month after planting.
- The second time, as soon as the potatoes bloom, the portion of fertilizer should be doubled.
- One month after planting
- During the flowering period
Before fertilizing, water the potatoes to prevent the root system from being burned by chemicals. Natural fertilizers are a good choice, as they allow for environmentally friendly vegetable production. Humus and wood ash, for example, are excellent fertilizers. However, it's important to remember that too much fertilizer can lead to excessive growth of the tops, which can damage the tubers.
To increase yields, you can cover the space between the rows of your garden with a layer of leaves or straw, as these wastes not only serve as excellent fertilizers, but also prevent moisture evaporation and weed growth.
Harvesting
Potatoes should be harvested in dry weather. Two weeks beforehand, it's recommended to mow down all the tops to prevent the plant from wasting energy on growing greens. This simple method can speed up the ripening of the roots and promote thickening of their skin. The harvested crop can be stored for about eight months, free from rot and infection.
Pros and cons of the method
Each method of planting potatoes has its own strengths and weaknesses, which are worth paying special attention to.
Pros:
- Planting potatoes with a shovel allows you to get a good harvest with minimal resource expenditure;
- potatoes grown using this method have high commercial qualities;
- The harvested crop can be stored for 8 months.
Cons:
- requires a lot of energy because it is a labor-intensive method;
- It is difficult to provide potatoes with the required amount of nutrients, light, moisture and air.
Video: Planting potatoes with a shovel
In the following video, a gardener will show how he plants potatoes in his garden:
Planting potatoes with a spade is a tried-and-true method for many gardeners, helping to yield a good harvest if all the recommendations above are followed. It's also important to water the plants regularly, weed, and hill them. To increase potato yield, it's important to consider fertilizing.