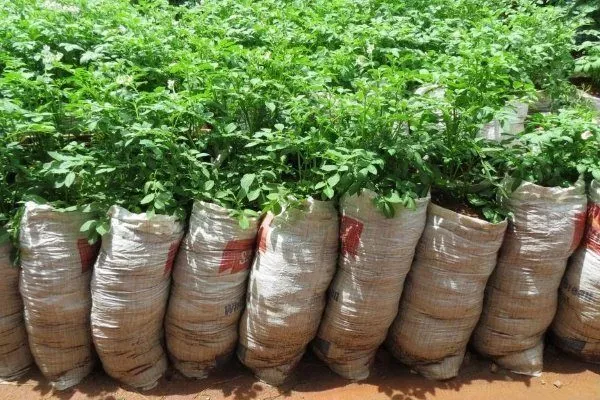
Potatoes can be grown in a regular bag with minimal space, time, and effort. This method is typically used by gardeners with limited space for future crops, poor soil, or unsuitable garden conditions such as waterlogged or rocky areas. What is the essence of this method and how to grow potatoes this way? Let's explore further.
The essence of the method
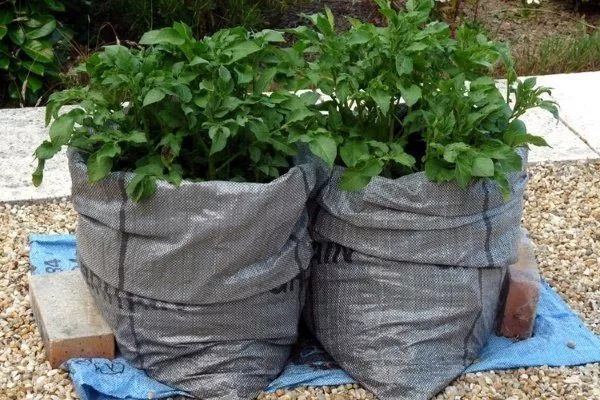
This method involves planting potatoes in bags, which are then used to grow the plants. It's typically used in small gardens or summer cottages with poor soil.
In this case, three key conditions for a good harvest are identified. They are as follows:
- provide the potatoes with a loose growing medium so that they can grow healthy and strong;
- water the plant generously;
- maintain good lighting.
Another important consideration in this method is the placement of the potato bags. They can be buried slightly in the ground or placed near a support. In any case, the plant should be well-lit, accessible for maintenance, and protected from roof runoff.
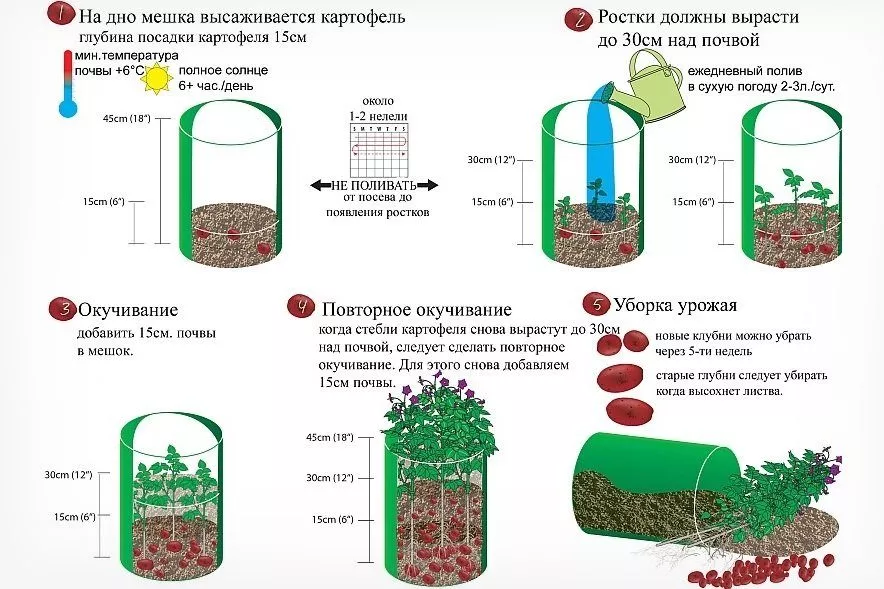
The implementation diagram for this method looks like this:
What bags to use?
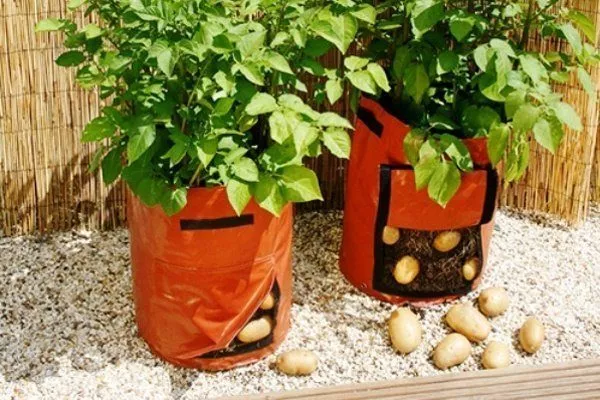
Planting containers come in a variety of shapes and sizes. Gardeners often use bags with pockets for harvesting potatoes, but regular bags made of synthetic fibers, such as those used for sugar or flour, are also suitable. The most important thing is that the container has holes to allow excess moisture to evaporate. Without them, there's a high risk of the tubers rotting during development.
The containers you choose should not be too deep, as the plant may not have enough moisture and strength to grow and produce new potatoes.
You shouldn't use regular garbage bags when planting potatoes, as they are less durable than their counterparts and may tear when caring for the potatoes.
Selecting a variety
Mid-early and early varieties are most suitable, as are mid-season potatoes, which are highly resistant to various diseases. Unlike later varieties, early varieties mature faster, reducing plant maintenance time.
Here are the most popular options:
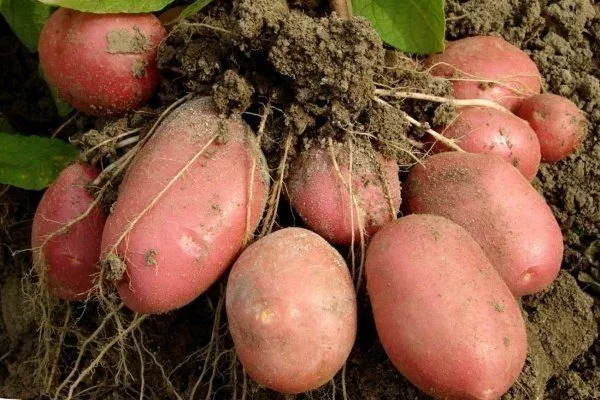
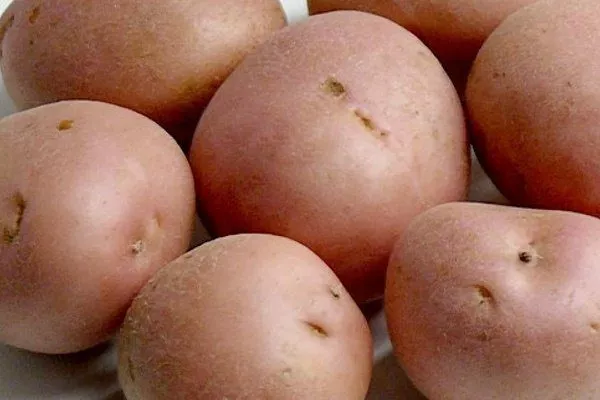
- Bellarosa is an ultra-early ripening variety of German selection that bears large, even pink tubers;
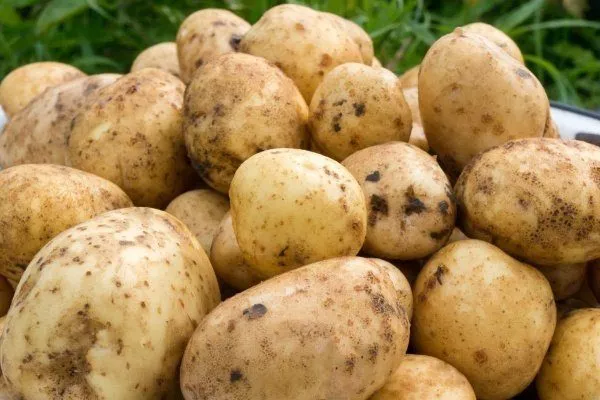
- Sante is a mid-early variety of Dutch selection that produces yellow root crops 2.5-3 months after planting;
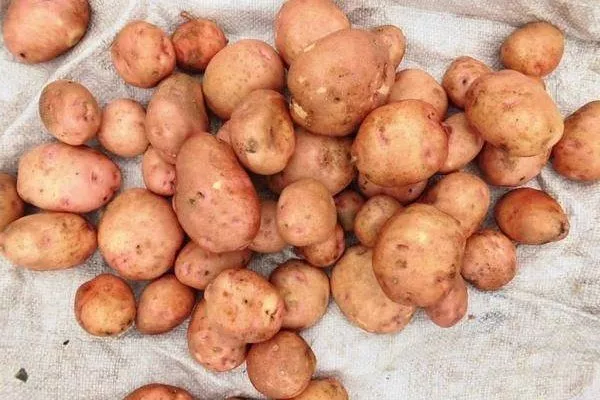
- Slavyanka is also a mid-early variety, but of Ukrainian selection, which ripens 3-3.5 months after planting;
- Povin is an early-ripening variety of Ukrainian selection, which ripens by mid-June – early August, the fruits weigh up to 200 g;
- Svitanok Kyivskiy is a mid-early variety bred in Kyiv that boasts excellent commercial qualities and high yields in all climates.
Many of the listed varieties allow you to get the first harvest by the end of May.
| Variety | Ripening period (days) | Yield (kg/bush) | Disease resistance |
|---|---|---|---|
| Bellarosa | 45-60 | 3-5 | High susceptibility to scab and late blight |
| Santa | 80-90 | 2.5-4 | Average to late blight |
| Slav | 90-110 | 3-4.5 | High susceptibility to viruses |
| Povin | 60-75 | 2.5-3.5 | Average to scab |
| Svitanok of Kyiv | 85-100 | 3.5-5 | Highly complex |
Early-ripening potato variety "Bellarosa"
Mid-early potato variety "Sante"
Potato variety "Slavyanka"
Early-ripening potato variety "Povin"
Mid-early potato variety "Svitanok Kyivsky"
Preparation of planting material
For sowing, select the strongest and healthiest tubers, disinfect them, and allow them to germinate. So, 2-3 weeks before planting, do the following:
- Press several peeled garlic cloves through a press and add cold water at a rate of 10 liters of water per 1 kg of garlic.
- Mix everything and leave for 2 hours.
- Soak the potatoes in the resulting infusion for 5 hours. It's important that the solution completely covers the potatoes.
- After treatment, place the tubers in a well-ventilated, bright area and leave them to germinate. The optimal temperature is 14 to 18 degrees Celsius. When sprouts 2-5 cm long appear, you can begin planting. Tubers that haven't sprouted should be discarded immediately, as they won't produce a good harvest.
Treating tubers with a garlic solution will protect the planting material from diseases and also stimulate plant growth.
Substrate preparation
Soil preparation should begin in the fall, but it's important to remember that soil previously used for growing nightshade crops, including tobacco, eggplant, tomatoes, peppers, and so on, is unsuitable. This is a necessary measure to protect the crop from late blight, as well as other diseases and their pathogens. Also, soil infested with mole crickets should be avoided.
Suitable soil must be weeded, steamed, or treated with chemicals to prevent weeds and pests from getting into the bags later, as they will be difficult to remove in a confined space.
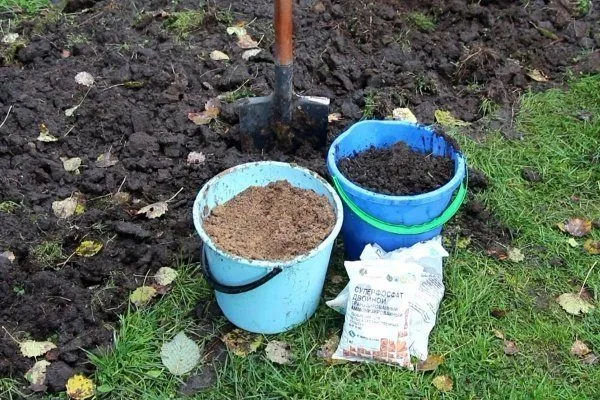
Potatoes grown in bags require more nutrients than tubers grown in open ground. Therefore, you should prepare one of the following soil mixtures:
- Garden soil and compost (humus)They are taken in equal parts. Fallen leaves, manure, sawdust, or wood shavings can be used as compost, and black soil, yellow sand, and a small amount of clay to retain moisture can be used for soil.
- Soil and fertilizersMix humus-rich soil with potassium and phosphorus fertilizers. To maintain optimal proportions, add 0.25 cups of complete fertilizer per bag (about 4 buckets of soil). It's important to note that if you're using pure humus from a manure or compost pile, you don't need to add minerals.
You can also use regular soil without adding humus or fertilizer, but in this case the yield will suffer significantly.
It's important to remember that when creating the soil mixture, special attention must be paid to its looseness and air permeability. To achieve this, before placing the soil in bags, sift it and remove any solid particles, weed roots, and pests such as wireworms and mole crickets. These simple steps will help you achieve beautiful, even root vegetables.
Planting time and technology
Potatoes should be planted when the weather becomes consistently warm. In many temperate regions, this time comes in late April or early May.
The planting of prepared tubers is carried out in the following order:
- Fill the bottom of the bag with loose soil mixture. Depending on the overall depth of the future bed, this layer can be 20 to 35 cm high.
- Place 4-5 potatoes or wedges with sprouted eyes on the surface of the soil.
- Cover the potatoes with soil mixture to a height of 15 cm.
- Water the plants lightly if necessary. Sprouts will appear in 8-15 days. When they reach 10-15 cm above the soil, add more soil mixture to encourage the formation of additional lateral roots, which will support new tubers. Only the tops of the shoots should remain above the soil surface.
- Continue sprinkling the seedlings until one third of the total height remains to the top edge of the bag.
How to care?
To get a good potato harvest, you need to properly care for your plantings. To do this, pay attention to the following:
- Arrangement of bagsThey should be located on the sunny side of the plot, as this will ensure good warmth of the plants and promote faster germination. The bags can be stored under the walls of a building, along paths, between trees, or in flower beds. Another option is to place them around the perimeter of the plot if you don't plan to plant anything. The most important thing is to ensure their stability so they don't tip over. If there is no support, the containers should be lightly buried. Never store the bags in deep shade or under a gutter.
- 2 weeks after germination: 10 g of ammonium nitrate per 10 liters of water
- In the budding phase: 15 g of potassium sulfate + 20 g of superphosphate per 10 l
- After flowering: 30 g of superphosphate per 10 l (for filling tubers)
Feeding schedule
It is better if the covering under the plant is able to absorb excess moisture that runs off after watering.
- WateringMoisture evaporates very quickly in bags, so potatoes require abundant and frequent watering, especially during flowering, when the first tubers appear. Of course, overwatering is also important, as this will negatively impact the yield. There's no need to water the plants until the first shoots appear. After sprouting, wait 3-4 days before watering. The recommended daily watering rate is 2-3 liters, but only in dry weather.
- ✓ Moisture control: the soil should be moist at a depth of 10 cm
- ✓ Water temperature for irrigation: not lower than +15°C
- ✓ Watering time: early morning or evening after 6:00 pm
- ✓ Water consumption in hot weather: up to 5 liters per bag every 2 days
- ✓ Sign of overwatering: the appearance of midges at the surface
- Top dressingPotassium and phosphorus fertilizers should be applied once per season to maintain yield and tuber quality. These fertilizers should be diluted according to the instructions and applied in liquid form at a rate of 1 liter per plant. However, excessive nitrates and nitrogen should be avoided, as they inhibit tuber growth and reduce their quality.
- Make a pocket flap at the bottom of the bag.This will significantly facilitate the removal of tubers and provide additional ventilation for the root system. Its advantage is that you can remove the ripe potatoes at the bottom without disturbing the top layer, where the tubers are still younger and smaller.
Harvesting
Typically, it is produced in the second half of August in two ways:
- Turn the bag on its side and pour the potatoes out.
- If the bags had pockets, open them and remove the potatoes. Of course, if you don't plan to use the bags anymore, you can simply cut them open and easily pour out the potatoes.
Experienced gardeners can harvest up to 5 kg of potatoes from one “bed”.
Thus, from 5 planted tubers you can get about 10 kg of harvest.
After harvesting, the whole bags can be folded and reused next year.
Recommendations and nuances
Additionally, the following points should be taken into account:
- Unlike the classical method, this method requires more frequent and abundant watering.
- Throughout the plant's growth, cover the bush with soil, leaving only the top leaves exposed. This will help develop a strong root system, from which new potatoes will begin to grow.
- The largest potatoes will grow at the bottom of the bag. The closer to the surface, the younger the tubers. This is because the bag initially grows from the tubers planted closer to the bottom.
- If the container is made of thick fabric, it's a good idea to make a few small cuts in the bottom and sides before planting. This will allow excess moisture to evaporate, preventing the potatoes from rotting.
- After harvesting, the soil loses all its beneficial properties and cannot be reused. It should be spread over the garden bed as mulch.
Pros and cons
Growing potatoes in bags is a container planting method that has its advantages and disadvantages. We'll discuss them below.
What is the power?
- significant space savings, because a bag of potatoes can be kept both on the path and near the house, the main thing is to provide good lighting;
- easy to care for, as container potatoes do not need to be hilled up; you just need to add soil as the plant grows;
- there is no need to weed, because they will have nowhere to come from in a closed space;
- complete protection against the Colorado potato beetle, late blight and wireworm, which must be combated when planting tubers in open ground;
- minimal risk of rot, since water does not stagnate in the bag, and the soil warms up perfectly;
- quick harvesting, as the potatoes do not need to be dug up; simply turn over or cut the bag to collect dry and clean potatoes.
What's wrong?
- quick drying of soil in bags;
- the need to use a large amount of nutrient soil or prepare a soil mixture;
- The bushes ripen quite quickly, so it is extremely important to maintain all the conditions for the formation of full-fledged tubers.
Video: Yield Assessment
The following video clearly demonstrates the yield that can be obtained using this potato planting method:
With proper cultivation techniques and proper plant care, you can harvest an excellent crop by the end of the summer season even in very limited space. This isn't just empty talk, as 4-5 plantings can yield up to 5 kg of vegetables.