To be sure of the quality of your garlic, it's best to grow it yourself and enjoy its flavor, knowing it's free of any harmful additives. To ensure a bountiful harvest of your own garlic, you need to know a few tricks.
Spring garlic can be stored for a long time, right up until the next harvest.
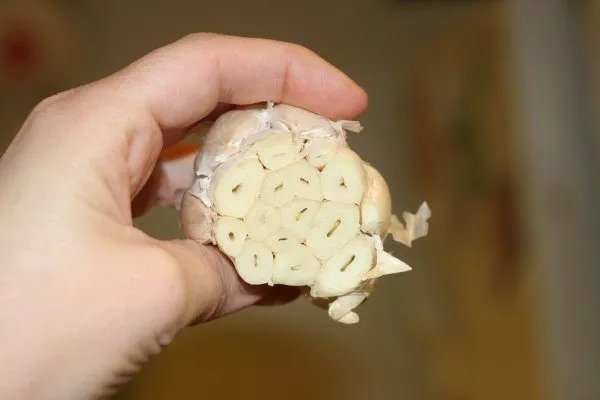
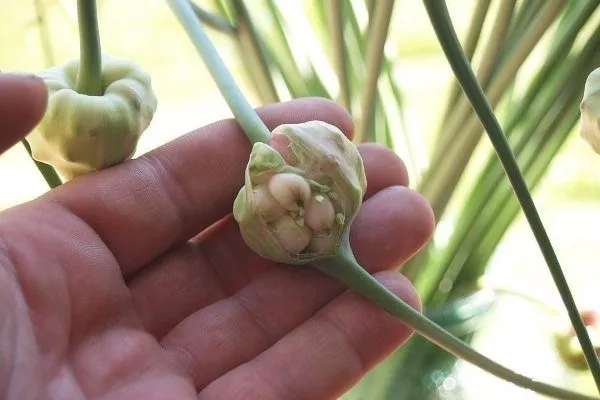
Spring garlic cross-section: the cloves are small and numerous. The garlic does not produce shoots.
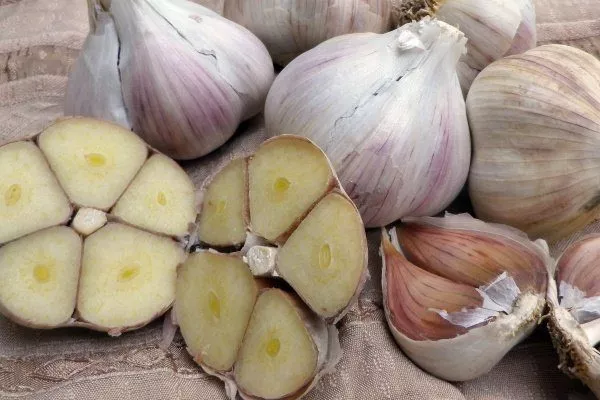
Winter garlic cross-section: large cloves on a stem. Yields are good, but the storage life is short.
What is the difference between spring and winter garlic?
There are two types of garlic: spring and winter. Spring garlic is planted in the spring, in late April or early May, while winter garlic, on the other hand, is sown in late fall. Spring garlic is more difficult to grow and requires more care, but it is more nutritious. In Japan, for example, residents eat only this type of garlic.
Harvested spring garlic keeps much better than winter garlic. It can even be stored until the next harvest, allowing you to have your own healthy, home-grown garlic year-round. Winter garlic, on the other hand, dries out within just a couple of months, even when stored properly.
| Criterion | Spring garlic | Winter garlic |
|---|---|---|
| Planting time | April-May | October-November |
| Storage | Up to 12 months | 2-4 months |
| Number of cloves | 12-20 | 4-10 |
| Disease resistance | Higher | Below |
| Productivity | 0.5-1 kg/m² | 1-1.5 kg/m² |
Choosing a location
Selecting the right location is crucial for growing high-quality garlic. One of the most important criteria is the type of plants present in the area where you plan to plant garlic.
So, it's best to plant it in soil after legumes, cabbage, pumpkin, or grain crops. In such soil, garlic will be enriched with the nutrients left behind by these crops, allowing it to grow faster and produce a larger harvest.
We don't recommend planting vegetables in the same spot they grew in last year. You need to change the location each time to ensure the plant receives enough nutrients from the soil and thrives.
The worst predecessors of spring garlic are potatoes, tomatoes and onions.
Avoid sowing garlic in areas previously occupied by other varieties. Since it won't receive all the vitamins it needs for growth, it will grow more slowly and remain small and tasteless.
If you choose a shaded area for garlic, you will get a lot of greenery, and a sunny place will produce large and juicy heads of the vegetable.
Timing of sowing garlic
Spring varieties need to be planted at the right time to ensure a high-quality and tasty product. Early spring is the best time for this.
You should start planting garlic when the air temperature reaches around 6 degrees Celsius. If you plant when it's already too warm outside, the harvest will be very small.
The planting period also depends on the location. The colder the region, the later the vegetable should be planted. However, it's important to pay attention to not only the air temperature but also the soil temperature. Planting can begin when the soil temperature reaches 3°C (37°F). This is sufficient for the vegetable's growth and development, as it's relatively easy to grow. However, if the soil temperature is 8°C (45°F), garlic will grow even better and develop more vigorously.
At soil temperatures around 16°C, the harvest will be small and of poor quality. Also, planting garlic too late will reduce its shelf life. Therefore, it's important not to plant too late, but also not too early.
Soil preparation
Six weeks before sowing, the soil should be dug over. The day before planting the cloves, the soil should be dug over again, as well as the top layer should be loosened and leveled, and all weeds should be removed. Fertilizing the soil is also necessary. The choice of fertilizer depends on the soil type in the area:
- If the soil is clayey, mix 6 kilograms of humus and peat, 10 kilograms of river sand, 2 tablespoons of superphosphate and 1 teaspoon of urea.
- For loamy type For each square meter you need 4 kg of humus mixed with a teaspoon of urea and 2 tablespoons of superphosphate.
- If the site has peaty soil, then for each square meter it is necessary to add a mixture of 6 kg of humus with 10 kilograms of river sand, a teaspoon of urea and two tablespoons of superphosphate.
- If the soil is sandy loam, then prepare a mixture of clay soil and humus in a 2:1 ratio.
Do not bury the fertilizer too deeply so that the plant roots can reach it later.
Preparation of planting material
The heads you will be planting can be stored in two ways before planting:
- cold storage;
- warm.
With the first option, the bulbs are stored at +3°C. With the second, the temperature reaches +20°C. Warm storage accelerates the harvest by about a month. However, if you choose this method, the garlic needs additional preparation for planting. To do this, place it in a place with a temperature of 2-3°C for three to four weeks.
Before planting, the heads should be specially treated. To do this, separate the garlic cloves and keep only the medium and large ones. Remove the small ones completely, as they are not suitable for planting. Then, peel the suitable cloves.
To increase the yield, experts recommend soaking the prepared cloves in plain water for 2 to 2.5 hours. Then, wrap them in a damp cloth, place them in a plastic bag, and refrigerate for a couple of days. After this time, the garlic should begin to develop roots.
In addition to this procedure, you can soak the teeth in a solution of nitroammophoska (five grams per ten liters of water) for about 7 hours.
- ✓ Calibration of teeth (min. weight 3 g)
- ✓ Disinfection in potassium permanganate (1%, 30 min)
- ✓ Stimulation of root formation (Epin, 2 drops/l)
- ✓ Drying before planting (2-3 hours)
- ✓ Check for fungal infections
Landing
There are several types of planting material, each of which will yield a harvest after planting and growing:
With teeth
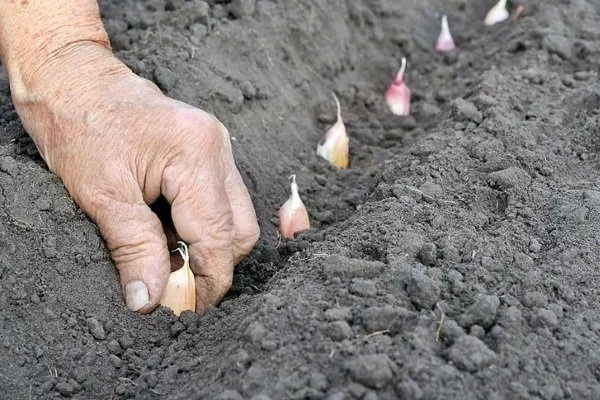
To plant garlic in the spring using a head, you should follow several rules:
- The distance between rows should be about 25 cm. Place the garlic in the furrows.
- There should be about 10 cm of free space between the teeth.
- The planting depth is 6 cm; the garlic cloves should be placed straight upright, without tilting.
- Immediately after planting the garlic, you need to mulch the beds. Straw and wood shavings are suitable for this.
- For a good harvest and development of vegetables, you need to water and feed them.
- Day 1-3: Soil Preparation
- Day 4: Planting at 10cm intervals
- Day 5-7: First watering (10 l/m²)
- Day 14: Loosening the row spacing
- Day 21: Application of ammonium nitrate (15 g/m²)
Work schedule
Planting with bulblets
The bulblets are called garlic seeds. Planting them this way guarantees a good, healthy harvest.
This method takes about two years. However, it's likely you'll get small heads of garlic with one clove in the first year.
Before planting, wrap the bulblets in newspaper and store them in a dark place at a temperature of approximately 20°C (68°F). A month and a half before planting (planting is done in the spring), move the bulblets to a cool place: you can place them in the refrigerator or wrap them in a cloth and place them in snow. Just before planting, remove them, dry them, air them out, and soak them in a weak solution of potassium permanganate for a couple of hours to remove any harmful bacteria.
When planting garlic this way, plant it at a depth of approximately 4 cm, with 15 cm between each bulb. After planting, fill each hole with soil and level the soil. It's also a good idea to mulch the top with straw or dry grass, as with planting cloves.
Post-planting care
This variety of garlic doesn't require much care. It only requires regular watering, loosening the soil, removing weeds, and fertilizing.
Until the garlic bulbs appear, water generously, then reduce the amount. During rainy periods and 14 days before harvesting, avoid watering.
The soil should be loosened to prevent weeds from appearing and to remove the dried layer of soil that prevents water from reaching the garlic roots.
| Period | Watering frequency | Water standard |
|---|---|---|
| May-June | 2 times a week | 12 l/m² |
| July | Once every 10 days | 8 l/m² |
| August | Stop it | — |
Garlic also needs to be fertilized every 10 days during the growing season. Fertilizers containing potassium and phosphorus are recommended during this time. During clove formation, the garlic should be fed with an infusion of mullein or manure: 1 kg per 10 liters of water, steep for 4 days, and then add the same amount of water.
Common mistakes
The most common mistakes when sowing include:
- Incorrect sowing time. Garlic should be planted as soon as the snow melts, before the soil warms up. Delaying sowing will reduce the yield by half.
- Incorrect location. Spring garlic is adversely affected by temperature fluctuations, so it should be planted in a sunny location and avoid drafts. Planting garlic in a low-lying area is also a bad idea, as water will stagnate there.
- Avoid buying planting material from the store, as you don't know how long ago it was harvested or how it was stored. In this case, you can't be sure you'll get a good harvest of delicious garlic.
- Do not use small cloves for planting.
Learn the secrets and subtleties of spring garlic planting in this video – what kind of planting material to use, when to plant it, and how to do it correctly:
Planting spring garlic is quite simple, and caring for it is straightforward. Simply follow the planting guidelines and take note of a few tricks, and you'll reap a bountiful harvest of delicious spring garlic. This means you'll have vitamins on your table year-round.