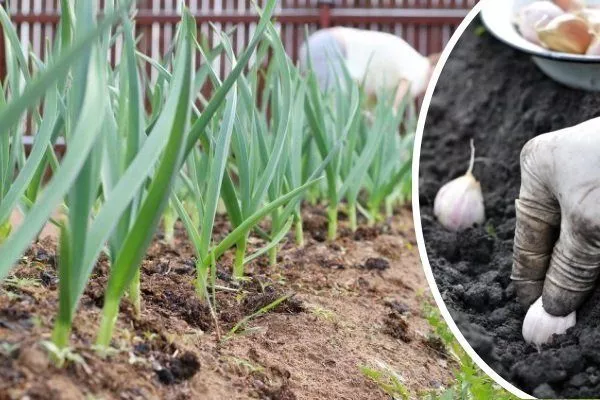
Winter garlic differs from spring garlic in its planting time and early ripening. Its vigorous spring growth allows it to quickly form large heads of garlic, which gardeners use for immediate needs. Let's learn how to properly plant and grow winter garlic.
Features of winter garlic
The crop is planted in open ground in the fall. Having established its roots in the fall and successfully survived the winter, the plant grows vigorously in the spring. The development of the winter crop is facilitated by moisture stored after the snowmelt.
Biological and agronomic characteristics of winter garlic:
- high adaptability to various climatic conditions;
- high winter hardiness;
- roots germinate at 0 °C, and at 3-5 °C they grow intensively;
- demanding of moisture, especially during the period of leaf growth;
- root length – 10-20 cm;
- increased demands on soil fertility, the best option is light, slightly acidic and well-fertilized soils, sandy loam or loamy;
- the desired soil acidity is neutral or close to it;
- Garlic cannot be grown in the same place for years; it can only be planted again in the same place after 3-4 years.
- ✓ The soil pH level should be strictly within 6.0-6.5 for optimal nutrient absorption.
- ✓ The soil must have good drainage to avoid water stagnation and root rot.
Winter garlic is a bulbous plant whose leaves and head repel pests such as slugs, caterpillars, borers, and even moles.
Which winter garlic variety should I choose?
The main drawback of winter garlic is its poor shelf life. Among the abundance of winter garlic varieties, gardeners have long identified several favorites. The choice of variety depends primarily on yield, size, and flavor of the bulbs. Table 1 lists popular winter garlic varieties.
Table 1
| Name | Brief description |
| Komsomolets | Produces flower stalks. The number of cloves per head ranges from 6 to 13. The husk is pinkish. High frost resistance. |
| Local Danilovsky | An undemanding variety. Each head contains 6 to 11 cloves. |
| Gribovsky 60 | Produces flower stalks. There are up to 11 cloves per bulb. The cloves are large. An early ripening variety. The flavor is pungent. |
| Otradnensky | Tolerates low temperatures well. Excellent flavor. The stalks should be picked promptly to avoid losing the harvest. The husk is pink with a purple tint. There are 4-6 cloves per head. |
| Jubilee Gribovsky | A mid-late variety. Each head weighs up to 80 g. The husk is purple. Each head contains 10-12 cloves. It produces stems. |
| Anniversary 07 | A mid-season, high-yielding variety. The heads are flat-round and white. Weight: 80 g. |
You can read more about these and other varieties of winter garlic in next article.
Landing time
Winter garlic is planted in late autumn. This should be done before the onset of slush and frost. Planting times depend on the specific climate of the region, ranging from mid-September to late October. In southern regions, garlic can be planted as late as November, but in the north, it's best to finish planting earlier—in early autumn.
To avoid planting mistakes, consider your local climate. Find out when the ground freezes for the first time. Garlic should be planted 3-4 weeks before this period. During the remaining time before frost, the cloves or bulblets will root but not germinate.
The gardener explains how to grow winter garlic in detail in his video below:
Choosing a location
Winter garlic is grown in all regions of the Russian Federation, including the north. It is frost-resistant, so it easily survives winter temperatures.
Features of choosing a site for winter garlic:
- Good lighting.
- Waterlogged or swampy soils are unsuitable, as garlic will rot in them. Preference is given to elevated areas to prevent flooding from meltwater or rainwater.
- Favorable predecessors are legumes, pumpkins, and greens.
- The best soils are fertile sandy loams and loams.
- The best neighbors are berry crops. Garlic is planted near raspberries, strawberries, and gooseberries, as well as near flowers—it grows well alongside roses, tulips, daffodils, and gladioli.
Crop rotation rules
To ensure winter garlic doesn't get sick and produces high yields, consider crop rotation rules:
- The best predecessors are green manure crops. Garlic is recommended to be planted after beans, oats, buckwheat, alfalfa, clover, mustard, and legumes. Among vegetables, favorable predecessors include cabbage, early potatoes, tomatoes, beets, peppers, and carrots. Sites where pumpkins were grown are considered favorable for growth.
- Crops from the onion family, susceptible to the same diseases as winter garlic, are considered unfavorable predecessors. In addition to onions and garlic, these also include bulbous flowers.
Preparing for planting winter garlic
The agrotechnical cycle of growing winter garlic begins with the preparation of beds and planting material.
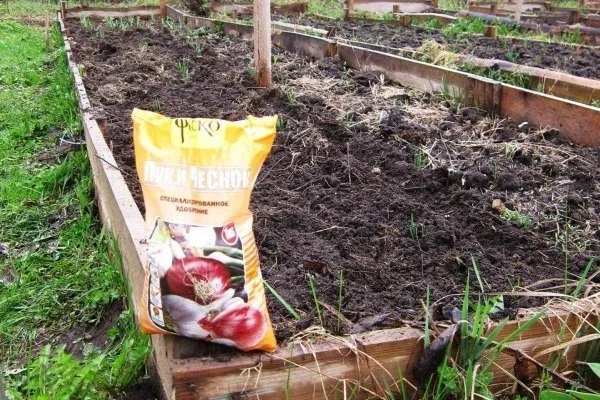
Beds for garlic
The procedure for preparing the beds:
- The beds are prepared a month and a half before planting or in the summer.
- If the soil is heavy and clayey, add river sand, sawdust, and compost. Ultra-light sandy soils, on the other hand, require additional weight, adding clay soil, compost, and humus. If the soil is highly acidic, alkalize it beforehand by adding slaked lime, bone meal, or dolomite.
- Avoid adding fresh organic matter, as it contains a lot of ammonia. Nitrogen, while stimulating leaf growth, will doom the garlic to winter death. It's best to fertilize the beds with peat-manure compost or rotted cow manure. Apply 1-4 buckets per square meter. Dig the soil with the organic matter to the depth of a spade.
- Fertilize the plantings with superphosphate (30-40 g per 1 sq. m) and potassium salt (10-25 g per 1 sq. m). Soot or ash can be used instead of phosphorus-potassium fertilizers – 0.5-1 liter per 1 sq. m of the bed.
| Fertilizer type | Impact on yield | Recommended dosage |
|---|---|---|
| Ash | Increases by 15-20% | 0.5-1 l/sq.m |
| Superphosphate | Increases by 10-15% | 30-40 g/m2 |
Winter garlic beds should be placed in sunny locations and oriented north to south. Before planting, the soil in the dug beds should settle.
Planting material
First, the planting material is hardened off. To do this, the selected bulbs are kept in a cool place (3-5°C) for 2-3 weeks. The subsequent preparation process depends on the type of planting material. There are two options for planting winter garlic:
- With teeth. The garlic is separated into cloves, and each one is carefully inspected. When separating the heads into cloves, it is important not to damage the skin. All small, diseased, or damaged cloves are discarded. Deformed cloves or those with cracks at the base are not suitable. The selected material is disinfected:
- In ash lye. To prepare the solution, add 400 g of ash to 2 liters of water. Boil the solution for half an hour, cool, and soak the cloves in it for 2 hours.
- In a solution of potassium permanganate (medium pink color) or 1% copper sulfate. Soaking time: 15 minutes.
- Bulbs. They do not require treatment before planting - they do not contain any infections or pest larvae.
- Two weeks before planting, calibrate the cloves, selecting only those with a diameter greater than 12 mm.
- One week before planting, treat the selected cloves with a biofungicide to prevent fungal diseases.
For planting, take cloves with a diameter of at least 10 mm.
Step-by-step planting instructions
Hardened and disinfected teeth are planted in the following order:
- The beds are loosened with a rake and furrows are made. The distance between adjacent furrows is 20-25 cm. The depth is 6-8 cm.
- The cloves are spaced 6-8 cm apart in the furrows. They are placed vertically, either upside down or on their sides. The bulblets are planted more closely, leaving only 15 cm between the furrows and 2-3 cm between the bulblets themselves. They are planted 3-5 cm deep.
- The planting is watered and covered with a layer of mulch. Use compost, rotted straw, peat, humus, or sawdust, 3-4 cm thick. Mulching enriches the soil with humus and mineral salts and provides additional insulation for the planting. Read more about soil mulching. here.
- In areas with winter temperatures below -25°C, it's advisable to re-insulate the plantings by laying spruce branches or branches on top. This cover will promote snow accumulation, which will provide additional insulation.
Care and cultivation
Winter garlic care begins in early spring and continues until harvest. In northern regions, garlic ripens in the last ten days of July; in other regions, it ripens earlier.
In the spring
Caring for winter garlic in spring:
- As soon as the snow melts, remove any spruce branches or branches used for cover. The fine organic mulch layer doesn't need to be removed—green shoots will soon emerge from underneath. Winter garlic is the first greenery in the garden. The shoots emerge in March-April.
- When the greens appear, the garlic is fertilized with nitrogen. Two weeks after germination, the plants are watered with a solution of urea, ammonium nitrate, or nitroammophoska (20 g per 10 liters). Fertilize again after two weeks.
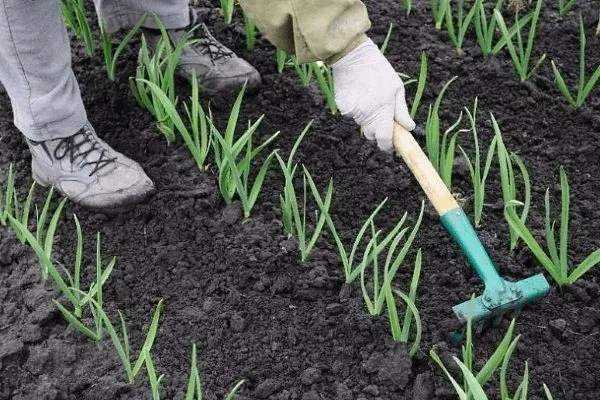
- During the growing season, the beds are regularly weeded and loosened to a depth of 3 cm.
- Water the plantings every 5-7 days.
In summer
Care for winter garlic continues during the summer period:
- In June, a third feeding is carried out to support the plants as they develop heads. Phosphorus and potassium are added by watering the beds with an ash solution. This is prepared by steeping a cup of ash in a bucket of water for three days. You can also add a solution of monopotassium phosphate (20 g per 10 liters), superphosphate (25 g per 10 liters), or potassium nitrate (15 g per 10 liters).
- Garlic plants continue to be watered in summer with the same frequency as in spring. In hot weather, watering frequency increases. Watering is stopped three weeks before harvest.
- After each watering, it is advisable to loosen the soil.
- When the stalks reach 15 cm in length (for garlic varieties that bolt), they are broken off. This is necessary to prevent nutrients from being wasted on the flower stalks.
What pests might you encounter?
The most dangerous diseases of winter garlic are rot and rust. Bacterial infections typically affect garlic during storage and then enter the soil with the planting material. Table 2 lists common winter garlic diseases and their control methods.
Table 2
| Pests/diseases | Damage/symptoms | How to fight? |
| Penicillium rot of the bottom | The leaves turn yellow and then die. | In case of penicillium wilt, harvest when the garlic is fully cooked. When trimming, leave the neck longer – about 10 cm. Dry the heads thoroughly. Store at a humidity level of no more than 75%.
Please note! Garlic leaves can turn yellow for other reasons as well, which are discussed below. HereThen the methods of combating this phenomenon will be different. |
| Rust
| Rusty spots appear on the leaves. | Spray the planting with fungicides such as Oxychom 0.4%, Ridomil 0.2%, or other fungicides. Repeat the treatment 2-3 times at intervals of 1-2 weeks. |
| Downy mildew | Gray spots appear on shoots and inflorescences. | The plant should be fertilized regularly. For prevention, plant calendula near the beds. Treat with Ridomil. |
| Stem nematode | These 1.5 mm long thread-like worms feed on plant sap. They can completely destroy a plant. Streaks appear on the leaves, the leaves dry out and die, and a rotten smell develops. | Spray Calypso according to the instructions for the preparation. |
| Onion fly | Fly larvae damage garlic feathers, slowing growth and yield. | Spray with a solution of shag (250 g) and hot pepper (1 tbsp). Pour 2 liters of hot water over the ingredients. Let it steep for three days. Strain, bring the volume to 10 liters, and add 30 g of liquid soap. |
Cleaning and storage
To ensure healthy, shelf-stable garlic, it's important to harvest it on time. If the bulbs are left in the ground for too long, they will lose their marketable quality—the outer scales will begin to crack.
Harvesting procedure:
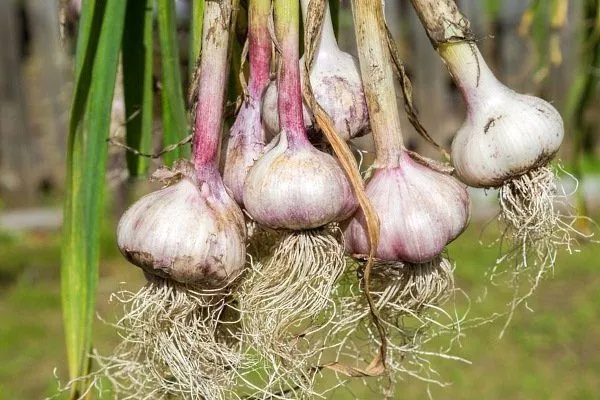
- Begin digging up the harvest as soon as the lower leaves turn yellow and the tops fall over en masse. Harvest garlic in dry weather. Dig up and pull the stalks out of the ground.
- Don't harvest the dug garlic immediately—it needs to sit in the garden for a few days to dry in the sun. The garlic dries along with the stems. If it rains, you'll need to move the harvest under cover, where it will dry for about five days.
- Trim the stems of the dried garlic. The stubs should be 4-7 cm long. Dry the heads in a well-ventilated area or under a canopy.
Read the article about When and how to harvest winter garlic from the garden.
If you're storing garlic in braids, don't trim the stems. If you're storing it in bunches, leave the stems at least 20 cm long.
To determine when garlic is ripe, leave a couple of scapes on the bolting varieties. When cracks appear on the spherical inflorescences, you can safely pull the garlic.
Properly harvested and dried garlic stores well—it doesn't spoil or rot. It can be kept under cover until the coldest weather arrives, after which it's transferred to baskets. The optimal storage temperature is 2-4°C.
Reviews
Growing winter garlic requires little care or investment, making it a profitable venture even for beginning farmers. This undemanding and frost-resistant crop can be grown in the northernmost regions.