Komsomolets garlic is a winter variety with excellent agronomic characteristics. Its low maintenance, combined with winter planting, allows for abundant garlic harvests as early as June and July. Experts consider Komsomolets one of the best winter varieties.
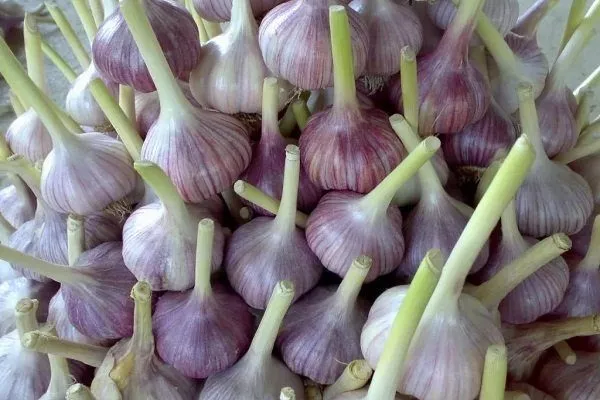
The Komsomolets variety is particularly fruitful.
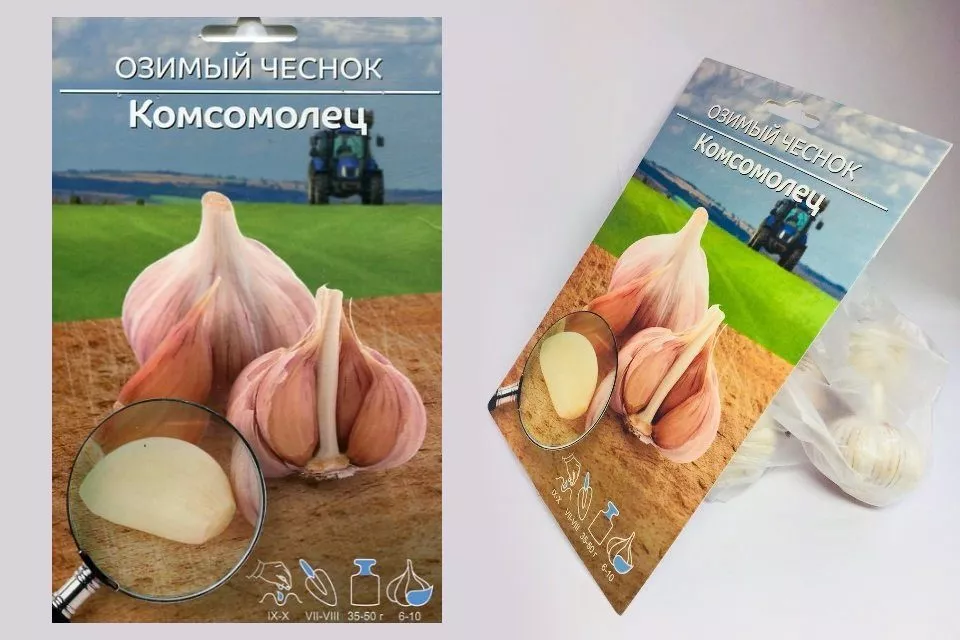
The unpretentious, easy-to-care-for garlic variety "Komsomolets"
"Komsomolets" is one of the best varieties of winter garlic.

The origin of Komsomolets
The history of the Komsomolets variety begins in the 1960s. Its creators, breeders from Voronezh, sought to create a particularly winter-hardy garlic specifically for the Central Black Earth Region. The variety has been officially bred and zoned since 1978. Through breeding using local winter-hardy crops, they developed a low-maintenance winter garlic with a resonant name for its time: "Komsomolets." Over time, this variety from the Central Black Earth Region spread throughout Russia.
Description and characteristics of the variety
Description of the culture:
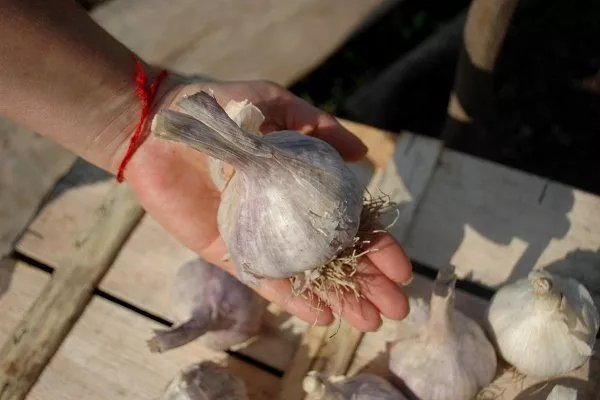
- Underground part. The head is large, flattened and rounded, covered in dirty white scales. The inner scales are coffee-purple. The cloves are sharp, with a rich garlic flavor, free of any aftertaste.
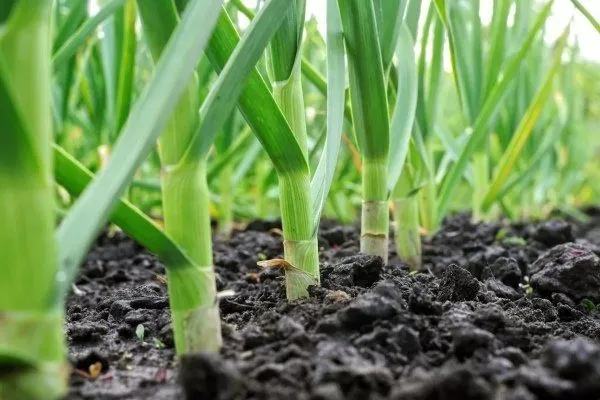
- Ground part. The dense stem consists of 8-9 green leaves with a waxy surface. The leaves are up to 40 cm long and very juicy with a pleasant taste.
- Inflorescences. The plant produces shoots 80-120 cm long. At the top are hundreds of small bulbs.
Agrotechnical characteristics of Komsomolets garlic:
| Characteristics | Parameters |
| Ripening time | mid-season |
| Growing season, days | 100-120 |
| Weight of heads, g | 30-100 |
| Number of cloves in a head, pcs. | 6-12 |
| Yield, kg/sq.m | 1.2-1.4 |
Advantages and disadvantages of the variety
Advantages of the Komsomolets variety:
- High frost resistance.
- Immunity to diseases, especially bacterial rot.
- Easy care.
- High yield.
- Good shelf life.
- Delicious in any form – fresh or processed.
Flaws:
- Prone to bolting.
- The yield is highly dependent on soil fertility.
Where to plant garlic?
The "Komsomolets" variety produces high yields when planted under certain conditions. The following planting site requirements apply:
- Good lighting. In partial shade, the heads grow small and contain little essential oil.
- Moderate humidity. The variety gets sick if overwatered. The area should be kept free of standing water.
- Loose loamy or sandy loam soils. The drainage properties of heavy soils are improved by adding peat or river sand.
- Fertility. This variety requires nutritious, well-fertilized soil. When digging, be sure to add humus/compost and mineral fertilizers.
- Crop rotation. Favorable predecessors are zucchini, cucumbers, cabbage, and legumes. Unfavorable predecessors are onions, potatoes, and tomatoes.
Rules and stages of planting
Garlic is planted in October to allow time for rooting before the first frost sets in. In central regions, it is recommended to plant garlic in the second half of October. The exact planting time depends on the region's climate and current weather. In regions with particularly cold winters, planting begins earlier—in mid- to late September.
Planting stages:
- Preparation of seed material. Garlic yield depends on the quality of the seeds. Damaged or spoiled specimens are discarded from the seed material. Seeds must be disinfected in solutions:
- salts;
- manganese;
- copper sulfate.
Criteria for selecting seed material- ✓ The teeth should be approximately the same size, without signs of disease or damage.
- ✓ Preference should be given to cloves with tightly fitting scales, which indicates their maturity.
- Site preparation. Dig the soil, adding compost and complex mineral fertilizers. If necessary, peat or sand is added if the soil is heavy.
- Planting cloves/bulbs. The planting pattern depends on the type of seed:
- Teeth. Between adjacent cloves – 10 cm. Depth – 5-6 cm.
- Bulbs. Between adjacent bulbs – 6-8 cm. Depth – 2-3 cm.
The distance between rows is the same for any propagation method – 25-35 cm. The planted material is lightly covered with soil and compacted by hand.
- Mulching. Immediately after planting, the beds are covered with mulch—sawdust, peat, or rotted manure. Mulch will help the garlic survive the winter without damage.
By sprinkling the beds with mulch, you can forget about planting until spring – all other agricultural activities begin with its arrival.
How to properly care for garlic?
Features of caring for winter garlic Komsomolets:
- Watering. Watering should be moderate. Don't overwater the garlic, but don't let it dry out either. Watering should be stopped a month before harvesting.
- Loosening. The soil is carefully loosened after watering, while simultaneously removing weeds.
- Cutting off arrows. To make the heads grow larger, the shoots are broken off when they reach 10-15 cm.
- Top dressing. Fertilizer is applied 2-3 times per season, during watering. The optimal fertilizer for garlic is ammophoska (15 g per 1 sq. m) or liquid mullein.
Methods of reproduction
Garlic is propagated by:
- With teeth. The distance between adjacent cloves is 10 cm. The planting depth is 4-6 cm. The distance between adjacent rows is 30-35 cm. When propagated by cloves, the harvest is obtained the following summer.
- With bulbs. These are aerial seeds that grow on a stalk. This planting method allows you to renew the variety, as constant propagation by cloves gradually degrades it. About 100 g of bulblets are planted per square meter.
Given the fertility of the Komsomolets variety, propagation by bulblets is particularly attractive. Several hundred aerial bulblets grow on each stem. Leaving 5-6 stems in a bed is enough to yield about 1,000 units of seed. However, with this propagation method, you have to wait two years for a harvest—the following summer, you only get single-clove bulblets, which are then planted again. These bulblets then grow into large, high-quality garlic heads with several cloves. This method is time-consuming but inexpensive, and most importantly, it renews the seed supply.

Pests and their control
Garlic, while being a protector for many plants from diseases and pests, can also fall victim to insects, fungi and viruses.
Methods of combating garlic pests and diseases
| Pests and diseases | Symptoms of damage | How to fight? |
| Aphid | Small insects form colonies on young garlic leaves. By sucking the sap from the leaves, they deprive the plant of some nutrients. Affected shoots become wrinkled and yellow. They spread throughout the plant, causing its death. | Spray with an ammonia solution. It's made from ammonia (50 ml) and grated laundry soap (50 g) diluted in 10 liters of water. A simple soap solution will also work: a bar of grated soap dissolved in 5 liters of water. |
| Stem nematode | The problem is difficult to spot—the white, thin worms are very small, only 1.5 mm long. They feed on plant sap. Leaves curl and dry out, and roots rot. |
|
| Onion fly | The pest looks like a common fly, but smaller. The fly's larvae damage garlic cloves by gnawing out their flesh. |
|
| Fusarium | The leaves turn yellow, the bulbs become soft, and the roots rot and die. The plant is easily removed from the soil. Another name for this condition is garlic bottom rot. |
|
| Rust | Black and red spots form on the leaves, eventually spreading across the entire leaf blade. The plant stops growing. |
|
| Downy mildew | The stem turns yellow and becomes deformed. Development slows. | Spray with fungicides - Thiram, Arcerida, Fentiuram. |
Cleaning and storage
There's a lag of about 100 days between the emergence of winter garlic seedlings and harvesting. However, this period can vary from 80 to 110 days, so experienced gardeners rely less on the timing and more on the plant's external characteristics.
Signs that garlic heads are ready:
- most of the feathers turned yellow;
- the stem at the base became thinner and lay on the ground;
- all the lower leaves turned yellow;
- the seed pods have cracked;
- the scales of the heads became transparent
Features of harvesting winter garlic:
- Check that the garlic is ripe by looking at its external appearance.
- It is best to organize cleaning early on a sunny morning.
- Place the pulled garlic on the ground to dry in the sun.
- Place the garlic in a dry, ventilated area to dry completely. You can also finish drying the harvest under a canopy. Drying takes several weeks.
- Cut off dried shoots after they are completely dry.
- Dried garlic is sorted, removing any blemishes. Shriveled garlic should not be stored—it will not only spoil itself but also become a source of disease for healthy garlic.
- The selected heads are placed in boxes or bags, which are taken to the cellar.
- During the winter, garlic is ventilated to prevent rotting.
- ✓ Storage temperature should be between +1°C and +3°C.
- ✓ Air humidity should not exceed 70-75% to prevent rotting.
If garden watering is stopped on time and harvesting time is chosen correctly, the garlic's pungency, flavor, and aroma will be as close to perfect as possible. Overripe and underripe garlic have poor flavor characteristics.
If harvesting begins too early, up to 20% of the harvest will be lost during storage. If, on the other hand, harvesting is delayed, overripe heads will fall apart during uprooting and then dry out prematurely, losing their marketable appearance.
Garlic is harvested by digging or by hand, depending on the soil type:
- on chernozems and heavy loams the harvest is dug up;
- On peat and sandy loam soils, they are dug out.
When choosing a harvesting method, consider the soil density. It's important to ensure that the garlic bulbs aren't damaged or cracked during harvesting. Under favorable conditions, garlic will keep for 2-3 months; winter varieties don't store for long. Therefore, winter garlic is best sold or processed immediately after harvesting.
Reviews of the Komsomolets variety
Winter garlic "Komsomolets" is very popular among gardeners. They have fully appreciated the advantages of this easy-to-grow and productive variety.
Komsomolets garlic is a reliable, high-yielding variety that won't freeze and leave gardeners without a harvest. Requiring little care, this winter crop produces large heads of garlic with excellent marketability and superior flavor.