Lydia grapes are a wine grape variety once widely used in winemaking. Their berries are characterized by the distinctive flavor and aroma of wild grapes. Let's find out what makes this ancient variety so special, and is it worth growing?
grape variety "Lydia"
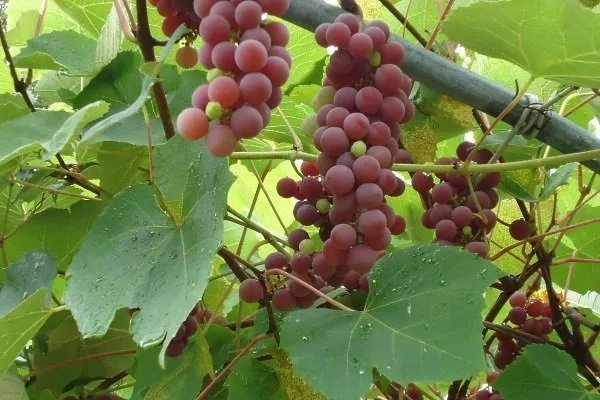
The Lydia grape has a pleasant strawberry flavor and an unrivaled aroma
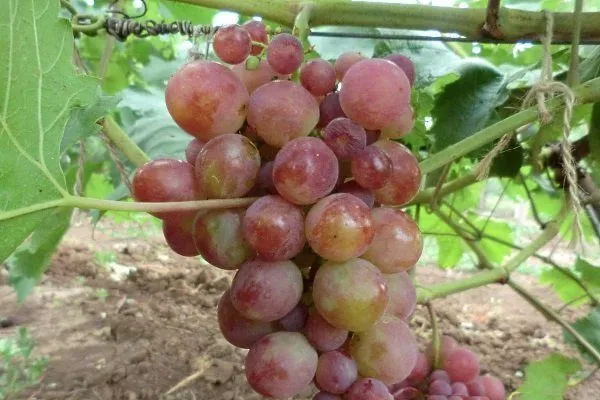
The Lydia grape variety has a high yield percentage
History of the variety's appearance
Lydia is a product of selective breeding, obtained from seedlings of the V. labrusca species, brought from North America. It was from here that wild grapes were brought to Europe, along with phylloxera and powdery mildew (an insect and a fungal disease, respectively). Moreover, unlike European varieties, this "foreign" grape was resistant to these pests.
To save the grapevine from extinction, breeders began grafting it onto a North American "wild" variety. Lydia is a hybrid variety created by crossing the parent pair—the "American" Vitis labrusca and the "European" Vitis vinifera.
Phyloxera is a North American insect pest that attacks grapes, except for labrusca varieties.
Ban on wine production
In the mid-20th century, the variety was popular in the USSR, especially in Moldova and Ukraine. There, it was grown as a wine grape over vast areas. Thousands of tons of wine were produced from "Lydia." However, in the late 20th century, wines made from "Lydia" and "Isabella" were found to contain elevated levels of methyl alcohol.
It was discovered that the berries of these varieties contain a lot of pectin. While fresh, the fruits pose no danger, but during fermentation, the pectin is transformed into methinols, which damage the liver, kidneys, and optic nerves, and can even lead to death.
Since 1999, the use of Lydia grapes in wine production has been banned in the US and the EU. Whether wine made from this grape is truly more harmful than wine made from other varieties is unknown, as any alcohol can have a negative impact on the body. Perhaps the ban on wine production is simply a competitive ploy.
Botanical description of Lydia
Brief botanical description of "Lydia":
- Bushes. Medium-sized, very dense. 80% of the shoots are fruiting. The leaves are large, heavily pubescent, and dissected into 3 or 5 lobes. The flowers are bisexual.
- Clusters. Loose, multi-branched, small, cylindrical. Average weight: 100g.
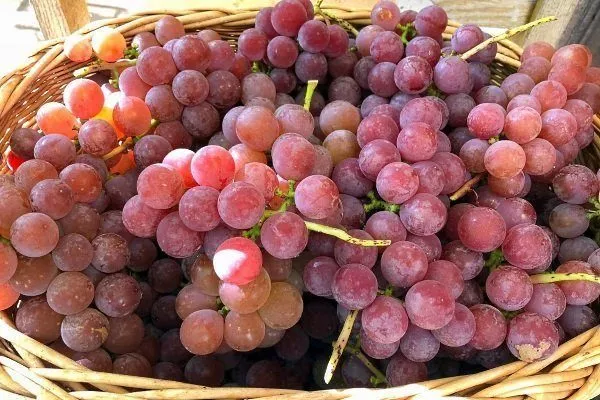
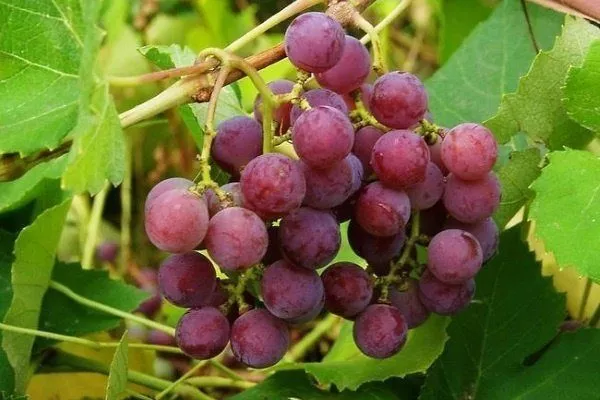
- Fruit. Round, red, with a pinkish-purple hue. The flesh is slimy, juicy, and has a distinctive strawberry aroma. Weight: up to 4 g. The skin is dense, covered with a waxy coating. The berry diameter is 15 mm.
The gardener provided a video review of the Lydia grape variety:
What is the difference between Lydia and Isabella?
'Lydia' is often called 'Isabella's younger sister.' It is often mistakenly referred to as 'Isabella Pink' or 'Isabella Red.' 'Isabella' is a natural hybrid of a wild American grape and the European variety Vitis vinifera. 'Lydia' was bred from 'Isabella' seedlings. The varieties resemble each other in their clusters and leaves, but differ in the color and flavor of their berries.
Advantages and disadvantages
'Lydia' isn't particularly prized by gardeners – the taste of its berries is clearly an acquired taste – but this variety has plenty of merit – it's no wonder it was once so popular.
Advantages:
- bears fruit stably and abundantly;
- frost-resistant;
- tolerates waterlogged soil well;
- berries do not crack when exposed to high humidity;
- has high immunity to a number of grape diseases;
- suitable for decorative use;
- capable of self-pollination;
- Thanks to the dense skin of the berries, they are easy to transport.
Flaws:
- It is necessary to regularly remove side shoots from the bushes and trim off excess shoots, which tend to grow rapidly;
- Harm to the body is possible if the wine making technology is not followed;
- The berries tend to fall off when ripening – it is important to harvest the crop in a timely manner.
Today, Lydia is practically no longer grown commercially—the vineyards have been cleared. The variety can still be found in private gardens, but even here, its popularity is steadily declining. It is increasingly used as an inexpensive landscaping tool.
Characteristics of the variety
The Lydia variety is distinguished by its vigorous, fast-growing vines, capable of producing dozens of bunches of grapes annually. Let's take a closer look at the main characteristics of this grape.
Productivity and fruiting
The variety is very productive despite its small clusters. Up to 120 centners of grapes are harvested per hectare. One vine produces up to 40 kg of grapes. This high yield is due to the excellent ripening of the vines—4-6 full-sized clusters grow on a single shoot. Moreover, the vines do not need to be thinned—they easily support the weight of the harvest.
This variety is a late-ripening variety. The berries ripen slowly, taking about 160 days. In temperate climates, the harvest is ready around mid-September. To ensure the ripe berries are juicy, sweet, and as large as possible, the bushes are watered regularly. Ripening is uneven—the sun-facing bunches ripen first.
Drought resistance and winter hardiness
Compared to most European varieties grown in the south, 'Lydia' has increased frost resistance. It can withstand temperatures down to -26°C. The bushes should be covered for the winter, otherwise severe frosts can cause frost death.
"Lydia" tolerates drought well, but only for short periods. If the bushes suffer from a lack of moisture for an extended period, the berries will be affected—they will be small and sour.
Resistance to diseases and pests
The variety is resistant to mildew and oidium. It is susceptible to lime chlorosis, which usually develops due to iron deficiency in the soil, as well as anthracnose and gray mold. Unlike its American ancestor, 'Lydia' is susceptible to phylloxera. Pests dangerous to 'Lydia' include spider mites and leaf rollers.
Scope of application
Like most Isabella varieties, 'Lydia' belongs to the industrial group. It is used to make dessert wines, fortified wines, and juices. The fruit is also eaten fresh and used for preserves, such as jams, marmalades, jellies, and other culinary delights.
Places of growth
This European variety is not suited for harsh Russian winters. Previously, this grape was grown in Ukrainian and Moldovan vineyards. It thrives in southern Russia. In more northern regions, it requires insulation.
This flavorless industrial grape variety has never been popular in temperate climates—requiring insulation, it lacks qualities attractive to gardeners and consumers. And after news of the harmful effects of Lydia wine, interest in the variety waned even further.
Transportability
This variety is characterized by excellent transportability. Thanks to its dense skin, the berries do not spoil during long-distance transportation. When stored properly—in refrigerators at +8°C—the bunches can be stored for up to two months.
Preparation and planting
The Lydia grape variety does not require any special planting conditions.
Terms and conditions
Saplings can be planted at any time—spring or fall. Each option has its own characteristics:
- Spring. Grape seedlings are planted in April-May. Over the summer, the young plants will strengthen and prepare for winter. The disadvantages of spring planting include frequent, heavy watering and the possibility of recurrent frosts.
- Autumn. The planting time is October. The seedling will take root and adapt to the new growing conditions before frost. The downside is the risk of damage from the first frost, so the seedlings should be carefully covered.
It's not easy to buy seedlings in the spring—nurseries usually sell their planting material in the fall.
Conditions for planting seedlings:
- soil temperature – from +10°C;
- air temperature – from +15°C.
The soil and holes are prepared in advance. For spring planting, this should be done in the fall. However, if the holes weren't prepared in the fall, they are dug in the spring, about a week before planting. This will give the soil time to settle at least a little.
Planting material
Today, few people plant Lydia from seedlings—this variety propagates perfectly from cuttings, which are inexpensive. The survival rate of cuttings is 100%.
Planting cuttings depends on the climate:
- In southern regions, cuttings can be planted directly in fertilized and tilled soil in the fall. They are then covered and left until spring. At least 7-8 out of 10 cuttings will successfully take root.
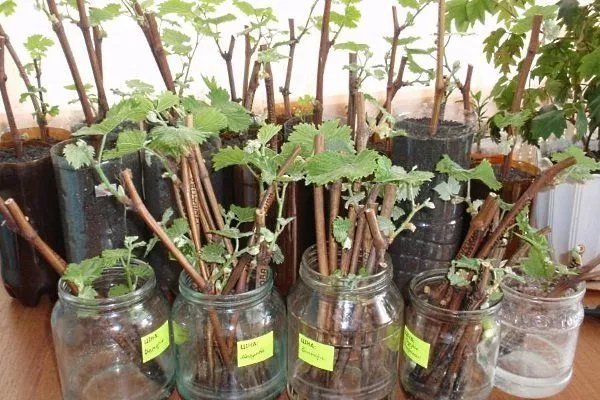
- In regions with cold winters, seedlings can be grown from cuttings planted in pots. Cuttings can be planted, for example, in cut-down plastic bottles.
The procedure for preparing cuttings for spring planting.
- Whiskers, leaves and side shoots are removed from the shoots.
- Cuttings 40-45 cm long are cut. Each cutting has 3-4 buds.
- The cuttings are placed in water at room temperature for 24 hours.
- After 24 hours, the cuttings are taken out, sprayed with potassium permanganate and dried in the air.
- The cuttings are wrapped in plastic and stored in a cellar. The recommended temperature is 0 to 2°C.
In February or March, the cuttings are taken out of the cellar and move on to the second stage of preparation:
- The cuttings are placed in water for two days.
- Using pruning shears, make cuts. One is 3-5 mm from the bottom bud, the second is 2 cm from the top bud. These cuts increase the chances of germination.
- After removing the lower bud, the upper one is dipped in melted paraffin wax, then in cold water to harden. This procedure is aimed at protecting the planting material from bacteria.
- Make four cuts at the bottom of the cutting. The cuts are 3 cm long. The key is not to damage the wood; you only need to lift the bark. Once the cutting is planted, roots will grow from these cuts.
Planting site and soil
Requirements for planting site and soil:
- The optimal option is chernozem or sandy loam soil with an acidity of pH 6–7.
- The depth of groundwater is not less than 1.5 m.
- The area should be exposed to sunlight throughout the day.
- There should be no drafts or piercing wind.
- ✓ The soil pH level should be strictly within 6.0-6.5 for optimal nutrient absorption.
- ✓ The depth of groundwater is at least 1.5 m to prevent root rot.
Planting stages
The first stage of planting is preparing the planting site:
- Prepare the hole in advance—it should sit for a while to allow the soil to settle. The hole should be 80-90 cm wide and deep.
- Place broken brick, pebbles, crushed rock, or expanded clay at the bottom of the hole to form a drainage layer. The layer height should be 15-20 cm.
- Prepare a nutrient mixture. To do this, mix the topsoil removed when digging the hole. Add the soil and fertilizer mixture to a 30 cm layer over the drainage layer. The soil mixture should consist of:
- fertile soil – 1 part;
- river sand – 1 part;
- humus – 1 part;
- nitrophoska – 50 g;
- double superphosphate – 50 g;
- ammonium nitrate – 20 g.
- Then add the remaining soil to the hole - the roots of the seedling must not come into contact with the fertilizer.
- Water the soil with hot water (70-80°C). Use a bucket per hole.
- You can begin planting after 5-6 days. It's best to plant the seedlings in the evening or on a cloudy day.
The second stage is planting the seedling:
- Place the seedling at the bottom of the hole. Although the soil has settled, keep in mind that it may still settle slightly. Position the root collar so that it is above the soil surface.
- Fill the seedling halfway with soil. Water with warm water (25°C). The heel of the seedling should be 40 cm above the ground surface.
- After the water has soaked in, add more soil until the hole is about 15 cm deep. This depression is created for future watering.
- Compact the soil and water it. The recommended watering rate is 20 liters per seedling.
- Once the moisture has been absorbed, loosen the soil and apply mulch. This will prevent crusting, moisture evaporation, and weed growth.
On the north side, you can place a support for a young seedling - on the north side.
Grafting cuttings onto rootstocks
The procedure for grafting onto rootstock:
- In autumn, cut cuttings with 2-3 good eyes.
- Store the cuttings in a container filled with sand at a temperature of 12°C until spring.
- When it's time to graft, trim both ends of the cutting. Coat the top end of the cutting with paraffin to retain moisture, and place it in water or humate to encourage root formation.
- Remove the old bush, leaving 5-8 cm above the ground.
- Clean the cut end of the bush to remove any debris. Make a slit in the center and insert the cutting into it.
- Tie the grafting site with a woven material and cover it with clay.
- Water the rootstock and mulch the soil.
Transfer
Grape vines can be replanted if necessary. This may be necessary if the vines are shaded by another plant or are simply growing out of place. Grapes are replanted in early spring, before the sap begins to flow, or in the fall, after the leaves have fallen. Transplantation is done by transshipping the vines, meaning they still have their soil.
To prevent the root ball from falling apart during transplantation, stop watering the bush 2 days before transplanting.
Transplantation procedure:
- Dig around the bush in a circle (d=50 cm).
- Prepare a hole in advance. It should be large enough to accommodate the root system and the root ball.
- Add double superphosphate (200 g), potassium salt (30 g), humus – 7 kg, and ammonium sulfate (100 g) to the new hole.
- Remove the bush from the soil.
- Transfer the plant to the new hole. Be careful not to disturb the soil around the roots.
Caring for Lydia grapes
Once the seedlings are planted, the gardener's job is to provide the crop with everything it needs to thrive. "Lydia" is an easy-to-grow variety, but its productivity, flavor, and fruit size directly depend on the quality of care—watering, fertilizing, pruning, and other agricultural practices.
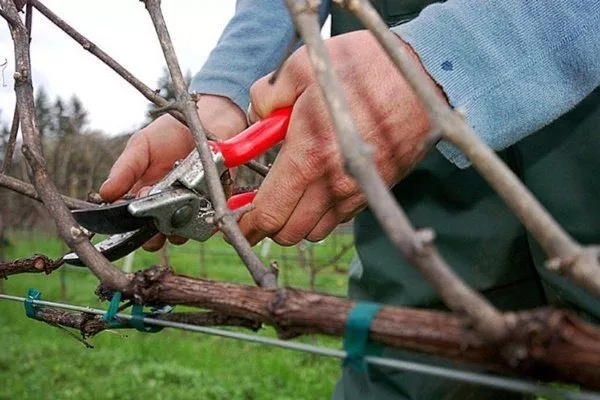
Shaping and pruning
Principles of pruning "Lydia":
- Beginning in the second year, bush shaping begins. Pruning is performed three times per season.
- In spring, sanitary pruning is carried out – dried, diseased and damaged shoots are cut off.
- In summer, pruning is done to thin out the bushes. Side shoots are removed to improve ventilation.
- In autumn, in October-November, pruning is carried out - the first year to 2-4 buds, then to 6-8 buds, and then to 15. On a mature bush, 35 to 50 buds are left.
Pruning is carried out before the sap begins to flow, at a temperature of at least +5°C.
Fan-shaped training is suitable for 'Lydia'. If the bush becomes overgrown, fruiting declines. With fan-shaped training, the bush has one or more main branches growing from the ground. Vines from these branches are distributed along trellises in different directions. The grapevine resembles a fan in shape.
Formation begins in the second year after planting and is completed in the fourth or fifth year of life. Formation features:
- In the first year, the bush is pruned in October, leaving only 2-3 shoots.
- In the second year, pruning is done in the spring, before the buds open. Three buds are left on the vines, at the bottom. By autumn, the bush should have at least three strong vines, which are tied to the trellis. The gaps between tiers are 30-40 cm.
- In the third year, three to four buds are left at the bottom of the vines if the bushes have two shoots. If the bushes have three shoots, two are used to develop branches, and the third is used to grow new branches, leaving three buds on it.
A bush with four strong shoots is trained as follows: all four shoots are tied to a trellis, forming branches with a slight slope. After removing the top buds, three are left to form new vines for next year. - In the fourth year, the bush is pruned in the same way as in the third year: fruiting branches and secondary branches are created from the branches. All other shoots are pruned. To create new branches, the top shoot is removed from the old ones, leaving only the two lower ones. The branches are tied to the trellis.
- In the fifth year, the bush's formation is completed. Unproductive shoots are removed, and new branches are formed in their place from replacement branches.
You can learn more about spring pruning of grapes from this article.
Watering
Regular watering is essential for rapid growth and high yields of Lydia. To water the bushes, dig 20-cm-deep grooves around the trunks. The recommended watering rate for each bush is 12-15 liters.
Approximate timing of watering the Lydia grapes:
- in spring, after pruning;
- after tying the branches to the trellis;
- when shoots grow to 25 cm in length;
- before flowering;
- after flowering;
- during ripening;
- after harvesting the grapes.
The soil around the grape trunks is loosened after each watering.
Fertilizer and feeding
To increase the sugar content of the berries, the bushes are fed throughout the growing season. Fertilizer is applied in solid form during soil tillage, or in dissolved form during watering.
Fertilizer application scheme:
| Period | Top dressing |
| March | For a bucket of water:
|
| 2 weeks before flowering | Same as in March. |
| Before ripening | For a bucket of water:
|
| After harvesting | Per 1 sq. m: potassium chloride – 15 g. |
Loosening and rolling
The soil around the trunk is loosened within a radius of about half a meter. Loosening is necessary to ensure oxygen reaches the grapevine roots. It is recommended to loosen the soil once every two weeks.
Once a year, in late spring or early summer, pruning is performed. This involves removing the fine surface roots growing at a depth of 20-25 cm. The procedure is performed with sharp pruning shears. This is a difficult undertaking, as improper pruning can damage the roots and cause the death of the plant.
Thanks to pruning, the plant can survive in the most challenging conditions. This procedure allows the bush to recover even after the death of its entire above-ground part.
Preparing for winter
This variety is relatively frost-hardy, but to reduce the risk of frost damage, it's best to insulate it for the winter. Cover the plantings in November using the usual method:
- remove branches from trellises;
- they lay them on the ground and tie them up;
- fill it with earth - a mound 10-15 cm high should form;
- To strengthen the structure, it is supported on the sides with boards.
Bird protection
Lydia berries don't have a particularly strong flavor, but birds love them. To protect the harvest from birds, the bunches are covered with special caps—they can be purchased or made, for example, from disposable plastic plates. The caps prevent birds from reaching the berries, preserving the harvest.
Birds can also be repelled using optical, acoustic, visual, or a combination of methods. Experienced gardeners also recommend placing several watering bowls around the plot—it's possible the birds are simply thirsty, prompting them to peck at the berries.
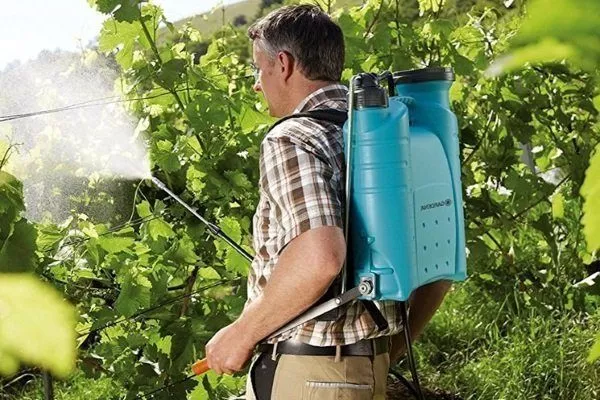
Diseases and pests
The Lydia variety is resistant only to certain diseases (mildew, oidium), so it requires preventative treatment.
| Disease | Stability of 'Lydia' | Recommended preventive measures |
|---|---|---|
| Mildew | High | Minimal processing |
| Oidium | High | Minimal processing |
| Gray mold | Low | Regular pruning and ventilation |
Diseases of Lydia grapes and measures to combat them:
| Diseases | Symptoms | How to treat? | Prevention |
| Gray mold | The bunches have a grey coating. The berries are rotting. | Spraying with a soda solution (70 g per bucket). Removing affected bunches. | Pruning for good ventilation. |
| Anthracnose | The leaves have brown spots with a dark border. The affected tissue dies. | Spraying with Ridomil (25 g per 10 l), Horus (3 g per 10 l). | Cleaning up plant debris. |
| Lime chlorosis | The leaves turn yellow, but the veins remain green. The tissue dries out, and the bush stops growing. | Spraying with Antichlorosin (concentration before flowering 0.1%, after flowering – 0.15%). | Selection of rootstock taking into account the carbonate content of the soil. |
| Black spot | The bark loses color, and small black spots appear. Young shoots are most often affected, with dark spots appearing on the first 6-7 internodes. | Spraying with Topaz - one ampoule per bucket. | Prevention of mechanical damage. |
Pests of Lydia grapes and measures to control them:
| Pests | Signs of damage | How to fight? | Prevention |
| Phylloxera | There are swellings on the underside of the leaves. The bushes are developing poorly. | Spraying with Confidor (2 ml per 10 l). | Use of fine-grained sand during planting – it is poured into the hole around the seedling. |
| Spider mite | The underside of the leaves is covered in a fine web. The leaves turn yellow, dry up, and fall off. | Spraying in spring with DNOC (150 g per 10 l). In August – with Phosphamide (20 g per 10 l). | Regular weeding. |
| Leaf roller | Caterpillars are eating the berries. The leaves are gnawed through. | Spring treatment of soil and plants with insecticides, for example, DNOC. | Good lighting and ventilation of the bushes. |
Harvesting
Harvesting begins in late August. The fruits don't hold well on their stalks—they fall off when touched, so it's important to harvest them promptly. The clusters are harvested in dry weather.
How to store Lydia?
The bunches are stored in boxes with a capacity of up to 15 kg. These boxes must have ventilation holes. The bunches are stored at 0-3°C and 90-95% humidity. The shelf life is 3 months.
Methods of reproduction
Old grape varieties, including Lydia, can be propagated by any means—seeds, cuttings, grafting, or layering. The easiest way is to plant a cutting, but if rootstock is available, grafting is better.
Gardeners' reviews of grapes
Whatever experts say about the dangers of Lydia wine, this old wine grape will continue to delight our gardeners with its harvest and cool temperatures for a long time to come. This grape is so undemanding and productive that it will always find its fans.