Red currants are considered long-lived for good reason – with proper care, a bush can produce fruit for 15-25 years. While it's not the most demanding crop, to ensure consistent fruiting, it's important to approach cultivation properly, taking into account the nuances of planting, propagation, and care.

Description of red currant as a berry bush
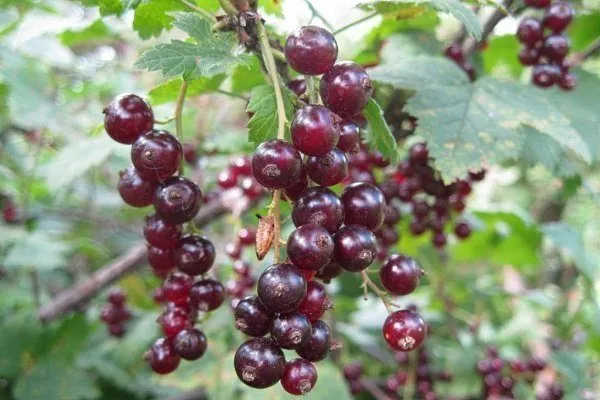
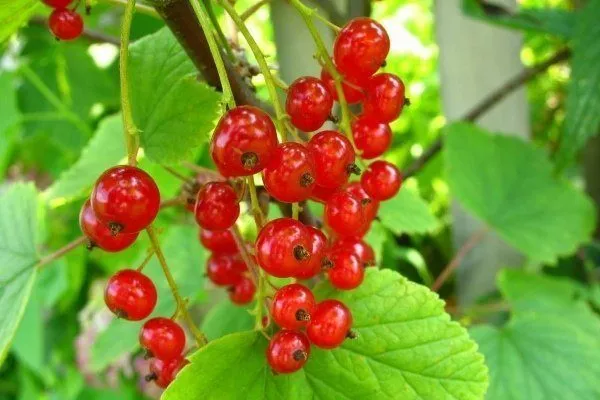
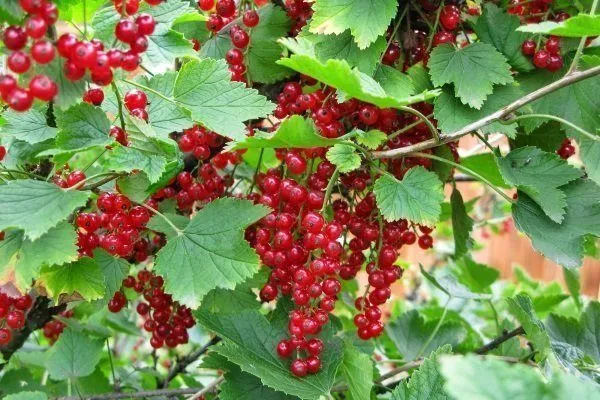
Red currants are one of the most common crops. The berries are not only delicious but also healthy. One reason for their popularity is their ease of care.
The bushes reach a height of 1.2-2 meters. The bush has well-developed shoots with leaves growing along their entire length. Basal shoots may develop at the base. This is a long-lived plant, as with proper care it can bear fruit for up to 25 years.
But, like other berry crops, currants quickly consume all the nutrients in the soil, so it's crucial to remember the need for regular fertilization. Otherwise, you won't be able to reap a bountiful harvest.
Other characteristics of red currants include:
- flowering begins in mid-May, the buds are framed with red or yellow petals;
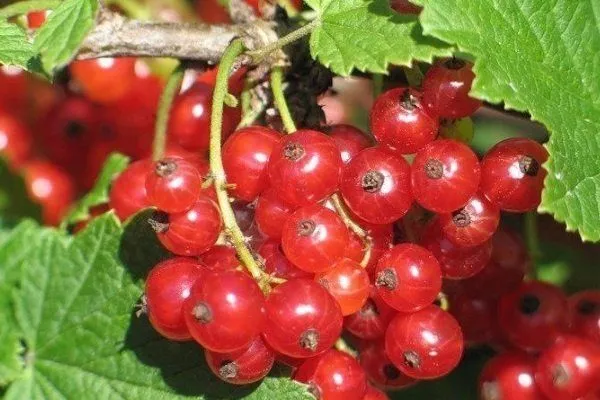
- in mid-June the berries begin to ripen;
- the fruits grow in clusters on light-colored stalks, their diameter can reach 1.2 cm;
- This crop has powerful roots, which allows them to penetrate deep into the soil and extract the necessary nutrients;
- To achieve better yields, it is recommended to plant several different varieties in the same area – this will allow for cross-pollination.
It's worth noting that red currants are rich in vitamins, making them very nutritious. For example, red currants contain vitamins A, E, C, PP, H, and all the B vitamins. They also contain valuable minerals and fatty acids. Moreover, red currants are low in calories—100 grams of berries contain only 43 kcal.
Red currants reduce the risk of cancer, slow down the aging process, strengthen the immune system, and cleanse the body of toxins.
Despite its many beneficial properties, red currants also have a number of contraindications. They contain organic acids that can irritate the stomach lining. Therefore, people with stomach ulcers, gastritis, or liver problems should avoid consuming them.
Red currants can also worsen conditions like hepatitis and pancreatitis. They are also not recommended for those with blood disorders, such as hemophilia.
Advantages and disadvantages of growing red currants
The positive features of this culture include:
- beneficial properties, high taste value, which makes the plant one of the most popular;
- early maturity – the harvest can be collected already in the first year after planting the seedling;
- winter hardiness - having chosen the right variety, you don’t have to worry that the crop will die when the first frost sets in;
- the possibility of freezing berries without losing their medicinal properties.
But the culture also has some minor drawbacks:
- Despite the ease of care, one must not forget the basic rules of planting and growing - otherwise, one should not expect large harvests;
- This plant is picky about its neighbors - it should not be planted near plums, cherries, raspberries; birches and pines are unsuitable neighbors.
If you have a small plot, such “capriciousness” of the plant will not allow you to grow all the desired crops.
The best varieties for planting
There are over 70 varieties of this crop, each with its own characteristics and requirements. It's recommended to familiarize yourself with them in advance to select the variety that best meets all your requirements.
Large
| Name | Winter hardiness | Yield (kg per bush) | Disease resistance |
|---|---|---|---|
| Viskne | High | 7 | High |
| Fertodi | High | 1.5 | High |
| Rondom | High | High | High |
The most popular large varieties include:
- Viskne – a winter-hardy variety that is practically not afraid of pests and diseases, the yield from one bush is up to 7 kg;
- Fertodi – a winter-hardy variety, not afraid of fungus, the weight of berries is about 1.5 g;
- Rondom – a high-yielding variety that is frost-resistant.
currant variety "Viskne"
currant variety "Fertodi"
currant variety "Rondom"

Sweet
| Name | Winter hardiness | Berry size (g) | Disease resistance |
|---|---|---|---|
| Svetlana | High | Small ones | Average |
| Early sweet | High | Average | Average |
| Houghton Castle | High | Average | High |
Popular sweet varieties include:
- Svetlana – a winter-hardy variety, the berries are small and have thin skin;
- Early sweet – a winter-hardy variety that requires careful care, the berries are medium in size;
- Houghton Castle – a high-yielding variety, the berries are medium in size.
currant variety "Svetlana"
currant variety "Early Sweet"
currant variety 'Houghton Castle'
Early
| Name | Winter hardiness | Yield (kg per bush) | Disease resistance |
|---|---|---|---|
| Victoria | Average | Average | High |
| Firstborn | High | 10 | High |
| Serpentine | High | Average | High |
Among the early varieties are:
- Victoria – an ideal option for further processing and freezing, the berries are medium-sized and have a pleasant taste;
- Firstborn – a frost-resistant variety. You can harvest up to 10 kg per bush.
- Serpentine – a variety resistant to pests and diseases. The berries are medium-sized and have a sweet and sour flavor.
currant variety "Victoria"
currant variety "Pervenets"
currant variety "Serpentine"


Average
| Name | Winter hardiness | Berry size (g) | Disease resistance |
|---|---|---|---|
| Buzhanskaya | High | 1 | High |
| Gazelle | High | Small ones | High |
The most famous medium-sized varieties of red currants:
- Buzhanskaya – a high-yielding and frost-resistant variety, the berry weight is up to 1 g, the fruits are suitable for further processing, including freezing;
- Gazelle – winter-hardy, resistant to fungi, the berries are small, but sweet and juicy.
currant variety "Buzhanskaya"
currant variety "Gazelle"

Late
| Name | Winter hardiness | Yield (kg per bush) | Disease resistance |
|---|---|---|---|
| Marmalade maker | High | High | High |
| Dutch Red | High | High | High |
The most popular late varieties are:
- Marmalade maker – a winter-hardy and high-yielding variety that is resistant to most diseases and insects;
- Dutch Red – a hardy crop, resistant to anthracnose and frost.
currant variety "Marmeladnitsa"
currant variety "Dutch red"
Landing features
Planting is recommended in the fall, but some gardeners also perform the work in the spring. When planting, it's important to prepare the site and choose the right seedling. When planting, keep the optimal planting pattern in mind.
When to plant red currants?
Experienced gardeners believe the best time to plant seedlings is mid-autumn, allowing the plants time to establish themselves in their new location. In this case, the harvest can be as early as early July, weather permitting.
But if you accidentally miss the fall planting, you can postpone the work until spring. However, if certain rules are not followed, there's a high risk that the planted shrubs won't take root.
Watch the video below about planting red currants:
Planting in autumn
Autumn is considered the most favorable time for planting red currants. This time of year has several advantages:
- you can prepare a landing site in advance;
- seedlings - fresh, recently obtained (and not stored in the basement all winter);
- It's not a big deal if the leaves dry out after planting, as the buds on the seedling have already formed.
However, there is an important point: seedlings must be planted at least a month before freezing temperatures (usually this is the beginning of September), otherwise the bush will not take root and will freeze.
Planting in spring
Planting red currants in the spring is more difficult. To ensure the bush takes root in the spring, it should be planted before the buds open. During this period, the soil doesn't dry out completely, so many gardeners plant the bushes with buds already formed and leaves already open. However, there's a high risk that the red currant bush won't take root.
Selecting and preparing a seedling
When choosing a seedling, look at the root system: the more developed the root system, the better the plant will take root (preferably with at least three skeletal roots). If the bark peels off a little, it's not a problem; it's important that the branches are not dry. The above-ground height is about 40 cm.
If the seedling was purchased in a pot, it must be carefully removed from the container to aerate the root system.
Soil preparation
It's crucial to prepare the plot in advance. If planting is planned for spring, dig the holes in the fall. This allows the soil to settle. To speed up the process, water the holes. Red currants prefer slightly acidic, loamy soil.
- ✓ The optimal soil pH level should be between 6.0-6.5 to ensure better absorption of nutrients.
- ✓ The depth of groundwater should not exceed 1.5 m to avoid rotting of the root system.
The soil needs to be properly prepared. If the soil is sandy, add some clay; if it's sandy loam, add minerals. This will allow the soil to "breathe." For acidic soil, add chalk or limestone (40 kg per 100 square meters).
The holes should be dug a couple of months before planting the seedlings. This will remove harmful substances found in many fertilizers from the soil. Fertilizer mixed with the topsoil is placed at the bottom of the hole. The fertilizer consists of 10 kg of compost, 300 g of ash, and 200 g of superphosphate. Manure is also suitable, but in this case, add a little straw and sawdust. It's important to avoid nitrogen-based fertilizers.
4-5 months before planting, add 15 kg of organic matter and 50 g of potassium and phosphorus supplements per 1 sq. m of area.
Planting diagram
The optimal distance between seedlings is 1.5 m, with at least 2.5 m between the bush and the trees. Planting closer will slow growth due to the intertwining of their roots. Also, try to plant the bushes at least 1.2 m from a fence, otherwise the plant will be overshadowed.
It is not recommended to plant the plant near other bushes that grow quickly (for example, near raspberries, gooseberries) - they will begin to suppress the growth of currants.
Caring for red currants
Red currants are not the most demanding crop, as they don't require specialized care. However, there are a few nuances to consider to maximize the plant's yield.
Top dressing
In April, urea must be applied at a rate of 15 grams per square meter of the plot, and in June, slurry or a solution of bird droppings (0.5 liters per 10-liter bucket of water) must be added. If organic matter is not available, approximately 15 grams of urea, potassium sulfate, and superphosphate are added under each plant.
In summer, apply foliar micronutrient fertilizers. Dissolve 3 g of boric acid, 10 g of manganese sulfate, 2 g of copper sulfate, 2 g of ammonium molybdate, and 2 g of zinc sulfate in a bucket of water (10 liters). Perform all procedures on a cloudy day.
In mid-autumn, carry out the final fertilizing: apply a mixture of 15 g of organic matter, 100 g of superphosphate, and 60 g of potassium chloride to each plant. More information on autumn fertilizing can be found here. here.
In the following video, an experienced gardener talks about fertilizing currants at different times of the year:
Spring care
In early March, sanitary pruning and shaping are carried out. In April, the bushes should be fertilized with urea. As soon as the soil dries, be sure to loosen the soil around the currant bushes to a depth of about 8 cm, then apply mulch.
Light frosts can sometimes occur in May during flowering. In this case, it's necessary to protect the plants by smoking. To ensure adequate watering, the soil should be kept slightly moist. It's important to remove weeds by loosening the soil to a depth of 8 cm. This procedure should be repeated every 14 days.
We recommend reading an additional article about this, How to properly care for currants in the spring.
Summer care
In June, currant bushes should be fertilized with organic fertilizer. Additionally, the bushes should be sprayed with a micronutrient solution. It's also important to inspect the plants—if any pests are found, they should be collected and destroyed.
- ✓ Yellowing of leaves between the veins may indicate a magnesium deficiency.
- ✓ Curling and reddening of leaves may be a sign of phosphorus deficiency.
When it's time to harvest, the berries should be picked as they ripen and stored in small boxes. Afterward, the bushes should be watered and the soil loosened.
Autumn care
At the end of September, the soil should be moistened, organic matter and mineral fertilizers should be added, and the soil should be dug over. When the leaves begin to fall, the currants should be pruned.
Read the article about How to care for currant bushes in autumn.
Watering
The plant has fairly strong roots, making it drought-resistant, but if there's insufficient moisture, the berries will become smaller. It's important to water the plant regularly, especially during the active growth period and when the fruit sets.
For every square meter, 20 liters of water is required, which will saturate the soil to a depth of about 40 cm. First, dig trenches around the bush, about 15 cm deep, spaced 30-40 cm from the bushes. Once the soil has dried slightly, thoroughly loosen it to prevent crusting.
Pruning and shaping the bush
Red currants require formative, sanitary, and rejuvenating pruning. This work is carried out either in early spring or late fall, when the plant is dormant:
- In the first year, remove 50% of the young shoots. This will help form a beautiful bush.
- For up to 5 years, leave no more than 20 shoots on the bushes to avoid darkening.
- Then carry out rejuvenating pruning – remove old shoots at the root, which will stimulate the growth of new ones.
- In the fall, it's essential to carry out sanitary pruning, removing diseased and damaged shoots. For more information on how to properly prune currants in the fall, seeHere.
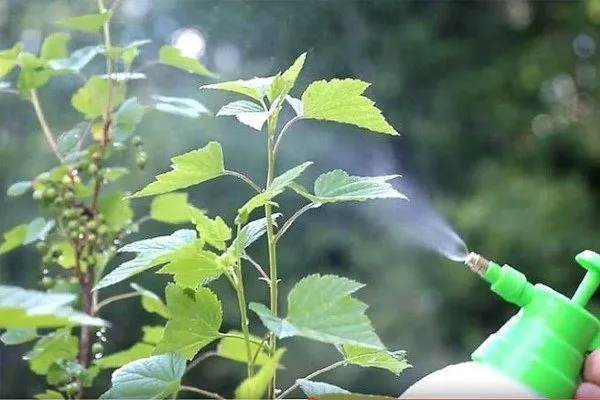
Processing
In early March, the plants are "awakened" by watering them with water heated to 80 degrees Celsius. Then, while the buds are still dormant, they are treated with copper sulfate to prevent various diseases. The next treatment is carried out with the same solution two weeks after the berry harvest. During bud formation, the plants are treated with malathion or Actellic.
Preparing for winter
Preparing for winter doesn't require much effort or time—a few simple steps are enough to ensure your shrub can survive even severe frosts:
- Forming the crown with a sharpened knife, and the cuts must be sealed with garden pitch.
- Moisture-recharging watering will moisten the soil to a depth of about 1 meter, which will positively impact root development. Each bush will require at least 30 liters of water. However, it's important to moisten the soil gradually to prevent root rot.
- If autumn is excessively rainy, watering frequency should be reduced several times. Water should be at room temperature to prevent it from turning into ice chips, which are harmful to plants, when frost sets in.
- Fertilizing. Potassium-phosphorus fertilizers are added to the soil in the fall. Organic fertilizers are also popular: just before the first frost, add mullein or manure.
- Mulching. Dig the soil to a depth of 12 cm (no more than 5 cm when working near the bush, to avoid damaging the roots). Sawdust, cardboard, or leftover covering material can be used as mulch. This procedure is necessary to create an optimal microclimate.
- The final step is covering the shrubs for the winter. In warmer regions, such as Crimea or Krasnodar, this step is not necessary – the branches are simply bent to the ground and secured.
In colder regions, it's recommended to cover red currants with plastic sheeting, making a few holes to allow the plant to breathe. If a very cold winter is expected, the bushes can be covered with spruce branches or any non-woven material.
Reproduction
Gardeners can purchase ready-made seedlings at fairs, but propagating this crop is a fairly simple process, so many grow the plants themselves.
Layering
The main advantage is that the cutting doesn't have to be separated from the mother plant. This means it won't suffer from a lack of water or nutrients. However, this method also has a drawback: it yields only a small amount of material for planting.
Propagation instructions:
- Thoroughly loosen the soil around the bush, adding a small amount of well-rotted manure. This will help retain more moisture in the soil, preventing crusting on the surface.
- Dig holes about 15 cm deep around the bush. Carefully place the shoots in them and press them into the ground.
- Cover with soil. Don't forget to care for the plant—water it and hill it up.
- In the fall, separate the cuttings and divide them into parts – these will be the finished seedlings.
However, it's important to remember that the shoots of this plant break easily and are quite difficult to bend to the ground without damaging them. Therefore, vertical layering is often used for propagation:
- In spring, cut back a healthy bush, leaving a stump up to 10 cm high.
- Sprinkle it with moist soil and hill it up.
- Water periodically to encourage new growth.
- In autumn, carefully separate the branches along with the roots and plant them in a new location.
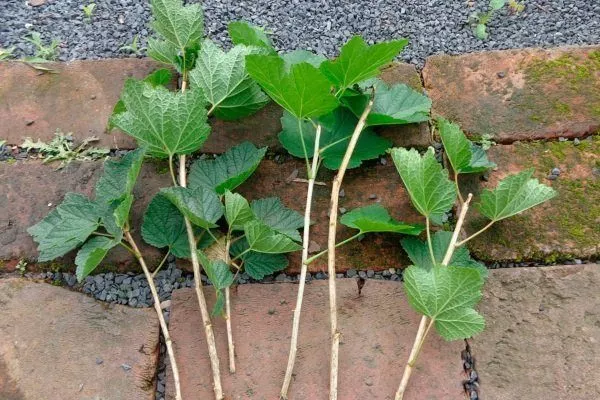
Cuttings
Reproduction by this method has advantages:
- due to the absence of replanting, the roots are not damaged, which means that the cuttings take root more easily;
- you can get a lot of planting material;
- The survival rate is over 90%.
Cuttings should be taken in early August – during this period, sap flow slows, the cuttings retain moisture, and they will root more easily. If you begin propagation later, the rooting process will be slower.
The breeding guide is as follows:
- Select a healthy bush and cut one-year-old shoots about 5-8 mm thick. Divide the branch into sections up to 20 cm long (each section should have 5-7 buds). Make the top cut straight to ensure proper shoot formation, and the bottom cut at an angle to allow the roots to better absorb moisture. Place the cuttings in a glass of water until roots form.
- Prepare the planting site: dig the soil, fertilize with compost, add ash to deoxidize the soil, and water thoroughly. Dig a trench about 15 cm deep. Plant at a slight angle, spacing them about 20 cm apart. A few buds should remain above the surface.
- The soil around the cuttings should be compacted, watered, and mulched with humus to a layer of about 5 cm. It is recommended to cover each cutting with a plastic bottle.
- Once the cuttings have overwintered and become stronger, they can be planted in a new location.
By dividing the roots
If you want to transplant a bush, you can divide it into sections to obtain ready-to-plant plants right away. This work should be done after the end of the growing season (usually mid- to late October) to allow the bush time to prepare for the cold weather, or in early spring, when the young seedlings will be able to establish themselves in their new location.
Reproduction is simple:
- We prepare holes about 50-70 cm deep, add humus, ash, and water.
- We dig up the plant to avoid damaging the root system. We leave the one-year-old shoots and trim them to a length of 30 cm.
- We divide the bush into sections, including roots and shoots. A sharp knife works best. After this process, treat all cuts with charcoal.
- We divide the plant into several parts so that each has roots and shoots.
- We plant, water, and hill up.
Diseases and pests of red currants
This crop is quite resistant to insects and diseases. However, it is not 100% immune, so it is important to know how to identify diseases and pests and how to combat them.
Diseases
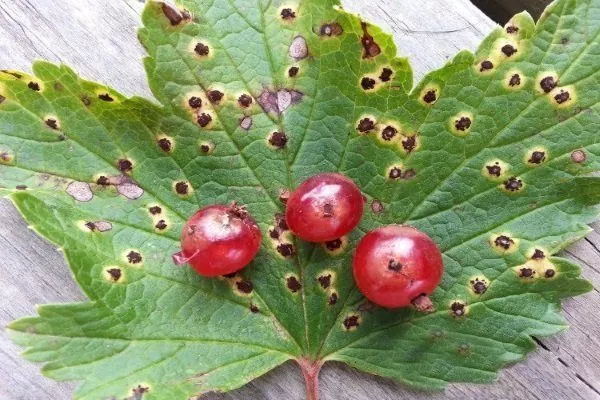
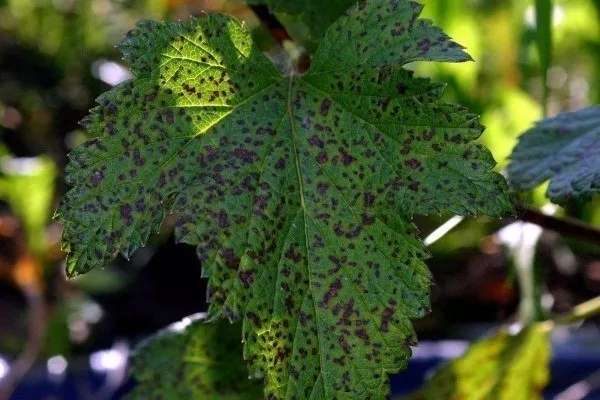
- AnthracnoseSymptoms include the appearance of brown spots on the leaves, which later develop into bumps. Over time, currant leaves become deformed and begin to fall off. A copper sulfate solution, sprayed not only on the plant but also on the soil around the bush, helps combat the disease. Treatment should be continued until bud break.
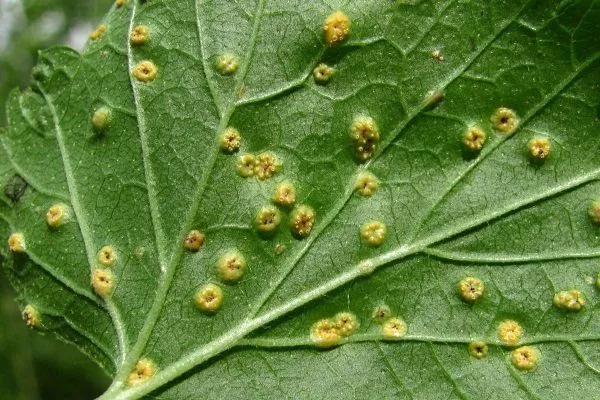
But it is better to use effective preventative measures - spray the bush with a 1% solution of Bordeaux mixture once every 2 weeks after flowering. - Goblet rustReddish spots appear on the leaves, containing fungal spores. Berries and leaves affected by rust should be burned, and the bushes treated with a suitable fungicide (Fitosporin-M is suitable).
- SeptoriaIt appears as brown spots with dark spores in the center. In this case, remove the affected leaves and treat the bushes with copper-containing products (copper sulfate is best), but fungicides are also suitable. To prevent infection, spray the bushes with copper sulfate several times before flowering.
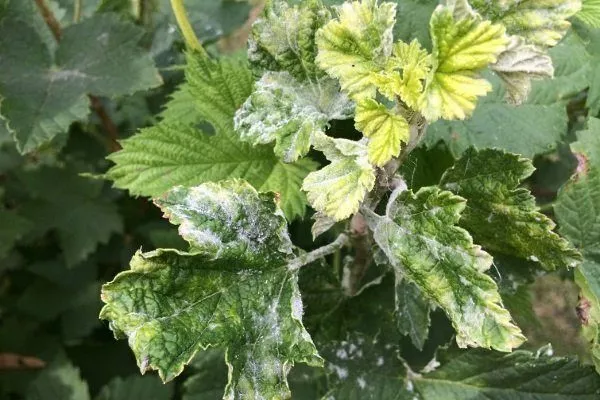
- Powdery mildew (spheroteka)The disease is caused by a fungus. The main symptoms include:
- a light coating forms on the plant, which darkens over time;
- leaves and berries fall;
- the bush slows down in development.
As a treatment, spray the affected bushes with fungicides. Alirin-B and Baktofit are best. All damaged shoots should be burned to prevent the disease from spreading further into the garden.
Anthracnose damage to leaves and berries
The appearance of cup rust on a currant leaf
Bush affected by septoria
Powdery mildew (spheroteka)
Pests
Most often, currants are affected by:
- narrow-bodied borer;
- kidney moth.
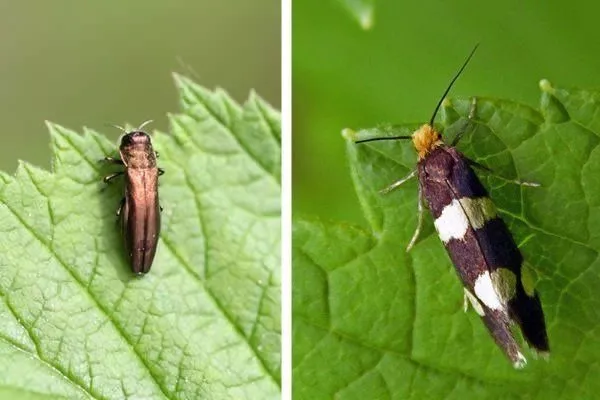
In the case of the narrow-bodied berry beetle, it's the larvae that cause damage to the bushes—they chew through the shoots, trying to tunnel through them. The insects themselves emerge around June, laying eggs in the shoots. The affected branches die over time, and the berries become smaller and stunted.
To prevent red currant bushes from dying, prune and burn weak shoots during spring preparation. If pests appear, they should be destroyed. It's also best to treat the bushes with an Actellic solution 20-25 days after flowering.
Bud moth caterpillars nest at the base of the bush. If control is not initiated promptly, plant yields will decline, and the bushes themselves will begin to wilt. To combat this insect, treat the bushes with Nitrofen, Karbofos, or another insecticide during bud swelling.
Gardeners' reviews
Red currants are the choice of many beginning gardeners because they require minimal effort and time, yet yield generous harvests. To ensure a good harvest, it's important to properly prepare the planting site and remember to water and fertilize regularly.