Growing this healthy grain at home doesn't require any special skills. All you need is the right steps and the key conditions for germination. Learn more about choosing seeds and growing wheat at home below.
What are the benefits of sprouted wheat?
Not everyone is familiar with sprouted wheat, although its beneficial effects on our body have been scientifically proven, and some experts even consider it a medicinal product.
The following are used for food:
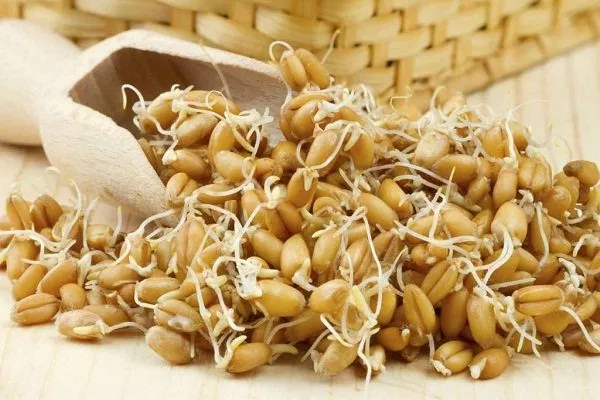
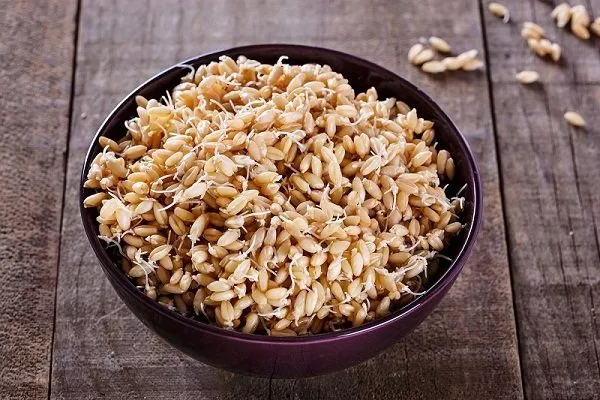
- sprouted grains (germs) with sprout length of no more than 3 mm;
- green, young shoots up to 20 cm high.
When grains germinate, they produce a large amount of protein, while the carbohydrate content decreases, as they are actively used in the growth process.
The embryos are rich in:
- vitamins – A, B, D, PP and E;
- amino acids;
- macro- and microelements – magnesium, potassium, calcium, iron, phosphorus;
- polyunsaturated fatty acids;
- Octacosanol - an oil that removes bad cholesterol from the body.
However, sprouted wheat, despite its valuable composition, should not be consumed by children under 12 years of age, people with gastrointestinal diseases, or those with individual gluten intolerance.
Sprouted wheat can be found in health food stores, but the germ has a short shelf life. If you want to be sure of the quality of your grains, it's best to sprout them yourself. This process doesn't take much time and requires virtually no financial investment.
Selecting grains for sprouting
Before you begin sprouting grain, you need to purchase high-quality grain. Follow these principles when choosing:
- Sprouted grains are purchased at stores or health food stores. The packaging should be labeled as specifically designed for sprouting.
- Winter wheat varieties are best suited for this process.
- By purchasing grain with the appropriate label, you can be sure it hasn't been treated with chemicals or pesticides. However, when buying wheat from farmers or at the market, no one can guarantee that the grain is organic, as it's impossible to detect chemical treatments by eye. The only thing you can do is ask sellers for certificates and documentation for the product.
- When selecting wheat, always pay attention to its appearance. The grains should be approximately the same size, whole, undamaged, not wrinkled, dry, and free of mold.
- ✓ Ensure that the grain has not been chemically treated by checking for certificates.
- ✓ Give preference to winter wheat varieties for better germination.
What will you need?
To germinate wheat you will need the following:
- containers – glass jars, enamelware;
- flat tray made of food-grade plastic;
- fresh, clean water at room temperature;
- a sieve or colander with small holes;
- gauze;
- a humidifier – you will need it if the air in your apartment is very dry or if you are sprouting grain on a regular basis;
- universal soil (for germination in soil).
How to germinate wheat without soil?
To germinate wheat without soil, follow these instructions:
- Place the grains in a deep bowl and cover with cold water. Stir gently to release any debris and empty grains. Drain the water and debris, then transfer the grains to a sieve and rinse thoroughly under running water.
- Place the washed wheat in a container and cover with cold water. The amount of water should be three times greater than the amount of wheat. Let it soak for 8-10 hours.
- After some time, drain the water and rinse the grains again under running water.
- Place the wheat in a clean container and cover the container with damp gauze folded in several layers.
- Leave the grains to germinate at room temperature.
White sprouts usually appear within 2 days; once they reach 1-2 mm in length, germination is stopped. Wheat germ should be stored in the refrigerator for no more than 2 days.
When sprouts grow longer than 2 cm, the product's value decreases, as most of the nutrients are absorbed into the sprouts themselves. Young shoots turn green and acquire a sweet taste, while toxic substances that are harmful to health begin to form in the grains.
If the wheat sprouts have not emerged within two days of soaking, the grains are discarded. They are no longer fit for consumption.
Step-by-step instructions for growing wheat on a windowsill
Wheat is germinated in soil on a windowsill according to the following instructions:
- Take the required amount of grains and rinse them under running water. Drain all the water and transfer the wheat to a deep bowl. Fill it with cold water—it should completely cover the grains—and cover the bowl with plastic wrap. Let it sit for 10 hours.
- After the time has passed, drain the water, rinse the grains, and soak them again in even colder water. Leave for another 10 hours. Repeat the process one more time. By the end of the soaking, small roots should appear on the grains.
- Make drainage holes in the bottom of a shallow container. Then line the bottom with paper towels to prevent the seeds from growing through the holes.
- Next, apply a 5 cm layer of general-purpose soil and moisten it thoroughly. Soil can be purchased at a specialty store.
- Spread the sprouted seeds in a single layer over the soil surface, pressing them lightly into the soil. Spray them with a spray bottle, and cover the container with several newspapers soaked in water.
- Maintain high humidity during the first few days. Mist the seeds every morning and remove the newspapers for a few moments to allow air to air out. Keep the soil moderately moist. Continue moistening the seeds in the evening, and mist the newspapers regularly to ensure they remain moist.
- After 4 days, when the seedlings emerge, remove the paper covering. Place the container in a bright spot, but avoid direct sunlight. This could damage the delicate seedlings.
Optimal conditions
To ensure that wheat sprouts evenly, it is necessary to provide conditions comfortable for its growth:
- Temperature. For normal wheat development and growth, the air temperature should be 22-24°C. Humidity should be maintained at a high level. If the air is very dry, using a humidifier is recommended.
- Lighting. The best location for a container with seedlings would be an east or west window, as they do not receive direct midday sunlight.
- Watering. Water the wheat daily. The soil shouldn't dry out, but it shouldn't be overwatered either, as this can cause the grains to burst and become moldy.
- ✓ Maintain room temperature at least 22°C to ensure rapid germination.
- ✓ Use a humidifier if the humidity in the room is below 50%.
Collecting sprouts
The sprouts are harvested when they reach 15 cm in height and begin to separate. The harvest is usually 9-10 days after sowing. The greens are cut with scissors just above the root.
It can be stored in the refrigerator for up to a week, but it's healthier to harvest it just before use. After the first harvest, the wheat continues to be watered, as it can produce up to three harvests. However, the greens from the third harvest are not as juicy and sweet as those from the previous two harvests.
You can also learn about sprouting wheat at home from the following video:
How to use sprouted wheat?
Experts recommend consuming cereal germ once daily in the morning, preferably on an empty stomach, half an hour before breakfast. Start with small portions; 1 tablespoon of sprouts (10 g) is sufficient. Then, if they don't cause any discomfort, gradually increase the amount to 30 g. When consuming, chew the grains thoroughly to ensure they are better absorbed.
Sprouted grains are eaten only fresh, as cooking destroys all their beneficial nutrients. They can be added to salads and smoothies. When preparing drinks, the germ is ground in a blender.
Wheat germ should not be consumed simultaneously with honey, dairy products, mumiyo, or pollen. Wheat fiber is a powerful absorbent. It absorbs all the valuable nutrients and removes them from the body, negating the healing effects of these foods.
Wheat greens are also best consumed fresh, adding them to vegetable and fruit salads and smoothies.
To learn how to make a wheatgrass smoothie, watch the following video:
Sprouting wheat at home is a simple task. To obtain a highly beneficial product, you won't have to spend a lot of time working with the soil or getting your hands dirty. The process is quite simple; the key is to know the basic rules of sprouting and create favorable conditions for the seedlings.