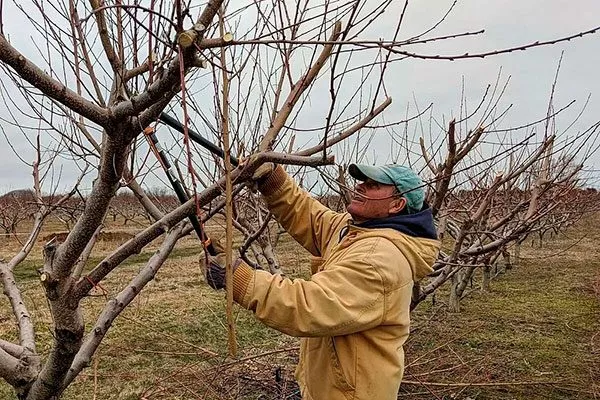
Pruning is an essential part of garden tree care, playing a vital role in tree development and fruit yield. This procedure is considered the primary means of maintaining a neat upper tree. Pruning helps prevent disease, but it must be done correctly.
Why trim trees?
Not only does it shape the tree, but it also removes elements that impede light and air flow. Proper pruning stimulates fruit bud growth, ensuring impeccably high yields and excellent fruit quality.
Pruning is also necessary to protect plants from the spread of diseases and strengthen their immune system. Furthermore, this care can help shape the plant to the desired height and diameter.
What tools are needed for pruning?
To create tree and shrub top shapes, you need the right tools. Use the following:
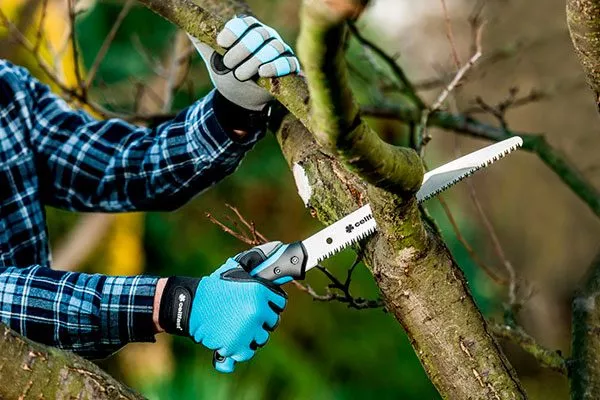
- Gardener's saw. It's characterized by extremely fine teeth that are sharpened on both sides, not just one. This minimizes damage to the wood. Use a specialized garden saw, as conventional saws can cause cuts to heal slowly.

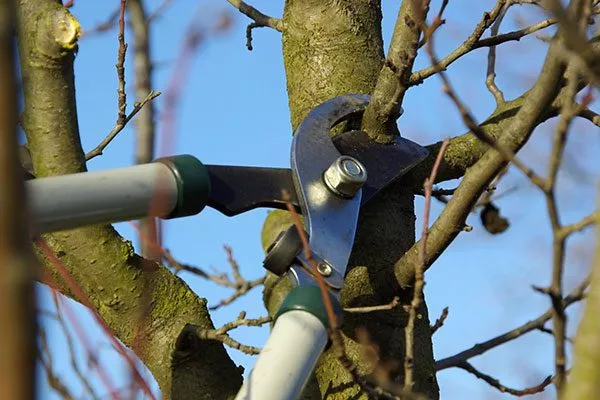
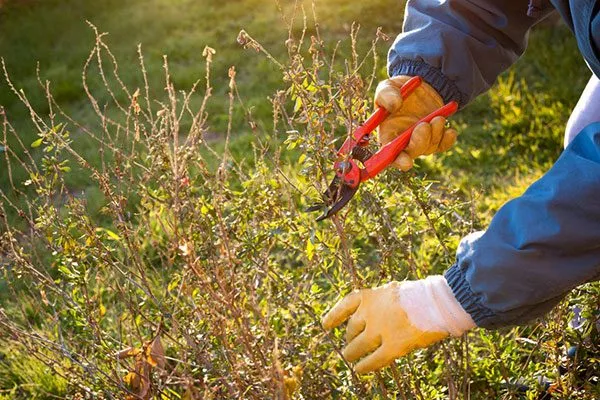
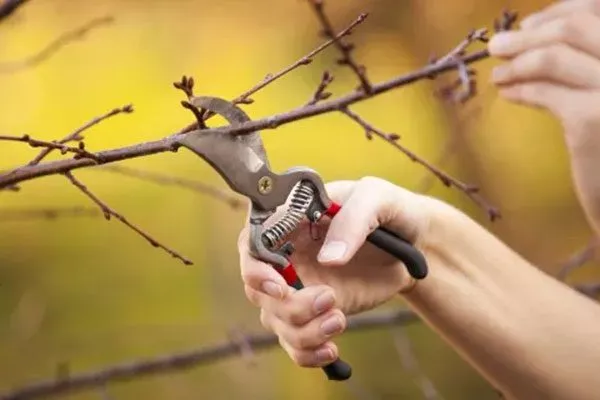
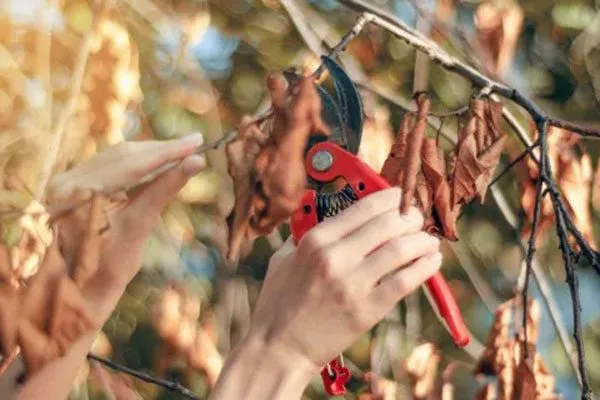
- Pruning shears. Suitable for pruning branches up to 2.5-3 cm thick. A sharply sharpened pruning shear ensures even cuts. Curved blade types and straight anvil types are also popular, although cutting accuracy may vary slightly.
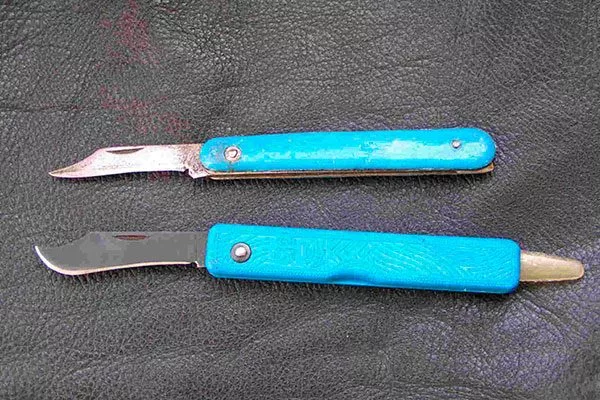
- Knife for gardening work. It must be sharpened to ensure smooth cuts. Using it requires experience to avoid mistakes.
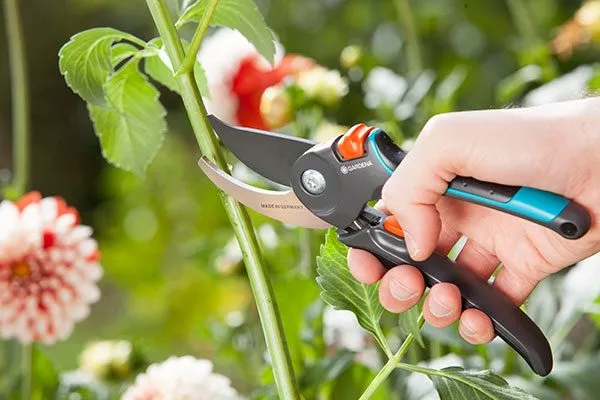
- ✓ The sharpening angle of the pruning shears blades should be at least 25 degrees to ensure a clean cut.
- ✓ The diameter of branches that can be cut with a garden saw should not exceed 10 cm to avoid damage to the tree.
Types of pruning
There are several types of pruning, each with a specific purpose. A detailed description is provided below.
Formative pruning
Creates the optimal shape for a specific plant species, especially at a young age. The main goal is to form a proper crown structure that provides good light and decorative appeal, while reducing the risk of various damages and diseases.
Watch the video for a detailed explanation of how to shape the crown of fruit trees:
Sanitary pruning
It can be performed at any time of the season, but is preferable in spring or fall, when the trees are dormant. This procedure is essential to maintaining the plant's health and vitality. It involves removing branches and shoots damaged by frost or disease, preventing the spread of infections.
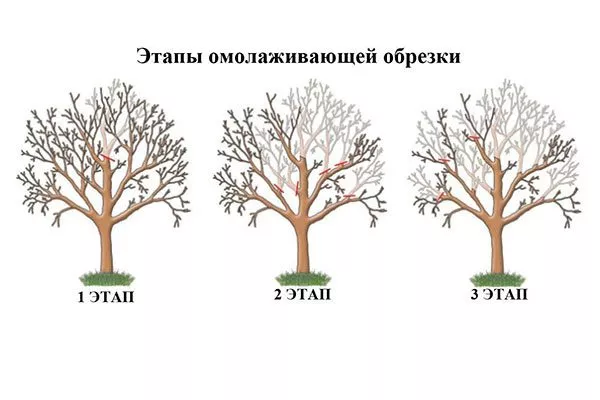
Rejuvenating pruning
Preferred for stimulating growth and fruiting in older trees and shrubs that have lost their ability to thrive. Signs that pruning is necessary may include weak growth, poor flowering, and fruiting.
Helpful tips:
- Prune back old branches thoroughly, leaving healthy young shoots that will form a new crown.
- Perform rejuvenating pruning on older trees every 3-4 years.
- For neglected trees, divide the pruning process into several stages to gradually remove old branches and lighten the crown.
Berry bushes often require annual rejuvenation pruning, which involves completely removing old shoots.
The video clearly shows how to rejuvenate trees:
Restorative (restorative) pruning
This procedure is performed if plants have been damaged, for example, by severe frost, wind, or infection. Restorative pruning helps restore the crown to its original appearance and improve fruiting. This is especially important for fruit and berry plants.
Pruning is the best solution for trees with an abnormally formed crown or those that have lost their shape due to inadequate care. Perform pruning after bud break, then remove damaged branches.
Other species
There are other types of fruit tree pruning. These include the following methods:
- Thinning pruning. The main goal of this method is to thin the tree's crown to improve light and ventilation. During the process, all poorly positioned branches must be removed: those that cross, rub, shade others, compete with each other, and are deformed.
Perform thinning pruning annually, starting in the 2nd or 3rd year of the plant's life. - Pruning for fruiting. This type of pruning is carried out to increase fruiting in fruit trees, especially on young seedlings, to increase yield and speed up the onset of fruiting.
- Pruning to stop growth. This method is used to control the size and shape of trees, especially when they begin to grow too vigorously or exceed the desired height. Pruning aims to improve access to the fruit, effectively distribute light throughout the canopy, and facilitate harvesting.
Basic pruning methods for stunting fruit tree growth include topping, removing excess shoots, shaping lateral branches, and regulating fruit production. Pruning to stunt fruit trees should be performed annually or as needed during the growing season. Proper pruning should be combined with other plant care practices, such as fertilizing, watering, and disease and pest control.
Watch this video tutorial for detailed instructions on how to prune trees to increase yield and quality:
Types of tree crown formation
There are several types of crown shaping for fruit trees. Each is suitable for specific conditions and purposes.
| Name | Crown type | Recommended distance between tiers | The angle of deviation of branches from the trunk |
|---|---|---|---|
| Sparsely tiered crown | Tiered | 10 cm | 45-60 degrees |
| Whorled-tiered crown | Tiered | 50 cm | 45-60 degrees |
| Tiered crown | Tiered | 35 cm | 45 degrees |
| Combined crown | Combined | 30-40 cm | 45-90 degrees |
| Spindle-shaped crown (spindlebusch) | Fusiform | 30-40 cm | 90 degrees |
| Bushy (bushy) crown | Bushy | 10 cm | 45-60 degrees |
| Semi-flat crown | Semi-flat | 70-100 cm | 45-60 degrees |
| Flat crowns – palmettes and cordons | Flat | Depends on the type | 90 degrees |
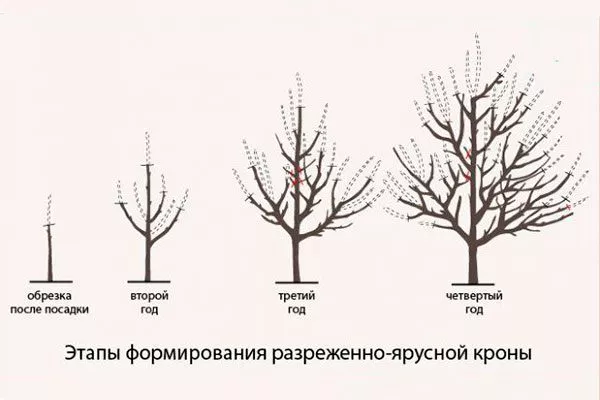
Sparsely tiered crown
After planting, perform an initial pruning, removing weak and damaged branches, leaving only strong and healthy ones. Then follow these instructions:
- Select 5-8 main skeletal branches with a wide angle of departure and place them at a distance of about 10 cm from each other.
- Place the lower branches in a tier, and the upper ones individually.
- After the skeletal structure has formed, carry out annual crown thinning, removing excess branches and cutting off elongated growths by a third of their length.
- Carry out regular pruning to maintain a sparse and layered crown, removing thickening branches and maintaining the correct shape.
Whorled-tiered crown
This crown type is a variation of the hemispherical shape, but with some differences. The lower tier typically has two pairs of branches, while the next tier has three. The distance between tiers is approximately 50 cm.
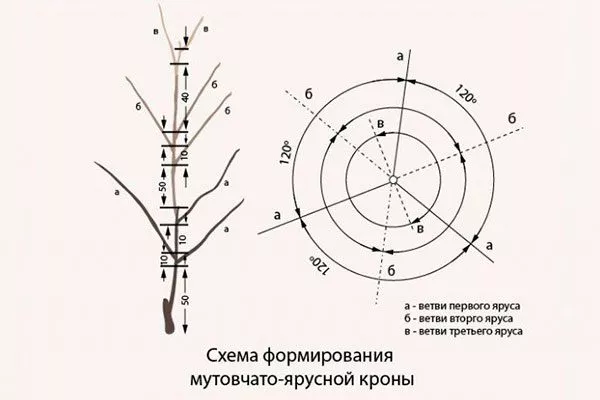
Creating such a crown is quite simple: find a bud 50 cm above the ground and leave it as the first scaffold branch of the lower tier. Then, just above the next bud, which will become the continuation shoot, cut the shoot without the stump. This method ensures a clear and easy formation of the crown's beginning.
Next season, begin forming the second tier by extending 50 cm upward from the mature shoot, leaving two or three buds at the new level. This will result in a seedling with two or more tiers within just a few seasons.
Advantages of the method:
- simplicity;
- convenient procedure.
Among the disadvantages, they note the possible suppression of trunk development by a large number of first-order branches and the potential fragility of the crown skeleton due to the adjacent arrangement of branches.
Tiered crown
This is another type of hemispherical crown. This variant uses 5 to 8 scaffold branches spaced approximately 35 cm apart. The conductor is usually shortened to 20 cm above the scaffold branches.
Formation of the main branches may take 3-4 seasons after planting. Ensure the branches are angled at least 45 degrees from the trunk to ensure a strong skeleton. When pruning, consider the position of the buds on the shoots to ensure their growth is directed correctly.
Using a 4- or 5-branch design will help save space on your property, creating compact trees. This approach is suitable for heavily branched trees or those with small spacing between main branches.
Advantages:
- convenient method of crown formation;
- allows you to achieve compact dimensions.
Among the disadvantages, they note the requirement for strict adherence to the “hierarchy” of branches by length and thickness when pruning, and the long time it takes to form the crown.
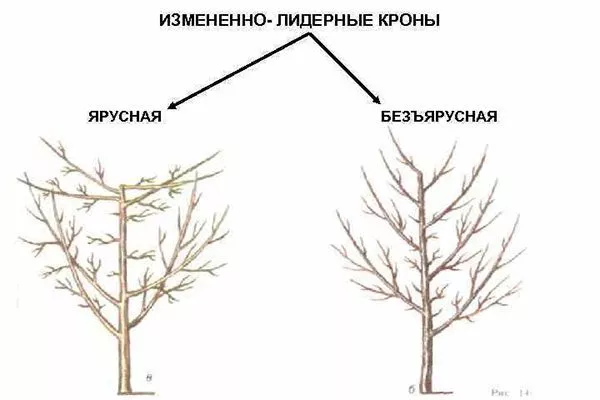
Combined crown
This type of crown is a combination of various shaping methods to combine their advantages. Here are the exact instructions:
- In most cases, the lower tier is formed from 3-5 branches, located 2-3 buds from each other and growing in different directions.
- You can leave a spare shoot in case one of the skeletal branches breaks.
- Place all skeletal branches at a distance of 30-40 cm from each underlying branch, and second-order branches on the lower one – at the same interval from the trunk.
- On subsequent branches, the distance is 40-60 cm to ensure better illumination of the upper parts of the crown.
- The main feature of the combined crown is that the lower branches of the tree are left in a raised position, as they grow, and the upper ones are bent to a horizontal position using clothespins and spacers, forming an angle of 90 degrees.

The advantages include a combination of the best aspects of different methods, while there are no disadvantages.
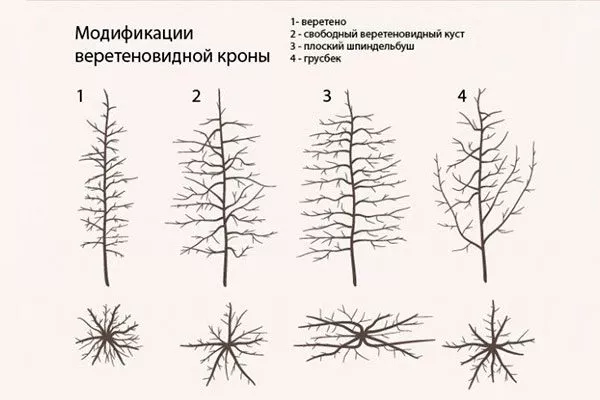
Spindle-shaped crown (spindlebusch)
This crown type is a basic rounded shape, consisting of numerous semi-skeletal branches arranged horizontally, with the exception of the lower ones, which can be raised for easier maintenance. Follow these instructions:
- Place the branches along the guide in the form of a uniform spiral, 1-4 buds apart from each other.
- During the first summer after planting, allow the branches to grow freely. In August, bend them back and secure them horizontally. The following year, to encourage trunk growth, prune the extension shoots to a height of 30-40 cm from the top bent branch. Repeat this process in August every year for 6-7 years.
- For low trees and crops on dwarf rootstocks, there are modifications of this scheme: flat spindle bush, free-growing spindle bush and grouseback.
Advantages of the method:
- the possibility of forming highly productive and early-bearing plantings;
- availability of variations for different types of trees and plantings.
The disadvantage is the labor intensity of this type of crown formation.
Bushy (bushy) crown
The number of skeletal branches varies from 5 to 8, with a wide angle of departure and a spacing of approximately 10 cm, which is considered optimal. Typically, 3-4 lower branches are arranged in a tier, while the remaining branches are arranged individually.
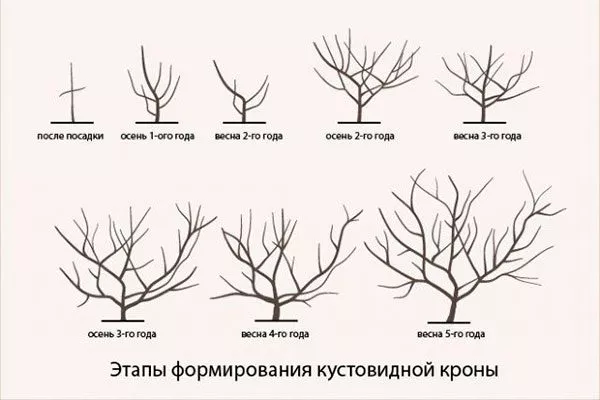
In the second season, shorten all new growth, cutting back by a third of its length. Leave the long shoots at the bottom longer than the short ones. Shorten the main shoot so that it is slightly higher than the last side branch, and then thin the crown annually to stimulate fruiting.
There are many different variations of bush-shaped crowns, including prostrate, creeping, and bush-creeping. They differ in the arrangement of shoots on the soil surface, but the pruning remains the same.
Advantages of the method:
- suitability for difficult climatic conditions;
- the possibility of forming low-growing trees.
Disadvantages include less suitability for low-branching and dwarf cultivars, as it may be difficult to establish strong, close-knit main branches in the early years.
Semi-flat crown
This crown type can be described as intermediate between a rounded and a flattened form. It is slightly elongated along the row line and compressed (flattened) between the rows.
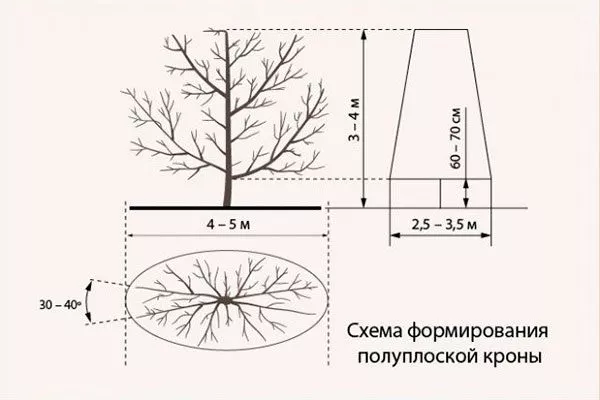
The crown consists of a well-developed central conductor and several (4-6) primary scaffold branches, arranged in rows of two branches each. The angle of their departure from the trunk should be at least 45-60 degrees, and the distance between tiers should be 70-100 cm (more for tall trees).
On the first-order skeletal branches, form semi-skeletal branches evenly on both sides: 30-40 cm from the trunk and 20-30 cm apart. Subsequently, thin the crown and shorten the central conductor annually.
Advantages:
- ease of formation;
- the ability to achieve early fruiting and high productivity of plantings under intensive gardening.
This type of crown formation has no disadvantages.
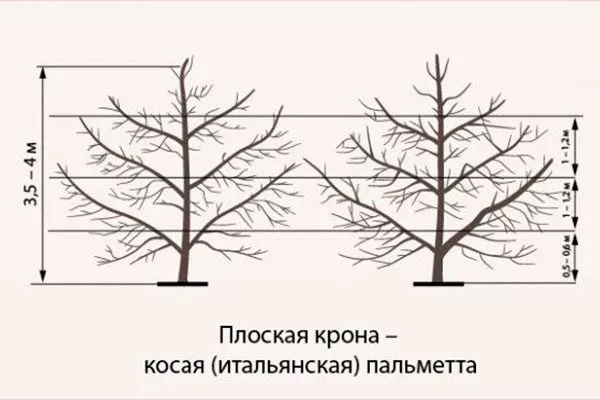
Flat crowns – palmettes and cordons
Flat tree shaping and pruning systems have been specially developed for creating intensive plantings.
Useful information:
- Palmette is a type of crown in which all skeletal (or semi-skeletal) branches of the first order are located in one vertical plane along the row line.
Planted close together, these trees can intertwine to form a continuous hedge. For vigorous trees, trellises are typically used in this system.
There are several types of palmettes, such as oblique, single-tiered, free, combined, etc. They differ in the number, direction, and tiering of branches, as well as the distance between tiers and branches. - A cordon is a strictly elongated trunk that evenly "bears" only short fruit-bearing branches. This shape is achieved by shortening the lateral shoots in the spring and repeatedly pinching the green shoots during the summer as they grow.
There are several modifications of cordons, such as oblique, vertical, horizontal, etc., which differ in the direction of the trunk and branches.
The advantage of these methods is the accelerated onset of fruiting in late-fruiting varieties. The disadvantages of the process include the training and labor intensity, as it requires large volumes of highly skilled manual labor.
Tree pruning depending on the season
The least traumatic method is to prune trees during the dormant period, before active sap flow and growth begins. It's important to prune before bud break, flowering, and active shoot growth begins.
Spring
Spring pruning is considered the most optimal time for tree pruning. This is because the winter frosts and winds have passed, but the trees are still dormant. Any type of pruning can be performed in spring, as trees tolerate it better than at other times of the year.
Consider the temperature: if it's freezing outside, branches become brittle and easily damaged, so it's best to wait until daytime temperatures are consistently above freezing. The optimal temperature for pruning is between 0 and 5°C.
Summer
Summer is not recommended for pruning fruit trees, but there are some exceptions. During this time, you can prune young shoots, pinch them, and remove suckers (upright young branches that can quickly grow to considerable lengths, thickening the crown and preventing fruiting).
Don't remove all suckers, as they promote tree renewal. Preserve branches that are located in favorable locations for future skeletal branch renewal.
Pears are often pruned in the summer due to their tendency to form suckers after spring pruning. Grapes, lemongrass, and actinidia can be pruned in the summer, especially if pruning was missed in the spring. Cherry pruning is permitted after harvest, but it's best to avoid it on hot days.
Autumn
In southern regions with mild winters, fall pruning is considered preferable, as trees are preparing for dormancy by shedding their leaves at this time. This reduces stress on the plant and improves its winter survival.
In the Moscow region, pruning in the fall is not recommended due to the potential reduction in frost resistance of garden trees. Instead, only diseased branches, suckers, and thickening branches can be removed to reduce snow loads, which can cause branch breakage.
Partial pruning in the fall will help reduce the amount of work in the spring. This is especially important when the active gardening season begins.
Winter
In southern regions, where winters are often snowless, pruning is done more frequently because the trees are dormant. In the Moscow region, winter pruning is not recommended due to snow cover and low temperatures. Snow and cold make branches brittle, which can lead to damage.
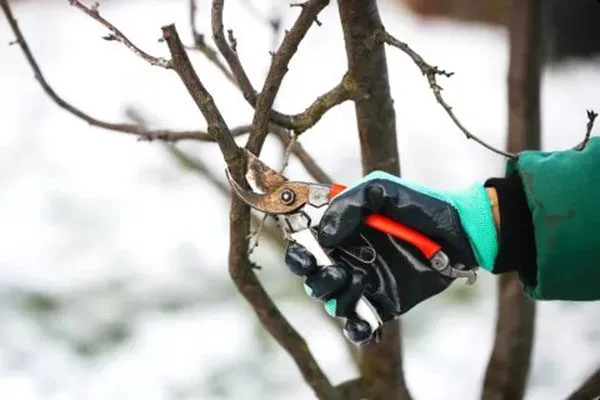
It's important to choose a period before active sap flow and bud break, when the buds are just beginning to swell. Therefore, the optimal time for pruning is late February to early March.
What is the difference between pruning young and old trees?
The age of the tree determines the methods and types of pruning. Immediately after planting, seedlings are pruned to stimulate branching and begin to form. Height depends on the species and variety; columnar plants are an exception. During the first two years, the root system actively develops, followed by intensive growth of the aboveground part.
During the first six years, the main skeleton and crown are formed. Pruning young trees involves selecting skeletal branches, creating layers, and removing unwanted shoots. This helps speed up fruiting and prevent problems with branch breakage.
Proper pruning at a young age determines the tree's productivity and ease of maintenance. Pruning young trees involves the following steps:
- Cutting the center conductor.
- Formation of the first tier.
- Removing weak and interfering branches and forming a second tier.
- When the plant reaches a height of 2-2.5 m, pinch the central conductor above the top branch to limit its height growth.
Mature trees are pruned differently. It's more of a maintenance procedure than a formative one. They undergo thinning, shortening, and removal of excess growth.
Basic rules for tree pruning
Incorrect crown shaping and improper pruning can cause serious damage to a tree and even lead to its death. Therefore, it's important to understand the basic rules and principles of this process:
- Each plant requires an individual approach with full responsibility, especially for mature specimens.
- Pruning should be done annually as it promotes healthy tree growth.
- Start with sanitary pruning. In some cases, this may be sufficient.
- It's recommended to remove no more than 25% of all healthy branches in a single season. Too much pruning can weaken the plant or lead to disease.
- It is preferable to prune one large branch rather than several small ones, since each cut leaves a wound on the trunk, and the fewer wounds, the easier it is for the tree.
It is important to remove rubbing and intertwined branches to ensure healthy tree growth.
Aftercare of the tree
After pruning, trees require fertilizing the following year. Apply fertilizer twice a season:
- In April, add 5 kg of rotted manure or 1-2 kg of chicken manure per 1 sq. m.
- At the beginning of June, use the same fertilizers or add mineral compounds – ammophoska or ammonium nitrate.
- Conduct a soil test to determine any nutrient deficiencies.
- Add organic fertilizer (rotted manure or chicken manure) in April at a rate of 5 kg per 1 sq. m.
- Use mineral fertilizers (ammonium phosphate or ammonium nitrate) at the beginning of June.
- In autumn, apply potassium-phosphorus fertilizers to increase winter hardiness.
In the fall, apply potassium-phosphorus fertilizer to improve fruit quality and increase winter hardiness. After applying the fertilizer, water the trees generously, using 20-30 liters per square meter. The next day, thoroughly loosen the soil around the trunk.
Pruning is an essential maintenance procedure essential when growing fruit trees in the garden. There are different types of pruning, each aimed at specific purposes. The main goal is to remove damaged branches and shape the tree into a proper crown.
A very informative article with diagrams, pictures, and helpful tips. I learned a lot about pruning. I need more comprehensive articles like this. Thank you so much for your work!