Before storing apples, carefully familiarize yourself with all the methods and precautions for preserving the fruit. The choice depends on the gardener's resources—whether they have a cellar or garage, a balcony or a heated storage room, etc. It's important to begin preparations well in advance, from choosing the variety to following the harvesting guidelines.
Varieties suitable for storage
| Name | Shelf life | Subspecies | Storage Features |
|---|---|---|---|
| Summer apples | 21 days | No | They spoil quickly and require immediate consumption. |
| Autumn apples | 2 months | No | Requires a cool place for storage |
| Winter apples | Before the beginning of summer | Early winter, mid-winter, late winter | Ripens during storage and requires humidity control. |
- ✓ Consider the variety's resistance to diseases that affect shelf life.
- ✓ Pay attention to the thickness of the peel – the thicker it is, the better it will store.
The shelf life of apple crops is influenced by their variety:
- summer apples – can be stored for no more than 21 days;
- autumn varieties – maximum 2 months;
- winter varieties - until the beginning of summer (they ripen as they are stored).
Winter varieties, in turn, are divided into the following subspecies:
- early winter – can be stored until the end of January;
- mid-winter – shelf life is maintained until the end of the art;
- late winter - can be stored with preservation of properties until the end of June.
The best varieties for winter storage are Pepin, Antonovka, Banana Apple, Verbnoe, Seruel, Sinap, Red Delicious, McIntosh, etc.
Harvesting and preparing fruits for storage
Approximately 20-35 days before harvest, treat the apple trees with Skorom, which reduces the risk of granary scab. Two weeks before harvest, stop all watering to prevent the apples from absorbing unnecessary moisture.
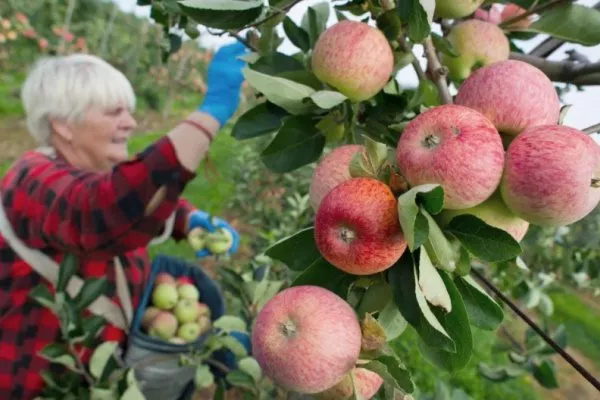
Be sure to follow the requirements for harvesting apples that are intended for long-term storage:
- collect in the morning, but be sure to do so after the dew has melted, or in the evening, when the heat has subsided;
- Immediately after harvesting, place the container with the fruits in a cool place, for example, in a cellar - store them there for 10-15 days, no more;
- When picking apples, use fabric gloves – this will protect the skin from scratches (from nails);
- pick fruits only with the stalk - this prolongs their shelf life;
- remove the lower tiers first, then the upper ones – this way the apples won’t be damaged;
- Do not wipe off the coating from the surface – it provides reliable protection;
- pick only when ripe for picking, that is, the apples should not be overripe or too green;
- immediately separate specimens with damage, traces of insects, signs of disease;
- try to collect apples growing on the sunny side in a separate basket - they will be stored longer;
- Don't pick up fallen flowers.
After quarantine (10-15 days in a cool place), begin preparing the apples for storage. This can be done without quarantine, but the first step will allow you to detect any defects. How to prepare the apples:
- Sort them by size. The larger the apple, the faster it will spoil.
- Remove all damaged and deformed ones.
- Sort by ripeness.
- Place them in storage areas.
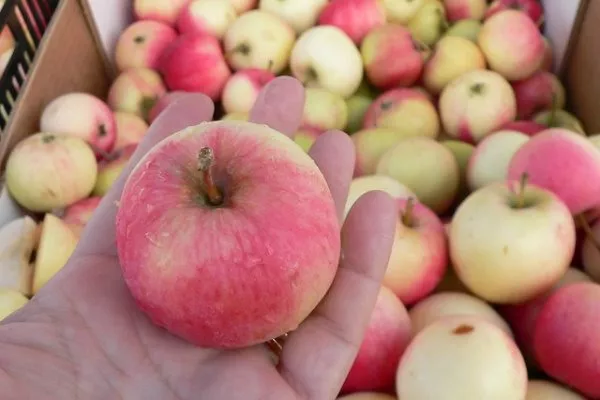
The optimal ripeness for storage can be determined by the following signs:
- about 6 fruits fell naturally under the apple tree;
- the seeds have acquired a dark shade only by 3/4 or half.
Harvest times for different varieties:
- early – July-August;
- average – August-September;
- late – September-October.
The time for picking apples depends largely on climatic conditions.
Conditions for proper storage
Maintaining optimal storage conditions for apples is crucial, especially when it comes to humidity. Insufficient humidity causes the fruit to wrinkle and dry out, which degrades not only its appearance but also its flavor.
Best conditions:
- humidity – 85-90%;
- temperature range – for fresh fruits from 0 to +5 degrees, for dried fruits from +12 to -5 degrees, for canned and soaked fruits from +1 to +10 degrees;
- sudden temperature changes are prohibited;
- You cannot place root vegetables and other fruits nearby (apples release ethylene, which promotes rapid ripening of, for example, plums and pears).
What is allowed to be used to transfer fruits?
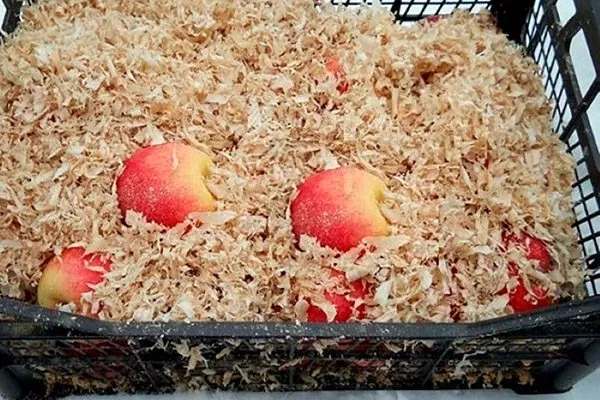
The key is to use natural, not synthetic, material to prevent mold and rot. Another rule is to arrange the apples in a single row, regardless of the type of filling. What you can use:
- paper (except glossy);
- sawdust and wood shavings;
- moss;
- sand;
- fine-grained perlite;
- paper soaked in vegetable oil (will prevent drying out);
- straw and hay;
- vermiculite.
The last material deserves special attention. Vermiculite should be treated before use: mix 1 part 6% vinegar with 4 parts water, pour the vermiculite over it, and let it sit. This method allows you to disinfect the room. For 10 kg of fruit, 200-300 g of the treated material is sufficient.
Where and how can you store apples?
The choice of storage location depends on the gardener's resources—whether they have a cellar or a balcony. It's important to consider the quantity of apples, the storage duration, and the availability of specific materials, equipment, and containers.
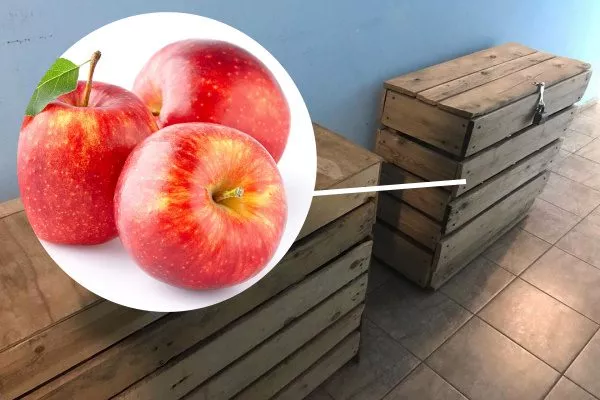
In the cellar, basement, underground
If your cellar isn't subject to frost, storing apples there is an excellent solution. The maximum storage period is 7 months, with a minimum of 3 months. Treating the walls and ceilings with slaked lime is mandatory. To do this, add 1.5 kg of lime to 10 liters of water.
- Disinfect the walls and floor with slaked lime 2 weeks before harvesting.
- Provide ventilation to prevent condensation.
It's important to wipe down the floor as well—use a 5% solution of ferrous sulfate. Containers used for storing fruit should be washed with washing soda.
You can store it like this:
- Boxes. Preferably, they should be wooden. If you're using plastic ones, make holes in the sides for ventilation. Be sure to line the bottom with a layer of thick cardboard, sawdust, or sand. Add a layer of apples, then cover with the same material again.
The maximum number of rows allowed is 4 pcs.

- Boxes. Cardboard containers can be used—they allow air to pass through well. The packing principle is identical to the previous one. Sand should not be added to cardboard boxes.
- Shelves. With this type of stacking, only 2-4 layers are allowed. Wrapping each fruit in paper and placing a cardboard base under the apples is mandatory.
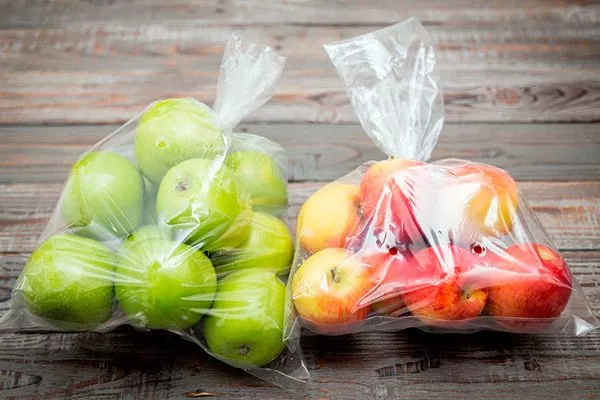
- Plastic bags. It's not recommended to store them in them, as the shelf life is very short—about three weeks. However, if you decide to do so, ensure each bag has ventilation holes.
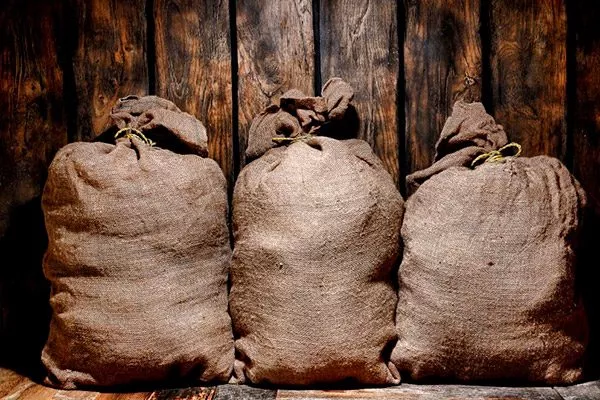
- Bags. They shouldn't be synthetic—only natural fabrics, such as burlap. Each bag should hold 7-10 kg. Only sour apples should be used. It's best to layer them with paper or cover them with any other filling material.


In the garage
If you plan to store apples in a garage, consider a few things:
- apples absorb odors, so there should be no foreign odors (gasoline, etc.);
- the garage must be heated or at least insulated;
- shelf life: 3-5 months.
They are stored in the same way as in a basement or cellar.
In the ground and in the pile
This option is suitable for those without a garage, basement, or other accessible space. This method is suitable for climates without harsh winters. On average, fruits retain their appearance and flavor for five months.
How to Store in the Ground – A Step-by-Step Guide:
- Dig a hole. Its depth can be from 80 to 150 cm.
- Place a waterproofing material on the bottom. If you don't have one, use sawdust or wood shavings, but not from coniferous trees.
- Place the apples in bags or spread them out on the surface of the bedding. If the latter, line the sides of the hole with waterproofing material.
- Cover the bags or fruit with sawdust. The top layer should cover the fruit by 30 cm.
- Cover with soil.
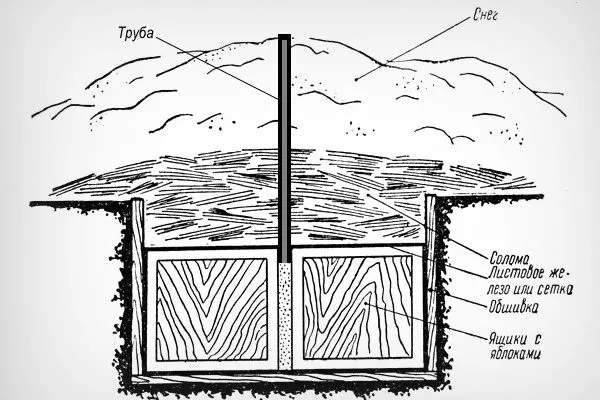
Apples can be stored in stacks, which is more convenient than a regular pit, as the fruit can be removed in crates. Small portions are difficult to remove from a pit.
How to do it:
- Dig a trench 150 cm wide and deep.
- Place wooden boards on the bottom and sides to form the floor and walls. This type of paneling is crucial for maintaining the desired temperature.
- Place branches on the bottom to ensure air circulation.
- Place boxes filled with apples and sawdust inside. Arrange them in 2-4 rows, spaced 15 to 20 cm apart. Install exhaust pipes (plastic or metal) every meter.
Their lower end should not touch the bottom of the pile, so tie the pipes to the box. - Place a wooden shield or sheet metal over the top drawer to serve as a roof. Arrange the sheets so that in winter you can open one of them and remove the drawer containing the fruit.
- Cover the top with sawdust, leaves, straw, and soil. Cover with dark plastic.
In the apartment
If kept at room temperature, apples will only last 2-3 months. Store them as you would in a basement. Place the boxes in a dark place, such as a pantry or under a bed. Avoid placing them near heating appliances.
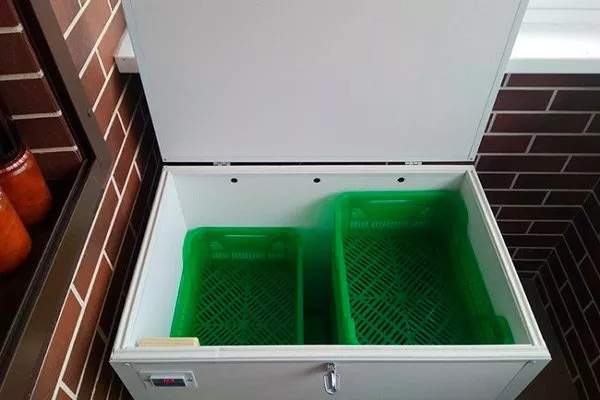
In a thermal chamber
The shelf life in a thermal chamber is 5-9 months. Thermal chambers are sold at specialty stores and are not cheap, but they ensure long-term storage. Trays are used for storing. The advantage of this device is that you don't need to monitor humidity, temperature, ventilation, etc.—all parameters are set manually.
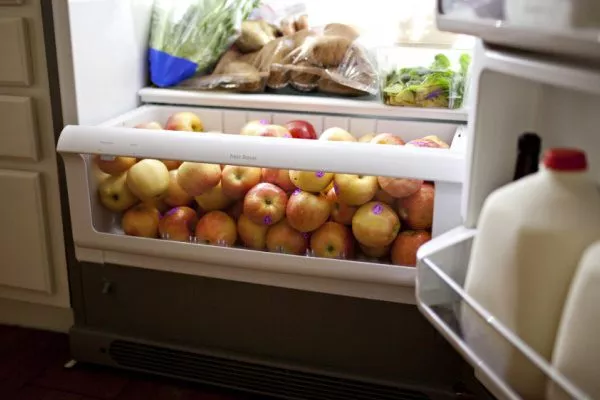
In the refrigerator
Only a small amount of the harvest can be stored in the refrigerator. The shelf life is 2 to 4 months. Store in the fruit/vegetable compartment. However, keep in mind that strong-smelling foods (opened cans, fish, etc.) should not be stored in the refrigerator, as apples quickly absorb odors.
How to store – options and rules:
- What to pack in:
- in a plastic bag with small holes;
- in a paper bag (the best solution);
- directly in the container (pull-out, refrigerated).
- Requirements:
- It is preferable to store the fruits 4-5 days after harvesting - the fact is that this is the period during which apples emit ethylene (if you store them immediately, the shelf life will be reduced);
- It is prohibited to wash the surface;
- the fruits must be perfectly dry;
- the stalks should not be torn off;
- To avoid drying out when stored in an open container, cover the fruit with a slightly damp towel.
In the freezer
The shelf life of frozen fruits is approximately 12 months. These apples are widely used for compotes and pie fillings. The preservation process is slightly different:
- Wash the fruit thoroughly.
- Trim off any areas that appear damaged.
- Cut the apples into pieces (any shape).
- Remove the seeds and stalks.
- Place the fruit on a flat plate.
- Place in the freezer for 3-4 hours.
- Remove and transfer the slices to a separate (portioned) vacuum bag. You can also use a regular plastic bag, but it's best to remove the air.
In the entrance
Sometimes the only available space is the driveway, so gardeners are willing to use this option. Of course, as long as the neighbors don't sneak in to eat your harvest.
Another option is to install a box that can be locked. Fill the inside with the same materials as the cellar, such as layering the fruit with paper, sawdust, dry leaves, and so on.
On the balcony/loggia
If the balcony is glazed and, especially, heated, the fruit's shelf life will be about 6 months; otherwise, 3-4 months. Storage guidelines depend directly on these parameters. However, there are some general guidelines:
- Place fruits in cardboard boxes or wooden crates;
- be sure to leave access to oxygen (make holes in the container);
- Place the fruit between paper or sprinkle with wood shavings;
- stack the fruits so that there is a small space between them;
- Place the apples with the stems down.
If you have an open balcony, you'll need to ensure the fruit doesn't freeze or get wet from precipitation. Here's what you need to do:
- After placing the fruit in the containers, wrap the boxes with warm old blankets on all sides;
- in very severe winter weather, provide 2-3 layers of cover;
- During rain, cover the top with plastic film (necessarily thickened or regular, but in 2 layers);
- As soon as the rain stops, remove the plastic cover - otherwise the apples will "suffocate".
You can also build an insulated box/thermos cabinet on the balcony for storing the harvest:
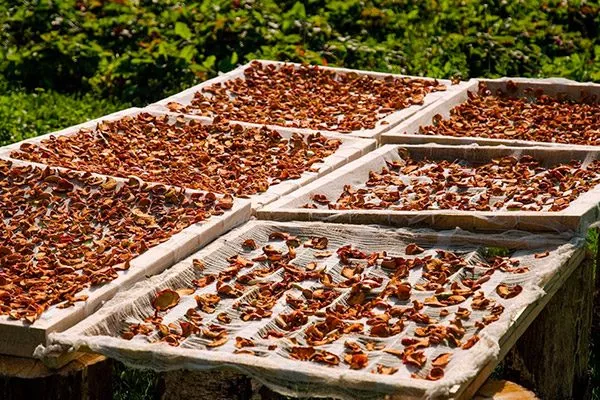
By drying
Dried fruits are used exclusively for making compotes, which are particularly delicious. This method is convenient because the fruit takes up minimal space. The shelf life is also long – approximately 8-36 months at a maximum humidity of 50%. Temperature is not a factor in this case.
Place dried fruits in:
- dry glass jars;
- canvas bags;
- paper bags.
Place: Any kitchen cabinet. Prepare the apples the same way as for freezing—that is, wash the fruit and cut into slices (preferably thin ones).
How to dry it well:
- Naturally (outdoors, but in light shade): spread the slices out on a flat surface or hang them strung on a rope, covering with gauze to protect from insects. Drying time is approximately 20-30 days. Optimal temperature is 20-25 degrees Celsius.
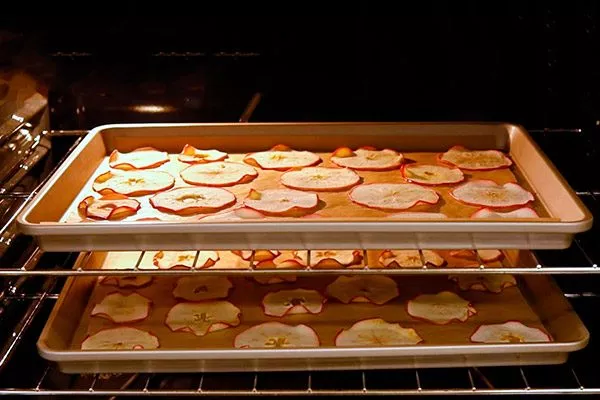
- Dry the fruit in the oven for about 5-8 hours. The temperature for the first 3 hours is 40 degrees Celsius (104 degrees Fahrenheit). Leave the oven door slightly ajar to allow moisture to evaporate. Then increase the oven temperature to 60-70 degrees Celsius (140-158 degrees Fahrenheit).
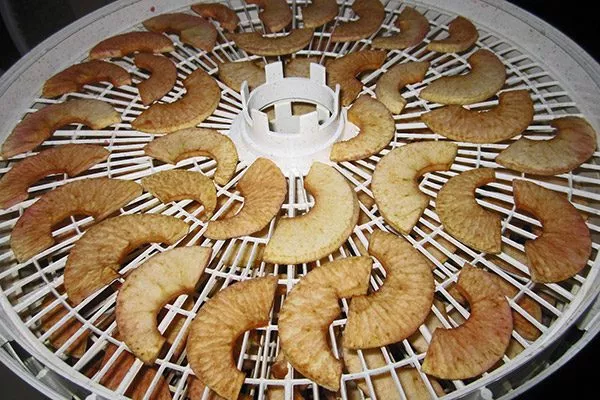
- The electric dryer must be set to the correct mode for its model. This method is faster, especially when loading multiple trays at once.
How should I treat it to make it safe?
To extend the shelf life of apples, experts and experienced gardeners recommend pre-treating the fruit. Here are some suitable and safest options:
- Dissolve 40 g of 4% calcium chloride in 10 liters of water, add 10 tablets of Furacilin - soak the fruits for 10 minutes, then dry without wiping with a cloth;
- lubricate the surface with regular pharmacy glycerin;
- keep it in a light pink solution of potassium permanganate for about 2-3 minutes;
- disinfect the fruits and the room with an ultraviolet lamp (15 minutes of exposure is sufficient);
- soak each apple in a 5% salicylic acid solution;
- dip in warm paraffin or beeswax so that the substance completely covers the fruit (without air access);
- Make a solution of propolis (100 g) and alcohol (500 ml), soak the fruits for 2-3 minutes.
What to do if the humidity in the cellar is too high or too low?
This situation occurs frequently and can have negative consequences for the harvest, so action must be taken immediately.
What to do if the room is too dry – options:
- Place containers filled with water on the floor;
- hang up wet towels (rags);
- set up a box with sand, which should be wet;
- Connect a stationary humidifier.
If, on the contrary, the humidity is high, proceed as follows:
- turn on the ventilation system or simply ventilate the room;
- install dehumidifiers;
- add dry sawdust - it will absorb moisture;
- spread dry lime under all walls;
- lay out paper, cardboard boxes;
- use dry calcium chloride.
Whenever storing apples over the winter, check the condition of the fruit once or twice a month. If damaged apples are found, remove them from the pile immediately. If the fruit is wrapped in paper, change the paper monthly, as it absorbs moisture.
Thank you so much for the advice! I always stored my apples in the cellar, but the humidity there increased after October, so I had to sort through them frequently and throw many out. Although, I did put paper between them. Well, I really didn't know what to do. Now I want to try the option with dry calcium chloride and sawdust (I don't have the means to install ventilation yet).
I also liked the storage method in the pile. We're getting a big apple harvest at our dacha this year (the trees are absolutely covered in them), so we were wondering where to store them. Now the question has been resolved. And most importantly, you gave such valuable advice so timely. Thanks again!