Growing a plum from a seed is a labor-intensive, but entirely possible, process. The first thing to consider is the plum variety. Following our recommendations, you can grow a plum without much effort and in no time.
Is it possible to grow a plum tree from a seed and will it bear fruit?
Growing a plum tree from a seed is possible, but you need to follow certain rules. A healthy tree will bear fruit if the correct variety is chosen. It's best to choose local varieties, as others may freeze in these conditions.
- ✓ Resistance to diseases typical for your region.
- ✓ Adaptation to the climatic conditions of your area.
- ✓ Compatibility with the soil conditions of your site.
If you decide to grow a heat-loving variety from a seed, there is a high probability that a wild plant will grow on your garden plot.
Selecting a variety
| Name | Fruit color | Productivity | Frost resistance |
|---|---|---|---|
| Chinese variety | red and yellow | high | average |
| Yellow variety | yellow | very high | low |
| Red variety | red | average | high |
| Black variety | black | low | very high |
Plum varieties are extremely diverse, but only four are popular in Russia. Based on the plum's specific requirements, you can choose the right variety:
- Chinese variety – not very common, has red and yellow fruits.
- Yellow variety – famous for its high yield and aromatic fruits.
- Red variety – it is characterized by high resistance to bad weather and frost.
- Black variety – has a viscous flavor and adapts to low temperatures. Thanks to its firm flesh, the fruits have a long shelf life.
Read about other plum varieties popular with gardeners. Here.
Preparatory stage
To ensure successful plum seed germination, it's essential to select the right plums. When purchasing plums, it's recommended to pay close attention to the country where the plant was grown. Imported plums will interfere with seed germination. This is because the plum's unfamiliar climate will hinder its adaptation to the new environment. The plant will likely die.
It's recommended to purchase ripe, soft fruit at a local market. This will significantly increase the likelihood of the variety taking root.
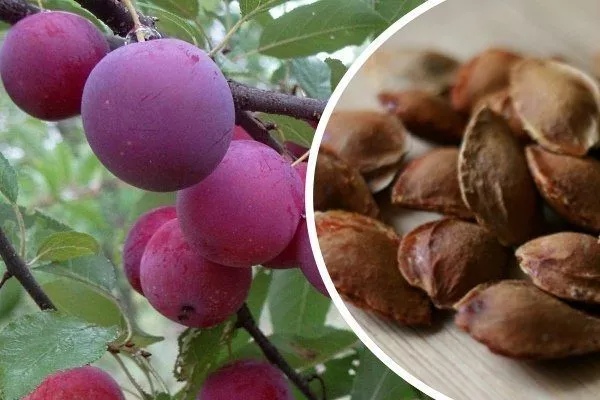
Seed collection
After removing the pit from the fruit, rinse it thoroughly in water to remove any loose pulp fibers. Then, place it in a warm, dry place. Allow it to dry thoroughly. This may take several days.
Once the plum pit is completely dry, you'll need to remove its kernel. A pair of nutcrackers or regular pliers can help with this. Remove the kernel very carefully to avoid damaging it.
To ensure a seed will germinate, there's a little trick. To test for germination, use a mug of warm water. A fertile seed placed in the mug will sink to the bottom, while an empty seed will float to the surface.
Germination of seeds
The plum kernel is removed from the pit and placed in a pre-moistened piece of cloth. It's best to use natural fabric rather than synthetic. Then, the tightly wrapped seed is placed in a refrigerator or other cool place. The cold ensures that the fertile seed will germinate.
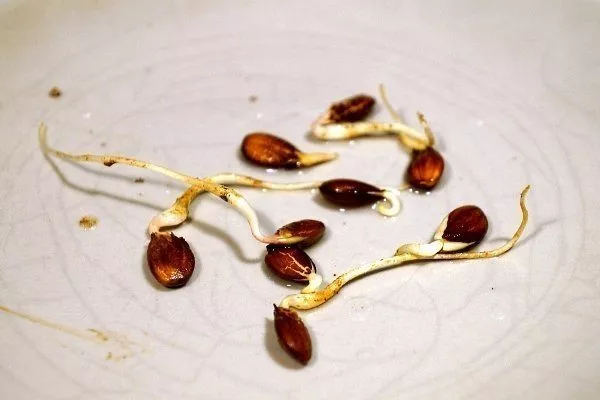
It's important to regularly check the cloth for moisture. If it dries out, you'll need to re-wet it. It will take at least six months for a plum seed to germinate. For example, if germination begins in November, the seedling will most likely emerge in early April.
Growing seeds
A biostimulant can help speed up the germination process. It can be purchased at any gardening store. Regularly apply the biostimulant not only to the seed but also to a piece of cloth. Mold that appears is completely normal, but it's best to remove it immediately. In this case, the cloth and seed should be thoroughly rinsed in water.
To ensure that a healthy and fruitful plant grows from a seed, it's a good idea to prepare for planting in advance. A flower pot is essential. It should be made of clay or ceramic and medium-sized. It's also a good idea to have a substrate made from garden soil, peat, and sand.
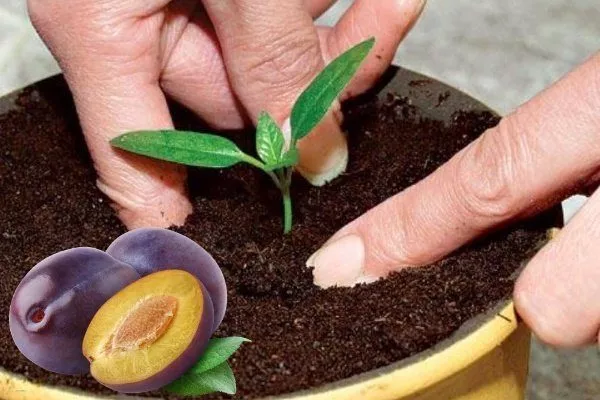
Planting in a pot
The process of transplanting a plum seed into a flowerpot is almost identical to sowing any other plant. Place a medium-sized layer of drainage material evenly at the bottom of the pot. Next, add the prepared soil. Water it thoroughly. The water should be warm, and the soil should be well-moistened.
Plant the plum seed in the center of the pot at a depth of no more than 5-6 cm. Once planted, wrap the flowerpot tightly in a plastic bag and place it in a warm location. If the weather is sunny, place the pot outside.
Greenhouse conditions allow the seedling to emerge within 3-6 days after planting. During these days, it's recommended to moisten the soil as needed and remove any condensation from the surface of the plastic bag.
Transplantation into the ground
Experienced gardeners recommend transplanting plum seeds into the soil in which the seedling will eventually grow. A small amount of this soil is placed in a flowerpot and mixed with a small amount of compost, in a ratio of ten to one.
- Two weeks before planting, begin hardening off the seedling, gradually increasing the time it spends outdoors.
- Check soil pH and adjust if necessary.
- Provide protection from wind and direct sunlight in the first days after planting.
You can also use the growth stimulants mentioned earlier. Using them in their pure form is not recommended. It's best to dilute some in warm water and use it as a seed drench.
The soil must be kept regularly moist. Otherwise, the seed will dry out before it has a chance to sprout. Once the first sprout appears, care for the plum tree as you would any other houseplant: water regularly and loosen the soil periodically.
When and where can you plant?
Plum trees are typically planted in a small, gently sloping area. This way, the soil beneath the sapling will be better warmed, and the plant will receive a good amount of heat. The tree can also be planted near a fence, but it should be on the side that receives the most sunlight.
If the tree is to be planted in a low area, it is recommended to choose a small mound, the height of which will be at least 40-50 cm, and the width from 180 to 200 cm. The optimal time for planting a plum is the early months of spring.
What will you need?
To provide the seedling with all the necessary minerals and nutrients to ensure healthy and vigorous growth, you'll need to stock up on certain types of fertilizer. For plum planting, these include granular superphosphate, wood ash, high-quality compost, and peat.
Mulching (that is, protecting and improving the soil's properties) may require manure, hay, or dried grass. A wooden stake will eventually be required. As the seedling grows rapidly, it's important to ensure its growth is directed correctly. For stability and balance, the seedling is carefully tied to the wooden stake.
Soil preparation
A high water table at the bottom of the planting hole can hinder the plum tree's healthy growth. Therefore, it's recommended to address this problem by creating your own drainage system. To do this, lay broken brick, expanded clay, and any available fabrics in an even layer at the bottom of the hole.
A nutrient-rich soil mixture consisting of one to two buckets of rotted plant debris, one kilogram of ash, and two buckets of warm water is laid over the homemade drainage layer. It's worth mentioning that highly acidic soil can complicate the plum tree's adaptation to its new location. To prevent this, it's recommended to treat the acidic soil with dolomite flour before planting. Then, add five buckets of warm water.
Requirements for the planting hole
Preparing the planting hole for a plum tree planted in spring should begin in the fall. If the tree is planted in the fall, preparation begins 15-20 days before the expected planting. The hole can be any shape, but its size has strict recommendations. For example, the height, width, and depth should be no less than and no more than 70 cm. When digging, discard the topsoil, and thoroughly loosen the bottom of the hole.
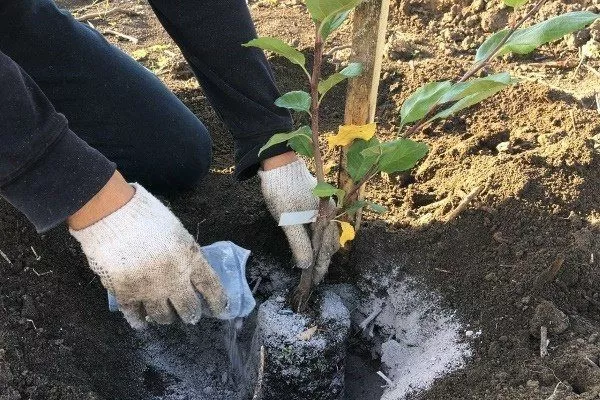
Description of the transplant process
Once all soil preparation has been completed, you can begin planting. To ensure the potted seedling can successfully adapt to the new conditions and prepare for cold weather before autumn, it's best to transplant it at the end of April.
- The planting hole should be filled with humus and high-quality compost. A light sprinkling of sand on the top surface is recommended.
- The plum seedling is planted along with the soil from the pot it grew in. No fertilizer is needed on the top surface of the soil.
- The soil is compacted before planting. This prevents air from reaching the root system. Ignoring this step can result in the roots drying out.
- If necessary, tie the seedling to a wooden stake.
- The plant is watered abundantly.
Caring for a seedling
The key to proper plum tree care is maintaining the tree's trunk circle. Its diameter should be at least 2 meters. Regular weeding and ensuring the soil remains loose will be essential. This will promote better soil aeration and oxygenation.
Regular watering is also essential. Three to five times per season is sufficient. During dry and hot periods, it is recommended to double this amount.
As for fertilizing, it's practically unnecessary in the first 2-3 years, as the planting hole has already been fertilized. The plant will receive its minerals and nutrients from there. Only in the fourth year is it advisable to periodically "feed" the soil with special fertilizers.
The onset of fruiting
Fruiting begins in a plum tree grown from a plum seed after 5-6 years. Only then can the success of the experiment be assessed. However, even if no fruit is produced, the plum tree remains an extremely attractive sight, making it a stunning addition to any garden.
Vaccinations
There are several types of grafting plum seedlings:
- split;
- soil;
- with well-known cuttings.
The first option requires making equal cuts, creating a split approximately 5 cm deep. The cutting is then inserted into the split, and the resulting cuts are treated with garden pitch. Soil grafting is considered the simplest of all the procedures.
After making identical cuts on the seedling and the plant to be grafted, they are joined and treated with the same garden pitch. The cutting is used to graft the seedling if the diameter of its branches and the grafted plant match.
Growing a plum tree from a seed in your garden is easy, as long as you follow all our recommendations. This tree will bear fruit well if you choose the right variety and provide the necessary care.